How to use File History to make secure backups on Windows 10
To use File History to make secure backups on Windows 10, follow these steps:
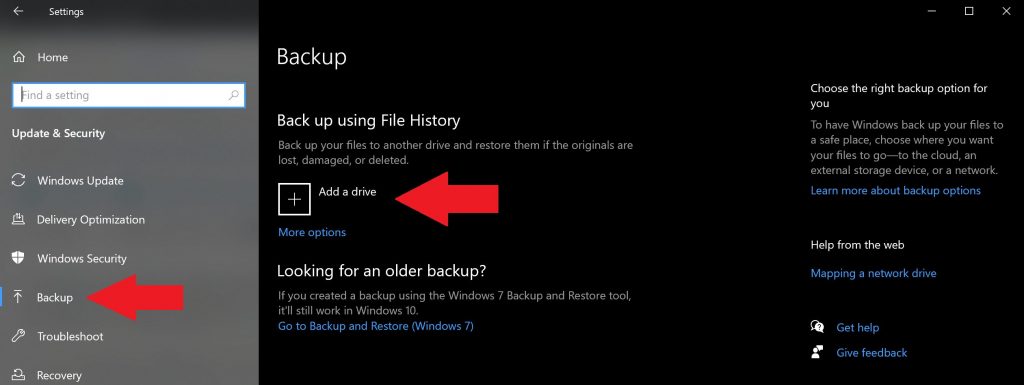
1. Go to Settings > Update & Security > Backup
2. Choose the plus sign (+) next to Add a drive
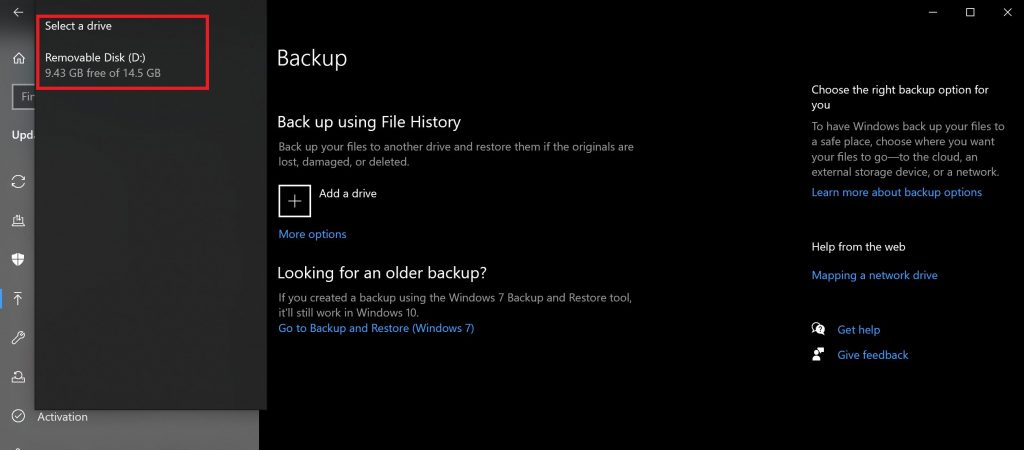
3. Choose the external or network drive
4. Choose Backup Now
Applies to All Windows 10 Versions
On Windows 10, the File History feature allows you to back up copies of files and folders to secure locations in the case you delete something by accident. By default, the File History feature will back up the files that are in the Music, Pictures, Documents, Downloads, and Videos folders, but you can also manually remove those default folders and add custom folders.
For the most secure experience, Microsoft suggests that you use an externally connected drive, like a USB drive, or use a network drive to backup your files. There are other options of saving backups, but these two are the most secure and provide the best options to protect your files from unforeseen PC issues. It is important to point out that your PC has BitLocker Drive Encryption, but your File History drive does not.
File History Backup
In order to get started using File History on Windows 10, use these steps:
1. Go to Settings > Update & Security > Backup
2. Choose + next to Add a drive
3. Click the external drive or the network drive
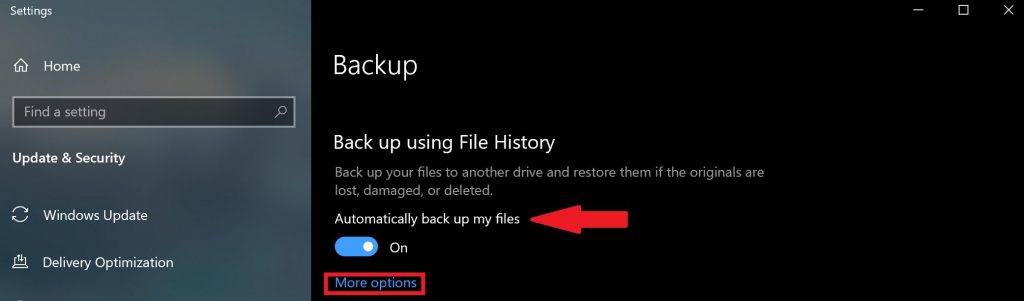
4. Once you choose the external drive or network drive, File History will begin backing up your data. If you want to turn off the data backup at any time, turn the toggle Automatically backup my files to off.
5. Choose More options under the toggle to see what folders File History is backing up on your PC.
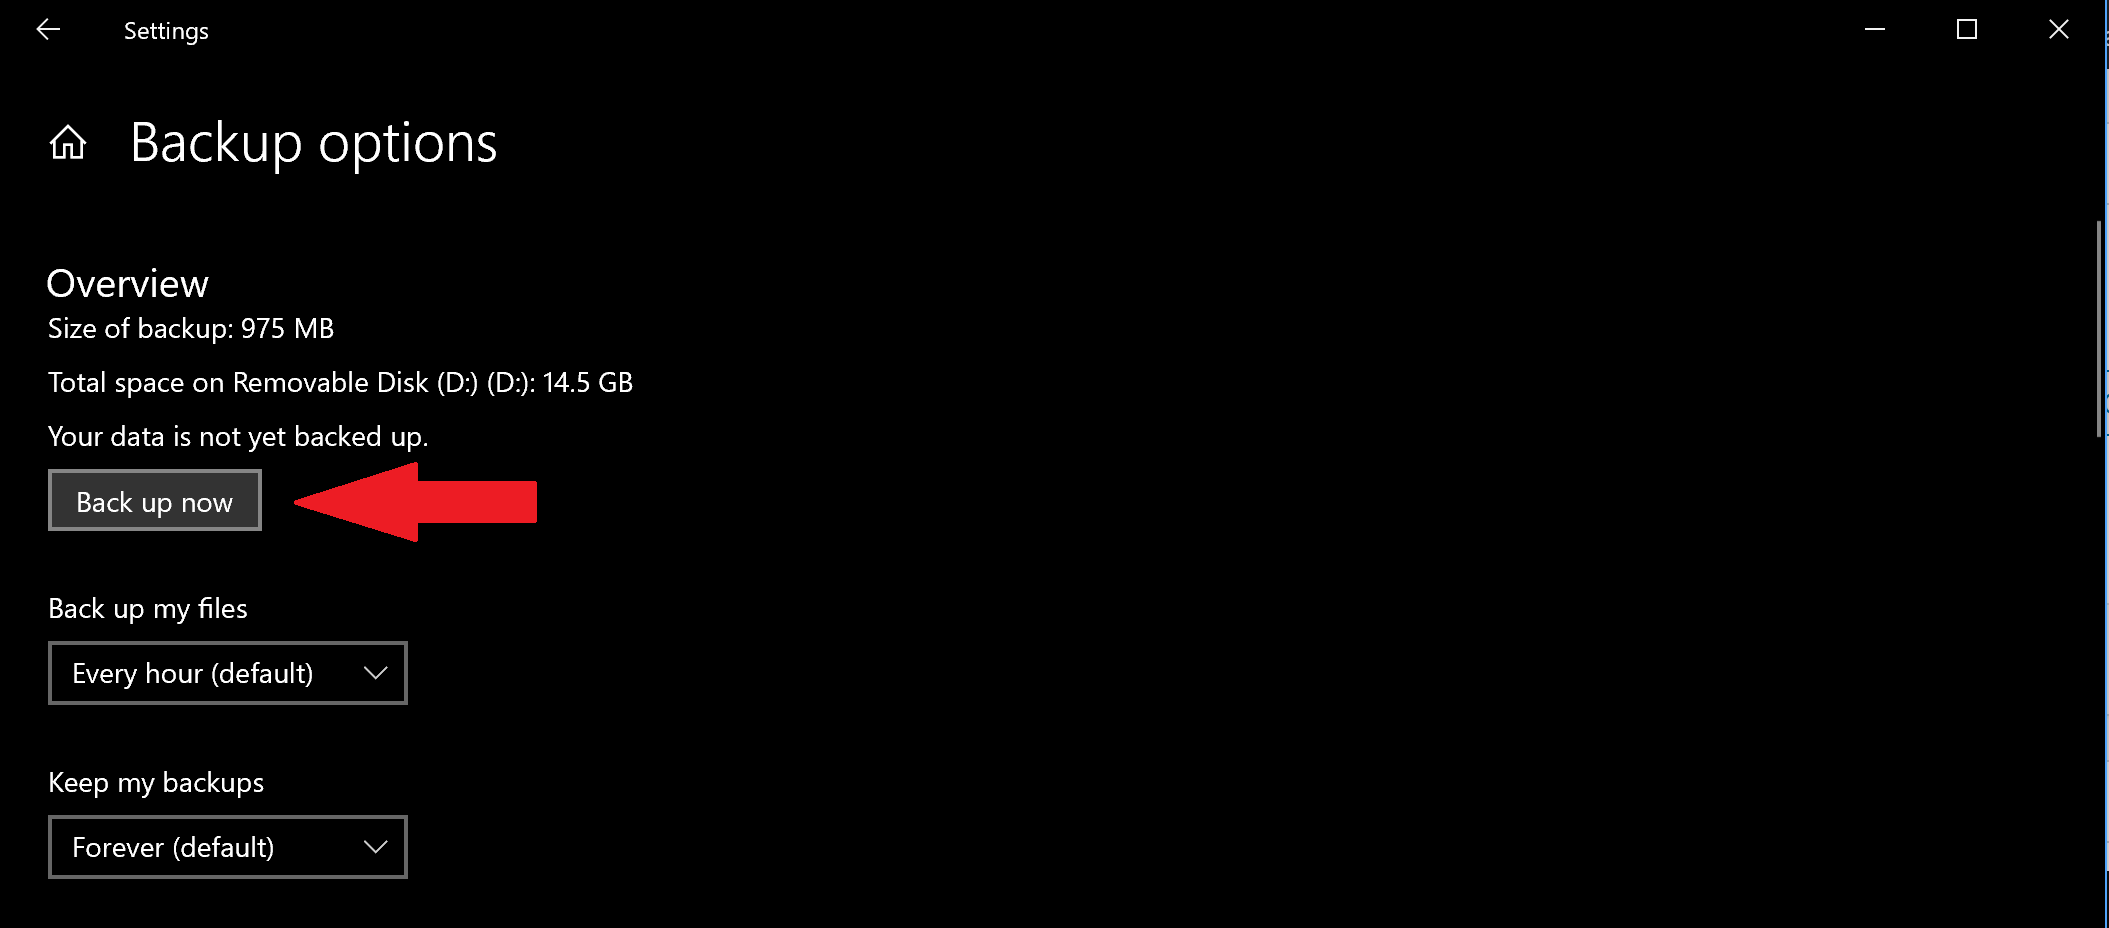
6. Choose Back up now to start backing up your files to your selected drive.
Once you choose the external drive or network drive, File History will begin backing up your data. If you want to turn off the data backup, click Cancel to turn off the backup.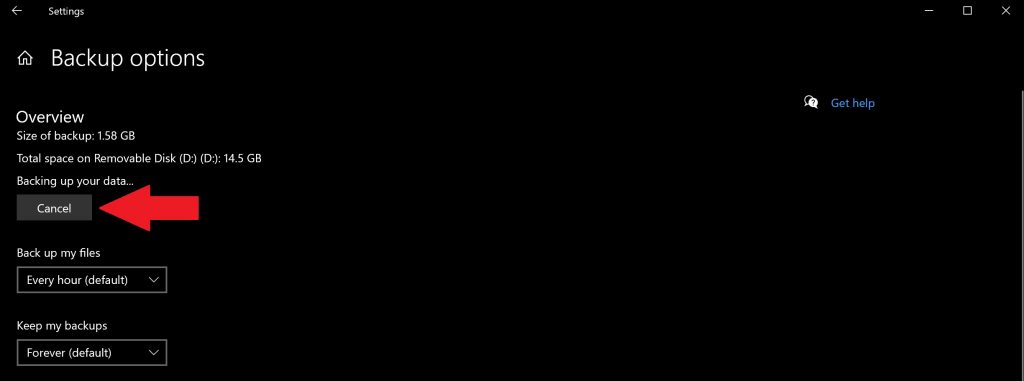
Congratulations, you have created your first backup! In the future, if your PC experiences a catastrophic event and you have to start from scratch, you will have a way to restore your most pertinent files. After your files finish backing up, you can use the dropdown menus to change the frequency of new backups that are saved and the length of time you want to keep your backups on Windows 10.

Add a custom folder to Backup
By default, File History is configured to save the folders that are located under the user’s %UserProfile% folder at “C:\users\[user].” If you want to add custom folders to your backup, you need to indicate which additional folders you want to save.
If you want to add a custom folder, follow these steps.
1. Go to Settings > Update & Security > Backup and choose More options
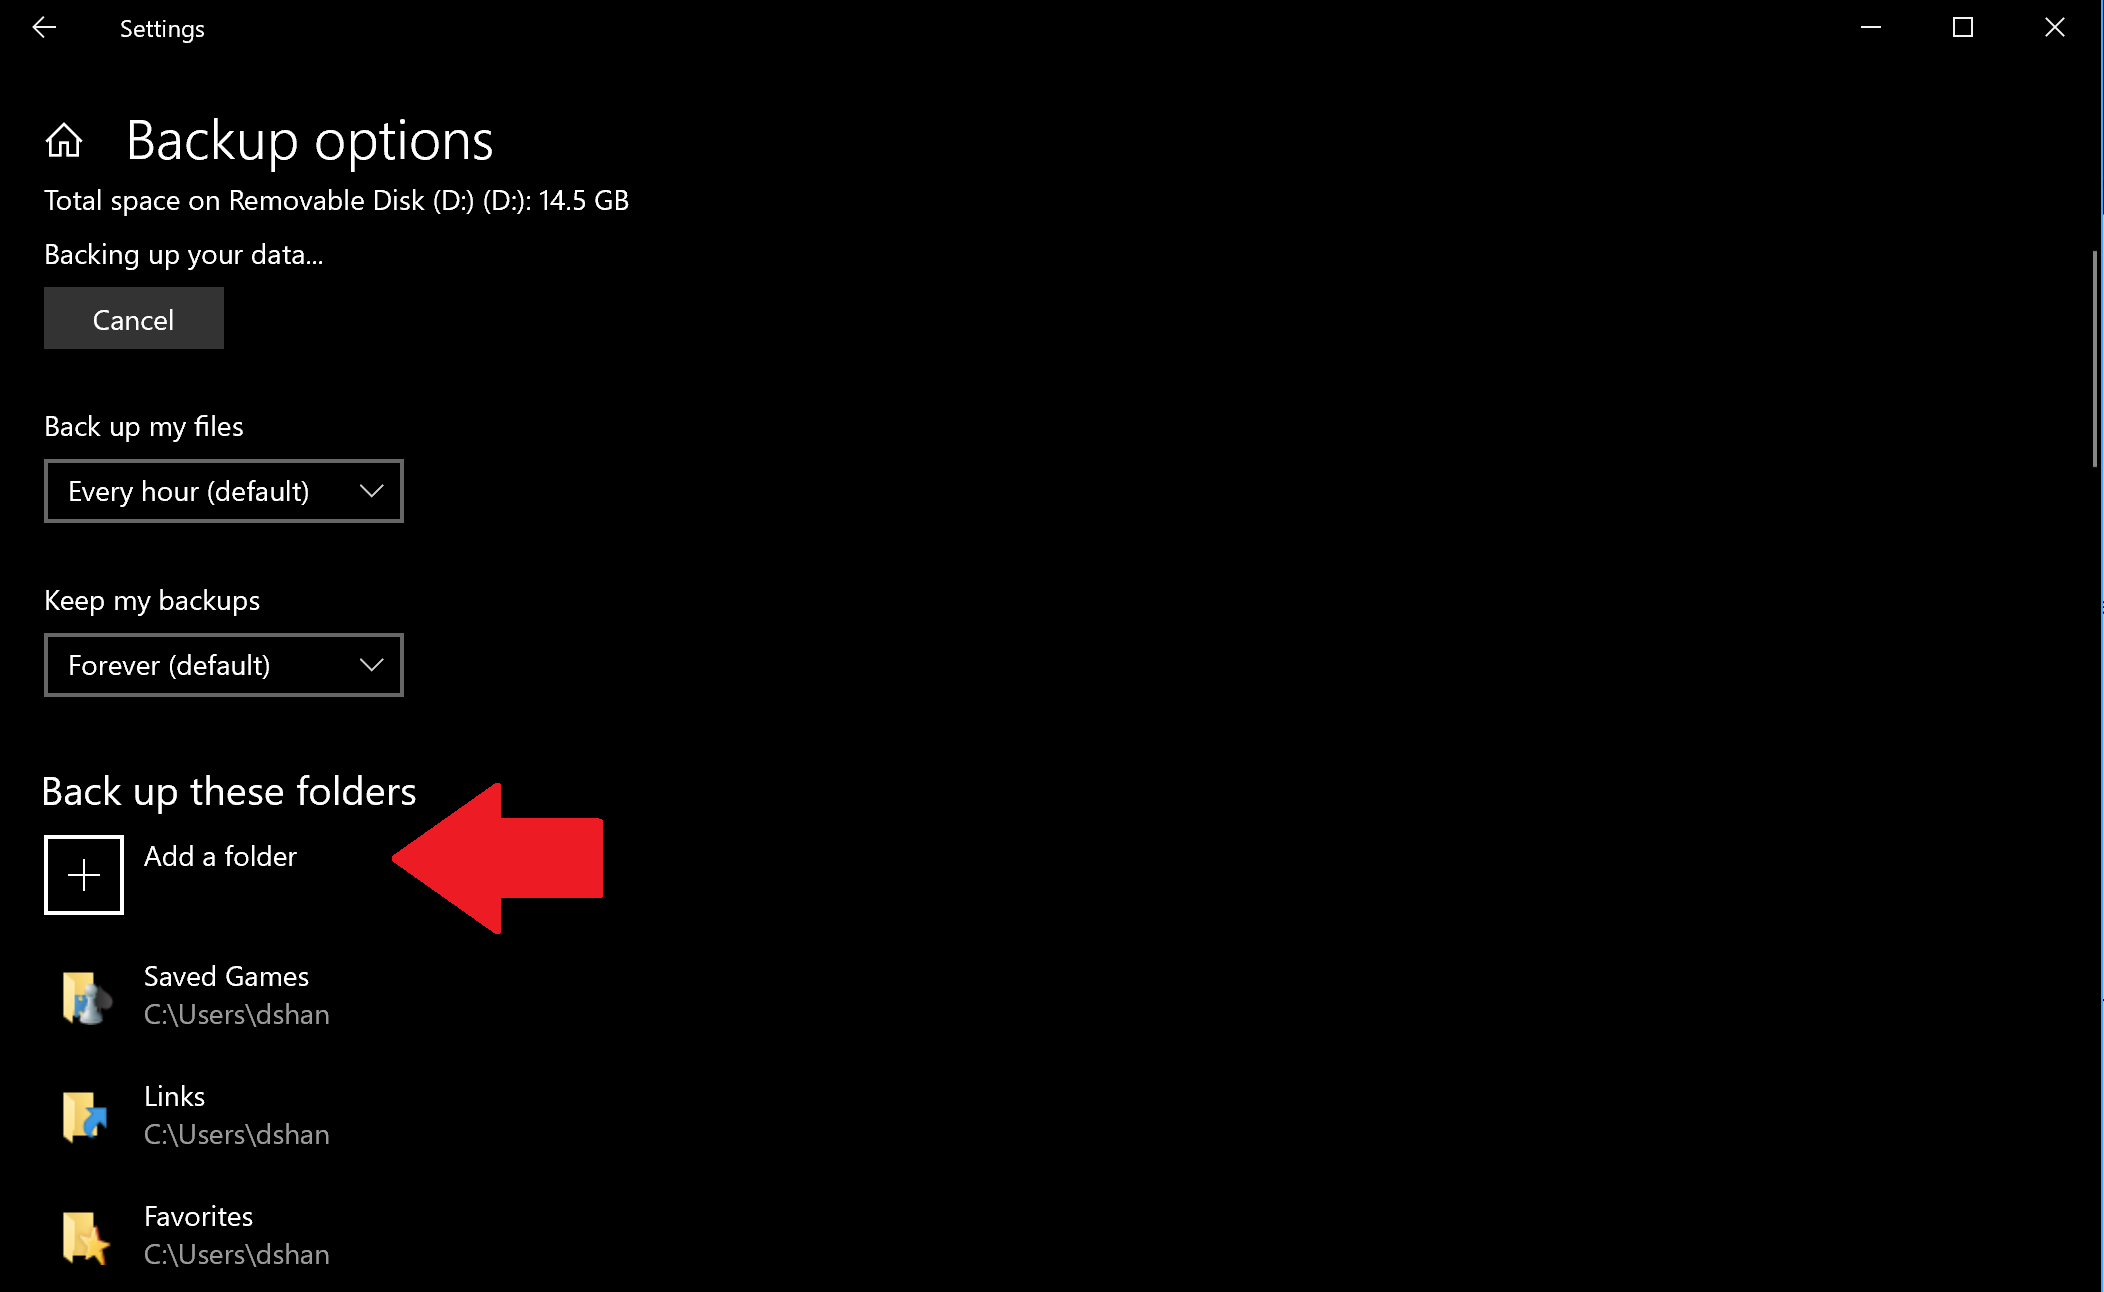
2. Choose Add a folder under Back up these folders
3. Add your custom folder
Once added, your custom folder will be saved and added to your next backup. Keep changes you make to your files in mind when backing up files in Files History because Windows 10 will backup and store different versions of the same files.
Restore files or folders using File Explorer
In the event that one of your folders or files gets damaged or inadvertently deleted, you can use File History to restore the file or folder you need from a specific backup date. If you need to restore a file using File History, follow these steps:
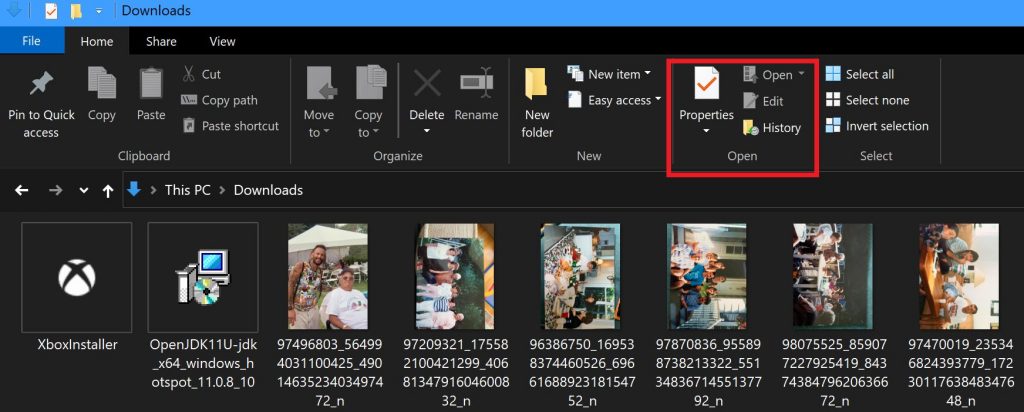
1. Open File Explorer and go to the folder whose files you want to restore. At the top of the windows, under the Home tab in File Explorer, there is a History menu option as shown below.
2. Choose History and the File History screen will pop up showing your the most current backup of this folder. If you have backed up this folder on multiple dates, you can switch between the different dates too.
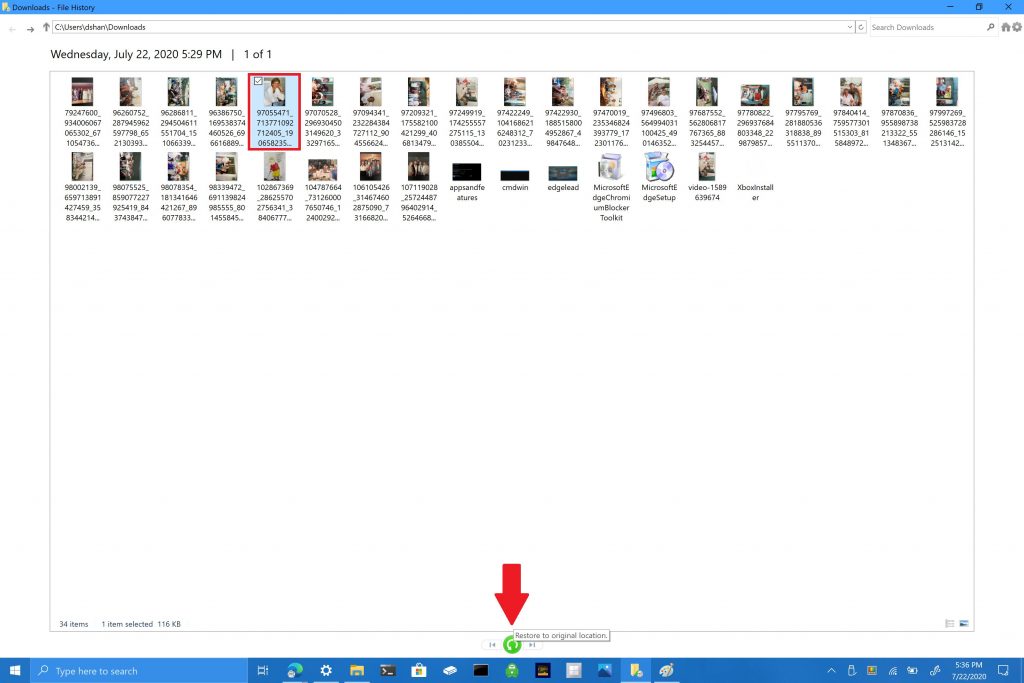
3. Choose the file you want to restore and click on the green restore button to restore the file to original location as indicated.
It is important to note that you can also choose to open File History by going to Settings > Update & Security > Backup and choose More options. At the bottom of the page, choose Restore files from a current backup to open the File History page and repeat steps #2 and #3.
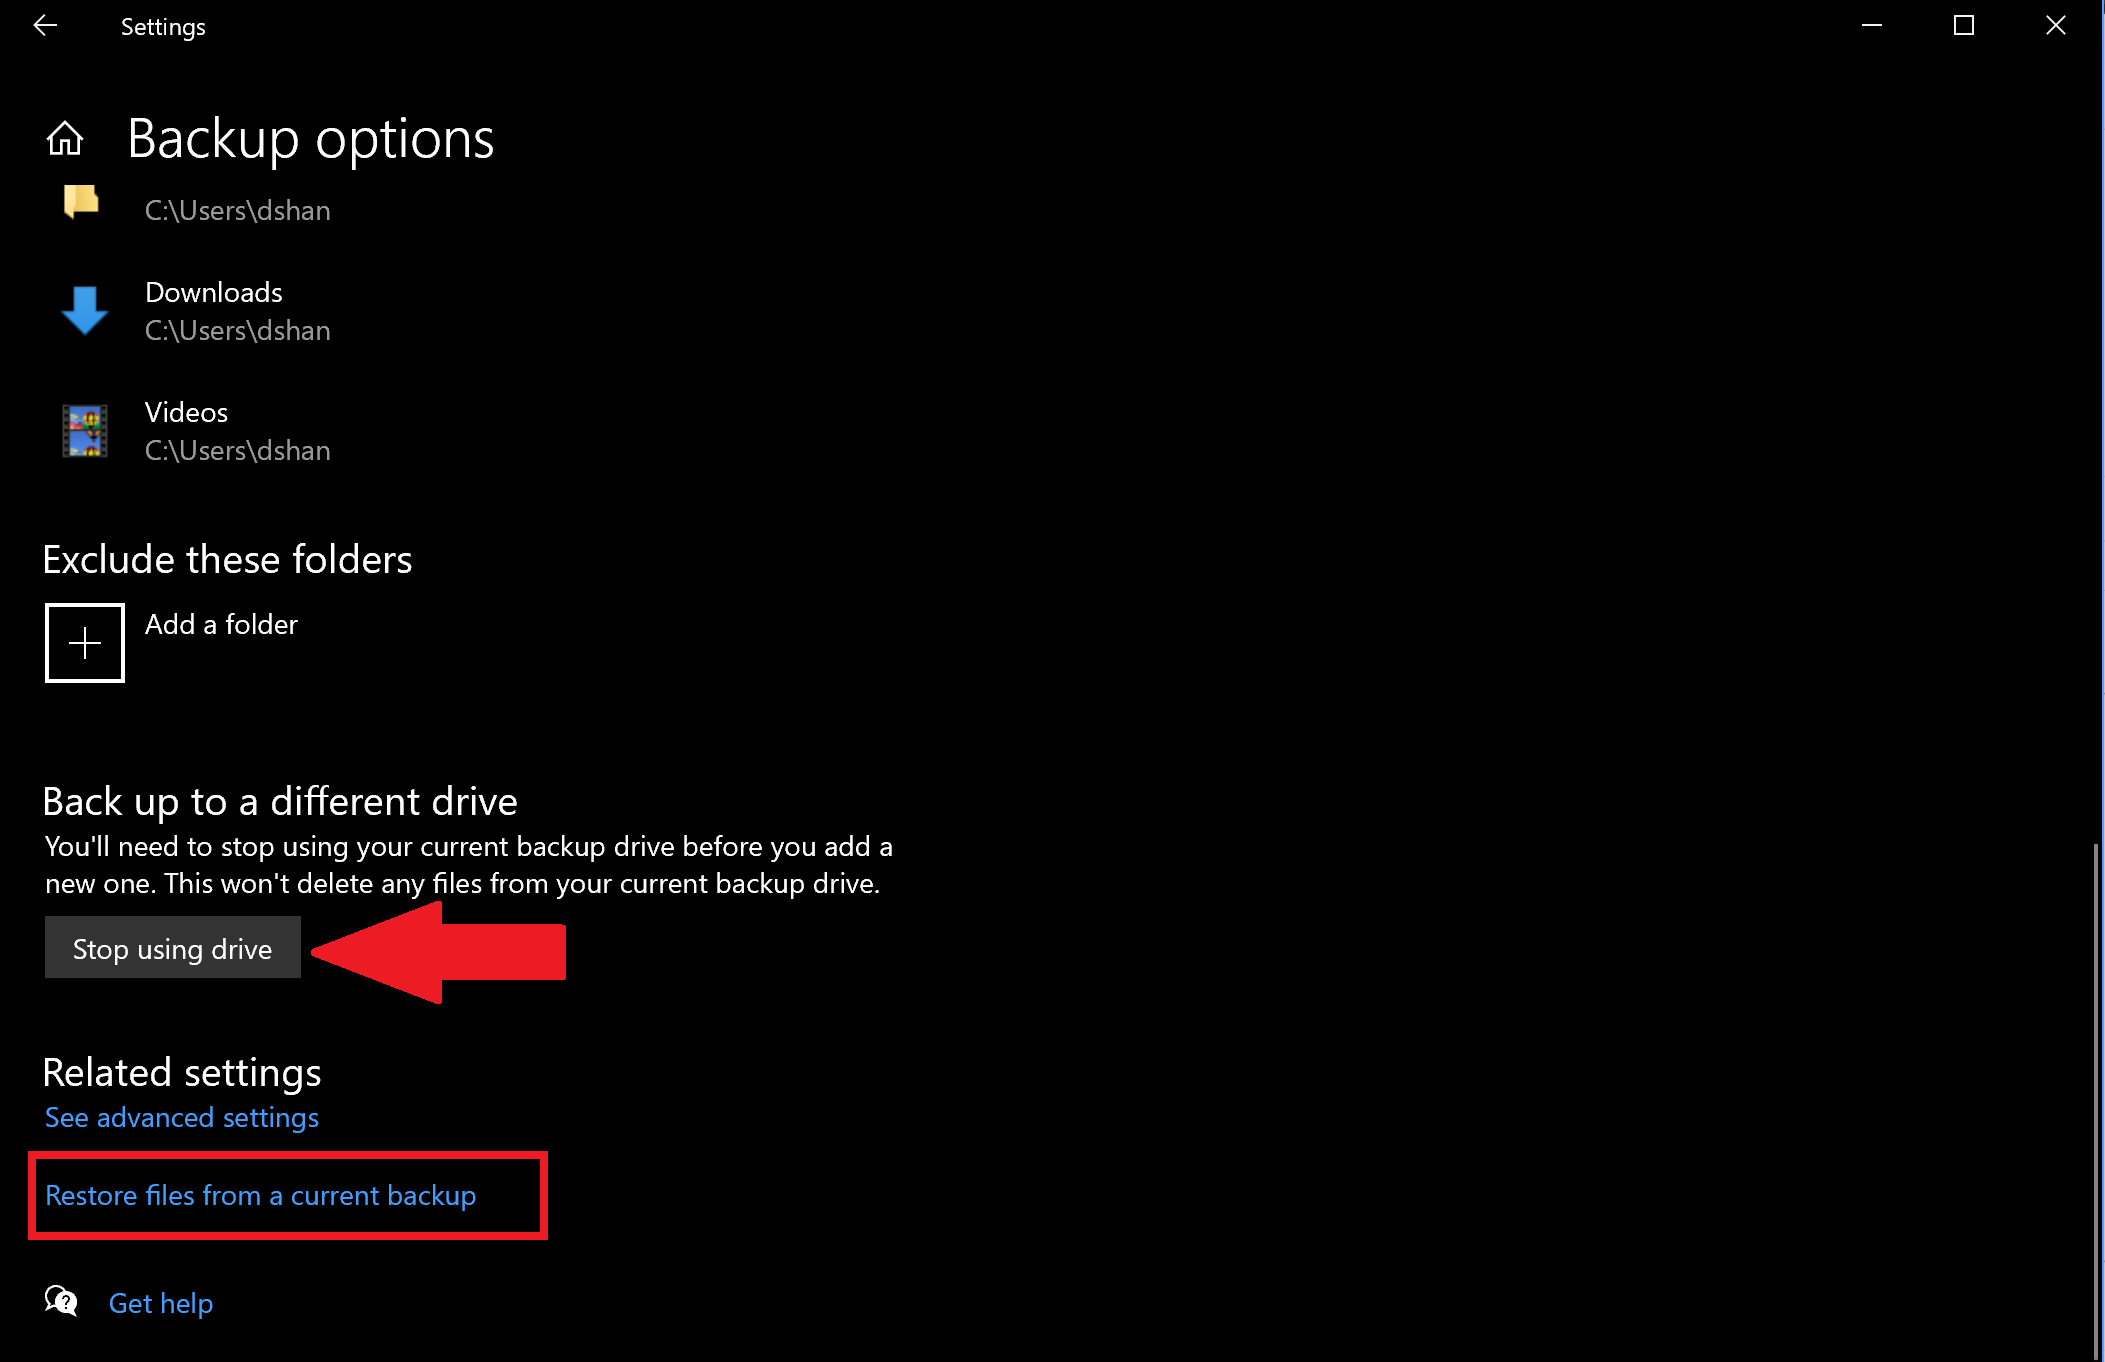
You are also not limited to just individual files, you can also restore whole folders if necessary. If you want to backup to another different drive, or create a different backup, you need to click Stop using drive. This will stop the current backup and you can now save a new backup to a new USB or network drive.