How to Fix Time on Windows 10 [Clock is Wrong]
Restarting the required services should fix this issue for good
6 min. read
Updated on
Read our disclosure page to find out how can you help Windows Report sustain the editorial team Read more
Key notes
- If the time on your Windows 10 PC is wrong, it might be due to some disabled services.
- You can solve this problem by re-registering the Windows Time service.
- Changing your time zone temporarily has also proved effective in solving this issue.
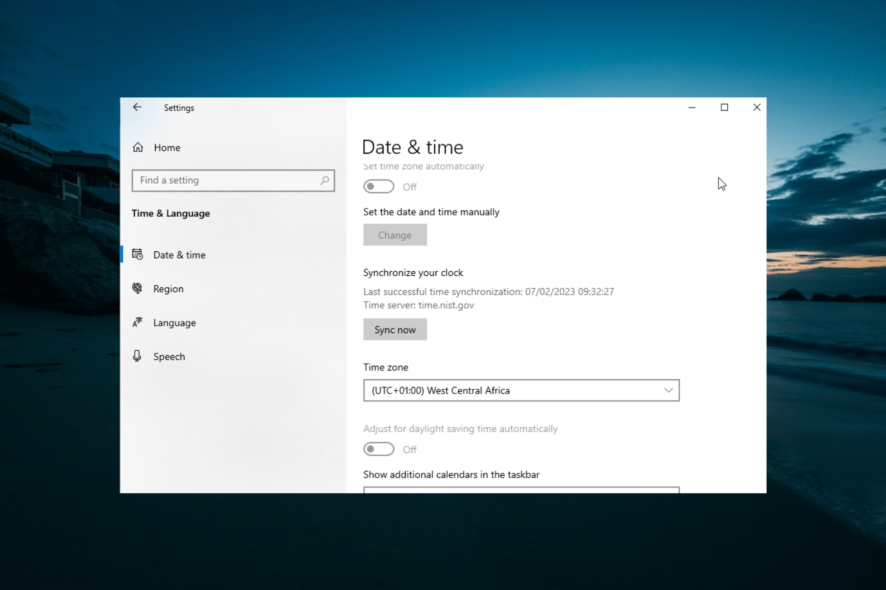
Although Windows 10 is an amazing operating system, there are still some minor issues that can appear once in a while. One issue reported by the users is the wrong time on their Windows 10 PC.
Although this isn’t a big problem, it can be inconvenient. So let’s see how to fix it.
Why is my Windows 10 clock wrong?
Below are some of the factors that can cause the Windows 10 clock to be incorrect:
- Outdated PC: In some cases, the wrong time on your PC can be due to the fact that your PC is outdated. You can fix this by updating your Windows 10 to the latest version.
- Faulty CMOS battery: Sometimes, the CMOS battery on your motherboard might be faulty, leading to this wrong time issue. The solution to this is to replace the battery.
- Presence of malware: Viruses can mess with every aspect of your PC, including the time. Scanning for malware with Microsoft Defender or a third-party antivirus should fix this.
After listing the causes of this issue, below are some of its variations, as reported by users:
- CMOS clock wrong
- The Windows clock is out of sync (This usually happens when time synchronization fails with time.windows.com).
- Windows 10 time wrong after reboot/daylight savings/sleep
- Windows 10 time is always wrong (time zone/date and time wrong – Sometimes, Windows 10 won’t let you change the time zone at all, but luckily we have a few fixes prepared).
- Computer clock wrong Windows 7/11
- Windows 10 time wrong by a few minutes (up to 1 hour)
- Microsoft Edge time wrong
- Windows 10 clock wrong dual boot
- Windows 10 domain clock wrong
How do I fix the clock is out of sync Windows 10?
Before delving into the solutions in this section, below are some preliminary steps to try:
- Update BIOS
- Change CMOS battery
- Check your PC battery
If this does not fix the issue, you now proceed to the fixes below:
1. Scan your computer for malware
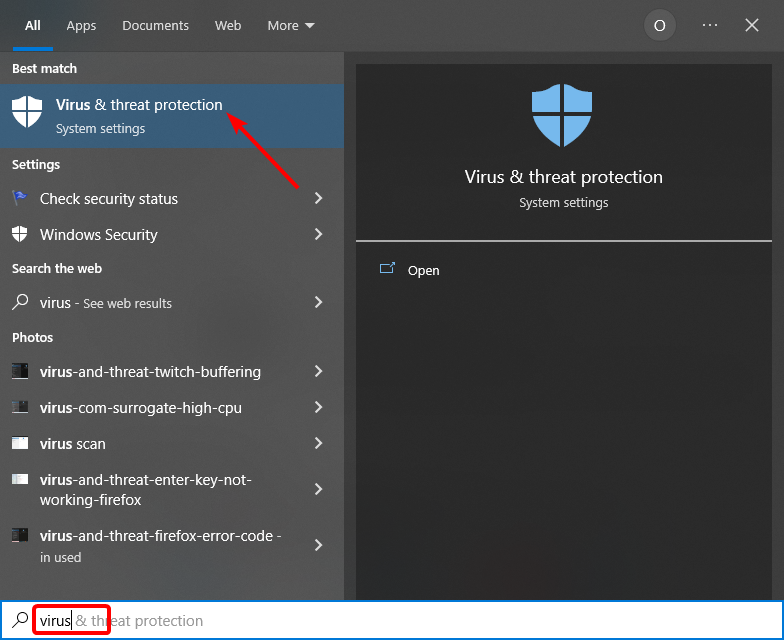
- Press the Windows key, type virus, and select Virus & threat protection.
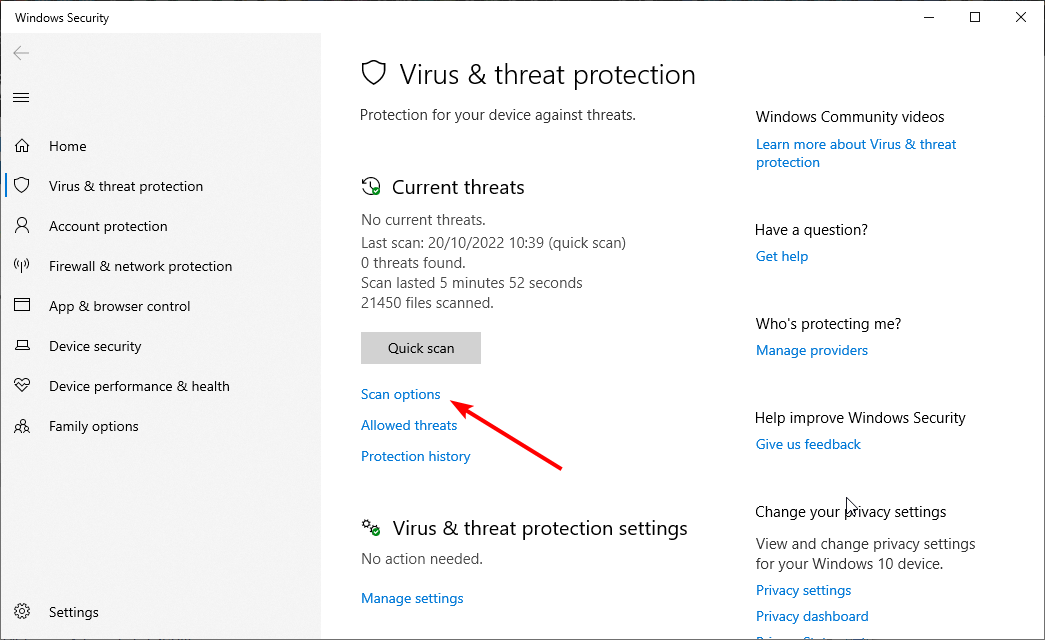
- Click Scan options.
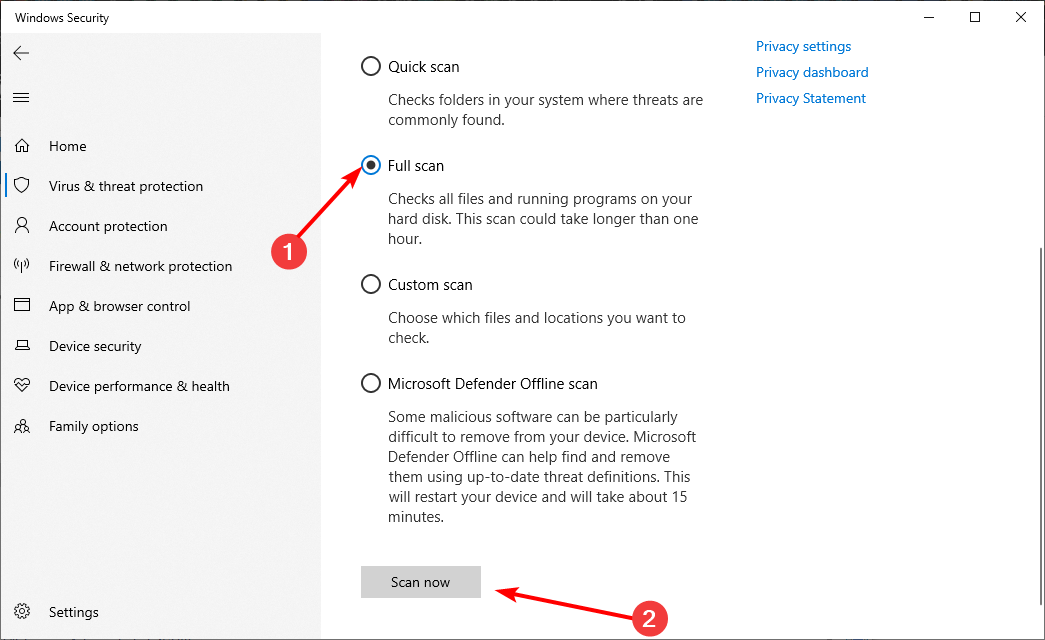
- Finally, select the Full Scan option and click Scan now.
Malware, viruses, and other cyber threats may interfere with your Windows 10 clock and cause it to display time inaccurately. Hence, you need to scan your PC for malware to fix the wrong time issue on Windows 10.
2. Check Windows Time service settings
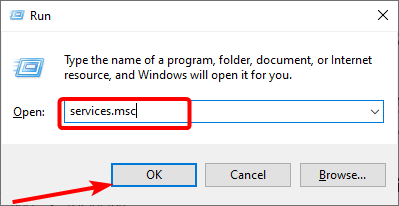
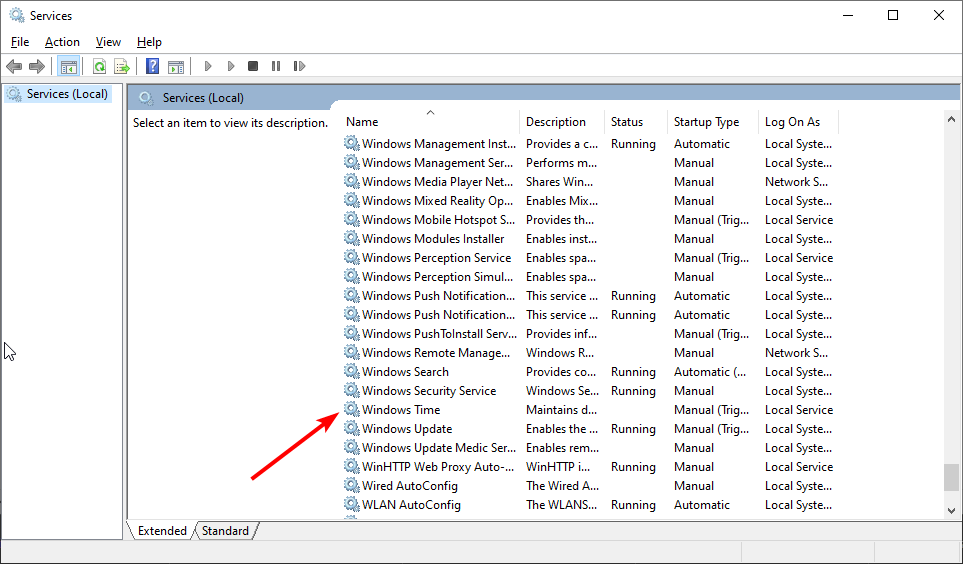
- Press the Windows key + R, type services.msc, and click the OK button.
- Double-click the Windows Time service to open its properties.
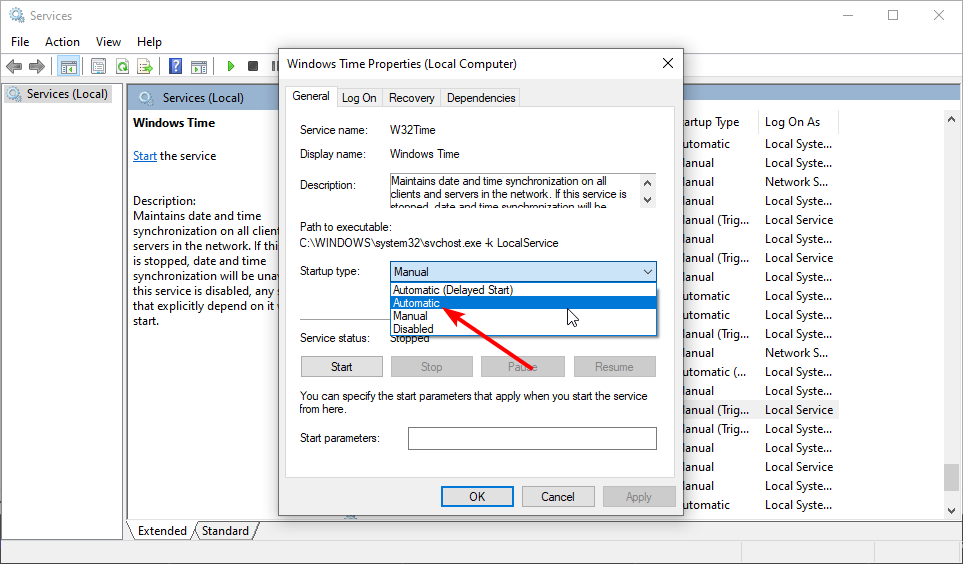
- Now, set the Startup type to Automatic.
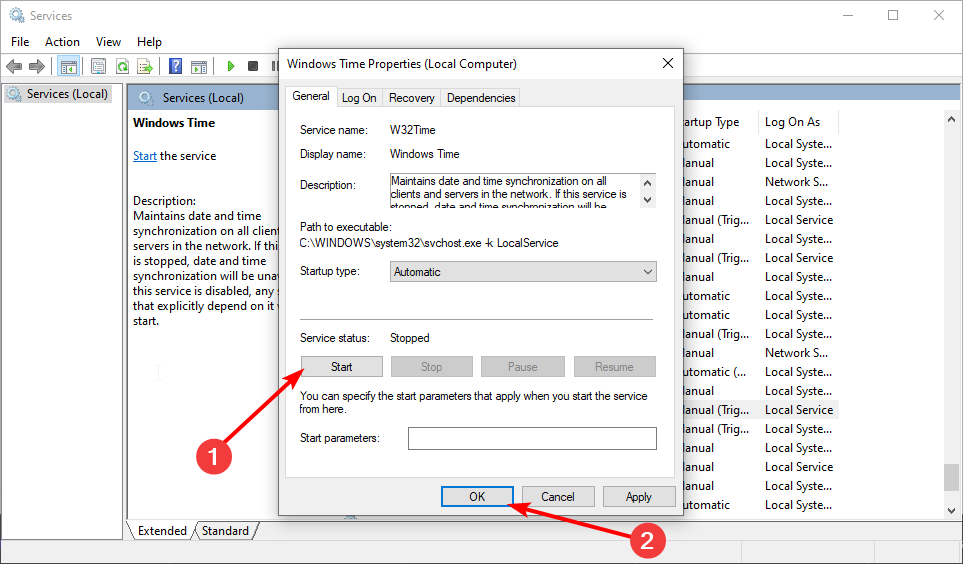
- Check the Service status. If the service is running, click Stop and then click Start again. If the service isn’t running, click the Start button to start it.
- Finally, click Apply and OK.
Another effective method to fix the wrong time on Windows 10 is ensuring the required services are running.
Few users suggest changing the Startup type to Disabled and restarting your computer. We’re not sure if changing the Startup type to Disabled works, but you could also try doing that.
3. Change the Internet Time server
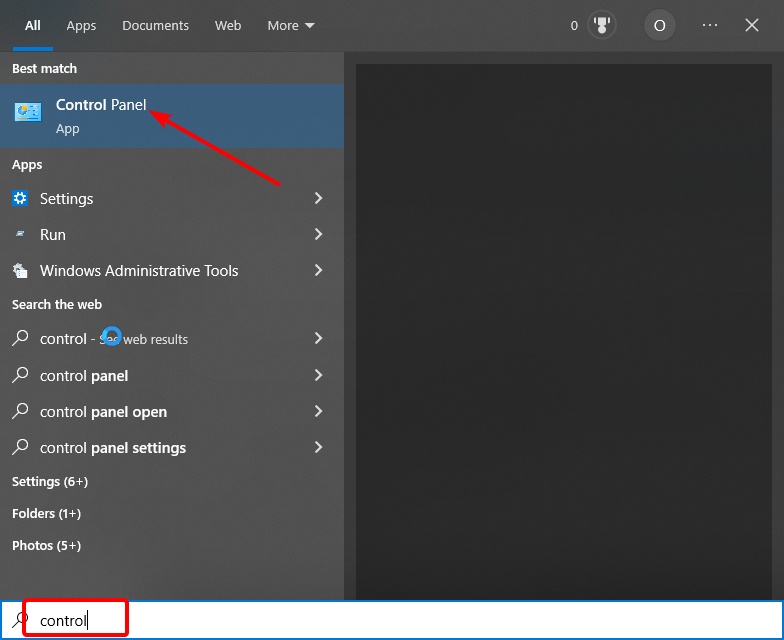
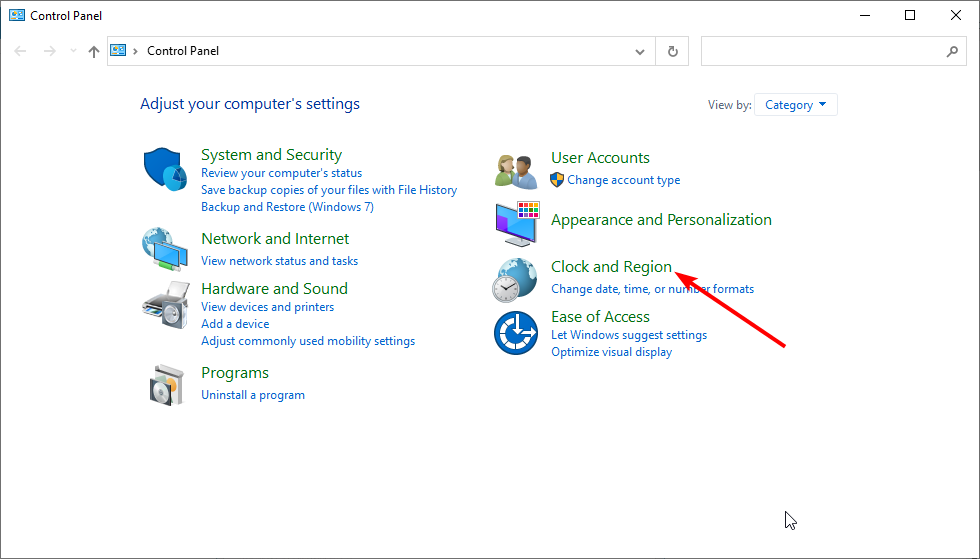
- Press the Windows key + S, type control, and choose Control Panel from the results list.
- Select the Clock and Region option.
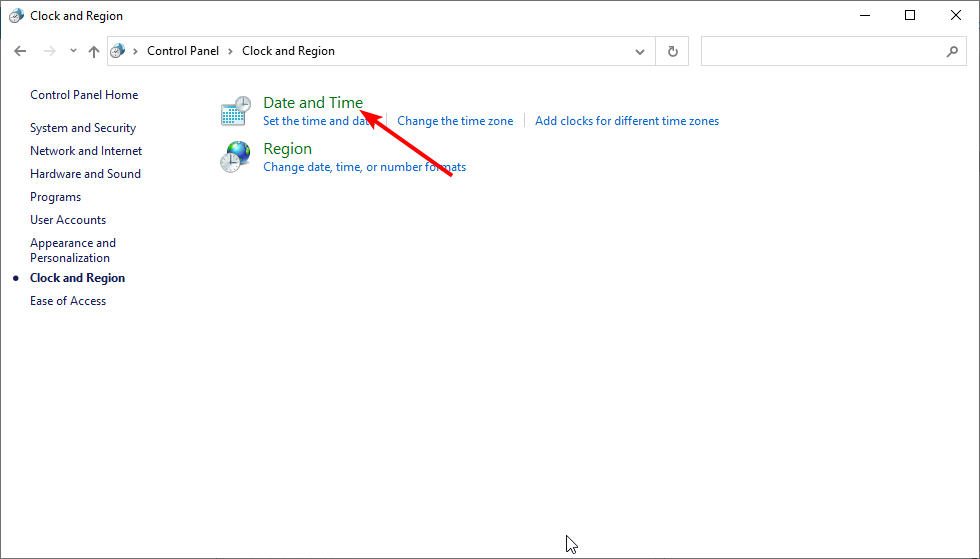
- Now, click on Date and Time.
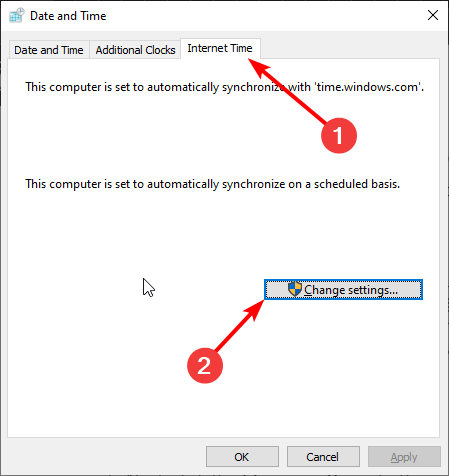
- Click the Internet Time option at the top.
- Next, click the Change settings button.
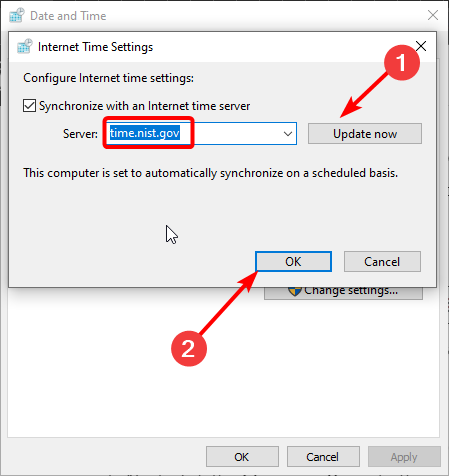
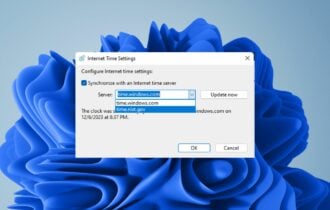
- In the Server section, select time.nist.gov instead of time.windows.com and click Update now.
- Finally, click OK to save changes.
The wrong time on Windows 10 might be caused by a problem with the Internet Time Server, and you can fix it by following the steps above.
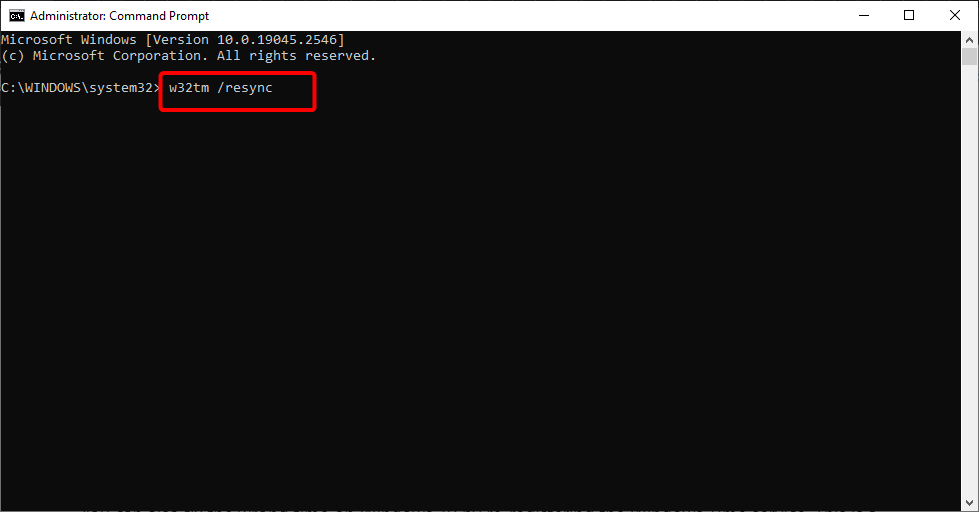
4. Unregister and register the Windows Time service
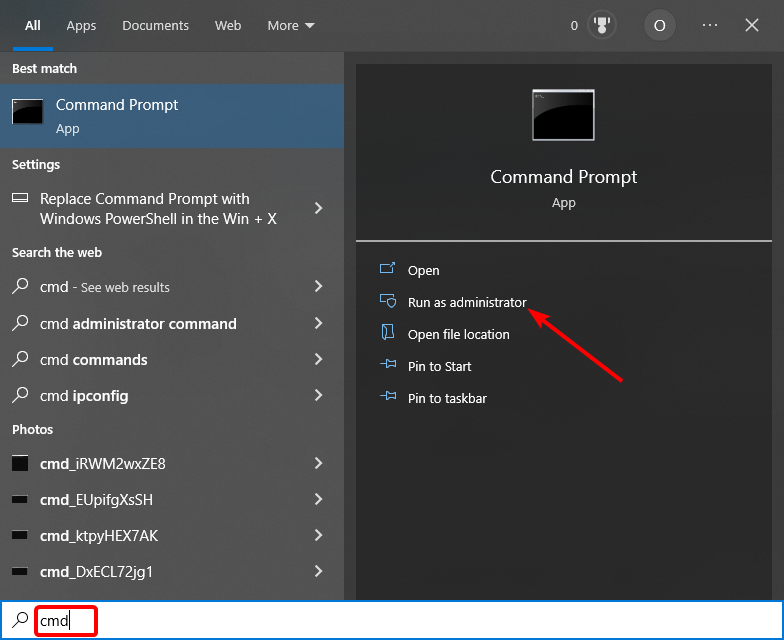
- Press the Windows key + S, type cmd, and select Run as administrator under Command Prompt.
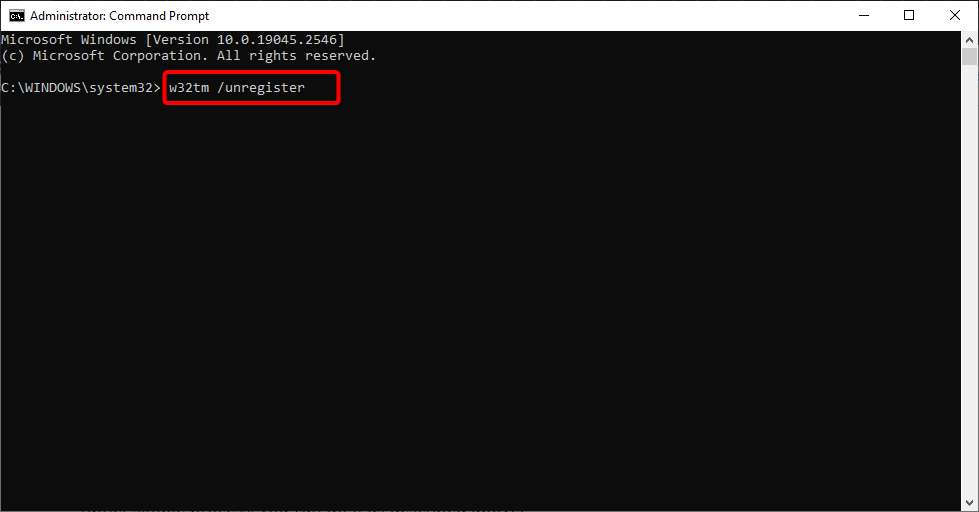
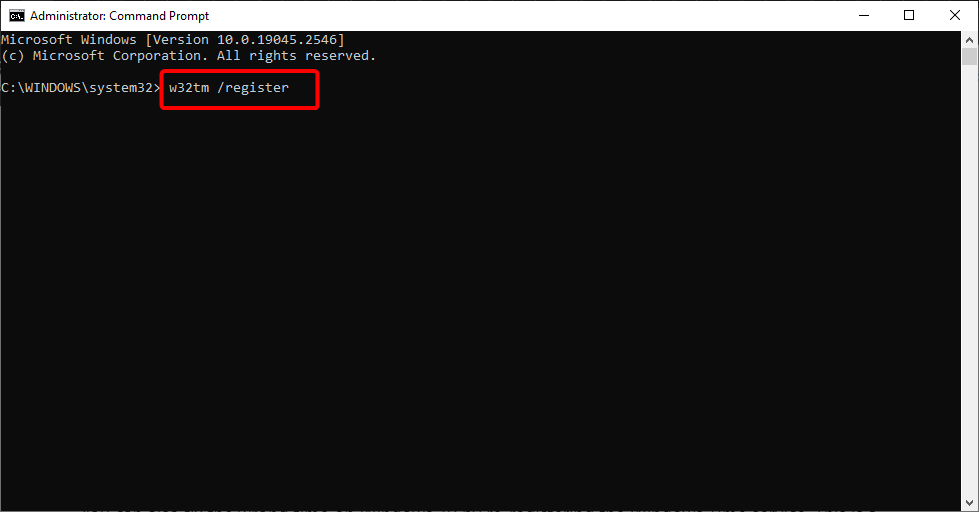
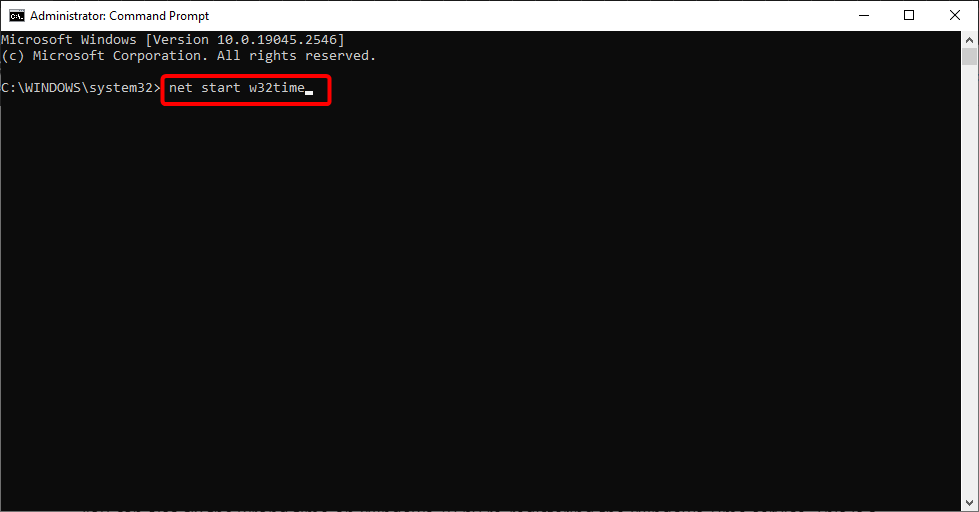
- Type the following commands and press Enter after each:
w32tm /unregisterw32tm /registernet start w32timew32tm /resync - Finally, wait for the commands to finish running and restart your PC.
You can also fix the wrong time on Windows 10 by re-registering the Windows Time service. This is a rather simple process; you can do it as described above.
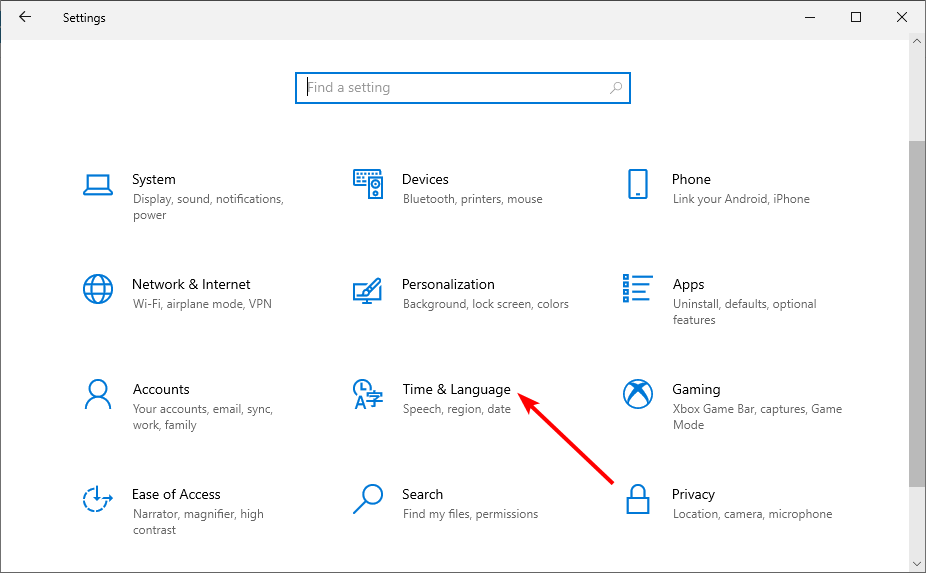
5. Temporarily change your time zone
- Press the Windows key + I and select the Time & Language option.
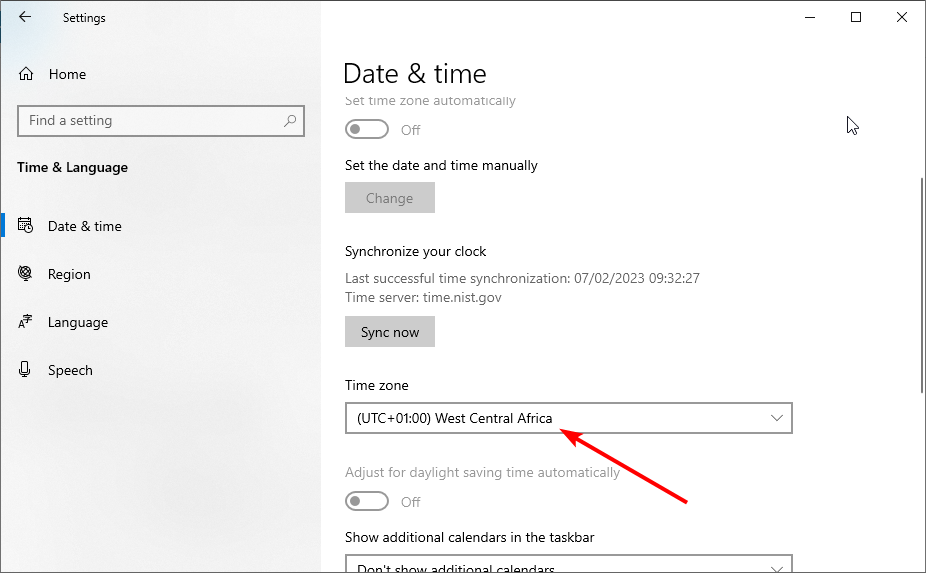
- Click the dropdown under the Time zone section.
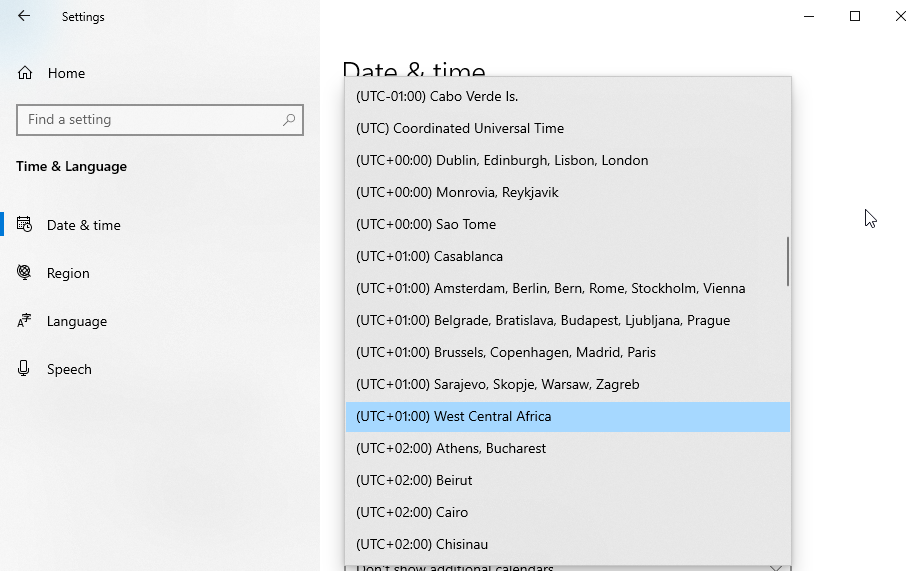
- Now, select a different time zone and leave it for some minutes.
- Finally, repeat the steps above and switch back to your time zone.
Some users confirmed that temporarily changing the time zone helped them fix the wrong time problem on Windows 10.
6. Remove Adobe Reader
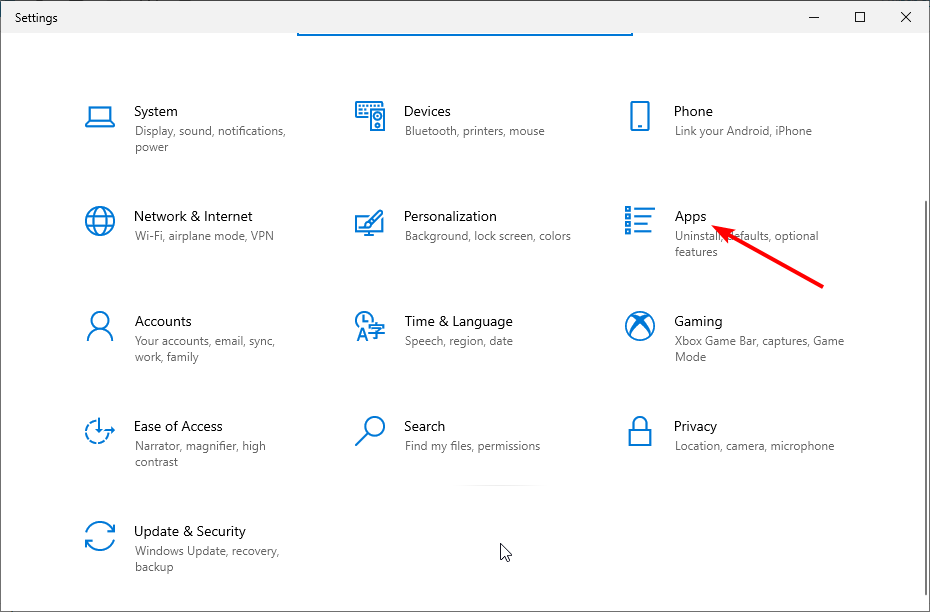
- Press the Windows key + I and select the Apps option.
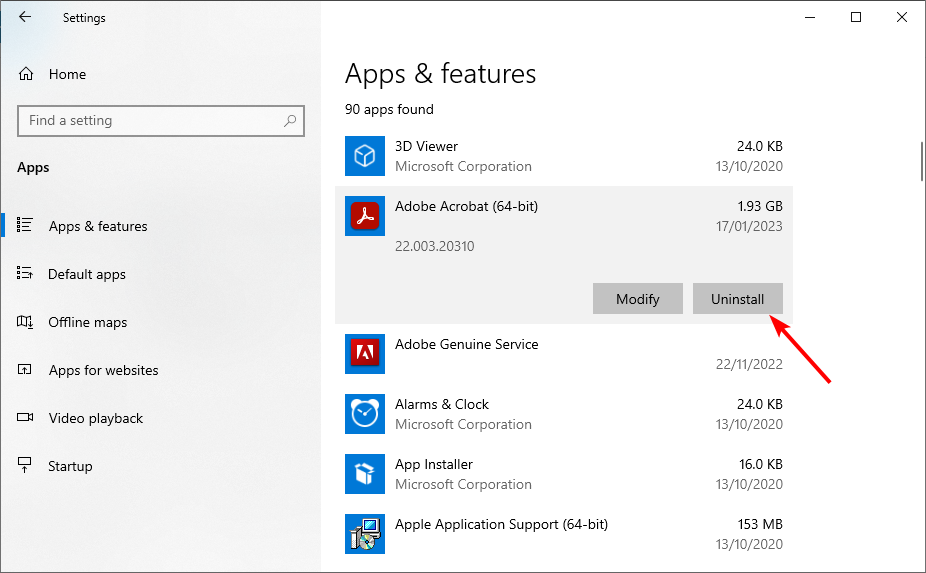
- Click the Adobe Reader option.
- Now, click the Uninstall button and follow the onscreen instructions to complete the removal process.
- Change your time zone as shown in solution 5 above and restart your PC.
- Finally, set your time zone to the correct one and reinstall Adobe Reader.
This is a rather peculiar solution, but users claim it to fix the wrong time on Windows 10 issue. So, you should try it.
7. Add RealTimeIsUniversal DWORD in Registry Editor
This solution applies if you’re using the dual-boot of Windows 10 and Linux. If you’re not using dual-boot, you can skip this solution because it won’t work.
To complete this solution, you need to make some changes in both Linux and Windows.
- Log in to Linux and run the following commands as a root user:
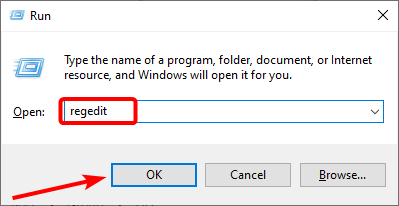
ntpdate pool.ntp.orghwclock –systohc –utc - Now, restart to Windows 10, press the Windows key + R, type regedit, and click OK.
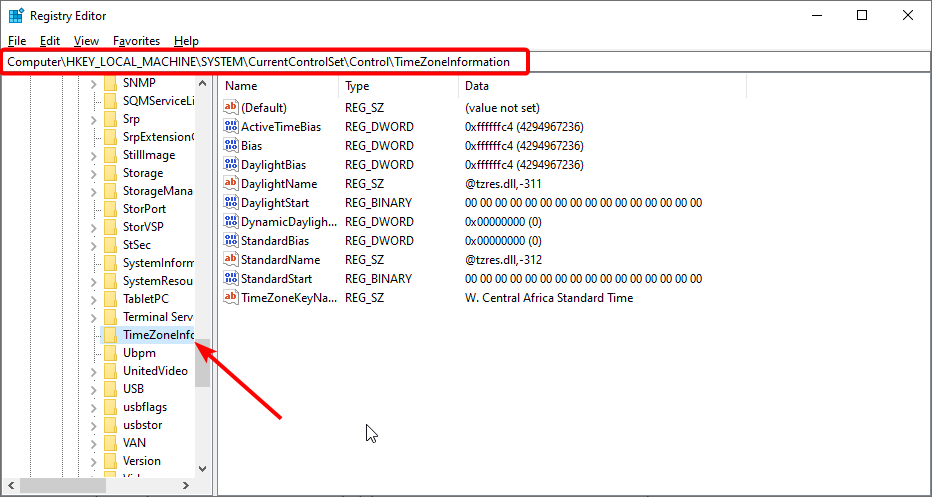
- Once Registry Editor opens, navigate to the following key in the left pane:
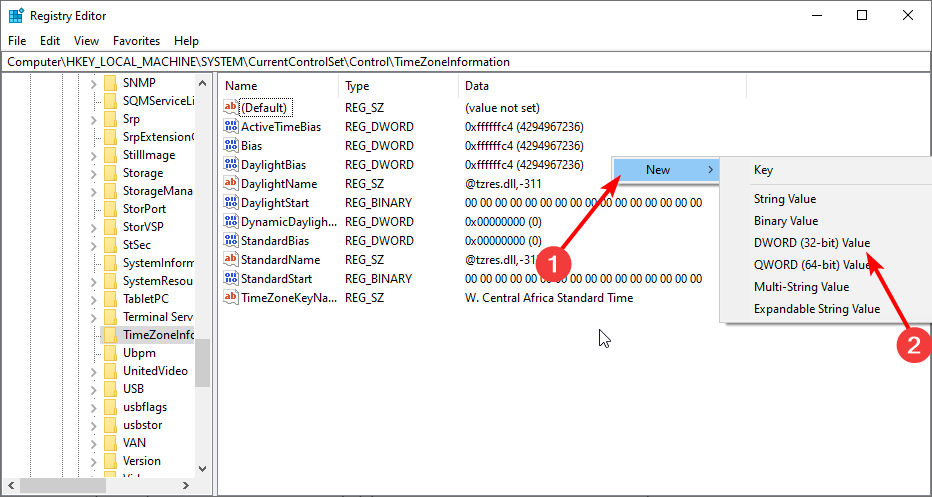
HKEY_LOCAL_MACHINE\SYSTEM\CurrentControlSet\Control\TimeZoneInformation - Right-click the space and select New > DWORD (32-bit) Value.
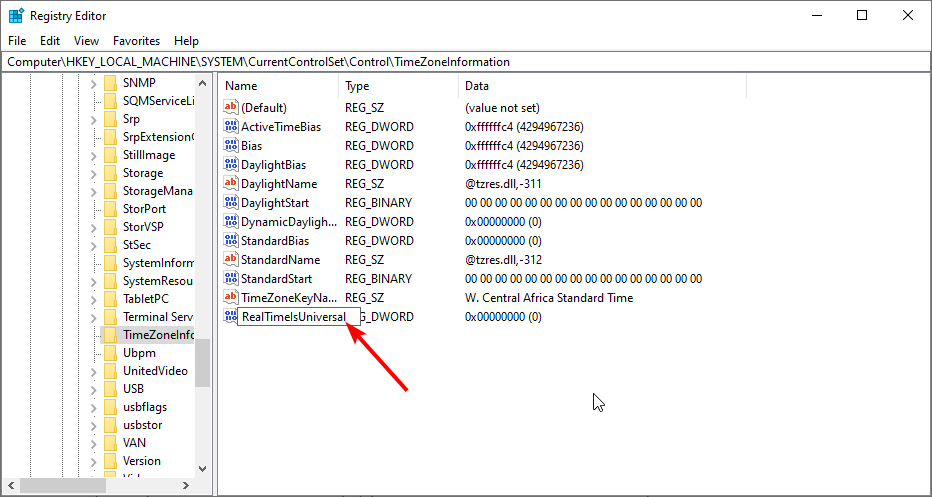
- Enter RealTimeIsUniversal as the name of the new value and double-click it.
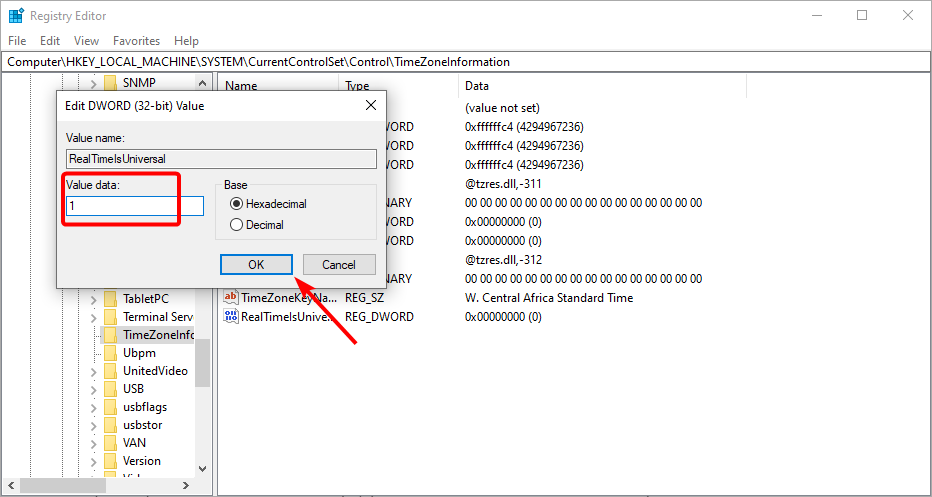
- Finally, set its Value data to 1 and click OK to save changes.
After completing the aforementioned steps, you should be able to fix the wrong time on Windows 10 issue.
8. Update Windows 10
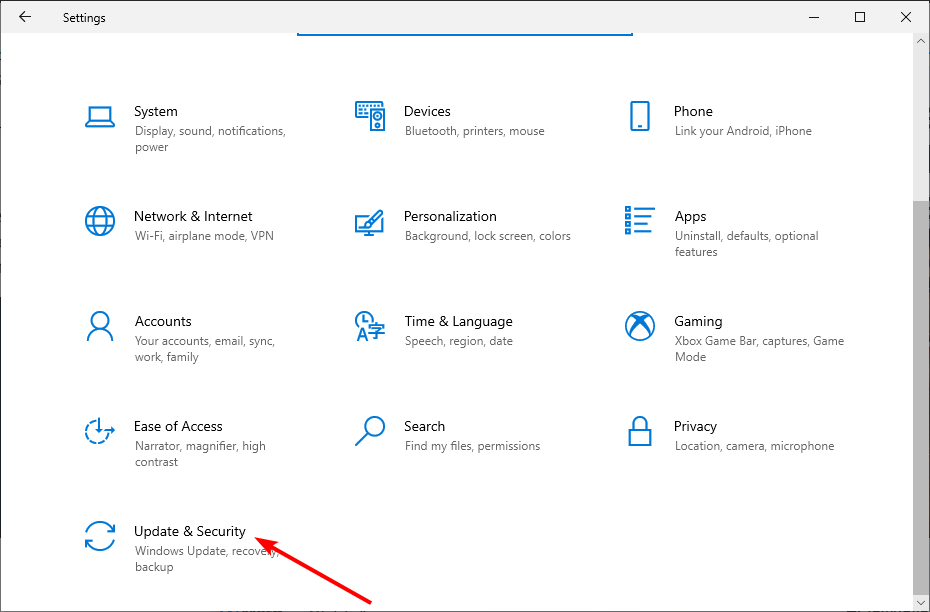
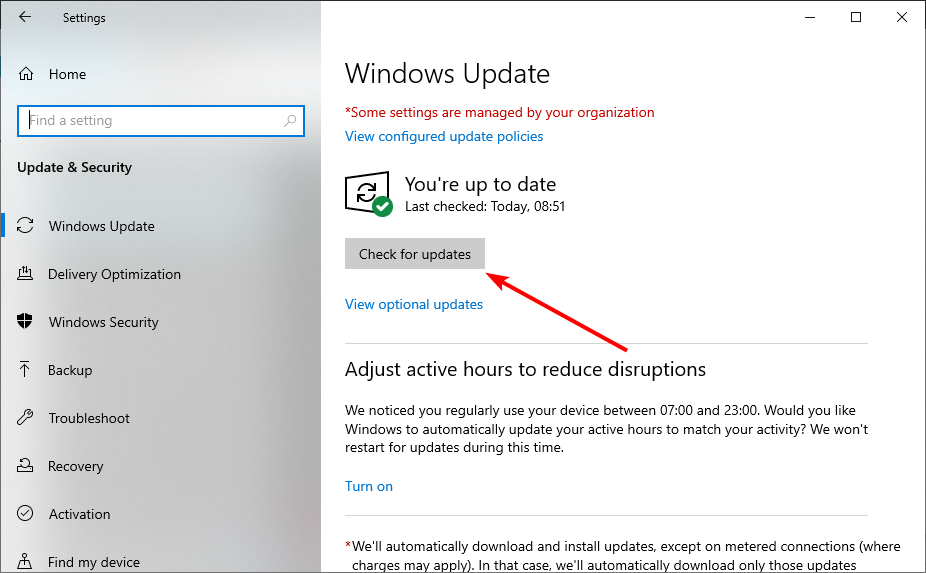
- Press the Windows key + I and select Update & Security option.
- Click the Check for updates button.
- Finally, install the available updates and restart your PC.
Running an outdated Windows 10 version may also trigger clock issues on Windows 10. Moreover, if this is a known issue, chances are that Microsoft has already fixed it in the latest patches.
With this, we can conclude this detailed guide. We believe you now have everything you need to fix the wrong time issue on Windows 10 for good.
If you are facing a related issue in Windows 10 time keeps changing, check our detailed guide to fix it convincingly.
Feel free to let us know the solution that helped you fix this issue in the comments below.


