Please note: this tutorial is not for beginners. This tutorial requires the use of Raspian terminal commands which are text-based, so you’ll at least need to have basic Linux knowledge. You can’t run actual MS-DOS on the Raspberry Pi as is, instead you will be running DOS via an emulator. By using a combination of QEMU PC emulator and FreeDOS, you can play classic DOS games and run other DOS programs on the Raspberry Pi. Once you’ve set up QEMU as the virtual machine and installed FreeDOS, you can run DOS programs and games on the Raspberry Pi.
At the moment, FreeDOS is the only DOS program that will allow you to run programs and games. The reason that you can’t install FreeDOS directly on the Raspberry Pi is because of the CPU architecture. Like any DOS, FreeDOS requires an Intel x86 CPU and a BIOS to provide basic runtime services. The Raspberry Pi operates using a completely different architecture, using an ARM CPU, which is not binary compatible with the Intel CPU and does not include a BIOS. Therefore, FreeDOS can’t run on the Raspberry Pi natively and instead must be used via an emulator.
Raspberry Pi Setup
First, you need a clean install of Raspbian installed on the Raspberry Pi. Raspbian is the operating system (OS) built specifically to be used on a Raspberry Pi. I used a Raspberry Pi 3 Model B+ for this, but any Raspberry Pi model should work. First, you need to install Raspbian to your Raspberry Pi. Follow the steps on how to install an OS to a Raspberry Pi. Raspbian is the OS you want to install. Once installed, you will want to open Terminal from the Raspbian desktop.
Install FreeDOS to a Raspberry Pi
QEMU is short for Quick EMUlator. QEMU is open-source virtual machine (VM) software that runs DOS as a “guest” operating system on Linux. It is no different from using a VM in Windows 10. The good news is that QEMU is already available on most Linux systems, including Raspbian, so there is no extra software to install.
By typing in a few lines of Linux commands, you can have FreeDOS up and running in no time. By using QEMU, you need to create every component of your Virtual Machine (VM). Here are the steps and commands you need to use to install and run FreeDOS. First, you need to define the virtual disk image in Linux for FreeDOS. Since FreeDOS doesn’t take up much space, I used the following command:
qemu-img create freedos.img 200M
This command instructs QEMU to create a disk image named FreeDOS.img that is 200 MB in size.
Now, you need to download and install the latest distribution of FreeDOS. Download the FreeDOS 1.2 CD-ROM “standard” installer (FD12CD.iso), as it works best for this scenario, so we will use that.
First, you need to tell QEMU to use the CD-ROM image and boot from that. Remember that the C: drive is the first hard drive, so the CD-ROM will show up as the D: drive. In order to add the rest of the parts to make FreeDOS work on the Raspberry Pi, copy and paste the following command in its entirety:
qemu-system-i386 -m 16 -k en-us -rtc base=localtime -soundhw sb16,adlib -device cirrus-vga -hda freedos.img -cdrom FD12CD.iso -boot order=d
After inserting the command, follow the prompts and FreeDOS will be installed in no time. For your information, the previous command line tells QEMU to create a an Intel i386-compatible virtual machine with 16 megabytes of memory, a US-English keyboard, and a real-time clock based on my local system time. The command line also gives my VM a classic Sound Blaster 16 sound card, Adlib digital music card, and standard Cirrus Logic VGA card. The file, freedos.img, is designated as the first hard drive (C:) and the FD12CD.iso image is designated as the CD-ROM (D:) drive. QEMU is set to boot from the CD-ROM drive (D:).
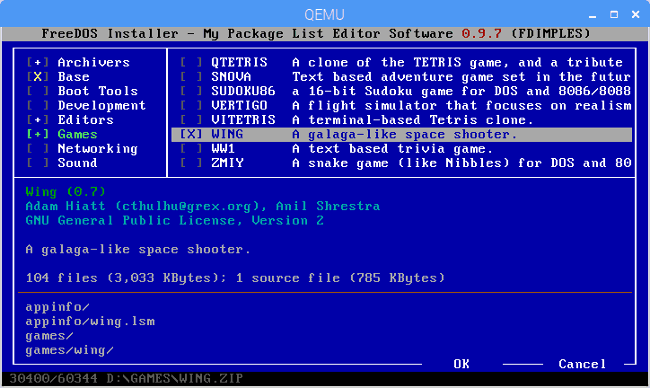
The FreeDOS 1.2 distribution is easy to install, all you need to do is follow the prompts. I provided some screenshots for what you should see after you insert the abovementioned Linux command for your reference.
After installation is complete, reboot FreeDOS. After reboot, the FreeDOS distribution package already comes with pre-installed games and applications to use on DOS running through the QEMU emulator on the Raspberry Pi. FreeDOS also offers additional links to other DOS programs and games available for download on its website.
Run FreeDOS on the Raspberry Pi
Now that you have FreeDOS installed in QEMU, you might want to see how well FreeDOS runs DOS applications and games. Performance issues are rare, but you may experience slow read/run times whenever you are doing any disk I/O, including writing large amounts of data. Overall, I have not experienced any issues running DOS applications and playing DOS games. Right now, my favorite game to play using FreeDOS in QEMU is Doom. Doom was my favorite game to play when I was growing up. Similar games, including Wolfenstein and Heretic work well too.
Again, because of the CPU architecture, you can’t run any DOS programs directly on the Raspberry Pi. However, it is nice to know that there is a workaround to run DOS applications and play DOS games on the Raspberry Pi via the QEMU PC emulator. Once you’ve set up QEMU as the virtual machine emulator and installed FreeDOS, you are all set to run all your favorite DOS programs and games on the Raspberry Pi.


