You can transfer a lot of your important data through your USB sticks. All you’ve to do is plug in the USB drive and select the files you want to copy. However, this simplicity of copying your data is precisely what might become a hurdle to your privacy and data security.
This is especially true if you’re using a shared device, where multiple people have access to your system. Anyone could come in, plug in a USB stick, and take your critical data with them. Interestingly, you can stop this from happening by disabling all UBS ports on your Windows. Let’s learn how.
How to disable all USB ports in Windows 10 or Windows 11
By disabling the USB ports in your Windows PC, you protect yourself in two major ways. You not only safeguard your Windows from unauthorized copying of files, but you also put a barrier for anyone who might try to infect your PC with a malware.
Let’s look at some of the easiest ways to go about doing this.
1. Disable the USB ports by Device Manager
The Device Manager is a free Windows tool that lets you manage the hardware of your PC. Troubleshooting, uninstalls, reinstalls, updates—you can do it all right from the Device Manager. Unsurprisingly you can also use it for disabling the USB ports of your Windows computer. Here’s how you can get started.
- Head to the Start menu search bar, type in ‘device manager,’ and select the best match.
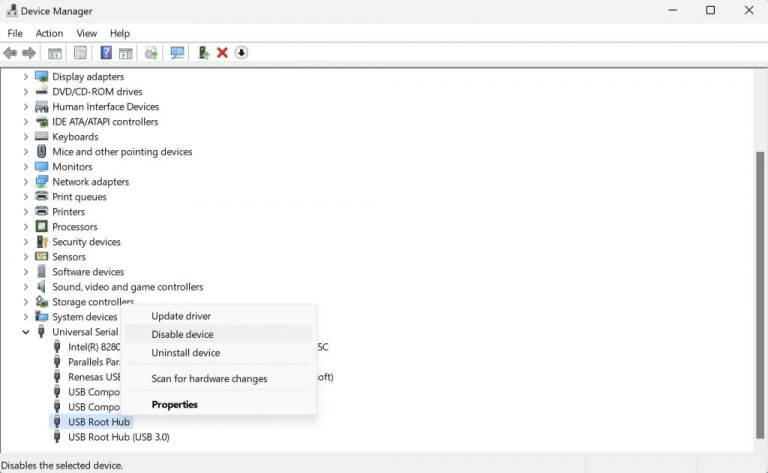
- In the Device Manager, head to the Universal Serial Bus controllers option and select the USB device icon.
- From there, click on the USB device and select Disable device.
That’s it. Do this and your Windows USB port will be disabled. To cross-check it, simply plug in the device and see if it picks up the USB. If your USB stick is still working, then jump to the next section and try out our second method.
2. Registry Editor
Another important tool in the Windows, the Registry Editor is a database collection that stores critical information about the software, hardware operating system and other user preferences.
You can also use the Registry Editor to disable the USB ports of your Windows PC. Here’s how.
- Go to the Start menu search bar, type in ‘run,’ and select the best match.
- There, type in ‘regedit.exe,’ and hit Enter.
- After the registry editor opens, go to the following address path:
HKEY_LOCAL_MACHINE\System\CurrentControlSet\Services\USBSTOR - Next, double-click on the Start key, and set the value data to ‘4,’ and press OK.
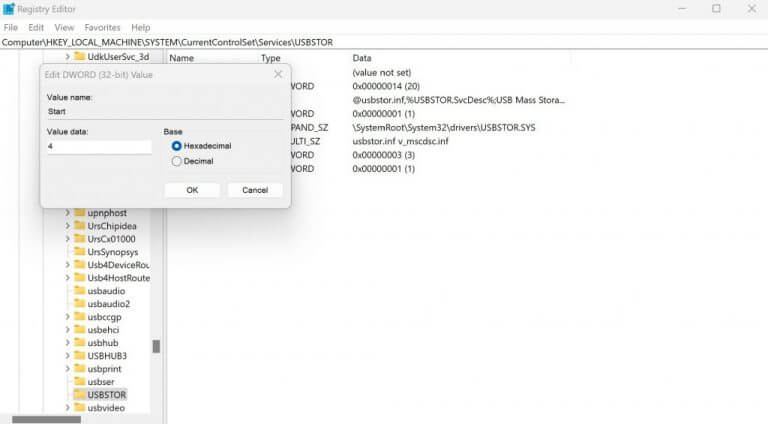
That’s it. Reboot your PC to finalize the changes, and you’ll find your USB ports will have been disabled.
Disabling all the USB ports on Windows
Locking out all the USB ports in your Windows will help you avoid people randomly accessing your PC. We hope one of the methods from above helped you disable your Windows USB ports with ease.