
To be fair, this site has been “in the cloud” for years, running on a VM at Rackspace, but when I took over management of OnMSFT.com last November, I started looking for ways to re-evaluate our expenses. Naturally, one of the first places I looked was in our own backyard, with Microsoft’s Azure.
I’ve been lucky enough to have a “grandfathered” MSDN Visual Studio subscription that came with my Microsoft MVP award – the MSDN perks ended long ago, but for some reason I retained my $150/mo credit at Azure. For much of the past few years, I barely looked at it, but it came in handy as I started looking seriously at using Azure for our site. If you’re looking at a move to the cloud, you can get $200 in credits for a month (along with a year’s worth of free services), but it was nice to take some time and learn more about Azure.
I should also say right off the bat that I’m not a developer, I think the old term of “webmaster” is what describes me best. I know my way around HTML and PHP (JavaScript, not so much), and I can, and do, use Bing frequently to find snippets of info here and there. I’ve set up servers before, and am familiar with FileZilla, MySQL Workbench, and NotePad ++ (I don’t use Visual Studio, and have never taken the time to try out Visual Studio Code, although I should). So finding something easy and intuitive was important.
I also don’t have any experience with Azure’s competition, I’ve never used AWS (well once, a long time ago, again only experimentally), so this isn’t a comparison of cloud services, only a quick peek inside what might happen if you decide to use Microsoft’s Azure to spin up a website or build out some cloud “resources.”
What we’re using
We’re on WordPress, like most of the rest of the blogging world, and WordPress is built to run on Linux. Specifically, WordPress likes a “LEMP” stack, that is Linux, Nginx (Engine x), MySQL, and PHP. I tried a couple of pre-built solutions (one from Bitnami for example, there are a number of them), but ended up choosing a Ubuntu 18.04 Virtual Machine, and then installing Nginx, MySQL and PHP myself. There are some great resources out there taking you step by step to get things set up, but do be aware, it’s a lot of steps (that’s where the pre-built WordPress installations are tempting, although you don’t get quite the control).
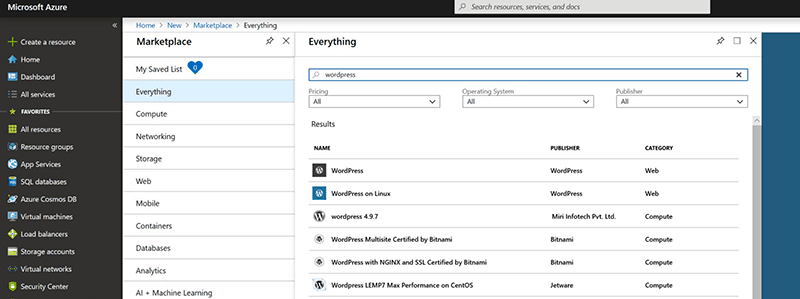
You could also choose a WordPress Web Service, which doesn’t give you a full Virtual Machine, but is great if you’re just starting out with a blog and want a little more control than WordPress.com. To begin with, however, the process is all the same: you log in to the Azure Portal, click on “Create a Resource,” choose from a wide array of selections (everything from VMs to developer and management tools, blockchains, containers, analytics and more), and get started.
It took about 4-5 minutes to spin up a Ubuntu VM, starting with choosing a VM size (well that could take a while, as again there’s a wide variety of available sizes for most everything, from a 1vcpu .75GB ram machine for less than $15/mo, to a GS4-4 monster with 224GB RAM and 64 data disks for over $3,500/mo). We chose a “Standard E4s v3” machine, with 4vcpus and 32GB memory. That setup comes with 64GB of “temporary storage,” but we added a 256GB data disk (plenty for storing our 20GB or so of WordPress data, with room to grow). We also turned on daily backups, and for the VM, backups, and data disk, we’re expecting to pay less than half what we paid at Rackspace.
Linux (ugghh)
Setting up the resources was easy, but to set up the machine, you need to get down and dirty with some Linux command lines. Azure has a built in editor (2 really: Bash, and Powershell). They’re available at the click of a button in the taskbar at the top, and once you log in to SSH (either with a password or an SSL key pair setup), you’re in.
I have to say that dealing with Linux was not especially fun, although I started to get the hang of it. I’ve lived in a mouse driven world for years, and it was like somebody cut my hand off, having to navigate without a mouse. I started to learn a few shortcuts and tricks, but be aware that command line interfaces are a whole different world if you’re used to pointing and clicking.
Resources and Resource Groups
In Azure, you set up resources in resource groups. Our group consists of the VM, some various services to handle network security and the IP (these are created automatically by Azure), the data disk, and the backup service. What’s nice about this (as I discovered while setting up and then disposing of various incarnations of machines on the journey to get the setup right), is you can, with basically a single click (yay mouse!), delete the entire structure and start over. Of course with a company or say a web development office, you would have multiple resource groups for multiple reasons. For the little guy just getting started, it’s nice to know that if you get in too deep you can just start over, easily.
The Dashboard
Azure provides a Windows Start Menu-like “Dashboard” that you can set up however you like. I had fun setting up ours, and by connecting our Office 365 Azure Active Directory to Azure, I was able to grant read-only access to the Dashboard, so our writers can poke around and get a feel for Azure (and how the site is set up and running) just by logging in to their Office 365 accounts.
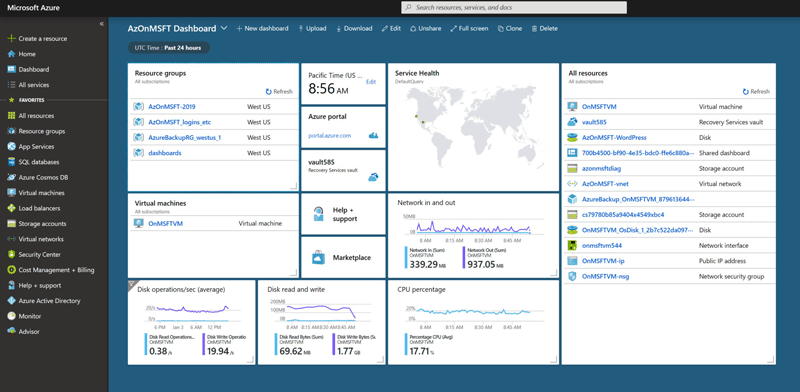
As you can see, Azure provides for some basic graphs to monitor stuff like network in/out and disk reads, giving you a quick view of any problems that arise, as well as quick links to resources. It’s a handy feature, and the Dashboard and the user interface built in to Azure is much easier to use than it was at Rackspace. It’s also easy to do stuff like lock down or open up access to ports without having to go into the dreaded command line, or to get to the backup, or to add more services.
First impressions? This is going to work ????!
We took some time to learn how to get things right, made (at times extensive) use of the ability to wipe everything clean and start over, felt comfortable in a largely Windows 10-like experience, and learned enough about the command line to get the box we wanted set up and running. While we don’t expect to make much use of blockchains and Internet of Things setups, it’s good to know that we can add more storage, or even move to a larger machine, while mostly using the Azure interface. Having a first party monitoring system is nice too, and having it all connected to our Office 365 management keeps everything in house.
Are we the perfect client for Azure? Probably not, both because there are other cheaper solutions out there, and also because Microsoft isn’t every going to make a lot of money off us, no matter how many new services they add. But is this going to work? So far, so good!
We hope to write more on our journey with Azure, are there aspects of the service you want to know more about? Let us know in the comments below.