Sharing videos can be an essential part of any business. You can use videos to train employees, share daily and informative snippets, recordings of meetings and more. Traditionally, you might think that YouTube would be the best tool for this, but did you know that Microsoft has an enterprise video streaming service?
That’s right, included at no extra cost in most Office 365 business subscriptions is a service known as Microsoft Stream. It allows you to upload videos, securely and privately, and share them across your company with coworkers. In this guide, we’ll show you how you can get started with Microsoft Stream.
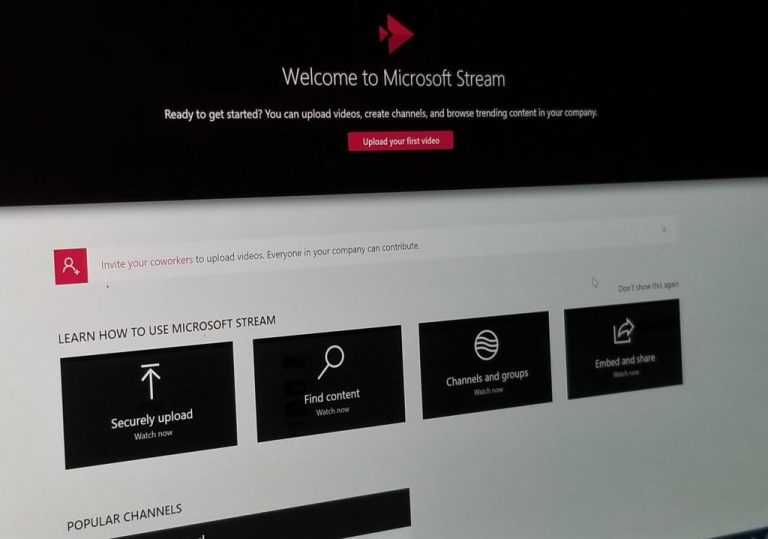
Find Stream in the Office 365 Dashboard, and create a Channel
To get started with Stream, you can find it from the All Apps section of the Office 365 dashboard. Alternatively, you can launch it by clicking here. Once you’re in, you’ll notice that the main page is quite empty.
Before processing or uploading videos, it will be best to create a channel. Channels will be the home and hub for all your new content and videos. If you don’t want a channel, you can get started with uploading a video right away by clicking the upload button on the top right corner. However, you’ll also want to invite your co-workers to Stream. You can do this by clicking the people icon next to the smiley face in the top bar of the webpage. This will ensure they know they have access to the app.
To create a new channel, click on the + Create sign on the top of the webpage. Then, choose Channel. You can then fill out the information, Including a Channel name and description. If you want, you also can choose who has access to the new Channel. You can limit access to a specific group in Office 365, or you can set it to companywide, for everyone to see. You also can upload a channel image, if need be. Be sure to save the link for the channel, for future reference. You always can access it later by clicking My Content and then choosing Channels.
Selecting a group will be useful if you want to share videos and your channel with just a group of individuals. Individuals outside the group won’t have access. For example, this could be a group for videos for sales, that you don’t want other employees to see. Otherwise, selecting companywide will let everyone see the content, say, training videos.

Upload and publish your first video!
Once you’ve created a channel, you can upload a video to Stream. Simply click the + button and choose Upload Video from the list. Once you choose your file, Stream will start uploading the video to Microsoft’s servers. Be sure to choose a video language, and then press Save. As the video uploads, you’ll be able to fill out some fields. Be sure to name the video, and give it a description. You can then choose a thumbnail image.
You might also want to include timestamps in the description, as these are part of the Metadata. Additionally, you can also use hashtags to group related videos together, to make discoverability even easier for viewers. As part of upload, you’ll also want to choose a language, as this will create a file for automatic closed captions.

Next up, there’s the permissions section. You can choose the option for everyone to view the video across your company. Under Share With, you can choose to share and add to a specific channel (like the one you just created) or with a specific person. There are also additional controls for who you want to own and edit the video. You can change their permissions.
Finally, you’ll find the options section. You can click this to change the comments, or to auto-generate a caption file. Once you’re ready for upload, you can click Publish Now. You can then view the video directly from the channel you uploaded it to, or by clicking My Content along the top, and clicking the video there.

Finding, Sharing, and Managing Content
Once you’ve uploaded a video to Stream, you’ll likely want to know how you can find it, and share it. Well, you can find all content by clicking on the Discover button on the top of the main Stream Dashboard. From there, you can click options for videos, channels, people, or groups.
Right away, you’ll also see a list of videos that have been uploaded or are available for you to view or manage. You can delete or share one by clicking the … next to the video and choosing the option.
Alternatively, when you’re viewing a video, you can click the Share button in the lower-left corner and copy the link. You can also choose options on where to start the video. If you’re emailing you can type out the name of a person to add them to the group to see the video. Finally, there is embed, which lets you change the video size, Autoplay options, and more to embed in a website or blog.

For more specific searches, you can use the Search for videos bar to search for videos. You also can sort by name, relevance, trending, publish date, views, or likes.
There’s also a Channels tab, where you can see the channels that are available across your organization or channels that you’ve been invited to. Then, there’s the People Tab which lets you search for certain people who have published videos. Finally, there are Groups, which functions as we’ve previously explained.
Keep in mind, the search box is also your friend. However, Stream is not like YouTube. The search box in Stream will only limit you to the videos that have been shared internally with the company. Search results will show relevant metadata and cognitive insights from the video.

The Video Player
Whenever you click a video to launch it, you’ll see the player. There are various tabs under the video. The Details Tab will explain details of the video, and show you the description. Transcript will show you an auto-generated transcript of the video. People will list out a timeline of people mentioned in the video (if enabled) and Interactivity will show any surveys, quizzes, or forms added to the video.
On the video player itself will be an option for closed captioning. There’s also a settings icon to help you adjust playback speed, quality. Then, there’s a button for theater mode and full-screen mode.
Under the video will be a space for comments. If you post a comment, you can edit or delete it if need be. You might also notice a little heart icon, this will let you like the video.

How will you use Stream?
As you can tell, Stream is a very useful video service. Just like how Microsoft Teams is an alternative to Slack, Stream is an excellent alternate option to YouTube for internal use. You can easily share links to videos, and keep things private and within your company, internally, without having to worry about the public viewing your sensitive content. Feel free to check it out, and let us know your thoughts in the comments below.