You’ve received a new Surface for Christmas – or you’ve put one on your wish list and want to be ready for the big day – and now you want to get started with Surface Pen. Surface Pen is Microsoft’s digital stylus accessory for the Surface range which provides an extremely accurate digital inking experience using dedicated internal hardware.
With Surface Pen, you can create digital drawings and take notes with a level of fidelity akin to that of a real pen. The latest Surface Pen has 4,096 levels of pressure sensitivity, so the only thing stopping you from reaching a true like-for-like experience is the smooth feel of the glass touchscreen itself. With use, you’ll soon get used to it though – it’s similar to writing on a whiteboard.
Before following this guide, make sure you read our “How to set up your new Surface” tutorial if you’re only just arriving in the Surface ecosystem.
Pairing your pen
First, the basics. You need to get your pen connected to your Surface. Check Bluetooth is turned on by heading to the Settings app (open the Start menu, type Settings, press enter) and opening the “Devices” category from the main menu.

On the first page that appears, toggle the “Bluetooth” switch to “On.” Now, click the “Add Bluetooth or other device” button at the top of the display. On your Surface Pen, press and hold the top button on the end of the pen until the pen’s indicator light starts flashing green.
Back on your Surface, you should see “Surface Pen” appear in the devices list of your open Bluetooth pairing window. Tap its name to complete pairing.
Get inking
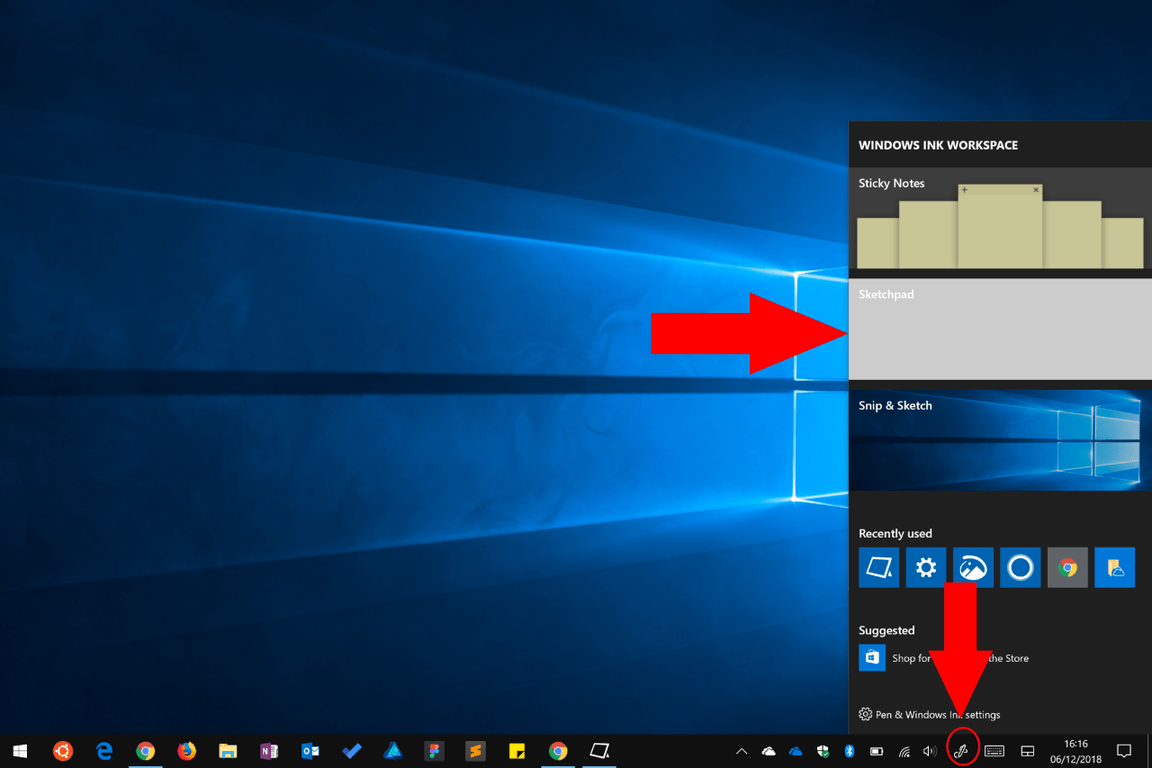
Your pen is now ready to use and you can try it out immediately. Press the button on the end of the pen and you should see Windows Ink Workspace open after a few seconds. This can also be accessed from the icon on the taskbar.
Here, you can select from several built-in experiences. Choose Sketchpad to open a blank canvas where you can immediately start scribbling down your thoughts. If you need to erase anything, just flip the pen and rub out your pen strokes by holding the end button against the display – it’s as natural and seamless as the eraser on the end of a real pencil.
Sketchpad includes the ink toolbar, which is common to all Windows 10 apps using Windows Ink and lets you change the ink colour, pen type and stroke width. Experiment with the options to get familiar with using your pen. Notice how responsive the pen is to different pressure levels and tilt angles.
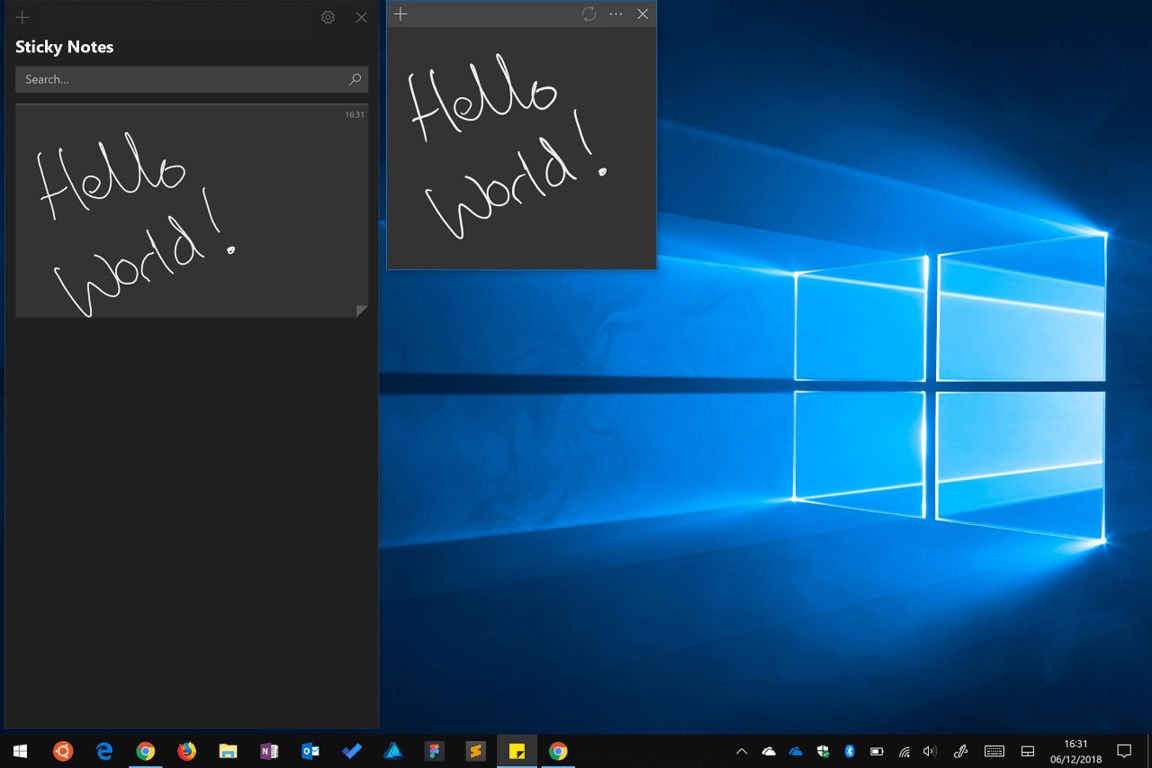
The other Windows Ink Workspace apps include Snip & Sketch, so you can annotate screenshots, and Sticky Notes. This allows you to scribble virtual sticky notes on your desktop, using your pen. With the recent Sticky Notes 3.0 release, they’ll be available across all your devices.
There are many other inking apps available, including Microsoft’s OneNote for note-taking, and Windows Photos and Maps which both support inking experiences. In the Windows Store, you can find more apps which fully support Windows Ink. Your pen will also work with most industry-standard professional graphics packages which support stylus input.
Finally, the pen will work as a mouse cursor in almost all Windows apps – whenever you see a button, you can click it by tapping the pen against it. Holding the barrel button on the pen while tapping will usually display the right-click menu.
Configure your pen
Once you’ve finished your initial experimentation, head back to the Settings app to configure how your pen works. You can customise what happens when you press the end button, as well as the behaviour for different pen features.
You’ll find the options on the “Pen & Windows Ink” page back in the Devices category. At the top of the page, you’ll first see a dropdown menu that lets you select whether you’re left- or right-handed – this alters how ink flows relative to the direction of the pen.
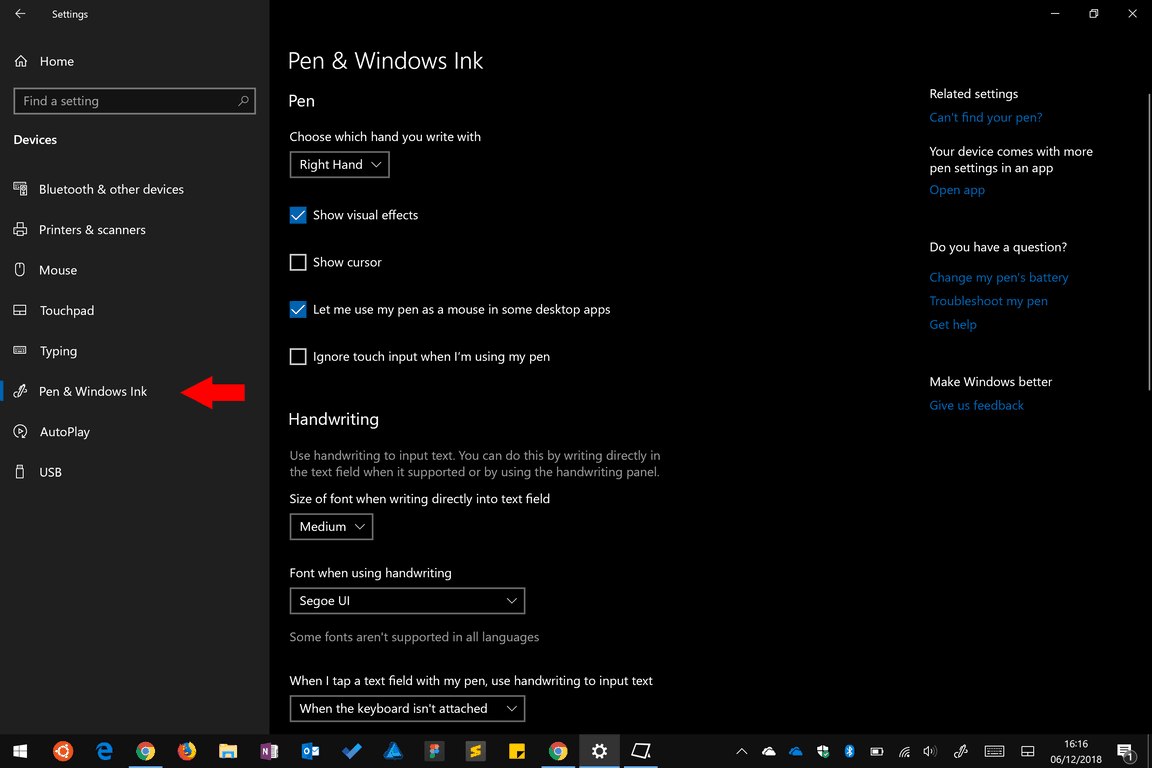
Next, there’s a series of checkboxes to control the visual experience. You can choose to hide or show visual effects and the pen cursor (we recommend disabling the latter for a more natural experience), as well as whether the pen can act as a mouse in desktop apps. The final checkbox lets you disable the touchscreen when using the pen, but this shouldn’t normally be necessary – the Surface has built-in palm rejection to automatically block touch inputs caused by you leaning on the screen to write.
The next section of the page controls the handwriting experience when you use your pen in regular form fields. Windows 10 now lets you use your pen in any textbox, so you can tap to reveal a handwriting panel you can write in. You can change the panel’s font and choose when it appears – by default, it’s whenever you’re using the Surface without a keyboard, but you can restrict it to only when Tablet Mode is enabled in Windows.
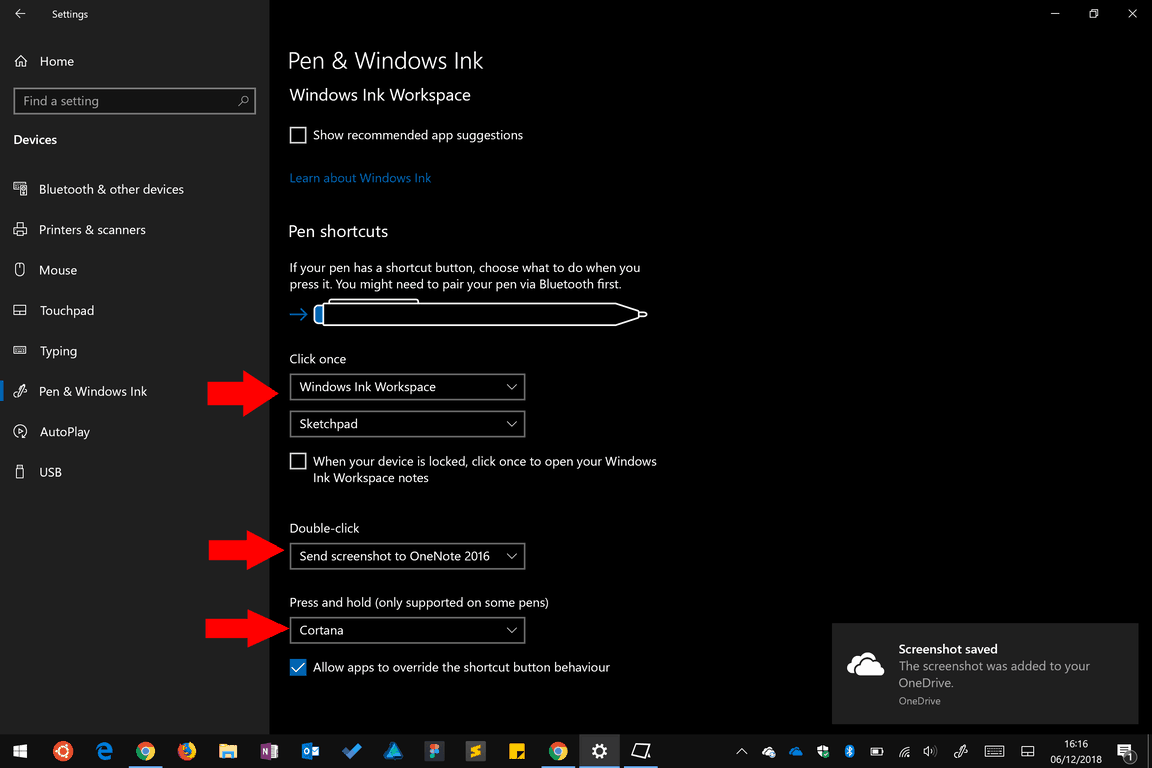
At the bottom of the screen, you can customise what happens when you click, double click or hold the button at the end of your pen. Use the dropdown menus to configure each individual behaviour. The options are launch an app, open the Windows Ink Workspace, open OneNote (Windows Store or 2016) or take a screenshot. Press and hold can also be used to launch Cortana voice assistance.
Advanced pen configuration
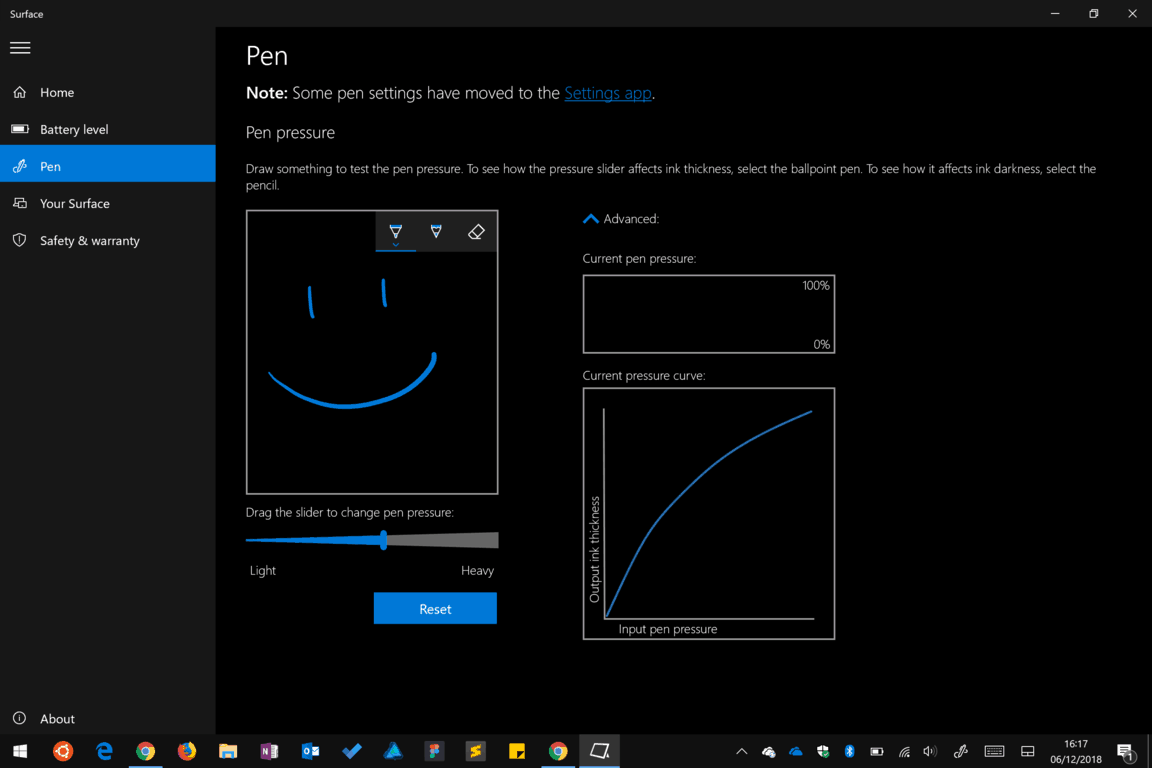
You can customise more pen options using the Surface app which should be preinstalled on your device. Open it up from the Start menu and switch to the Pen page from the navigation menu on the left. Here, you can customise the pen sensitivity to change how “light” or “heavy” it feels. Use the slider and test area to adjust the sensitivity to your liking. If you tap the “Advanced” link, you can view a realtime pen pressure graph to visualise how hard you’re pressing against the display.
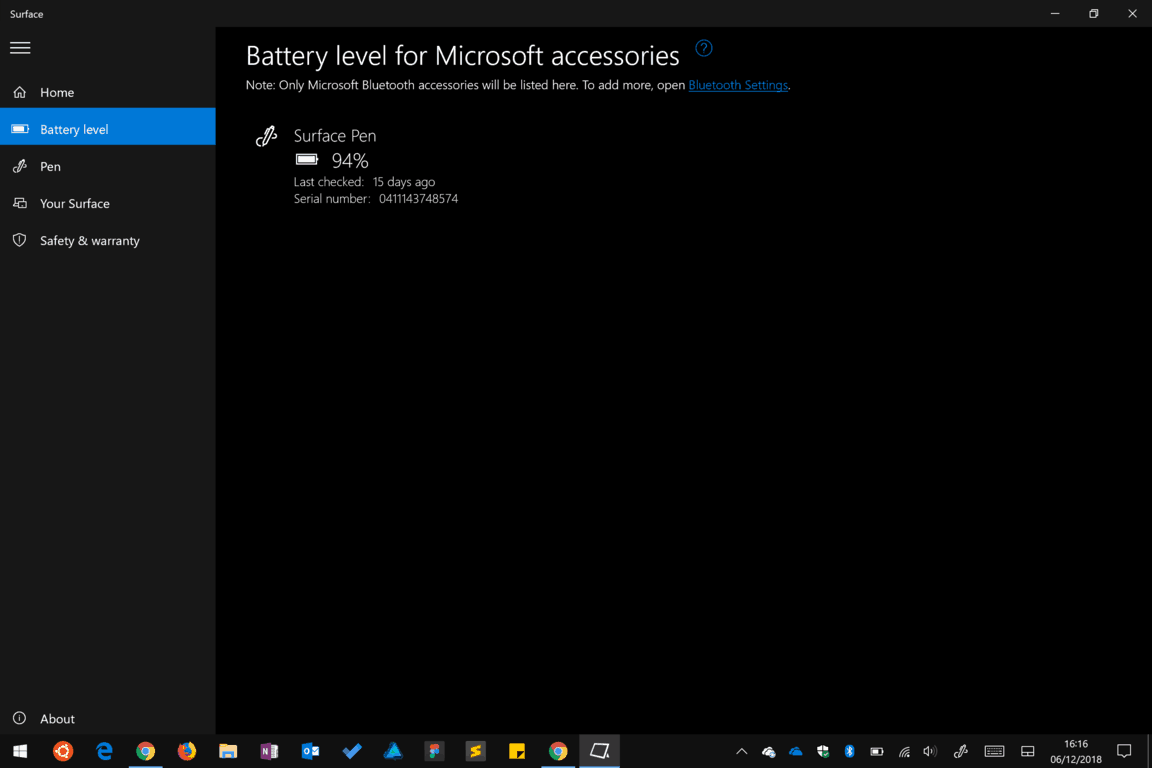
The Surface app also lets you check the battery level of your pen. Open the “Battery level” page to check its current status and view its serial number. Your battery life will vary depending on how often you use the pen, but you can expect to go months or even a couple of years without recharging.
With that, your Surface Pen should now be ready to use. Keep on experimenting using Sketchpad or your favourite app to get familiar with the pen and how it feels. Microsoft is continuing to work on inking technologies and more apps are adding support, so you can expect the experience to get even better with time.