How To Connect Xbox One Controller To Windows 10
![]() 4 min. read
4 min. read
![]() Updated on
Updated on
Share this article

Improve this guide
Read our disclosure page to find out how can you help Windows Report sustain the editorial team Read more
Key notes
- If you use Xbox One you probably already know that it is highly compatible with Windows 10.
- Find in the article below two easy ways to connect your devices and enjoy seamless gaming.
- First and foremost, make sure to install the latest drivers. You can do this manually with the Device Manager, or with the help of third-party software.
- Another option is to change your USB controller settings back to default. Read on to see how.
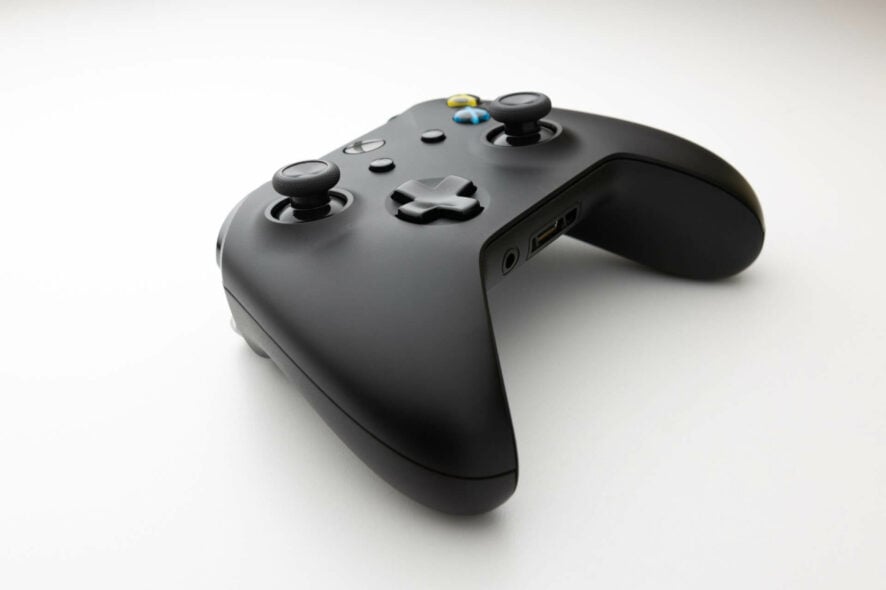
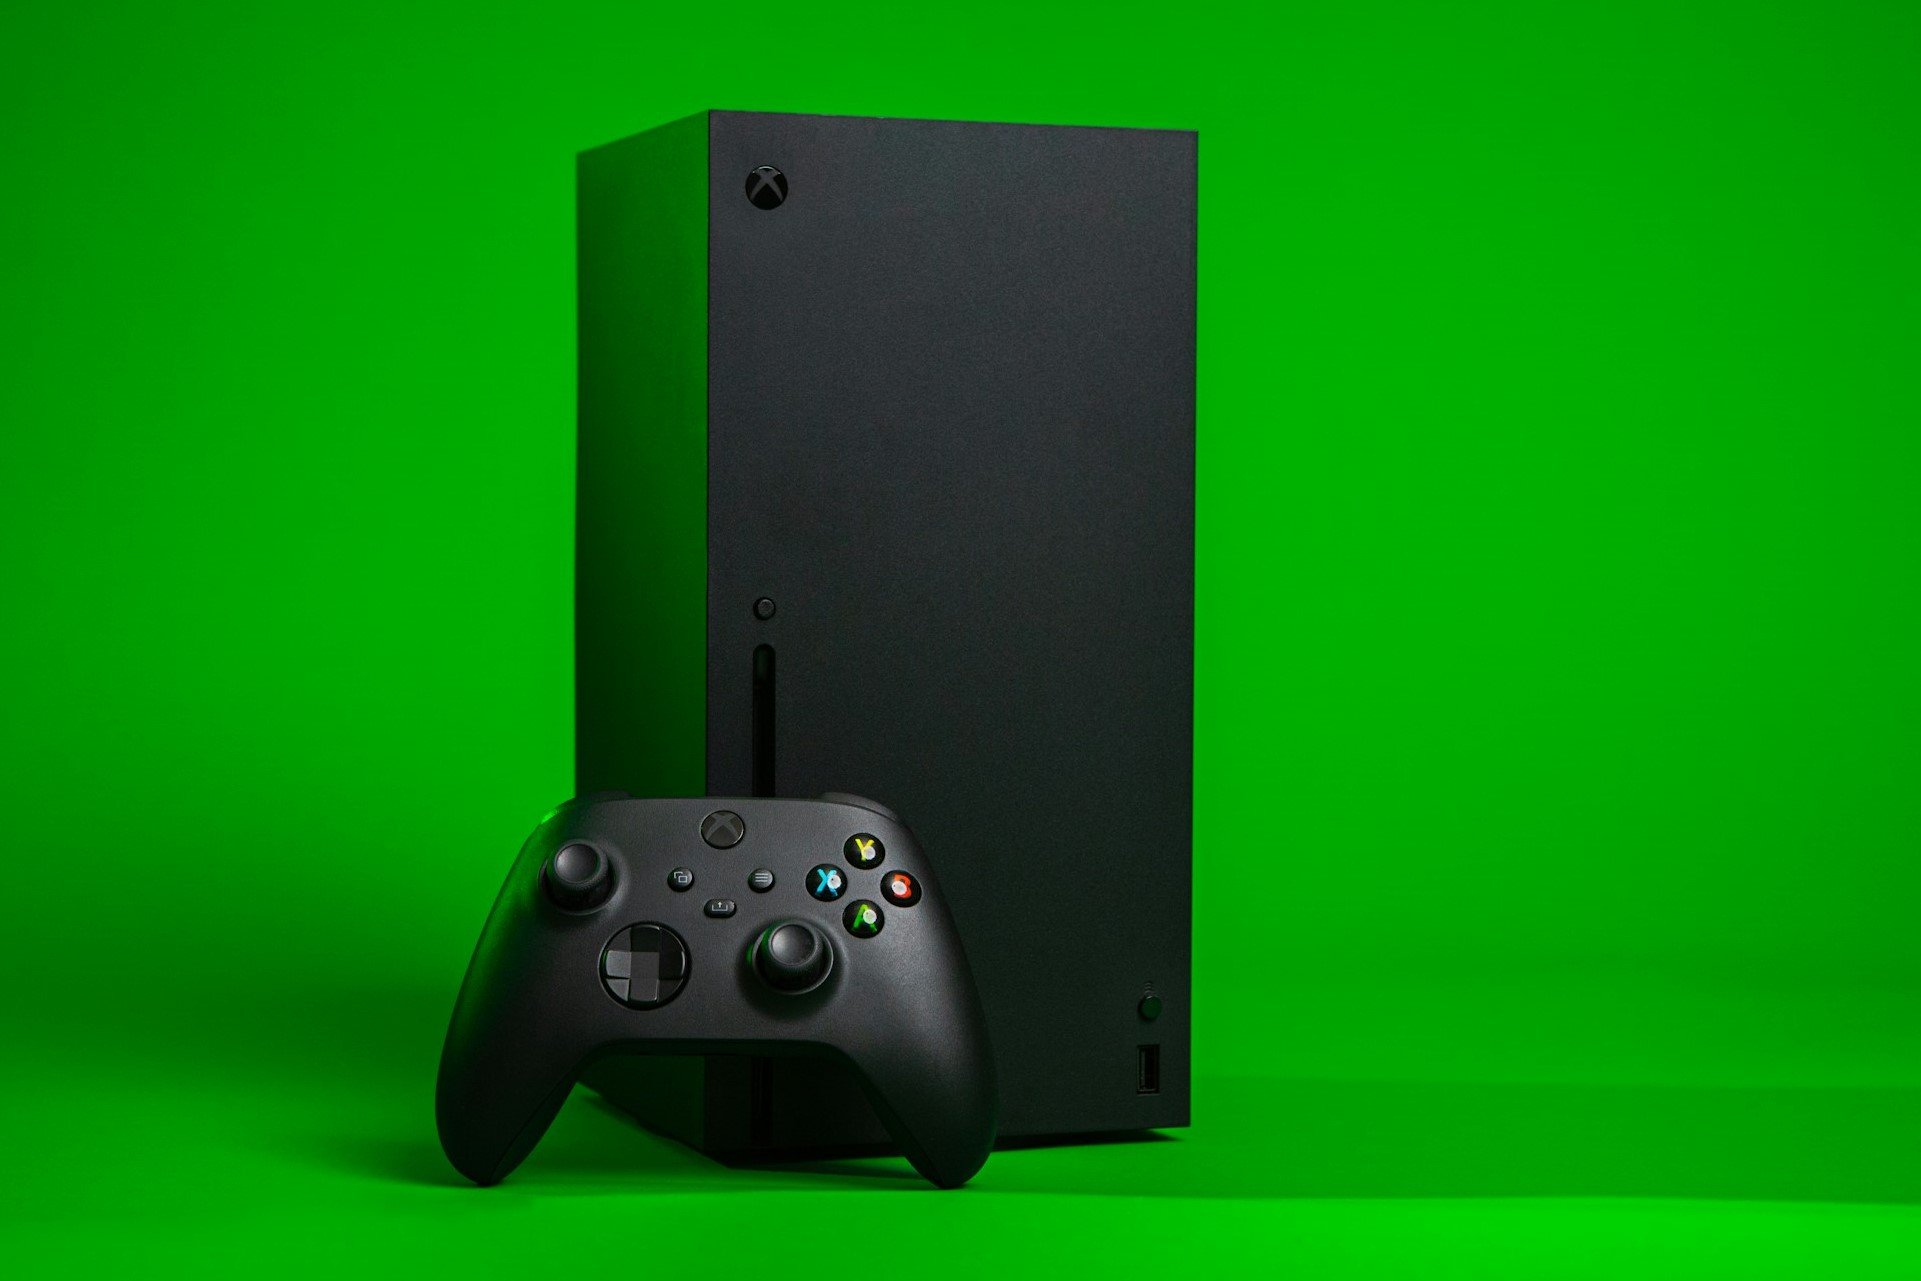
One amazing feature of Windows 10 is its compatibility with other Microsoft devices, such as Xbox One for example. We already showed you how to connect Xbox One to Windows 10, and today we’re going to show you how to connect Xbox One controller to Windows 10.
In our article on how to connect PS4 controller to Windows 10 we briefly mentioned that connecting Xbox One controller is rather simple due to Windows 10 native support for Xbox One. Unlike previous versions of Windows, Windows 10 comes with all the necessary drivers to use Xbox One controller, therefore there’s no need to download anything.
How To Use Xbox One Controller On Windows 10?
In order to connect your Xbox One controller to your Windows 10 device, just plug your controller into your PC using a micro-USB charging cable. Your controller should be automatically recognized and ready to use.
If you want to connect Xbox One controller wirelessly to your Windows 10 PC, you’ll have to use Xbox One Wireless Adapter for Windows. To connect Xbox One controller wirelessly to your PC, do the following:
- Connect Xbox Wireless Adapter for Windows to your Windows 10 PC. For best performance, make sure to connect the adapter to the USB 2.0 or 3.0 port on the front side. Sometimes there might be certain connection issues caused by your computer case, or any other metallic object, and this is why it’s recommended to connect the adapter to the front USB port.
- The necessary drivers will be installed automatically, so wait for the process to finish.
- After installing the necessary drivers, press the button on the wireless adapter.
- Press the pairing button on your Xbox One controller. LED on your controller will start flashing while your Xbox One controller connects to the wireless adapter. After the process is completed, LED will go solid.
After you’ve done all of this, your controller will be ready to use on your Windows 10 PC. As you can see, the connection process is rather straightforward, but there might be some minor issues from time to time.
Solution 1 – Install the drivers manually
If your Xbox One controller isn’t working on Windows 10, it might be due to a bad driver, so it’s recommended you install the driver manually. To do that, follow these steps:
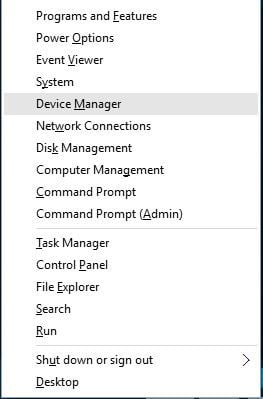
- Press Windows Key + X and choose Device Manager from the list.

- Once Device Manager opens, locate and right click Xbox One Controller.
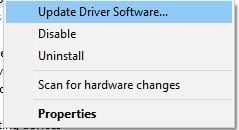
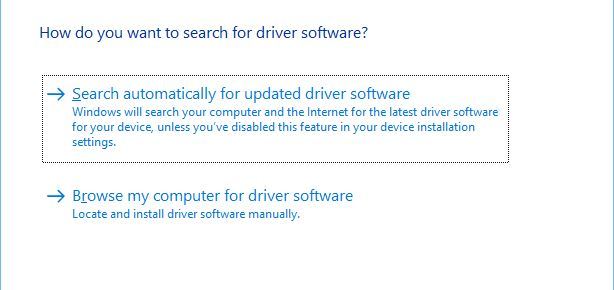
- From the menu choose Update Driver Software.

- Click on Browse my computer for driver software.

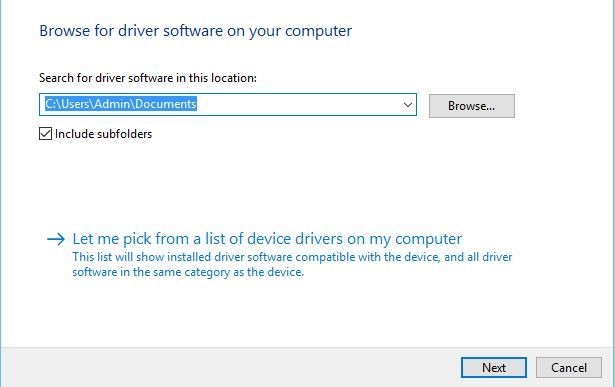
- Click Let me pick from a list of device drivers on my computer.

- Locate Microsoft Xbox One Controller on the list and click Next to install it. If you can’t locate Microsoft Xbox One Controller driver, you might have to uncheck Show compatible hardware option.
On the other hand, you can manage your drivers and install them automatically using reliable tools offered by expert software, namely Outbyte Driver Updater.
Solution 2 – Change USB controller settings
Few users reported that the right trigger shows up as a left trigger while using Xbox One controller on Windows 10, and to fix this issue it’s required that you install the Xbox Controller driver by following the same steps from the previous solution. After you’ve installed Xbox Controller driver, you need to do the following:
- Disconnect and reconnect your Xbox One controller.
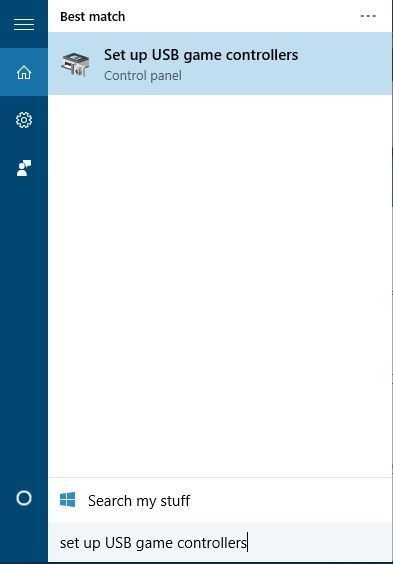
- Press Windows Key + S and type set up USB game controllers. Choose Set up USB game controllers from the list of results.

- Select Xbox One controller from the list and click Properties button.
- Go to Settings tab and click the Reset to default button.
- Navigate to Test section and check if your controller works.
Connecting Xbox One controller to your Windows 10 PC is rather simple, but if you have any issues, feel free to have a look at our solutions.