Master the Windows Registry with Registry Editor in Windows 11
Must-know tips on the Windows tool
![]() 4 min. read
4 min. read
![]() Updated on
Updated on
Share this article

Improve this guide
Read our disclosure page to find out how can you help Windows Report sustain the editorial team Read more
Key notes
- The Registry Editor is a powerful tool in Windows OS that allows users to view and modify a database that stores configuration settings.
- Modifying the registry should be done with caution, as incorrect changes can cause serious OS problems and even prevent it from booting.
The Windows Registry is a database of configuration settings for the Windows operating system and the software that runs on it. It’s an essential part of the system, as it stores information about hardware, software, and user settings.
If you want to customize your Windows 11 computer or troubleshoot problems, you’ll need to know how to use the Registry Editor, which allows you to view and edit the Registry.
In this article, we’ll show you how to access Registry Editor in Windows 11 and provide tips for using it safely and effectively.
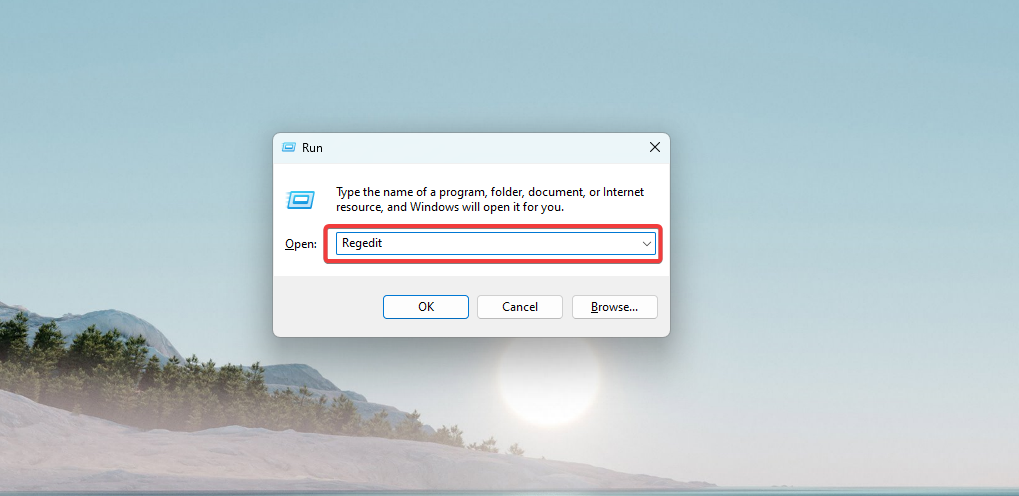
How do I get into Registry Editor?
- Press the Windows key + R to open the Run dialog box.
- Type regedit into the Run dialog box and press Enter.

- Registry Editor will open.
Now you have gotten into the tool, let us explore some tips for using Registry Editor as well as a few common tasks.
How can I use Registry Editor safely and effectively?
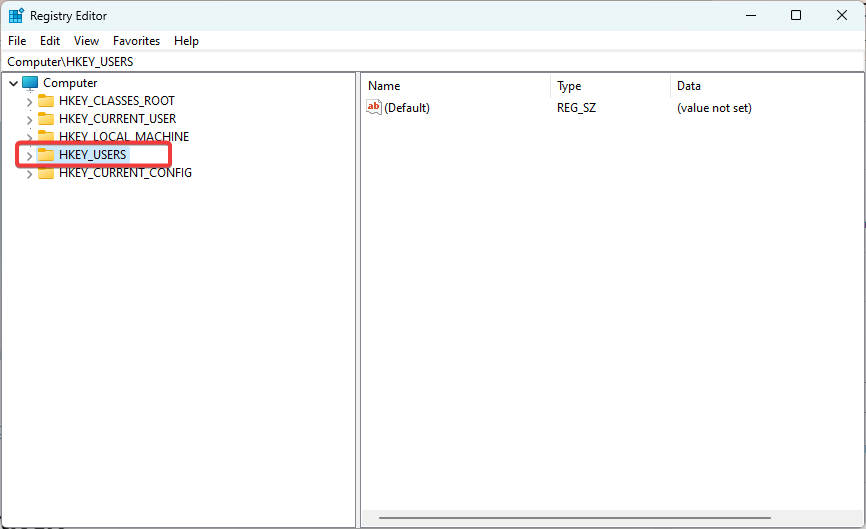
1. Make a backup
- Open the Registry Editor as shown in the above section.
- Select the key or set of keys to be backed up (in the example below, we have selected HKEY_USERS).

- Click the File menu and choose the Export option.
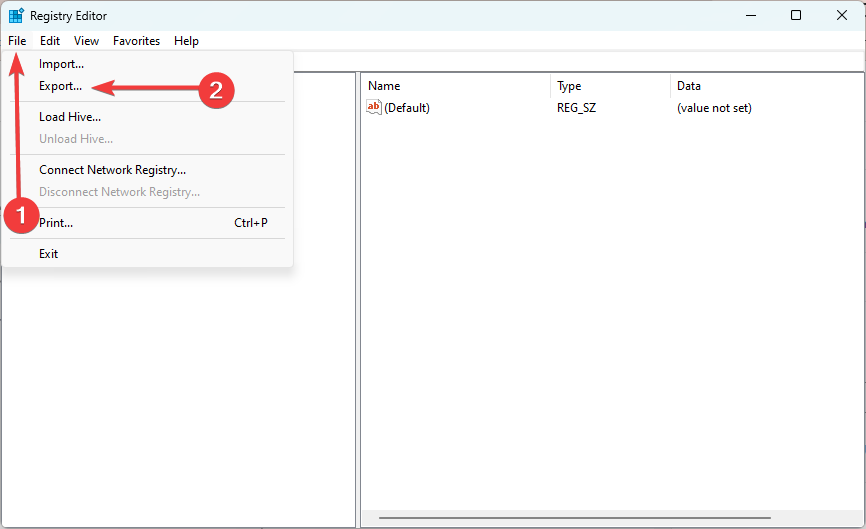
It’s crucial to make a backup of the registry before making any modifications. In the event that any issues arise as a consequence of your modifications, this will enable you to restore the register to an earlier state.
2. Modify values
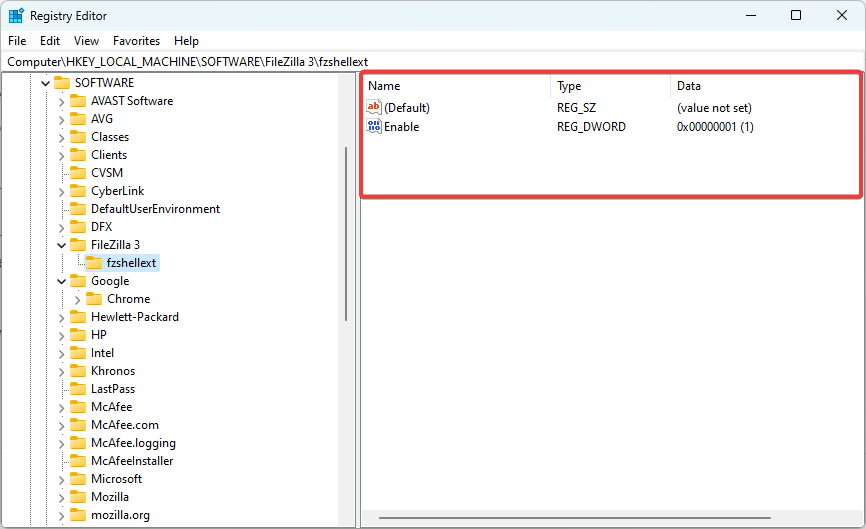
- Open up the Registry Editor, and navigate to the value you want to modify (The modifiable elements will be displayed on the right pane after you have selected a key).
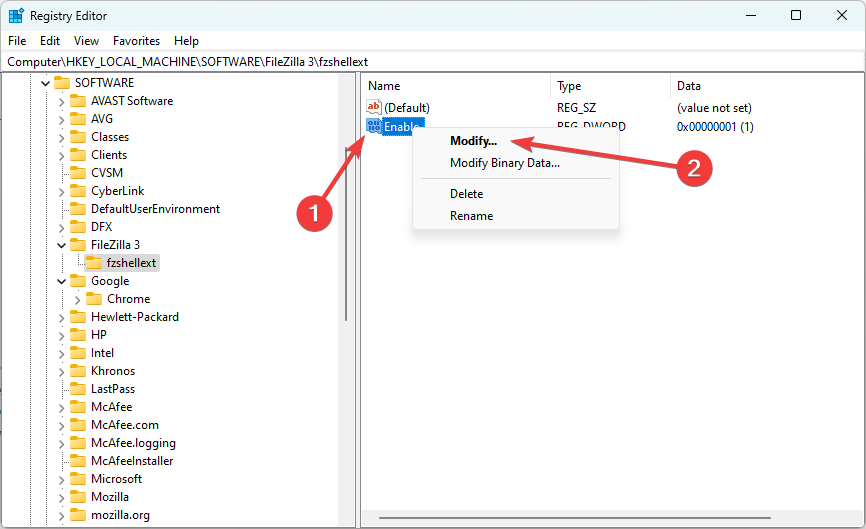
- Right-click on any of these elements and select Modify (you may also choose Modify Binary Data).
- Now enter the new values needed in the Value Data text fields and click OK.
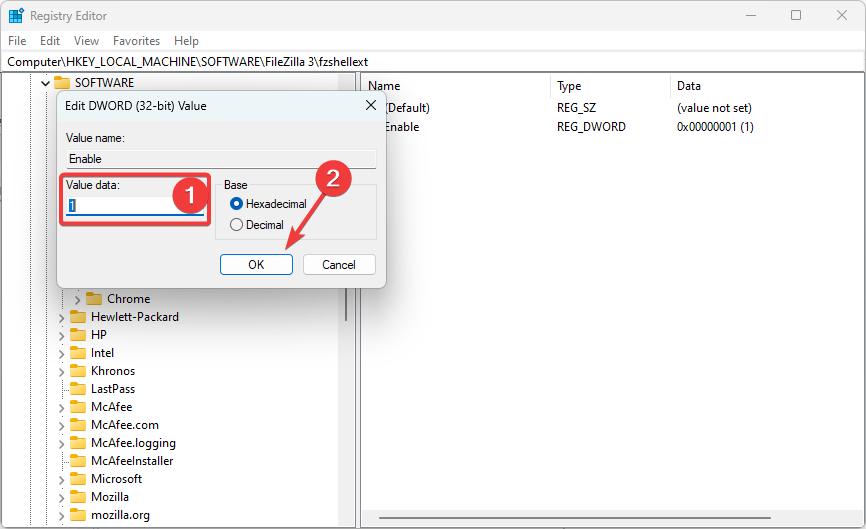
Be careful when modifying values; be sure to enter the correct data type and value. Incorrect data types or values can cause problems with the operating system or applications.
Remember to only make changes to the registry if you are sure they are necessary, since unnecessary changes can increase the risk of encountering problems.
3. Add values
- Open up the Registry Editor, and navigate to any key where you want to add a new value.
- Click on any empty space on the right pane, hover over New, then select any of the value types you wish to add.
- Name the newly created value. Then modify it accordingly using the steps shown in the Modifying values section.

4. Use the Registry Editor search function
- Launch the Registry Editor.
- Click the Edit menu and select Find.
- Alternatively, you may press Ctrl + F.
- In the Find popup box, type the name of the key you need in the Find what text field and click Find Next.
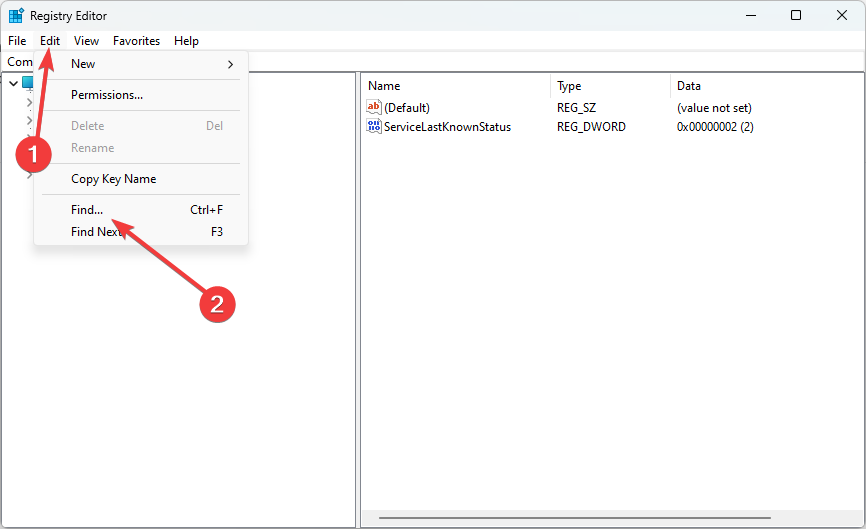

The Registry Editor includes a search function that allows you to find specific keys or values within the registry. This can be helpful if you are looking for a specific setting or if you are trying to troubleshoot a problem.
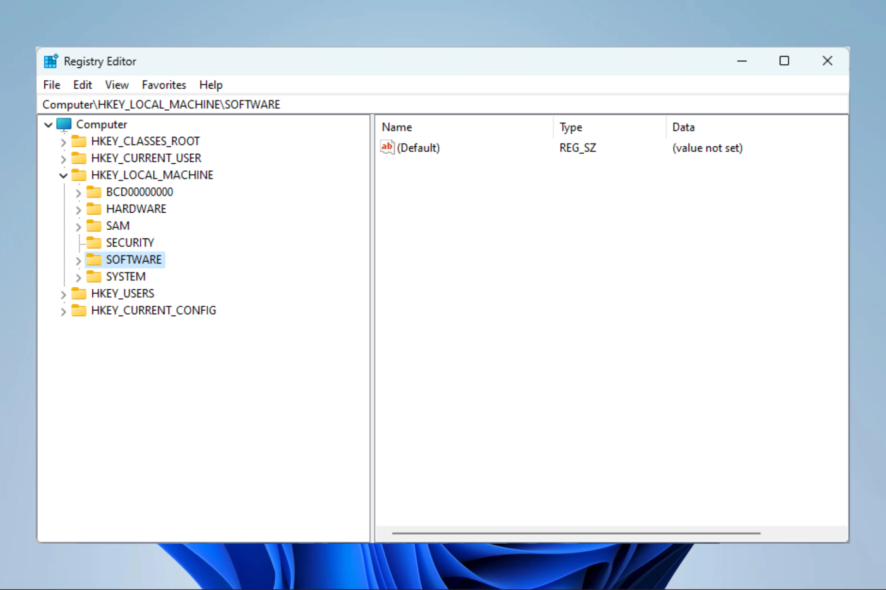
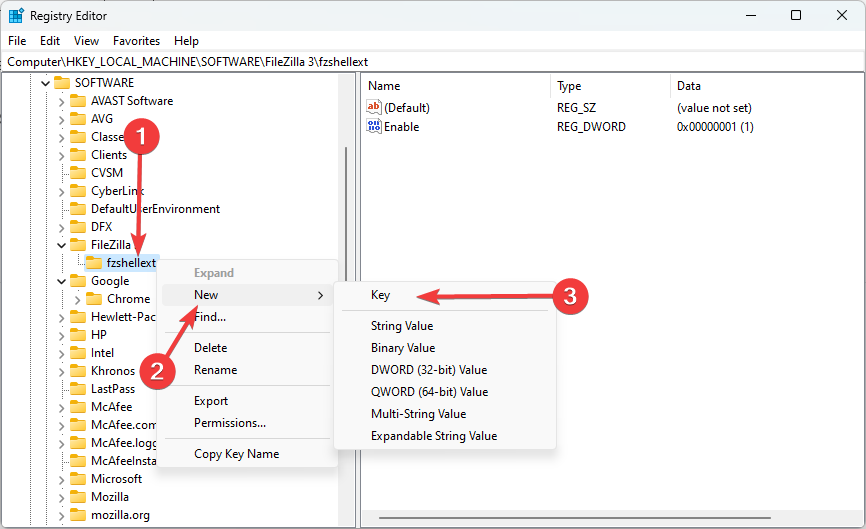
5. Add Registry keys
- Launch the Registry Editor.
- Navigate to the path where you wish to add the new key. In our case we have navigated to the path below:
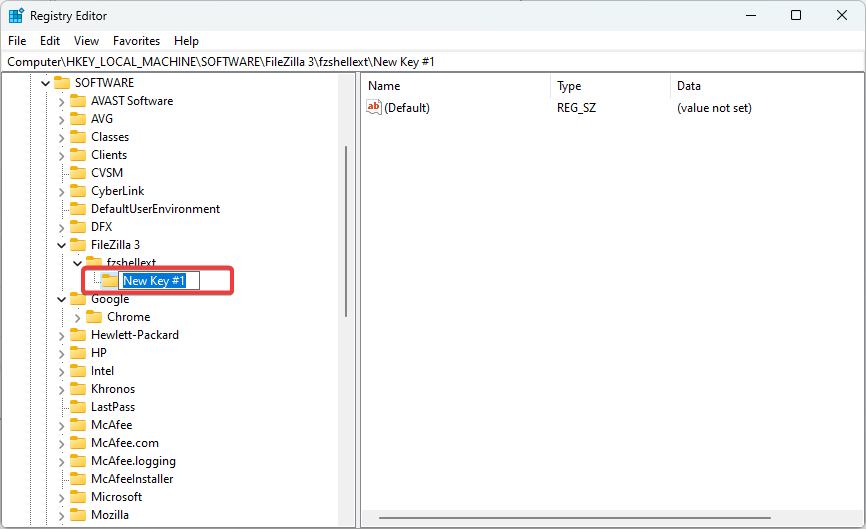
Computer\HKEY_LOCAL_MACHINE\SOFTWARE\FileZilla 3\fzshellext - Right-click on the element, hover on New, and select Key.
- Name the key. In our case, we call it New Key #1.
- Now you can edit values for this key using the same process explained in the Modifying values section.
6. Deleting values
- Launch the Registry Editor.
- Navigate to the key you wish to delete. In our case we have navigated to the path below (the new key we created in the section above):
Computer\HKEY_LOCAL_MACHINE\SOFTWARE\FileZilla 3\fzshellext\New Key #1 - Right click on the key and select Delete.
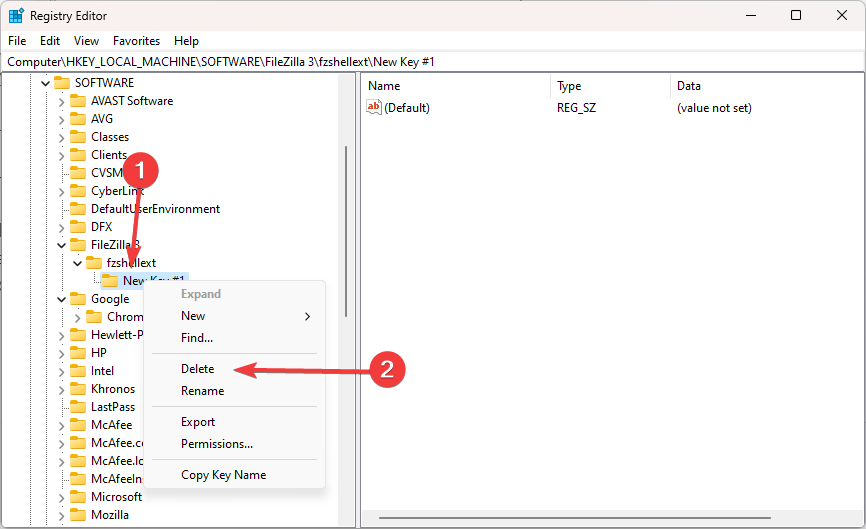
Use caution when deleting keys, as this can cause problems with the Windows OS or applications. If you are unsure whether a key is safe to delete, do some research or ask for help before proceeding.
These pointers will help you utilize the Registry Editor to alter the registry and adjust your system in a secure and efficient manner.
Always proceed with care while making modifications to your system, and ask for assistance if necessary. It’s possible that you experience the Regedit cannot edit error that might block your Windows Registry, yet our solutions will help you.
Let us know in the comments below what you love most about the Registry Editor in Windows 11.