If your company just came on board with Microsoft 365, then there’s a lot ahead for you. Not only can you enjoy email in Outlook, and Ofice apps like Word and Excel, but there’s also the power of Teams and other apps. But, what if you’re looking to customize the Microsoft 365 online experience and make it your own? Here’s a look at some of the ways to do that.
Customize your theme
You likely know how to customize your PC to your own look, but did you know you could do that to Microsoft 365, too? It’s easy.
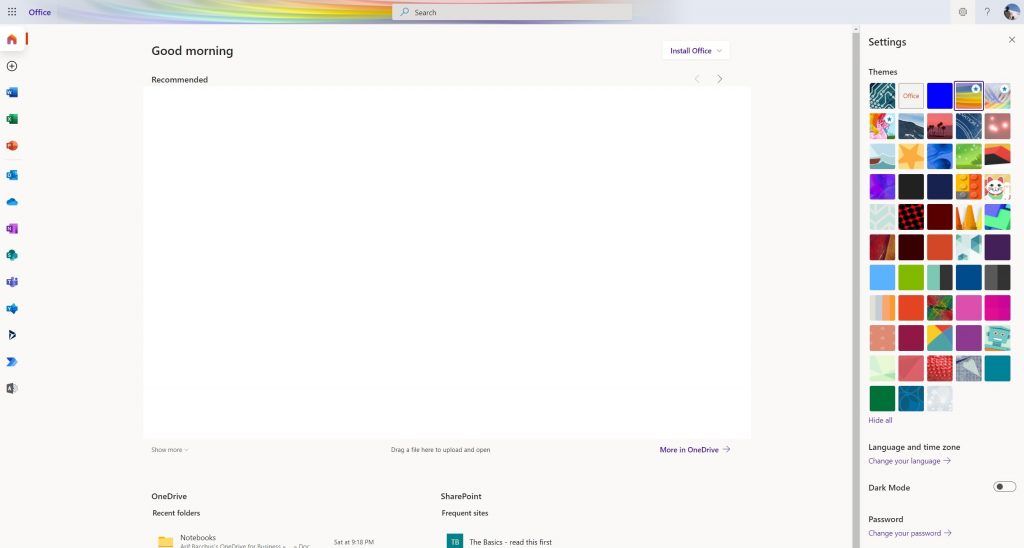
Just head to Office.com and sign in with your Microsoft 365 account. Then, click the settings gear at the top of the page. From there, you should see some Themes options. Click this, and then choose a new theme. There are various pre-sets like High Contrast, Rainbow, Blueprint, and more.
As you click the themes, the top bar in Microsoft 365 will change across apps like Planner. If you want, you can also click View All to see more themes. There’s a total of 52 to choose from, and the possibilities are endless.
Turn on dark mode
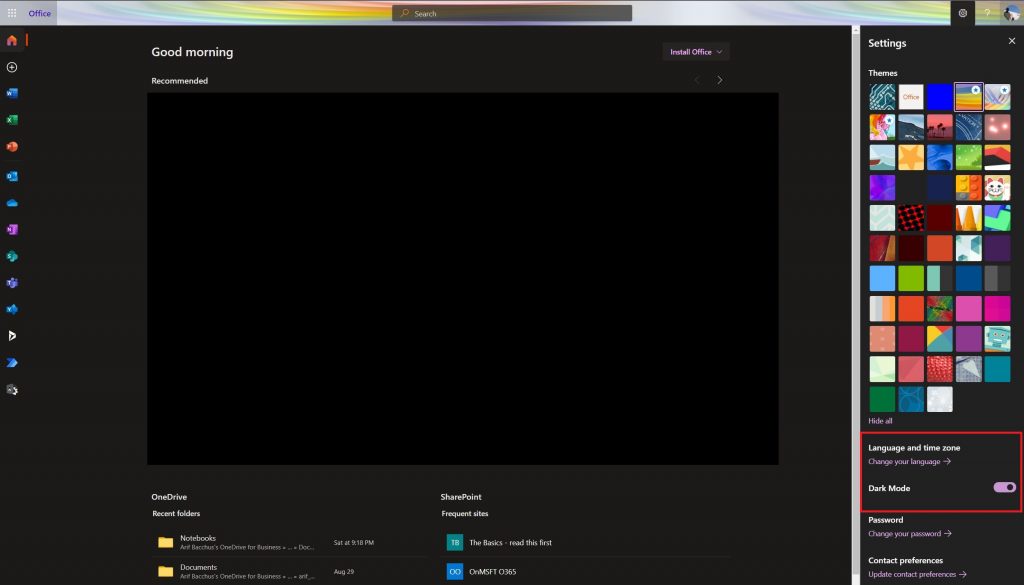
Working late at night? Or maybe you’re studying late at night? The last thing you want is a white screen to blind your eyes as you sit in the dark. Office has a lot of white space, but once you turn on dark mode, the experience changes drastically.
To turn on dark mode, visit Office.com and log in. Then, click the settings cog at the top right of the screen. From there, you can turn on Dark Mode with the toggle switch. Everything will instantly change, and become easier to view.
Pin or move apps to the launcher
Next on our list is another simple tip. If you use certain Microsoft 365 apps more than others, then you can pin apps to your launcher so you can access them more frequently. Say, if you use Teams more than Word, or Planner more than Excel.
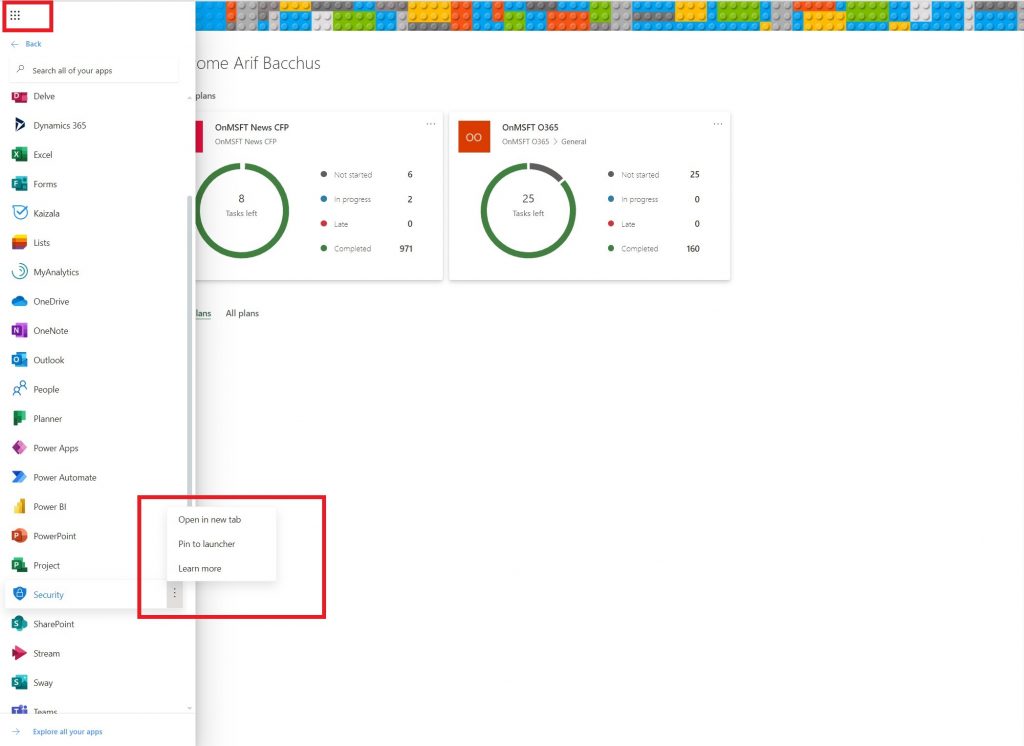
To do this, visit Office.com and click the All Apps icon at the top left side of the screen. Then, scroll through the list, and find the app you want to add to the launcher. Hover over that app, and then right-click on it. Some apps might be pinned already and you can unpin them by right-clicking. If the app you want isn’t pinned, right-click, and choose Pin to launcher. Now, every time you click the launcher, you’ll see that app is pinned for quicker access.
Change your time zone and language
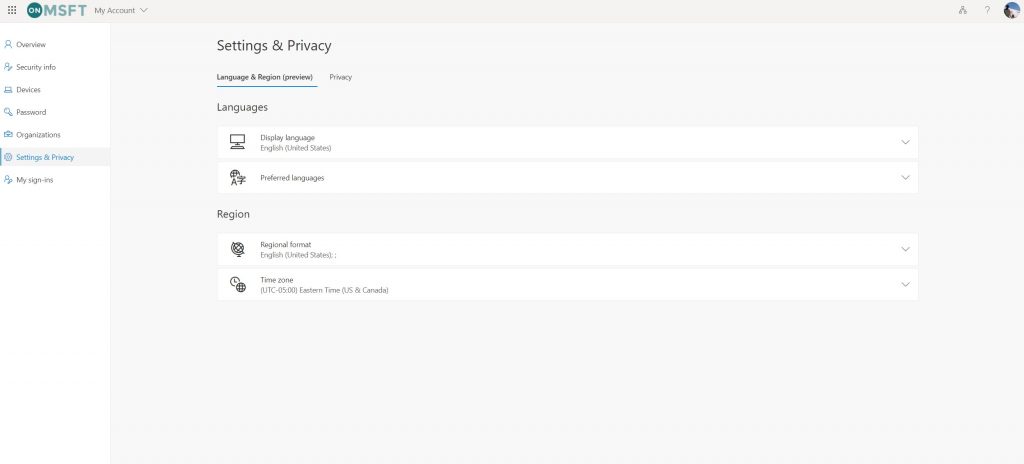
If you have a remote job or are schooling remotely, then you might not be in the same time zone or speak the same language or the location that you’re school or work is based in. Usually, Microsoft 365 is configured to the Time Zone that your organization is based-in, but you can set it up to your own location, too.
To set the time zone, click the settings cog after going to Office.com and then choose Language and time zone. Click the link that says Change your language. You’ll then be taken to this page, where you can configure settings and privacy. They’ll be a link that says Display Language. From here you can swap the language out to your native one. You also can change the region and the Time Zone, too. Just choose Time Zone from the list.
We have you covered
This is just our latest entry into our Microsoft 365 series. If you’re looking for more tips and tricks, check out our dedicated news hub. And, if you have anything else to share, let us know in the comments below.