Microsoft OneNote is a powerful digital notebook. You can use it to take notes, organize your thoughts into a journal, and then view them across all your different devices. Microsoft has continuously updated the app with plenty of new features, and it has become the defacto note-taking app for many.
In this guide, we’ll take a look at some of our favorite tips and tricks which can help turn you into a OneNote Pro. Keep in mind, though, we’ll be talking about the OneNote app downloaded through the Microsoft Store, and not OneNote 2016.
Tip 1: Use some keyboard shortcuts
Like the other Office 365 apps, OneNote depends heavily on using a ribbon for navigation. You can save your time in your busy day though, and try out some keyboard shortcuts to avoid having to constantly click on the ribbon for common tasks. Some of our favorite keyboard shortcuts can be seen below.
| Task | Keyboard Shortcut |
|---|---|
| Add a new page at the end of the selected section | Ctrl+N |
| Open a notebook | Ctrl+O |
| Create a new page below the current page tab on the same level | Ctrl+Alt+N |
| Move or copy the current page | Ctrl+Alt+M |
| Open the Home tab | Alt+H |
| Open the Insert tab | Alt+N |
| Open the Draw tab | Alt+D |
| Open the ribbon | Alt |
| Start a math equation or convert selected text to a math equation | Alt+= |
There are many other shortcuts that you can use in OneNote which we didn’t mention above. These range from formatting, adding items to a page, selecting notes and objects, tagging notes, and more. You can see the complete list of shortcuts here at Microsoft.
Tip 2: Change your paper style and color
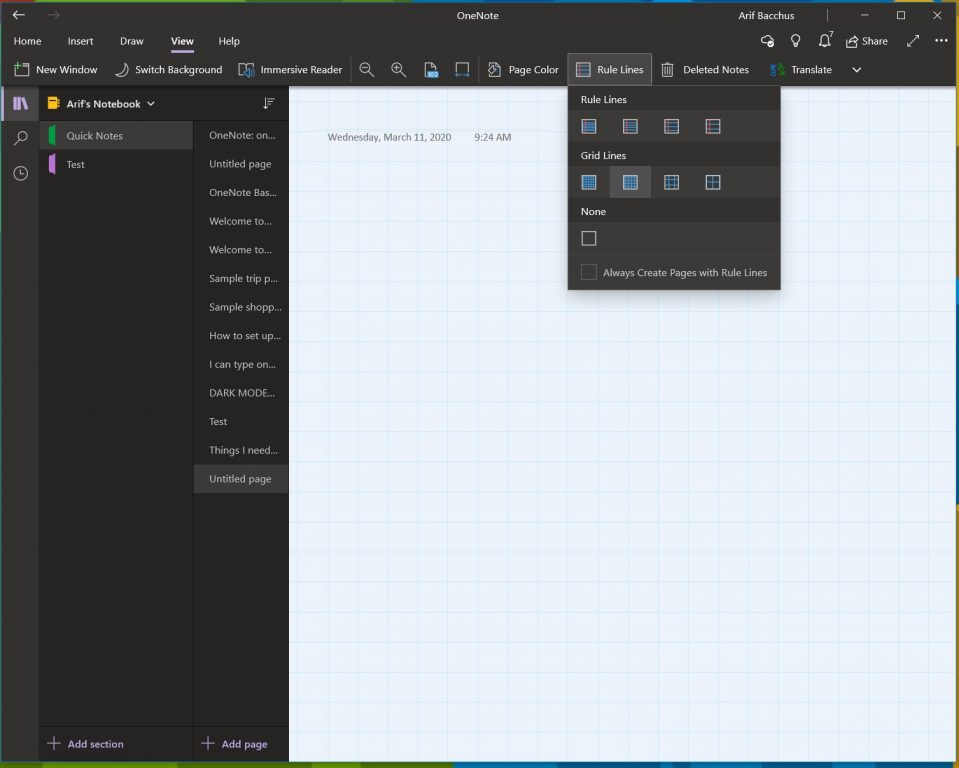
By default, OneNote gives you a blank white canvas to work on. However, if you go to the view menu, you can choose from different paper types. This will be more useful for different situations, be it inking up a graph, or just taking traditional notes in a lined notebook. By going to view and then choosing Page Color you can swap out between different page colors. You also can add lines or a grid to your page as well for various types of notebooks, say for graphing or taking actual notes. Just choose the Rule Lines option from the View bar to do this.
Tip 3: Use Dark Mode
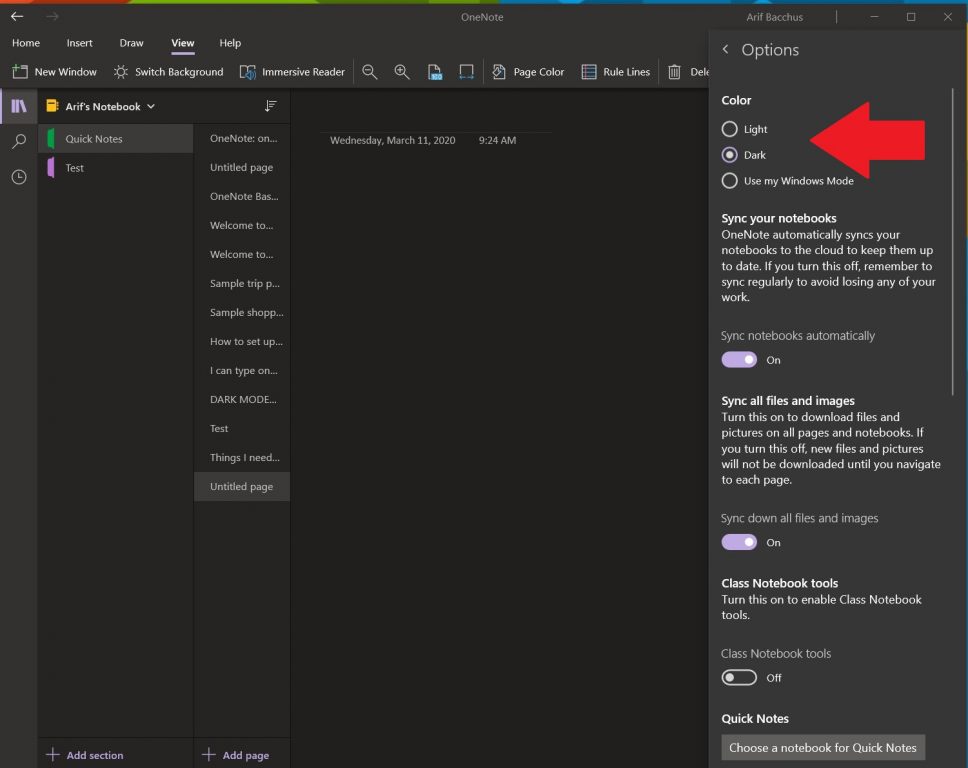
Staring at a white screen when taking notes and using OneNote can be hard on the eyes. Like the other apps in Windows 10, OneNote supports a Dark Mode. This will make many elements of the OneNote user interface easier to read and navigate. Your pages will turn dark, and so will the navigation bar. You can turn it on in Windows 10 by clicking the . . . Settings and More menu at the top right corner of the screen, and choosing the Settings option followed by Options. There will be an option for Dark mode, and you’ll want to choose that.
Tip 4: Password protect your sections
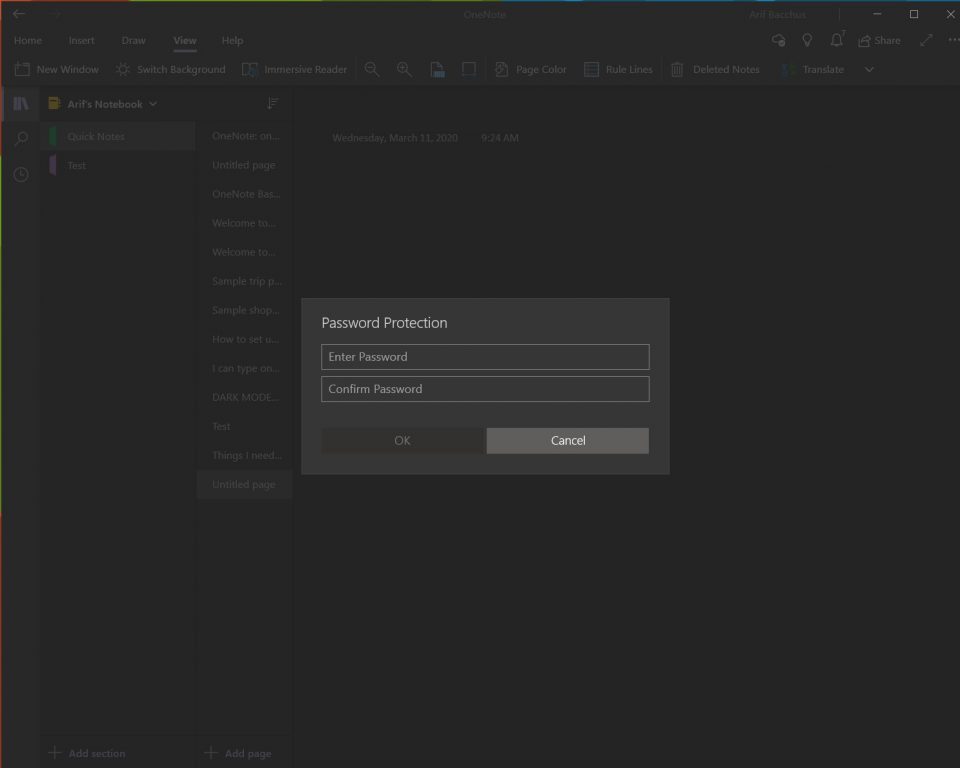
Nothing is more horrible than someone peeking at your personal notes or your super-secret documents. Much like with Word and PowerPoint documents, you can protect your OneNote sections to keep the spies away. You can do this by right-clicking the name of a section in the sidebar, choosing Password Protection and then selecting Add Password. You will then have to enter your password twice, to confirm it. We talk more about password protection in our other OneNote guide here, so be sure to give it a read.
Tip 5: Split up two sessions of OneNote into two windows
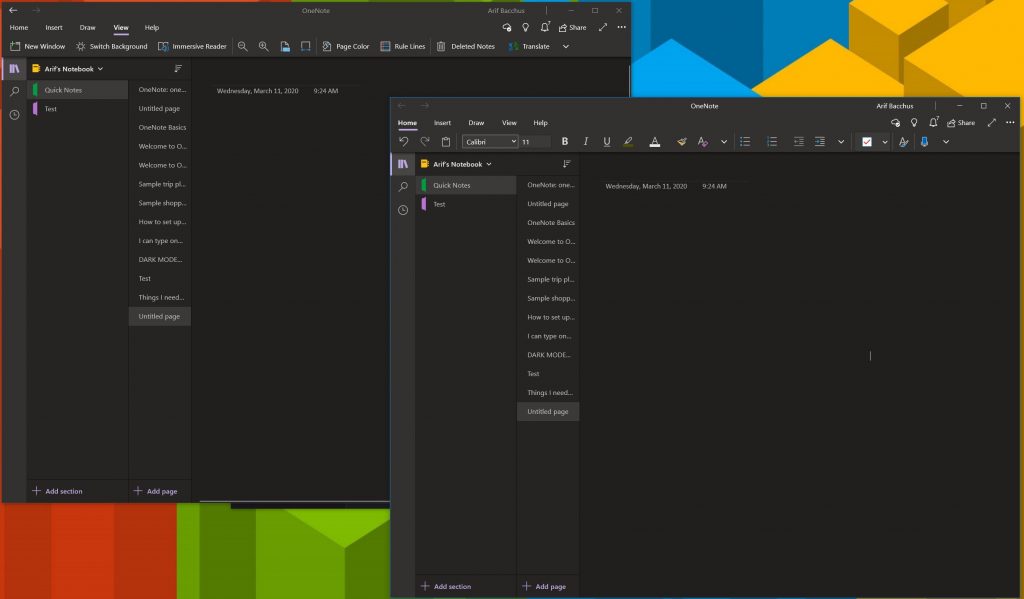
Multi-tasking is a great way to save time during your busy day. You already can do it with the other Office 365 apps like PowerPoint and Word by opening up two sessions of the same program side-by-side. But, you can also do this in OneNote too. All it takes is to head to the View tab and click the New Window button at the top left corner of this screen. This will open up a new instance of OneNote, and allow you to stack two versions of the app side by side and get more work done. it’s particularly useful if you’re copying notes, or looking at a graph and want to still take notes in OneNote.
Tip 6: Use OneNote for solving tricky math problems
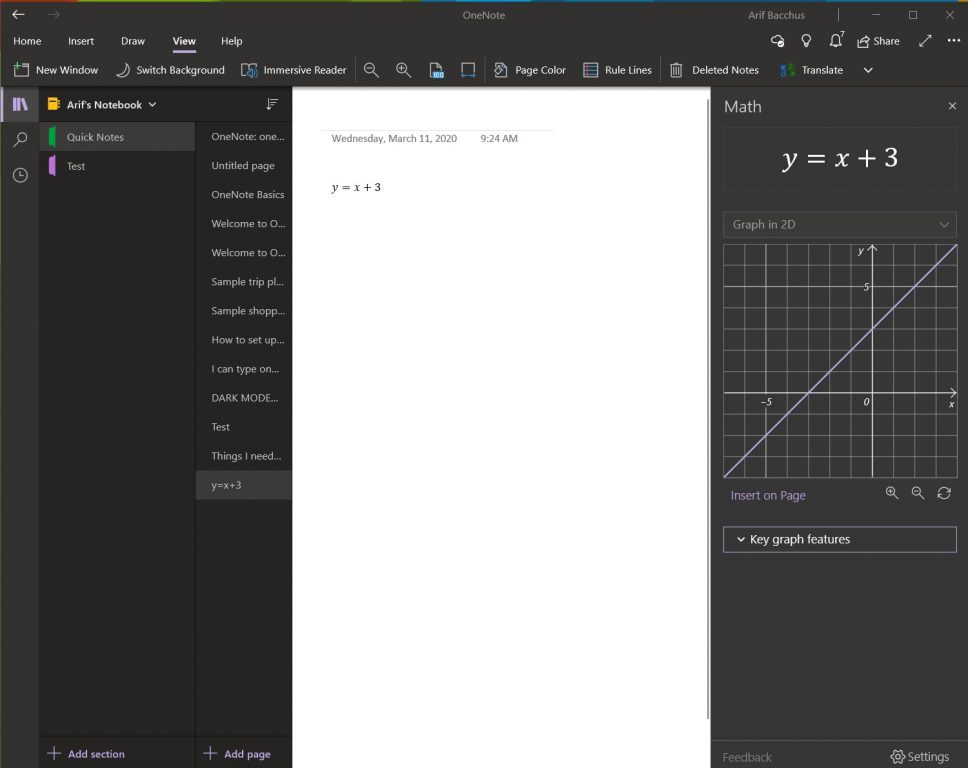
One area where OneNote is better than competing services like Evernote is its support for math problems. With OneNote, you can write out a math question and even have the app solve it and graph it for you. Of course, OneNote is no substitute for a math teacher, but it can really help out by giving you step by step instructions. To get started with this, all you have to do is begin by writing out an equation, either by ink with a pen or by typing it out.
When you’re done, you’ll want to click the Draw tab and select the Lasso tool and draw a circle around the equation. You can then click again on the Draw tab and choose Math. When done, you can select an action to solve or graph. Solving will give you a step by step solution, and graphing will give you an option to insert it on the page for examination or inking.
Tip 7: Use OneNote to insert printouts of Word documents, PDFs
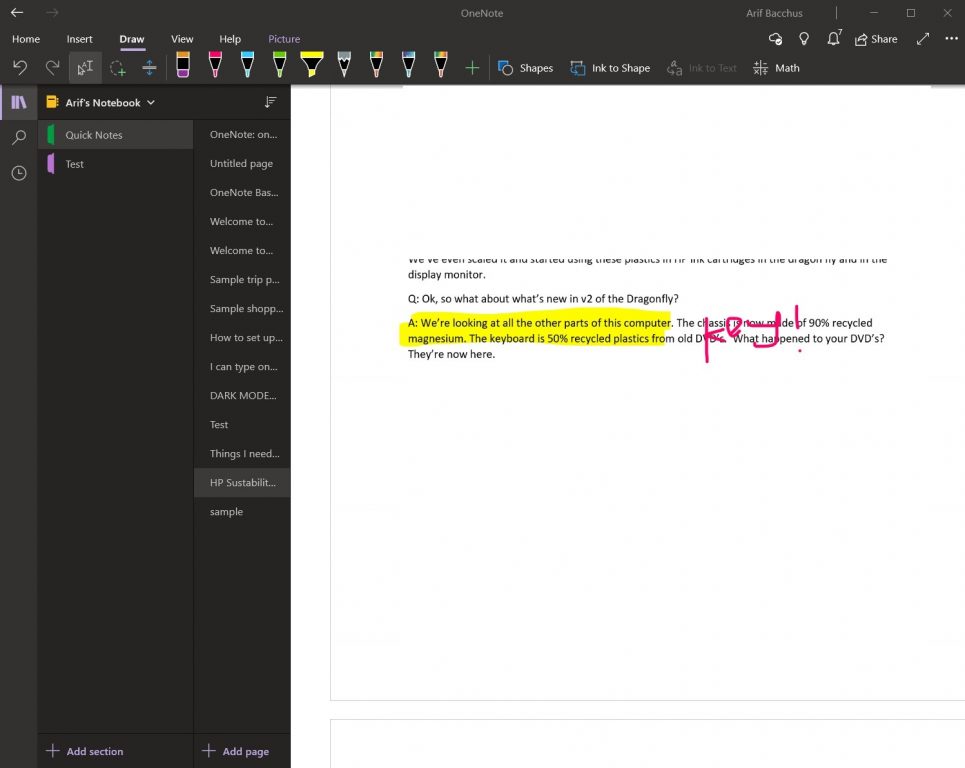
If you’re looking to mark up a PDF file for your own personal use, say, perhaps a textbook, OneNote can help. With the insert printout feature, OneNote will insert a file as a picture. You can’t physically edit the printout, but you can draw on top of it, and keep the original formatting. You also can move it anywhere on the page.
To do this, click where you want to insert the file printout. Then, go to Insert followed by File Printout. You can then click the file you want to insert, and click insert. When done, you can ink on the image as you please. You also can copy text from the printout if you want, by right-clicking the image and then choosing Copy Text from this Page of the Printout.
How do you use OneNote?
These are just our top 7 tricks for OneNote. There are many other ways you can use the app to your productivity advantage, especially if you’re sporting OneNote 2016. Check out our OneNote news hub for more, and let us know in the comments below how you use OneNote!