How to Test Your Microphone on Windows 11 [5 Tips]
Use the Settings app to test the audio
![]() 3 min. read
3 min. read
![]() Updated on
Updated on
Share this article

Improve this guide
Read our disclosure page to find out how can you help Windows Report sustain the editorial team Read more
Key notes
- Ensuring that your microphone is functioning properly is essential for clear and effective communication in various applications.
- You can use the Settings app to open the Microphone properties to check everything is in place.
Whether preparing for an important video conference, recording voiceovers, or engaging in online gaming, these tips will help you optimize your microphone settings and troubleshoot any potential issues.
In this guide, we provide you with a set of expert tips and step-by-step instructions on how to test your microphone effectively.
What can I do to test my microphone on Windows 11?
Before you move to the steps to test your microphone, let us consider performing these checks:
- If you are testing an external one, verify the microphone cable and jack are working fine.
- Ensure your Windows is up to date.
- Verify you have connected the microphone to the correct port.
- Check the privacy settings to ensure the apps have access to the microphone.
Once you are through these preliminary checks, let us move on to the methods.
1. Use the Settings app to test sound
- Press Windows + I to open Settings.
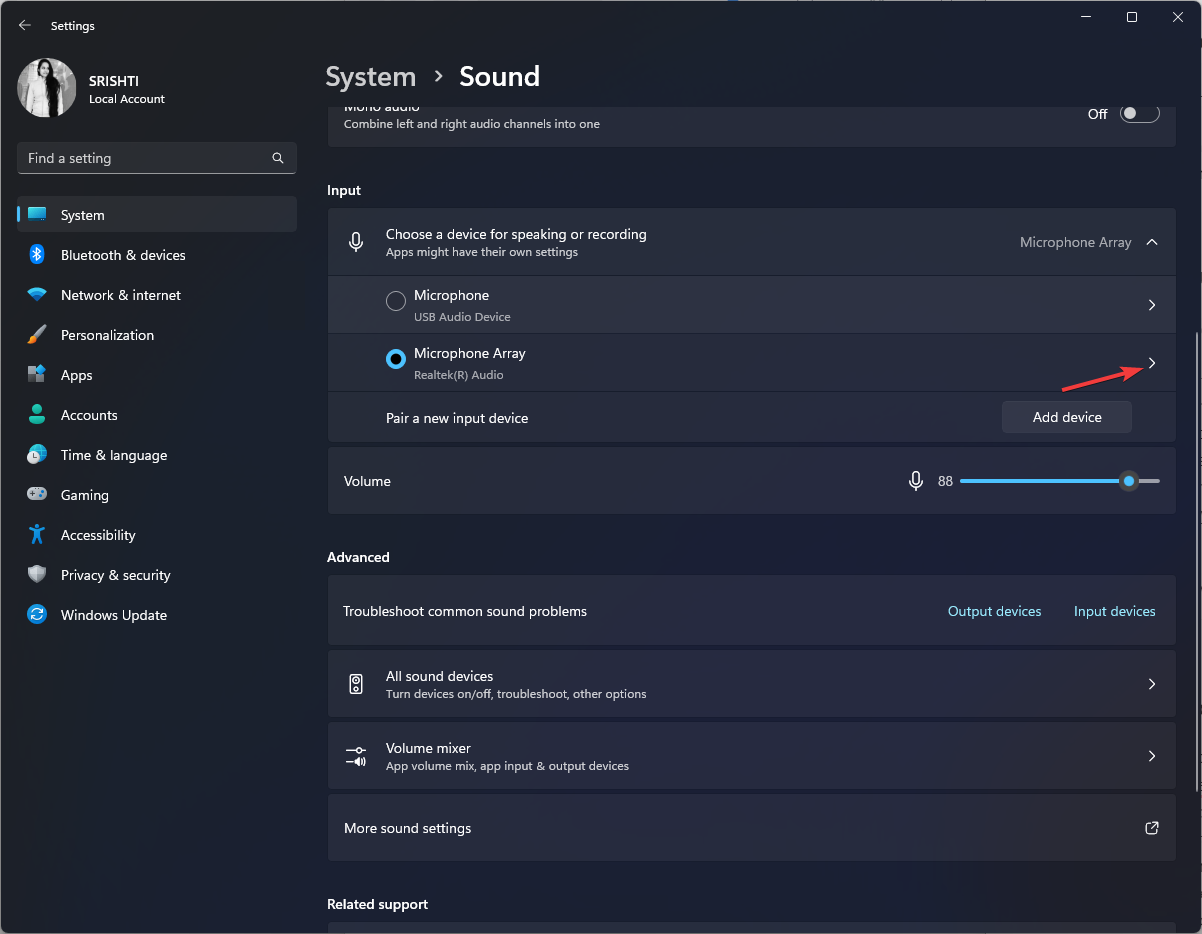
- Go to System, then click Sound.

- Locate Input; you will see the Microphones listed, including the internal one available with your device. Click the one you want to test.
- Go to Input settings, locate Test your microphone and click Start test.
- Start speaking; you will see the indicator showing the voice response. Once you are done, click Stop test.

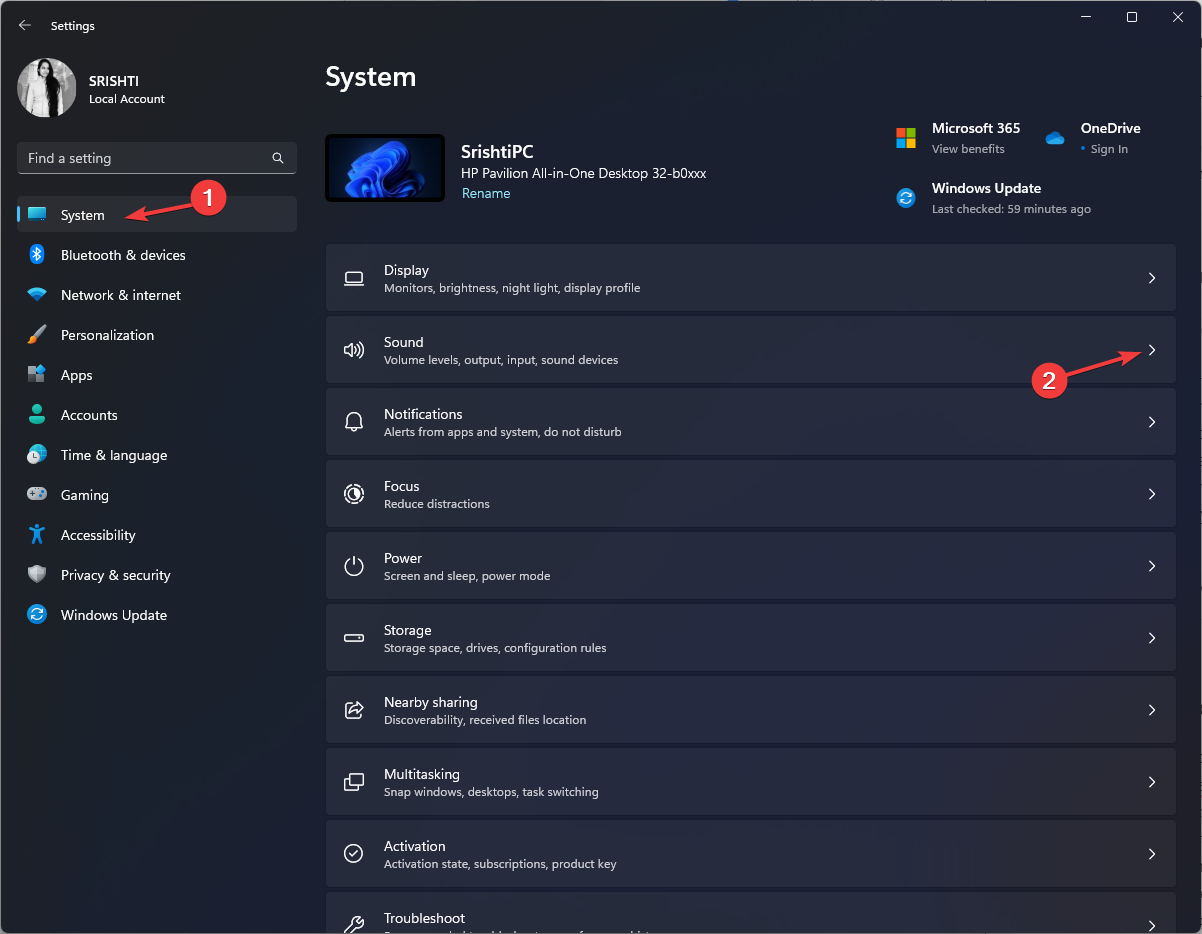

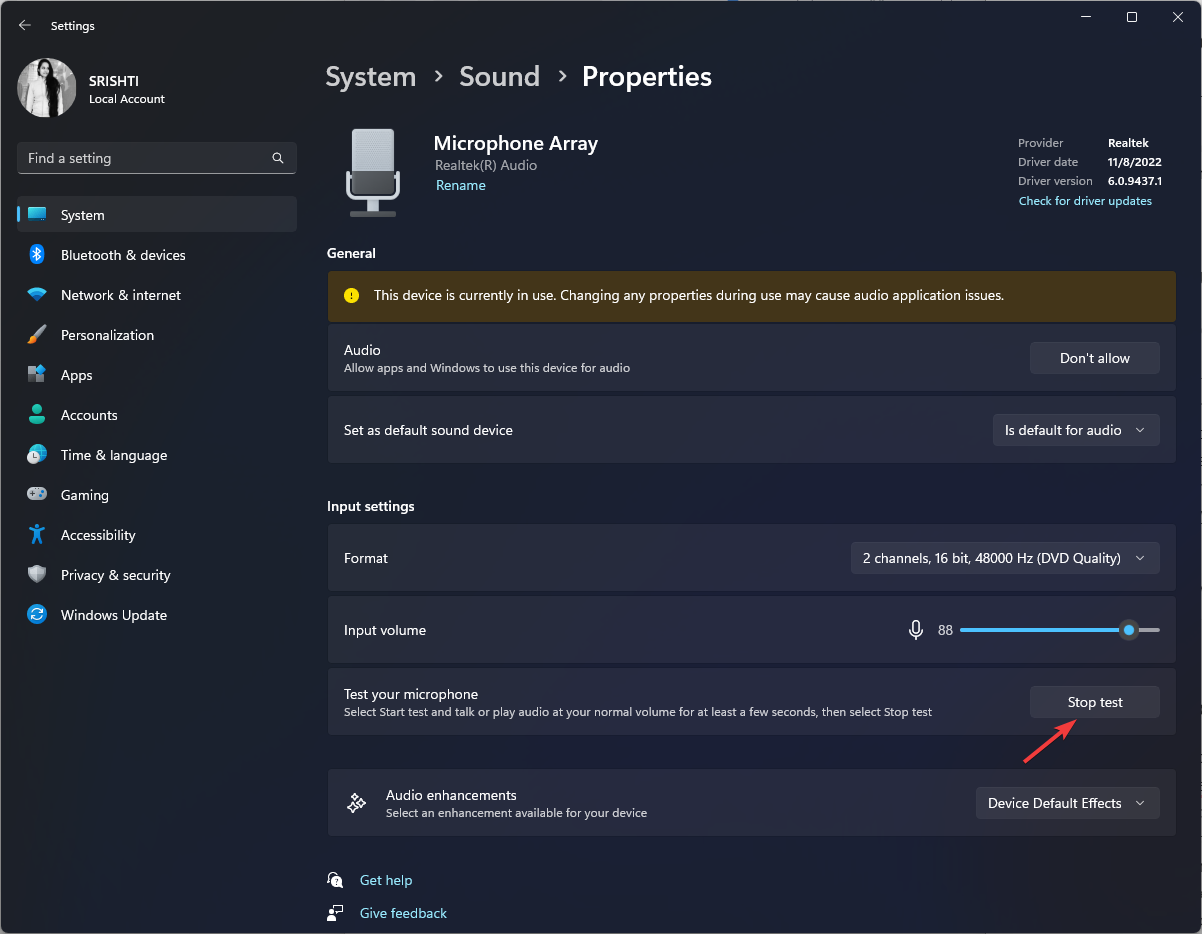
Windows will show you the results; if the test result is above 50%, then the microphone is functioning properly. However, if it is lower, adjust the Input volume using the slider to increase it and test again.
2. Use the Control Panel to check the sound settings
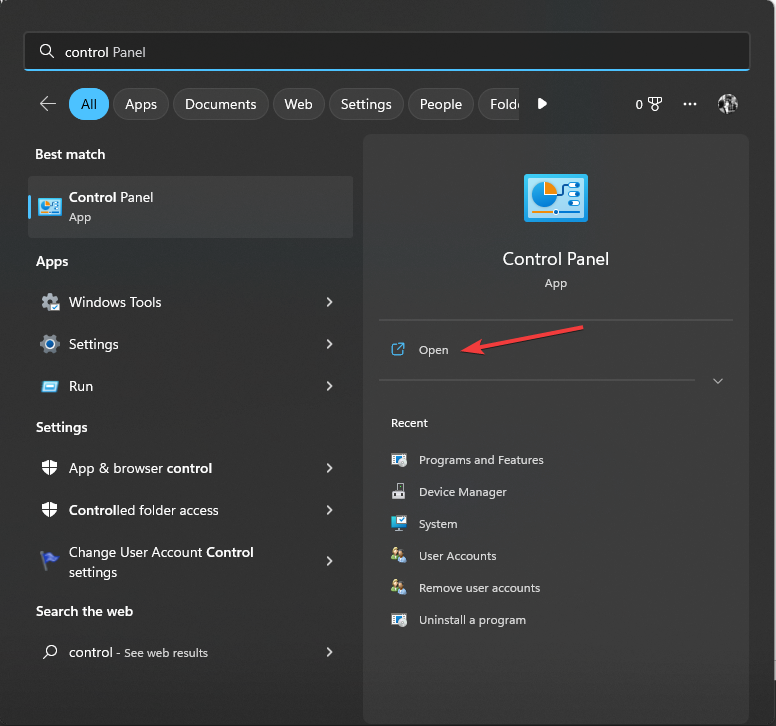
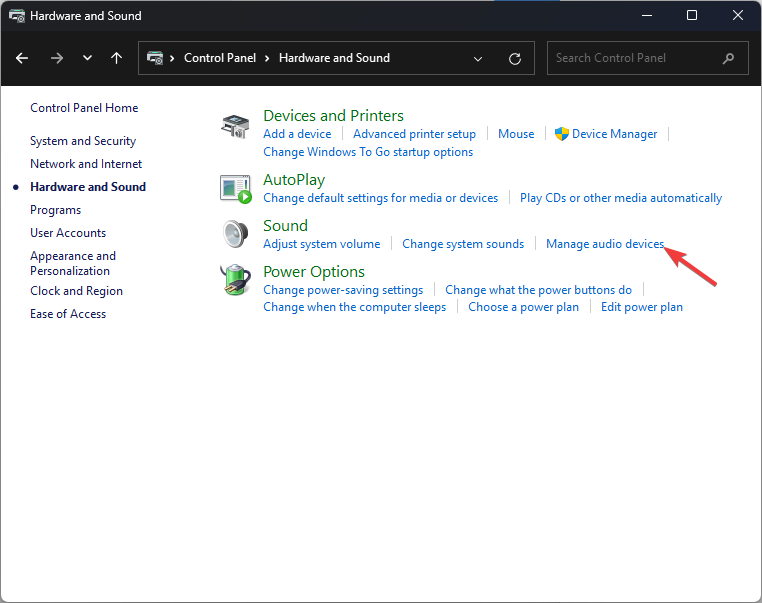
- Press the Windows key, type control panel, and click Open.

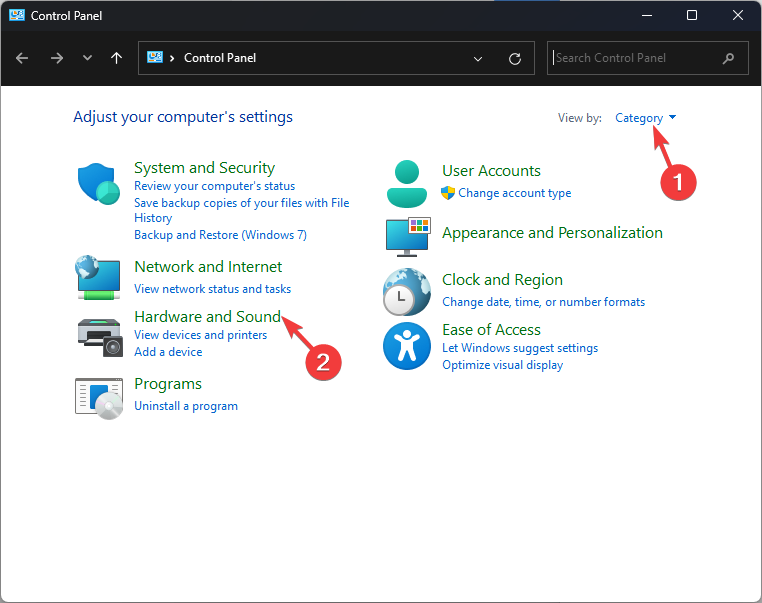
- Select View by as Category and click Hardware and Sound.

- Under Sound, click Manage audio devices.

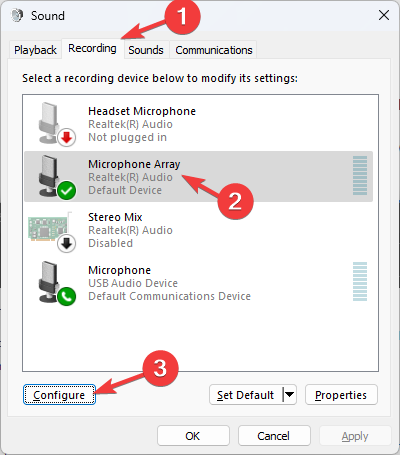
- Go to the Recording tab, select Microphone Array, and click Configure.

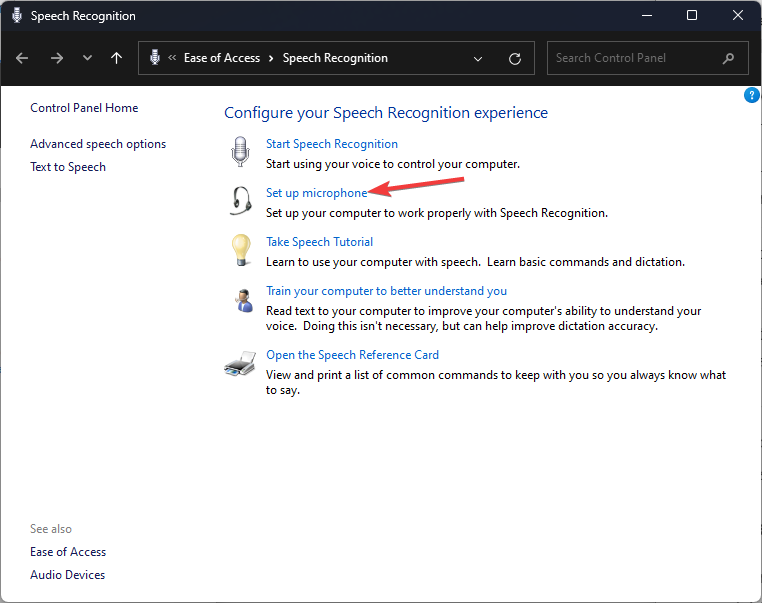
- Select Set up microphone.
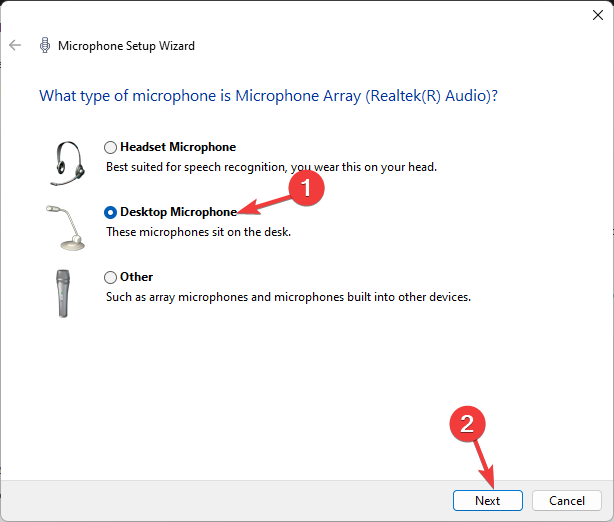
- Choose the type of microphone and click Next.

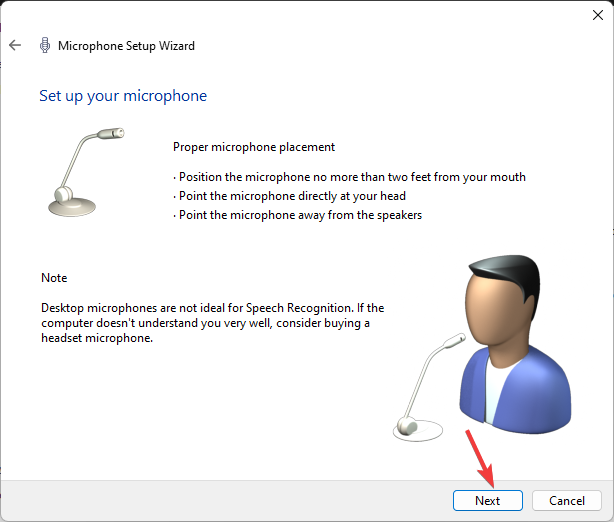
- Read the instructions and click Next.

- You would get a sentence to speak aloud; read it. If the indicator is within the green region, your microphone is working fine. Click Next.
- Click Finish.


3. Use an inbuilt recorder app
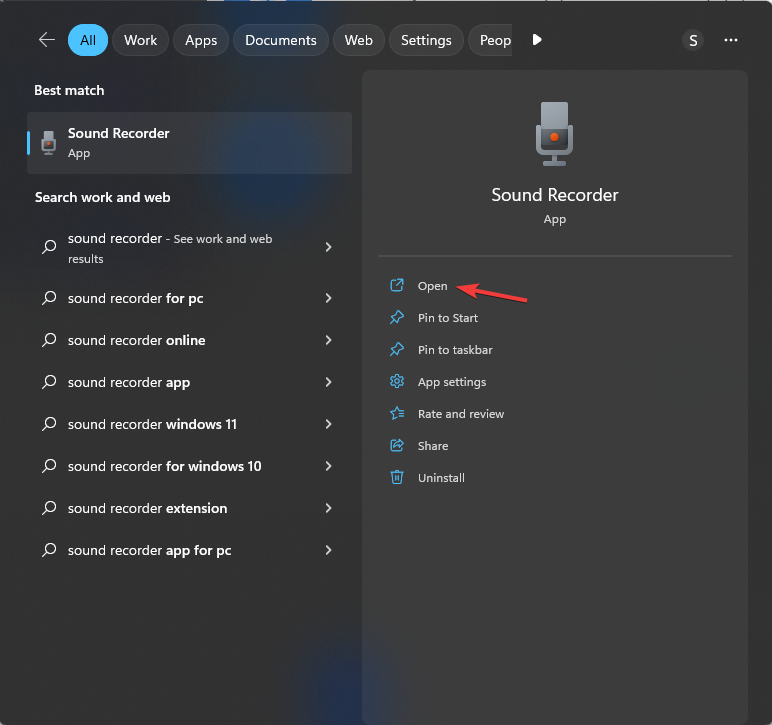
- Press the Windows key, type sound recorder, and click Open.

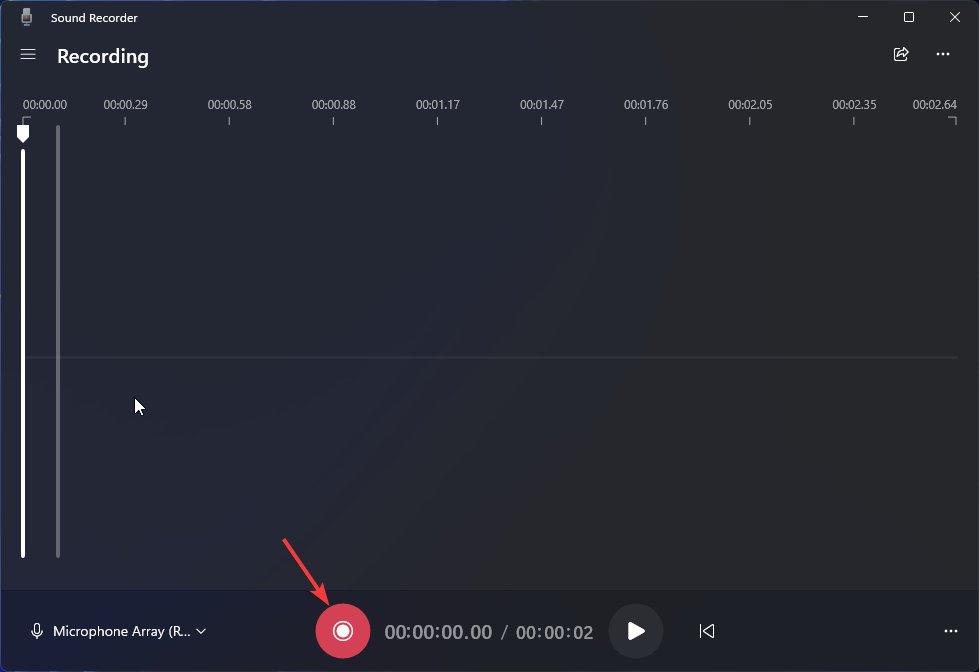
- Click the Record button to initiate the recording. Try speaking to record yourselves.

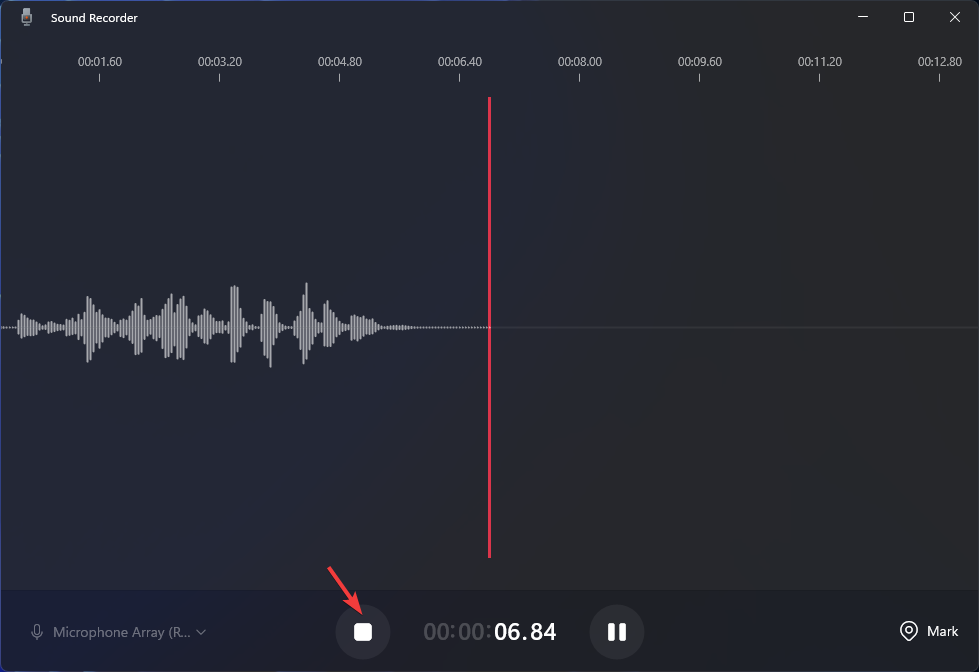
- Click the Stop button to stop the recording.

- Go to the recording file and play it to check if the microphone works.


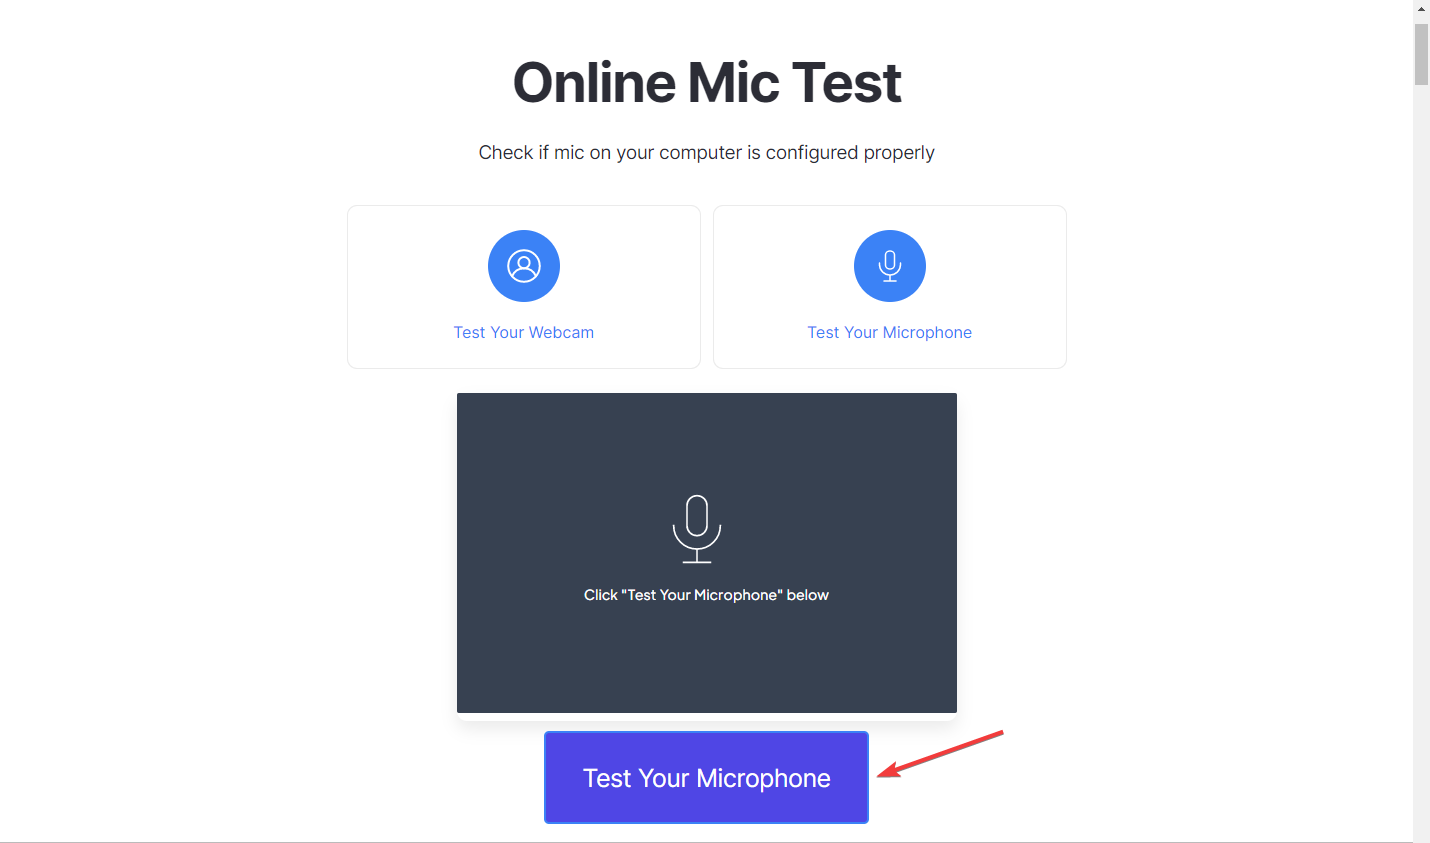
4. Use an online website
- Go to the videoform website and connect your microphone.
- Click Test Your Microphone.

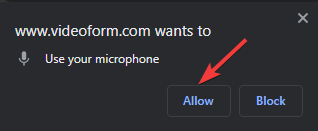
- Now click Allow to let the website use your microphone.

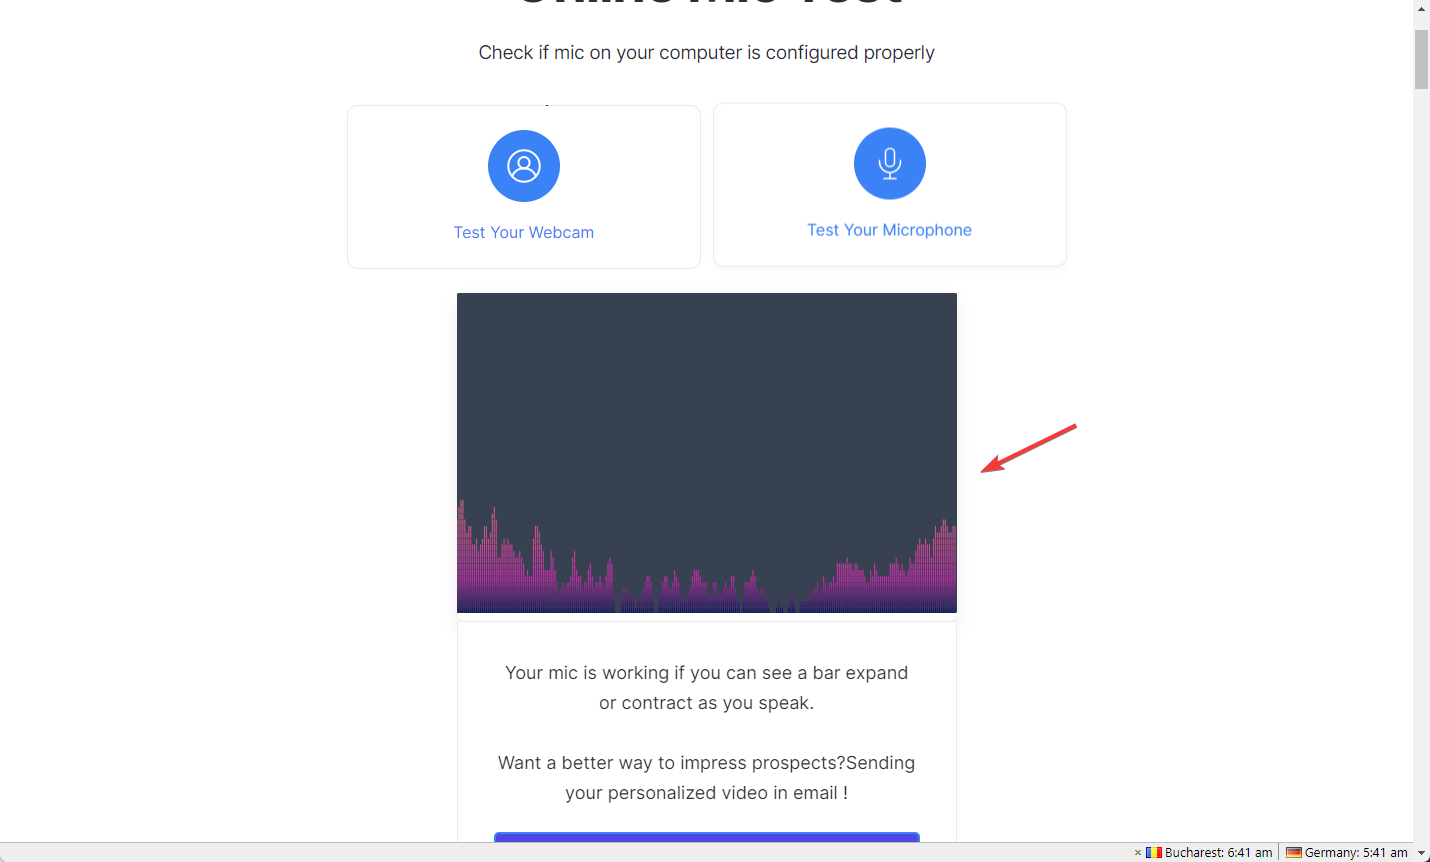
- Speak into your microphone; if you see a bar expand or contract when you speak, your mic works correctly.

5. Use a video conference app
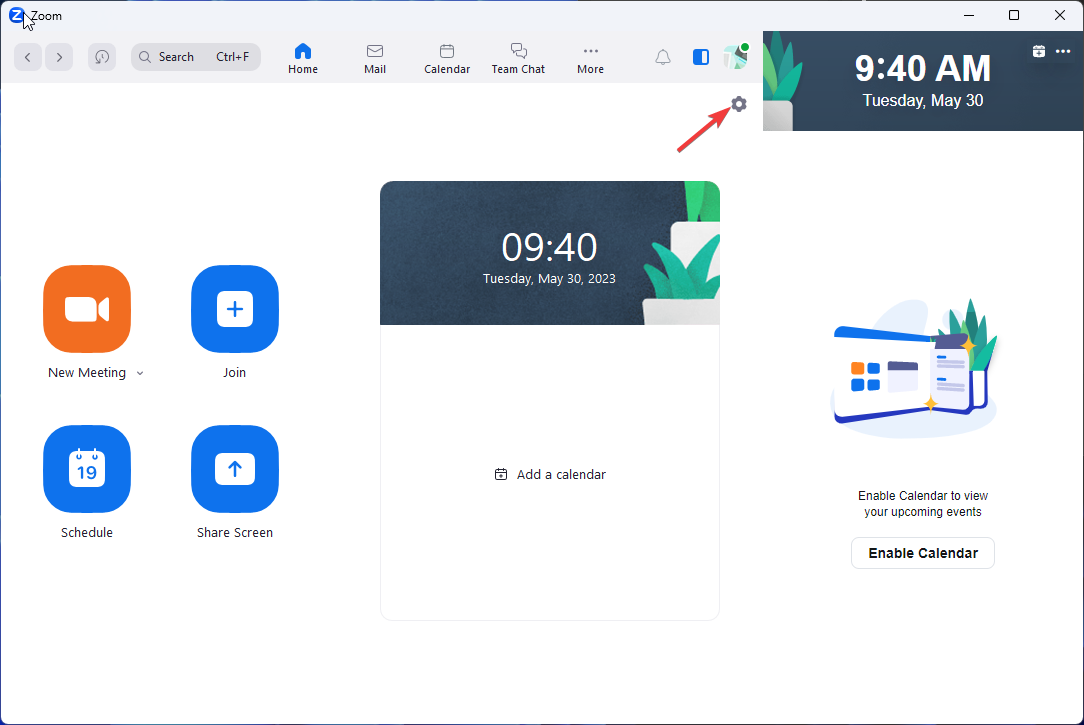
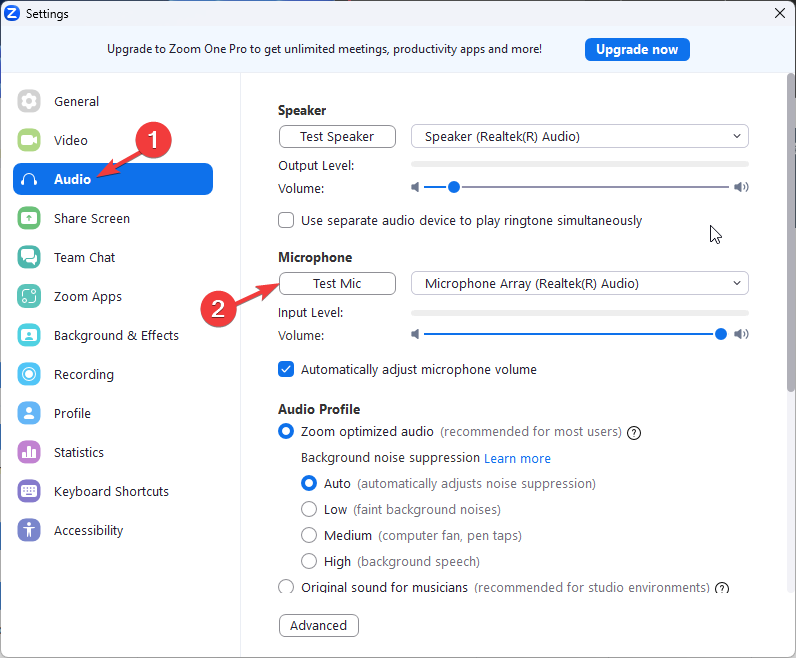
- Launch the video conferencing app. Here we are using the Zoom app for demonstration.
- Go to Settings.

- Click Audio from the left pane.
- Locate the Microphone and click Test Mic.

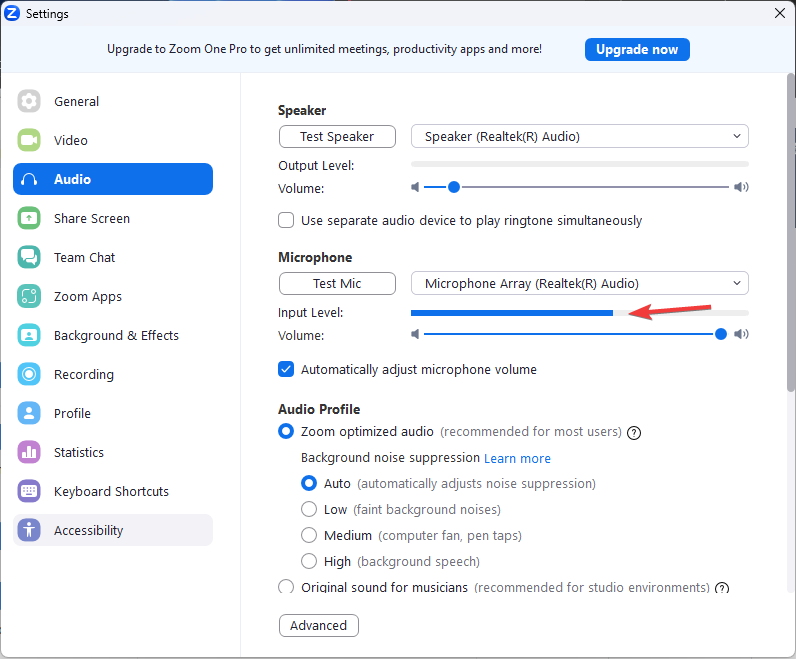
- Start speaking into the mic, and you can see the bar move next to the Input Level, indicating the microphone is working.

You can also test your call on Teams if you don’t have Zoom installed. If you think you have not enabled and set up your microphone on Windows 11 correctly, we advise you to check this guide to know the right steps.
So, these are some methods to test your microphone on Windows 11. If you have any questions or suggestions, feel free to mention them in the comments section below.