How to Delay Sending an Email in Outlook
Send emails at a time of your choosing by applying these settings
![]() 6 min. read
6 min. read
![]() Updated on
Updated on
Share this article

Improve this guide
Read our disclosure page to find out how can you help Windows Report sustain the editorial team Read more
Key notes
- You can delay sending emails in Outlook if you want to send them out at a preferred time.
- Here's the scoop on how to go about it from your browser or your desktop app.
Don’t you just hate it when you immediately hit send on an email and suddenly remember you forgot to add someone’s email address? Well, this can be a thing of the past with Outlook’s delay email feature.
Mistakes are not the only reason email users choose to delay emails. Most email clients have an automatic sending button, but sending email messages at the right time is considered proper email etiquette.
Using this simple scheduling feature, you may score a few points with your boss for observing time.
How can I delay sending an individual email in Outlook?
1. Use the Outlook desktop version
- Launch your Outlook mail from your desktop or search for it from your app list.
- Click on the New mail tab, and in the email composition window, fill in all the necessary details to compose a new email or reply to an already existing email from your inbox.
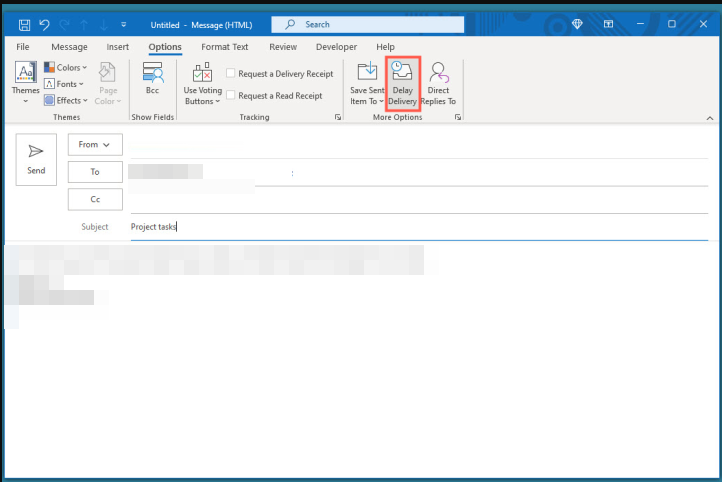
- Navigate to the Options tab and select Delay Delivery.

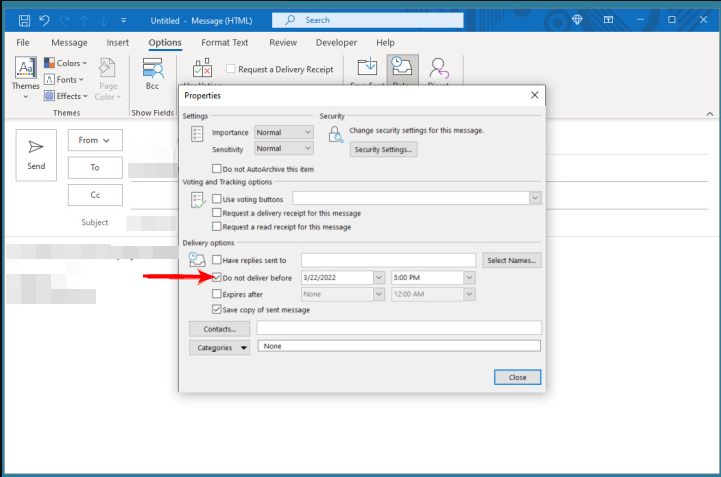
- Go to Delivery options section, tick the Do not deliver before check box, select the time frame, then click Close.

- Once you exit this window, you can go about typing your message and hit send. It will then be in your Outgoing mail until its scheduled delivery time.
- If you wish to edit the delivery time, you can follow the above steps and adjust the time. To disable it, clear the Do not deliver before check box.
2. Use Outlook browser version
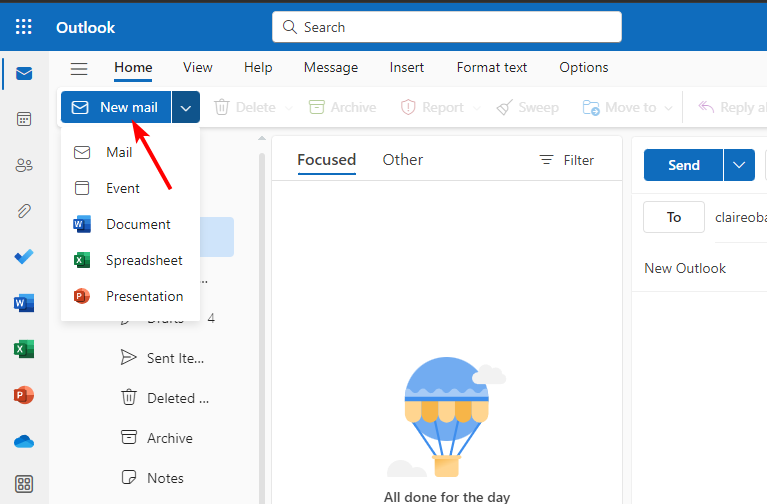
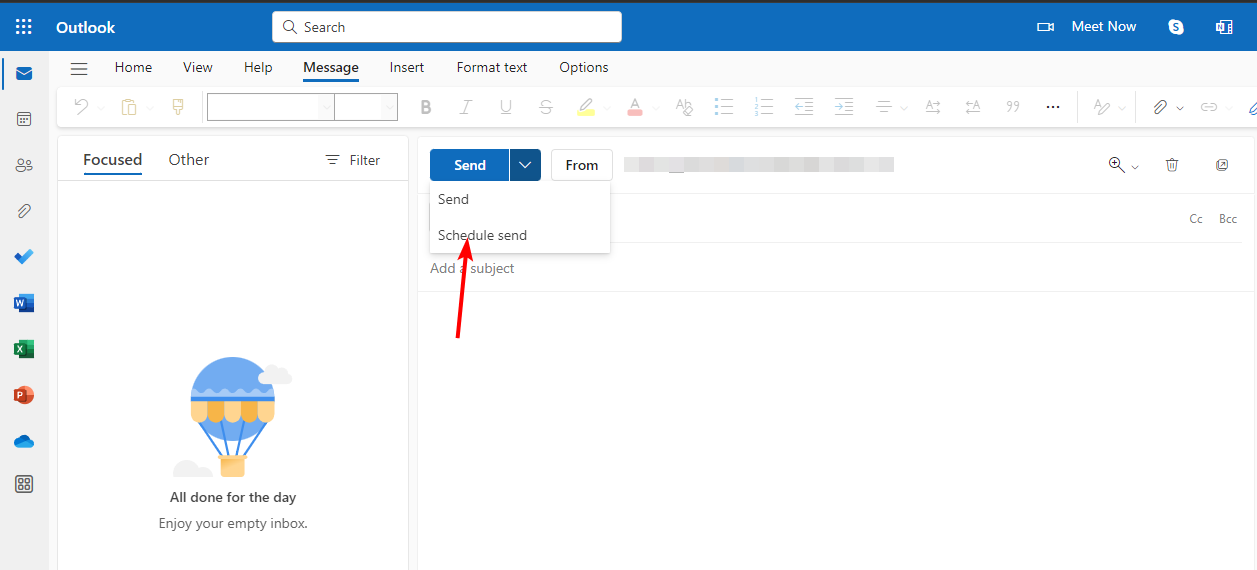
- Open your browser and login to your Outlook mail and click on the New mail option on the taskbar at the top.

- Fill in the necessary entries for the receiver, subject and compose the message in the email window.
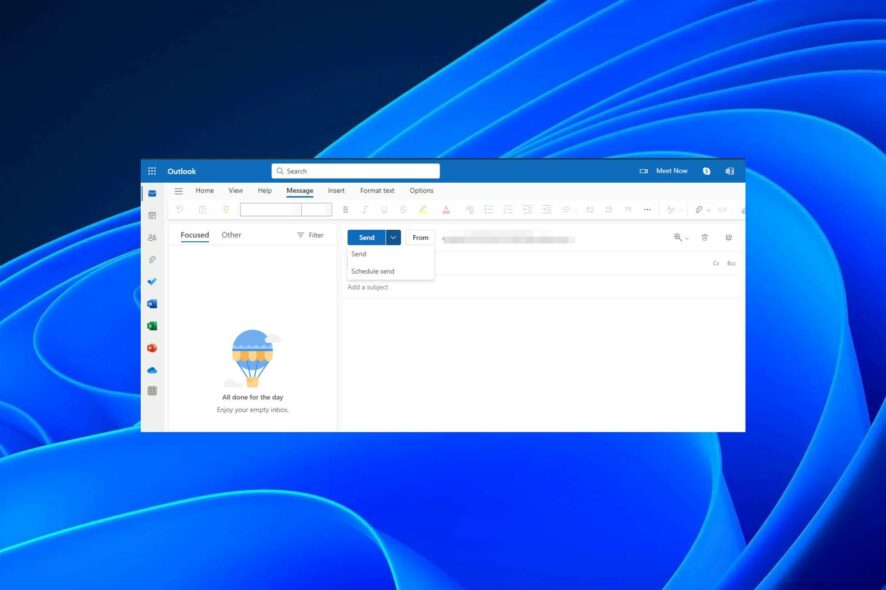
- Click on the drop-down arrow next to the Send option and select Schedule send.

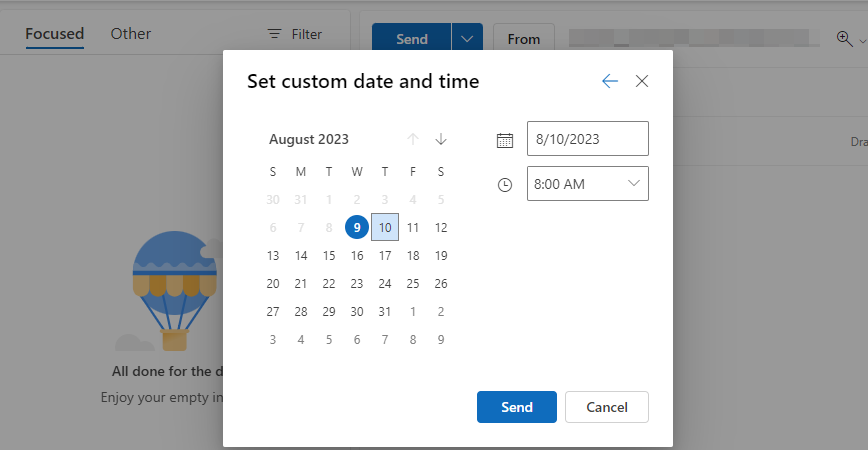
- A new window will pop up where you can set a custom date and time, you’d like your message to be delivered.

In case emails are not sending in your Outlook email, check out our detailed article on what to do.
Unfortunately, the delay or email scheduling option in Outlook mobile versions is unavailable. The only workaround is to use your mobile browser and switch to the desktop version to enable this feature.
How can I delay sending all emails in Outlook?
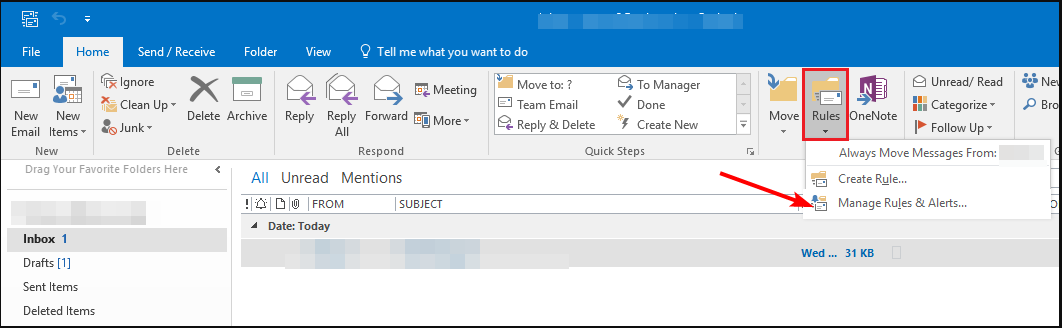
- Launch your Outlook desktop app and click on the File tab.
- Select Rules, and click on Manage Rules & Alerts in the drop-down menu.

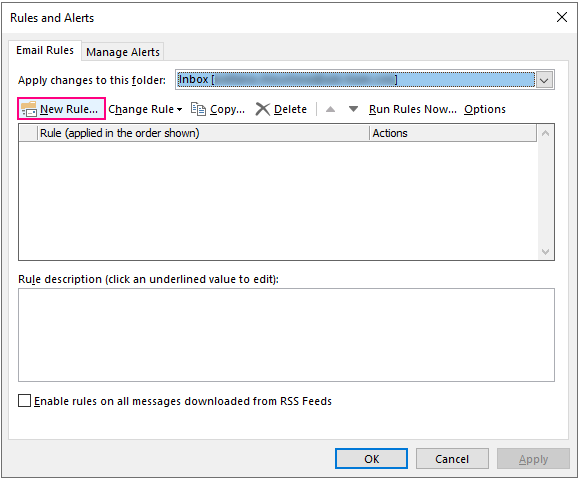
- A Rules & Alerts window will open. Click on the Email Rules tab and select New Rule.

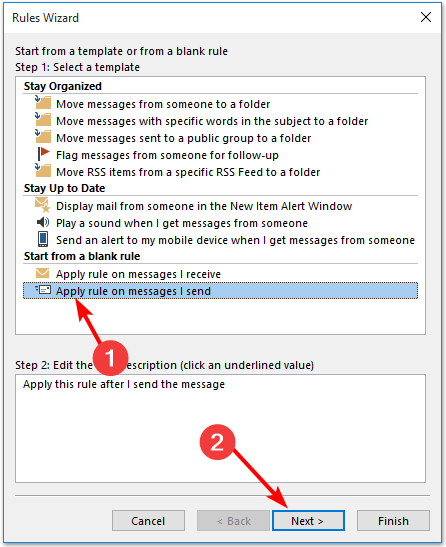
- Go to the Start from a blank rule section, click on the Apply rule on messages I send option, and hit Next.

- A new dialog box will pop up with scheduling options for the emails you wish to delay.
- Once you click any of these options, the standard delay for all messages will not apply. Therefore, ignore all these rules and simply click on Next.
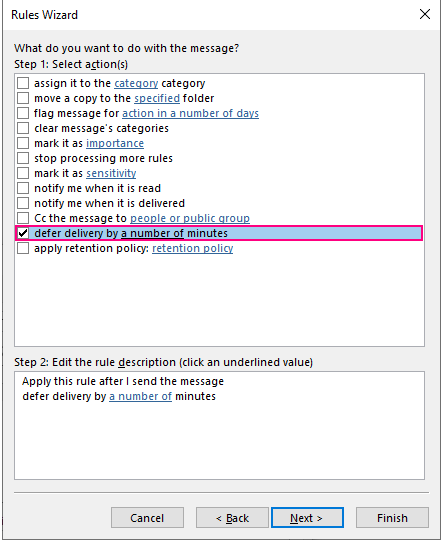
- In the next Rules Wizard pop-up window, tick the defer delivery by a number of minutes check box to set the Outlook delay send rule.

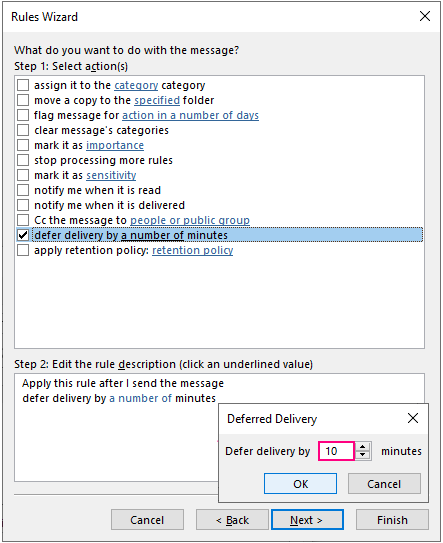
- Next, move to Step 2: to Edit the rule description (click an underlined value) at the bottom. Here’s where you’ll define the number of minutes as specified in 7 above. Click on the hyperlinked text, which will open a small dialog box where you can specify the period of time you wish to defer the email by then hit OK then Next.

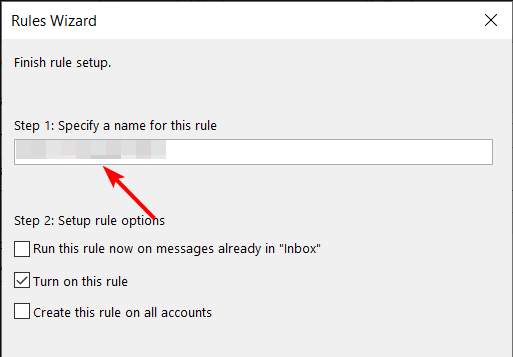
- Finish the rule setup by filling in the Specify a name for this rule section in case you want to create more rules in the future to avoid confusion.

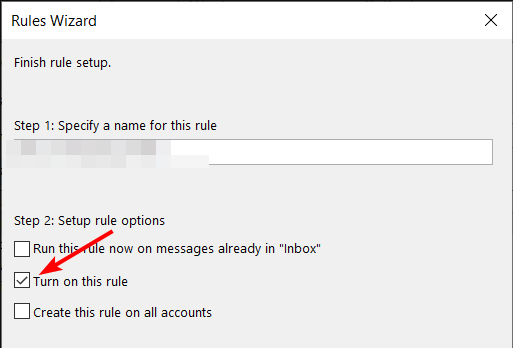
- Ensure you check the Turn on this rule box and then click on Finish.

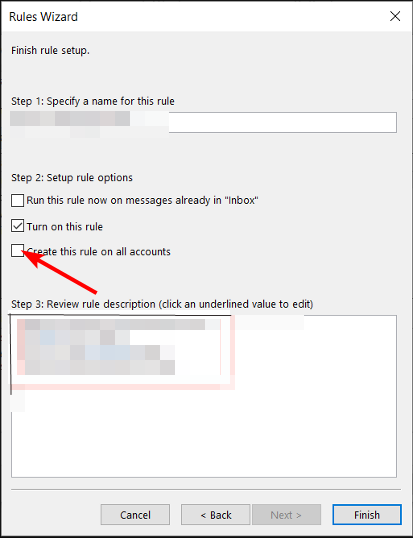
- If you have multiple Outlook accounts and wish to apply the same email delay rule, also check the Create this rule on all accounts box.

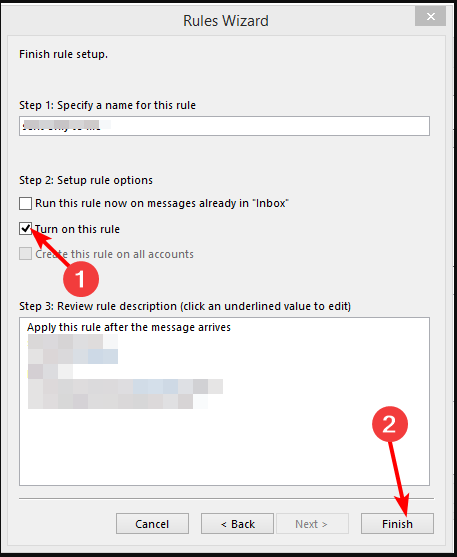
- Click the Finish button and confirmation dialog box that appears to finish setting up. Now all your messages will remain in your Outbox folder until their scheduled time.

- If you’d like to reschedule email delivery in Outlook, simply go to your Outgoing emails. Here you can edit the minutes check box again.
In case the email scheduling is not working, and emails are stuck in your outbox after the delivery time has elapsed, we have an article on what to do.
How can I disable or schedule automatic send/receive in Outlook?
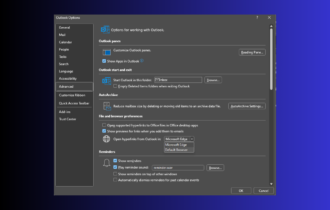
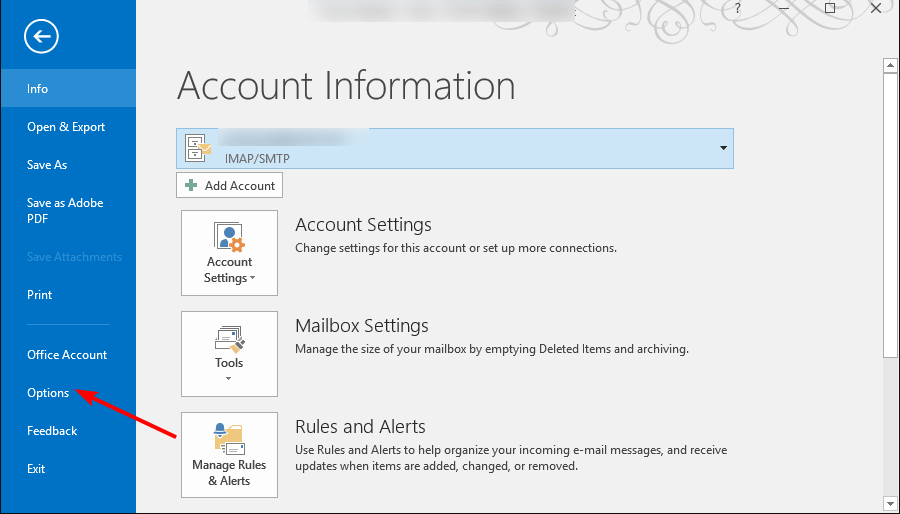
- Launch your Outlook app, select File, and under the Options menu, click on Advanced.

- Go to the Send and receive section and uncheck the Send immediately when connected box.

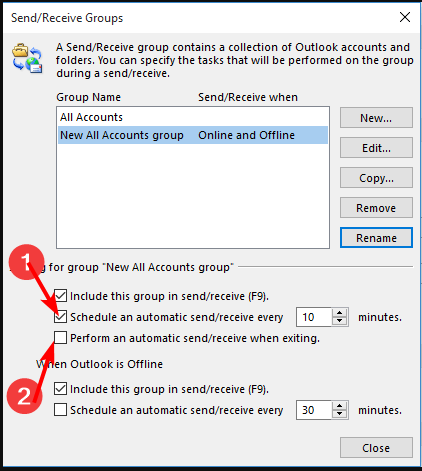
- Click on the Send/receive option and in the pop-up window that appears, uncheck the Schedule an automatic send/receive every … minutes and Perform an automatic send/receive when exiting boxes.

- Now click on Close to save these settings.
- From here, you will only have to press the F9 button when you’re ready to send these messages.
- To schedule the automatic send/receive option, follow the above steps, but in step 3, ensure to check the Schedule an automatic send/receive every … minutes, then adjust the email send time to an interval you’re comfortable with.

The only downside to this email delivery option is that you might miss out on important messages, especially when your inbox is not updating due to connection issues.
The next time you have a really important email or message that you don’t want to hit the inbox too soon, add an extra delay to the send time using the steps outlined above.
Hopefully, this brings you a step closer to better email productivity. Instead of keeping your emails in your drafts folder for long periods of time, try scheduling them.
You may also want to check out other modern email clients with email schedulers and see what they have to offer. Not only will you benefit from a cleaner interface but also out-of-office auto-reply, and email templates, among other features.
That’s it for this article, but we’d love to hear more from you. Which email scheduling option do you prefer and why? Drop us a comment down below.