
Power Virtual Agents (PVA) is a chatbot service built on Microsoft Power Platform, which includes PVA, Power Apps, Power BI, and Power Automate. The PVA on Teams development process uses a guided, no-code, and graphical interface approach that allows users to create and delete chatbots at will.
PVA allows you to build and deploy chatbots via the web or by adding the app directly to Teams. If you are using the PVA web app, you can use supported browsers including Microsoft Edge, Firefox, and Chrome. Keep in mind that you need a work, school, or organization Microsoft account. Unfortunately, there is no option currently available for personal Microsoft accounts.
Add Power Virtual Agents app to Teams
Once installed, you can create bots in the PVA app on Teams and share them across your team, company, or organization. The very first step is to install the PVA app, then you can move on to make bots.
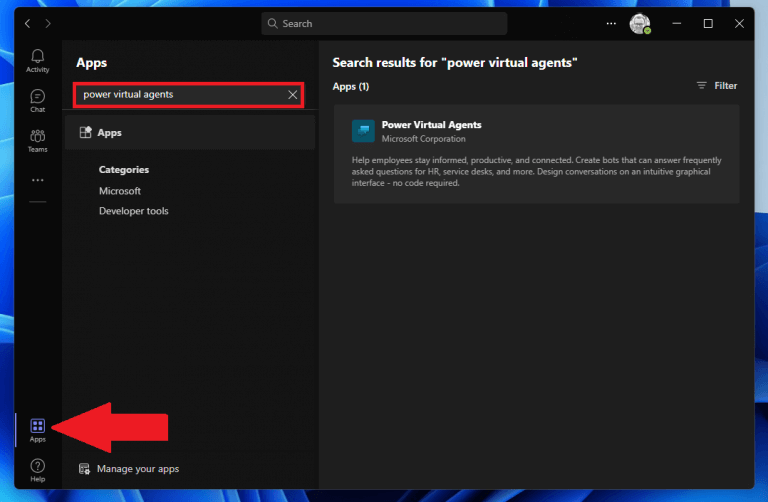
1. Go to the Microsoft Teams Apps store and search for “power virtual agents.”
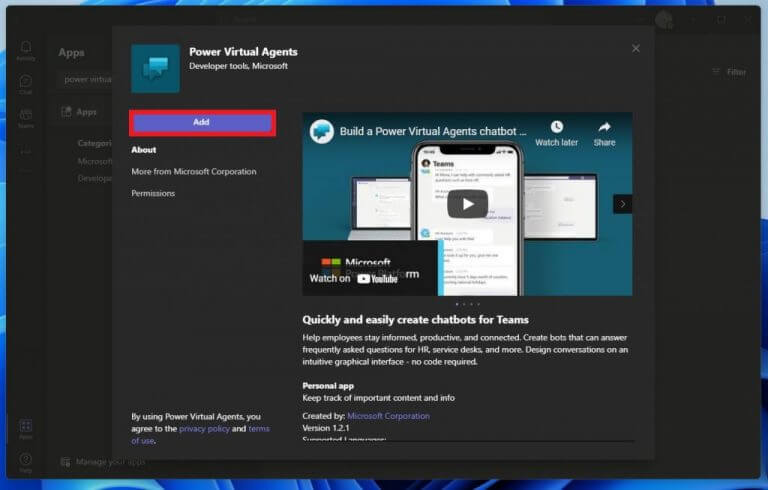
 2. Select the Power Virtual Agents app and click Add.
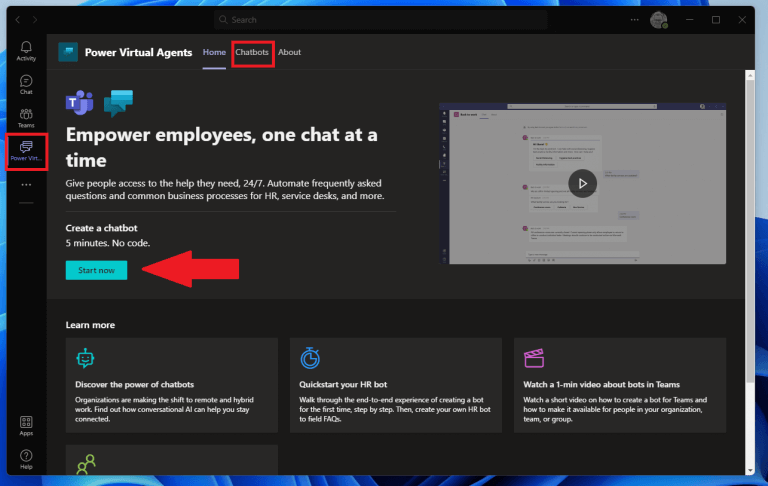
 The app will be added to the side pane in Teams and the app automatically opens to PVA interface. This is where Teams users can come to create, edit, and delete bots. This is the perfect time to pin the app to Teams so you don’t have to search for it later.
Create a bot
When you are ready, you have two options available to create a bot:
1a. Click Start now to quickly create a bot.
1b. Go to the Chatbots tab, select the team you want to use, and select New chatbot.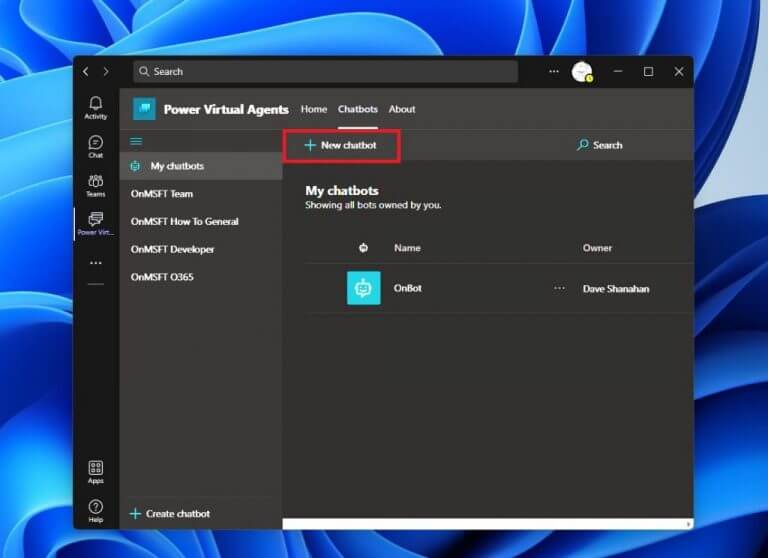
2. Choose the Teams channel name you want to use and click Continue. 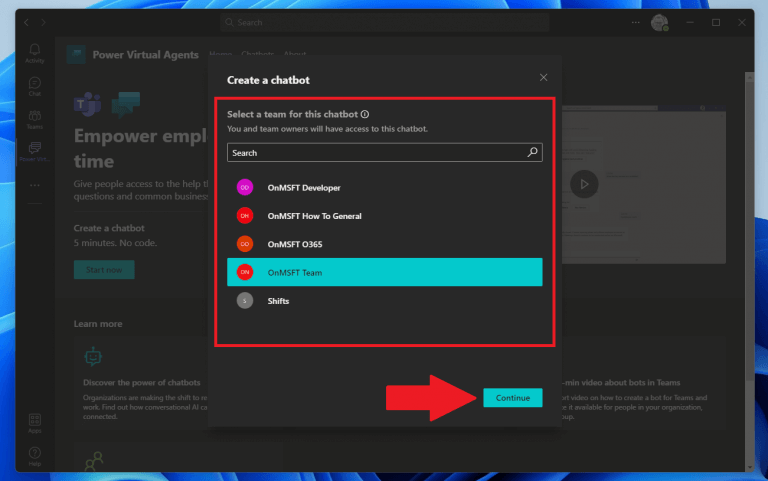 3. Name your bot and choose what language you want your bot to speak.
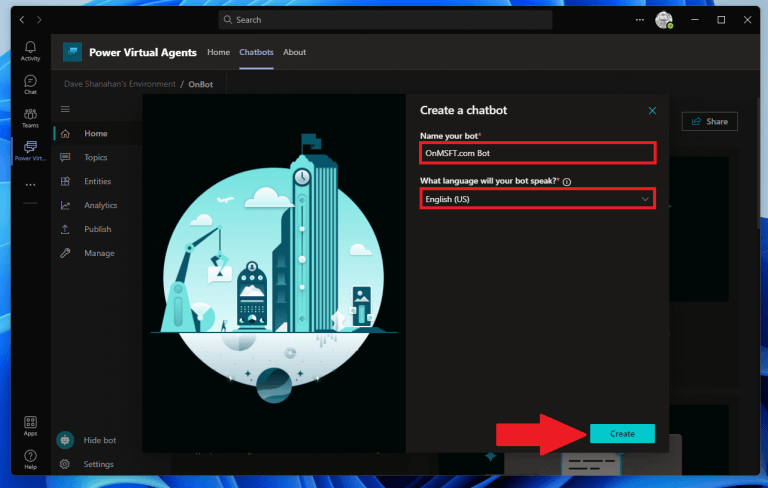 4. Click Create to create your bot.
Once the PVA app animation is complete, you are finished. If this is the first time a bot is being created in your team, you’ll see a notice explaining that it will take up to 10 minutes for the bot to be fully created. If you try to edit any topics or entities within your bot too early, you may find yourself getting errors.
Congratulations! You’ve successfully created a Power Virtual Agents bot on Microsoft Teams!
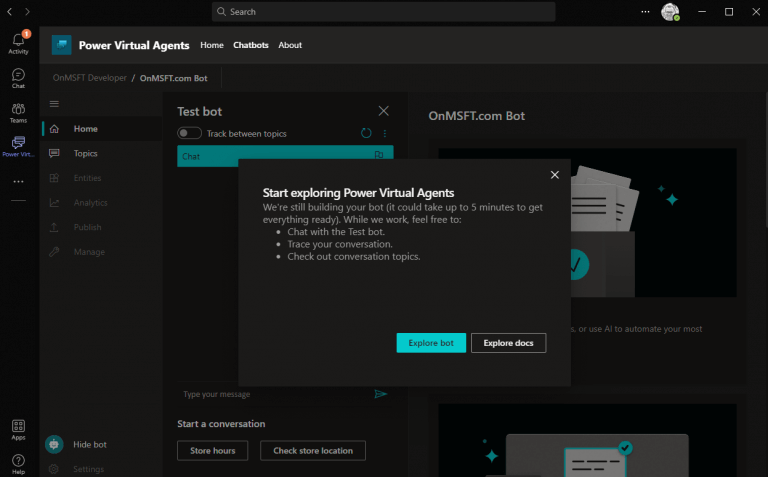
Now you can choose to Explore bot to view and manage the contents of your bot or Explore docs to browse through Microsoft’s extensive PVA documentation.
Delete a bot
If you decide you don’t need or want your bot, you can delete it just as easily from Teams. Here’s what to do.
1. In the Power Virtual Agents (PVA) Teams app, click Settings ⚙️.
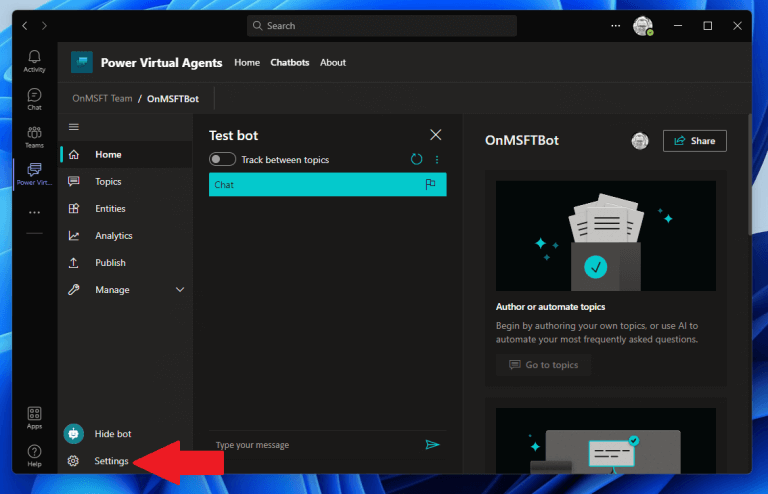
2. Click the Delete Bot button.
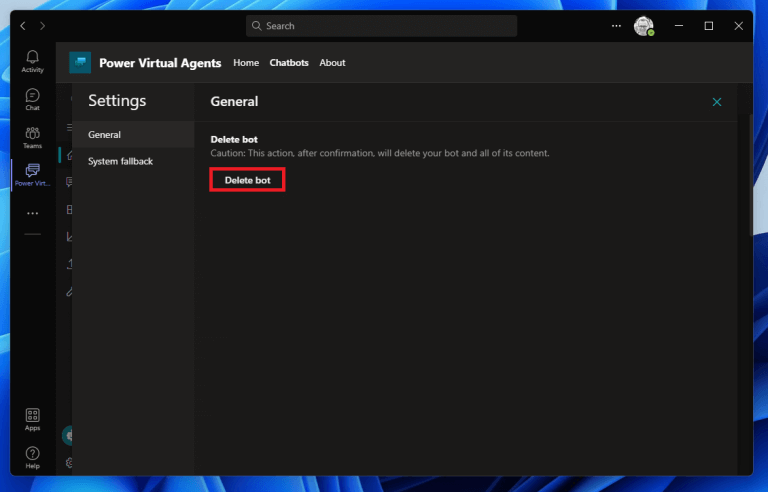
3. Type out the name of the bot and click Delete Bot to confirm bot deletion.

Add content to your Teams bot
Of course, besides naming the bot and choosing which language you want the bot is hardly the beginning. As you’ll soon discover, the ability to create and manage Power Virtual Agents (PVA) bots without leaving Microsoft Teams is just the beginning of functionality available.
Microsoft has an Employee FAQ PVA Template available if you are looking for an example of what a human resources (HR) chatbot looks like with PVA. If you are interested in importing this content on your own, remember you will also need to add PowerApps to Microsoft Teams. Otherwise, the installation steps are straightforward.
Interested in the next steps? Stay tuned, as we’ll walk through the steps required to add content to your Power Virtual Agents (PVA) chatbot in Teams. We’ll learn how to create, edit and manage topics, enable enhanced AI features and share and publish your bot with your colleagues at your organization and beyond on Microsoft Teams.
Got a Microsoft 365-related question you want to see answered? Let us know in the comments!
Comments are closed.