How to create a new list from scratch in Microsoft Lists
To create a new list from scratch in Microsoft Lists:
- Login to Microsoft Lists.
- Click “New list”.
- Name your list.
- Click “Add column” and select a data type for your new column.
- Use the flyout pane to name your column and customise its options.
Applies to
Microsoft Lists is a data management solution mixing elements of Excel spreadsheets, Access databases and third-party low code solutions such as Airtable. In this guide, we’ll show you how to get started creating a new list from scratch – if you’re looking for a more general overview of Lists, try reading our Getting Started guide first.
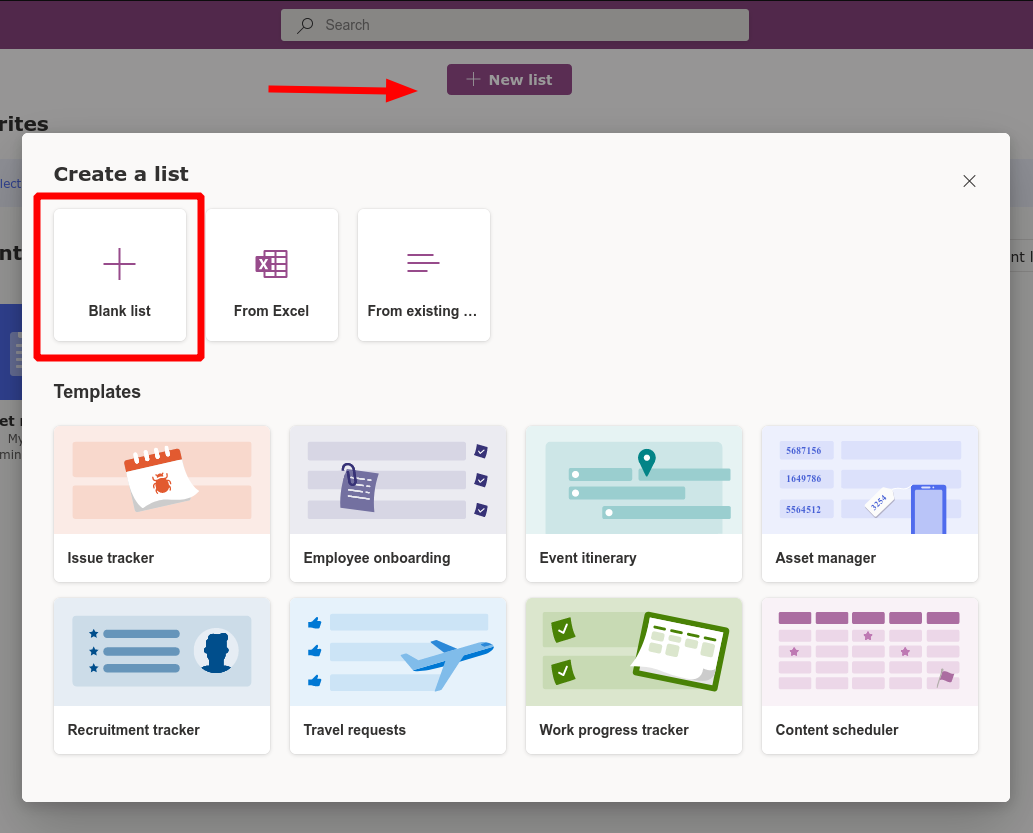
Login to your work or school Microsoft 365 account and launch Microsoft Lists from the app launcher. Click the “New list” button at the top of the app, then select the “Blank list” option.
Give your list a name and assign it a colour and icon. The latter two are purely decorational elements to help lists stand out against each other within the app’s UI.
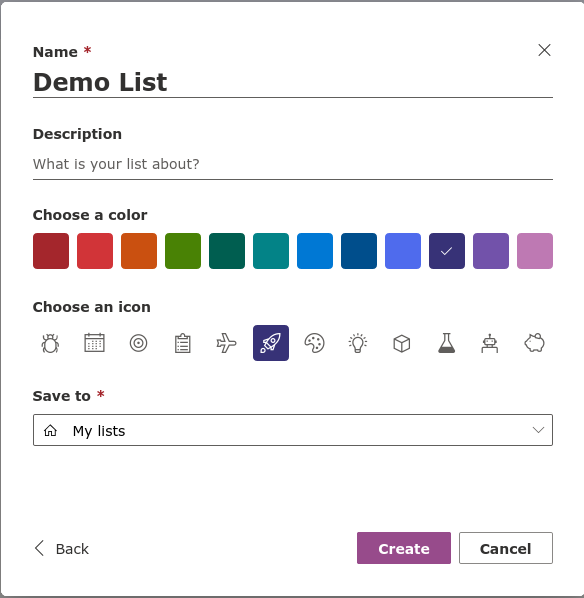
At the bottom of the form, you’ll need to choose where to save the list to. The default “My lists” option will result in a personal list which only you have access to. Within the dropdown menu, you’ll find the ability to save to a SharePoint team site. Selecting a site will make the list available to everyone with access to that site.

Once your list has been created, you can begin to define columns of data. A single “Title” column is created by default. You can rename this by hovering its name, selecting “Column settings” and then choosing “Rename”.
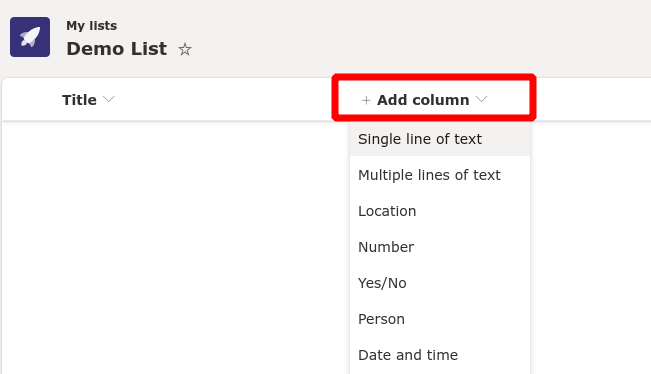
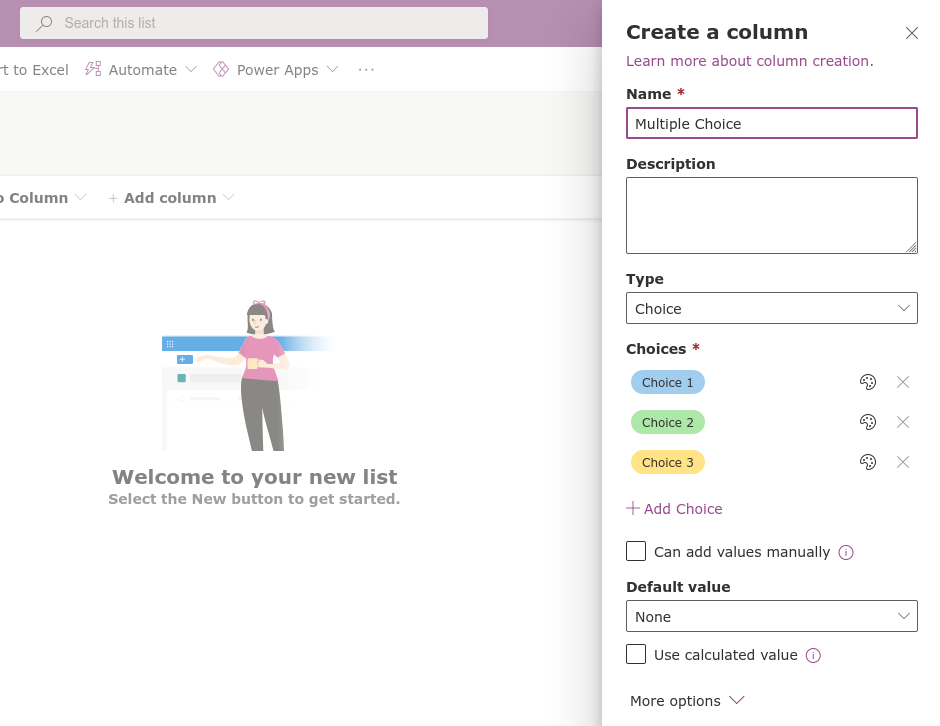
To add new columns, click the “Add column” button. You’ll need to choose a data type for the data you’ll enter in the column. A large variety of options are available. They vary from basic text to interactive elements such as a multiple choice selection.
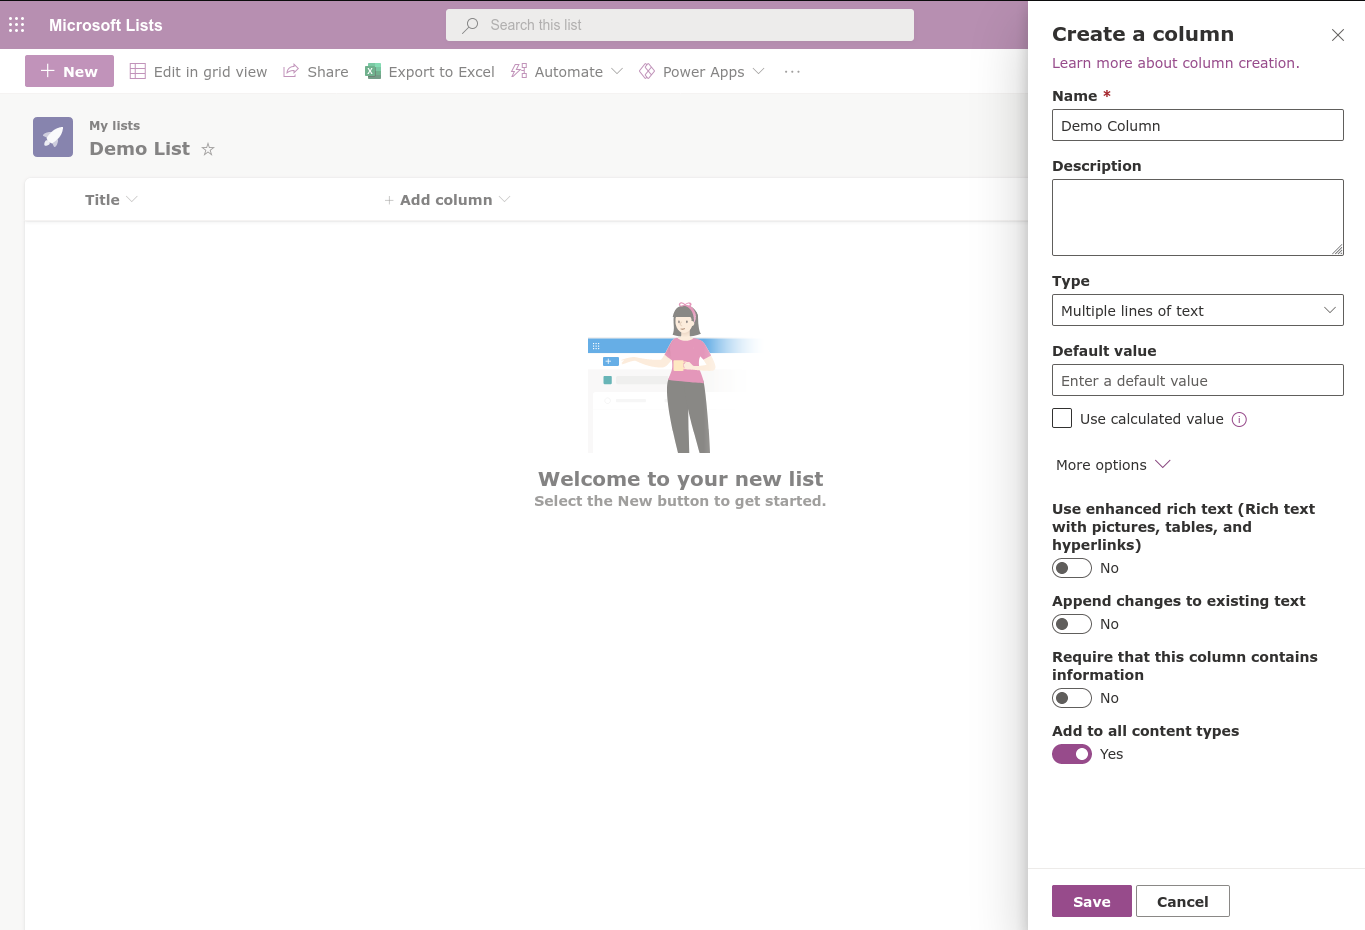
After you’ve selected a data type, a flyout pane will appear from the right. Here, you can name your column, add a description and set the default value for newly added cells. The exact options you’ll see here will vary depending on the data type you selected. There’s too many possible permutations to cover in one article – we encourage you to experiment with different data types, explore the settings which are available and evaluate the differences in how they display data.
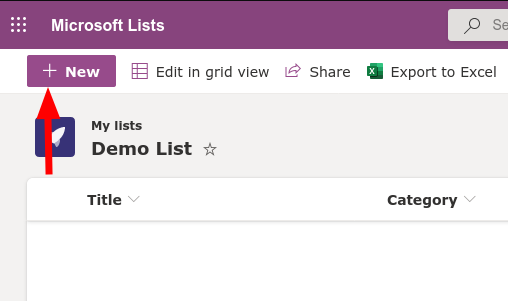
Once you’ve added some columns, you’re ready to start populating your list with data. Click the “New” button in the top-left to bring out the “New item” flyout from the right.
You’ll need to supply values for each of the columns in your list. The form fields will automatically use appropriate inputs for the data type of each column.
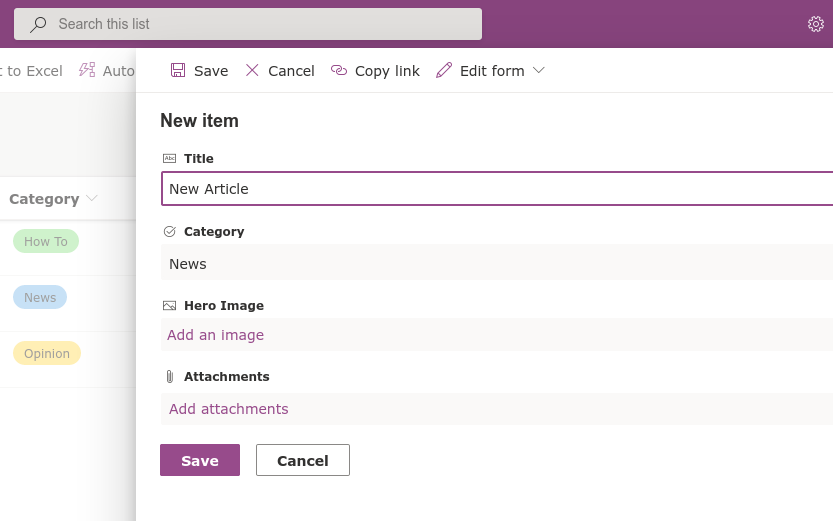
In our example, we’ve created a List which could be used to organise draft articles for OnMSFT. We write the title manually (Text column), select a Category from predefined options (Choice column) and add a thumbnail (Image column). Any item in a list can also have optional attachments associated with it.
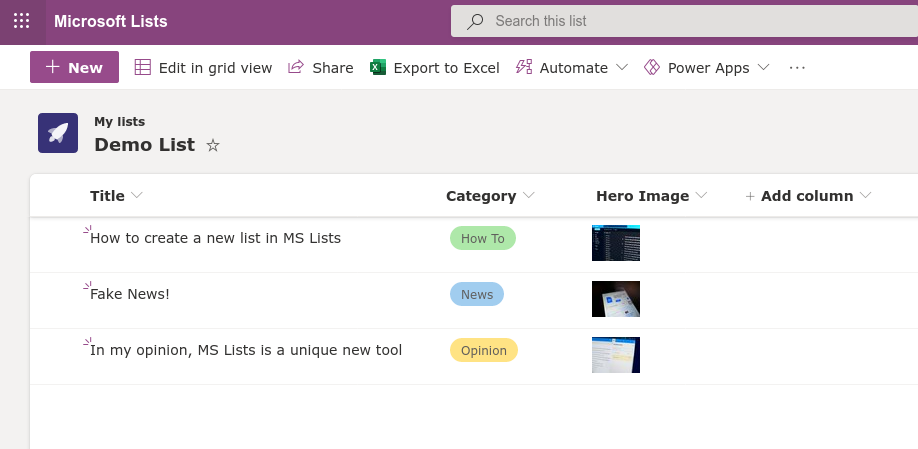
With some data in your list, you can now sit back and admire it. Lists automatically presents the data in each column using an appropriate format for the data type. This is where the real differentiation from tools like Excel occurs – although Lists requires a bit of time to setup, the result is a far more visual experience than the typical Excel spreadsheet supplies.
Lists combines the predefined structure of a database with the accessible presentation of a spreadsheet. At the same time, it offers interactive capabilities and seamless integration with services like low-code solutions such as Microsoft’s Power Automate and Power Apps. In future articles, we’ll introduce the advanced list editor which defers to SharePoint to provide even more control over how your data is stored and presented.