2 Easy Steps to Create a Restore Point in Windows 11
Restore points hold crucial files that are ideal in case any damage occurs to your system
![]() 4 min. read
4 min. read
![]() Updated on
Updated on
Share this article

Improve this guide
Read our disclosure page to find out how can you help Windows Report sustain the editorial team Read more
Key notes
- Creating Windows 11 restore points is simple, and you can do it from the System Restore app.
- You can use this feature inside Windows, but you can also restore your PC even if the operating system fails to boot.
- Read our guide to find out how to easily create a restore point for your system.
- We will also teach you how to use the restore point on your device.
Computer problems are bound to occur, and one way to fix them is by using a built-in Windows feature called System Restore.
Sometimes, to solve a certain problem, you need to pinpoint the exact cause and fix it manually, and some users may not have the necessary skills.
This is where System Restore comes in handy, and with this tool, you can restore your system to the previous state.
To do that, you just need to select a suitable restore point from the System Restore and follow the instructions on the screen. In this guide we’re going to show you everything you need to know about restore points, so let’s get started.
How does System Restore work?
System Restore is a feature that can be used to restore your PC in case any damage occurs to your system. To achieve this, it creates system snapshots called restore points.
If you encounter a problem, you can easily restore to the previous snapshot and fix any recent issues. As for restore points, they are created automatically, but you can also create them on your own.
System Restore can help you retrieve system files, installed programs, and your registry settings, allowing you to easily fix problems that have occurred after installing new software or an update.
Can I restore deleted files with System Restore?
System Restore creates only a partial backup of your system that includes your system files and applications.
Since the feature doesn’t allow you to create a full backup, it means that your files won’t be included in a snapshot, and they won’t be restored.
To sum it up, System Restore doesn’t work for deleted files, but if you want to solve this issue, we suggest that you create Windows 11 system image or use disk cloning software.
How can I create a Windows 11 restore point?
1. Make sure that System Restore is enabled
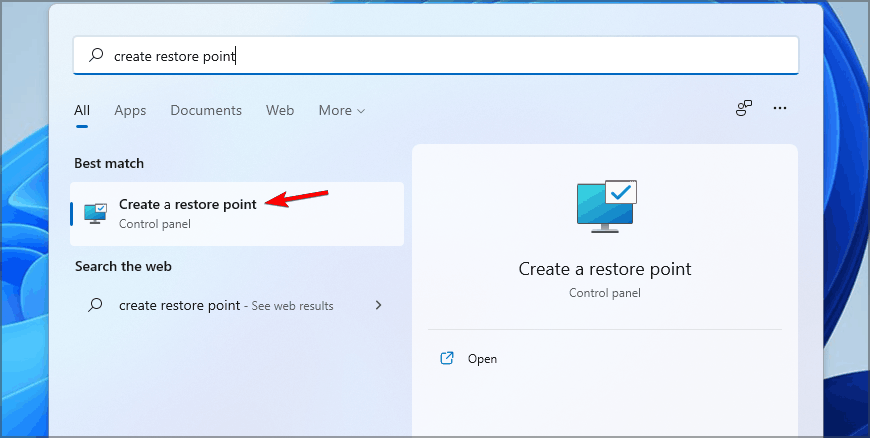
- Click the Search icon in the Taskbar.

- Type create restore point. Select Create a restore point from the list of results.

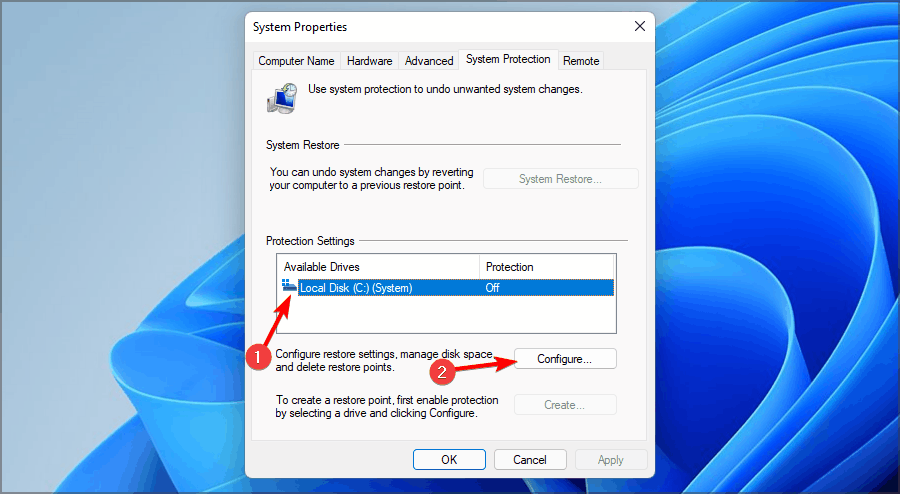
- Select the drive you wish to enable system restore for and click on Configure.

- Now select Turn on system protection. Set the Max Usage value and click on Apply and OK to save changes.


In case you can’t use the Search feature, our Search bar not working on Windows 11 guide has a couple of solutions that might help you.
2. Create a system restore point
The Windows 11 OS makes the process of creating a restore point very easy and quickly. All you need to do is navigate to the dedicated menu in Control Panel and configure it.
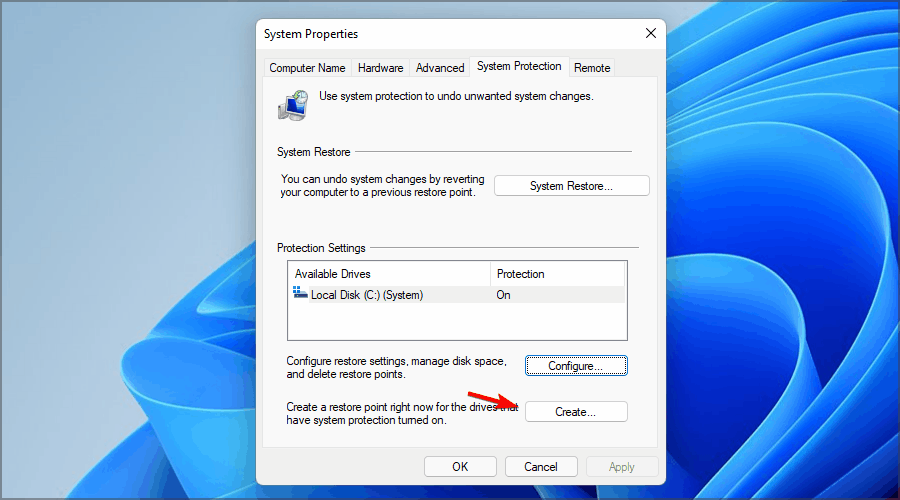
1. Click the Search icon on your Taskbar.

2. Type create a restore point and select the first result.

3. When the System Properties window opens, click on Create.
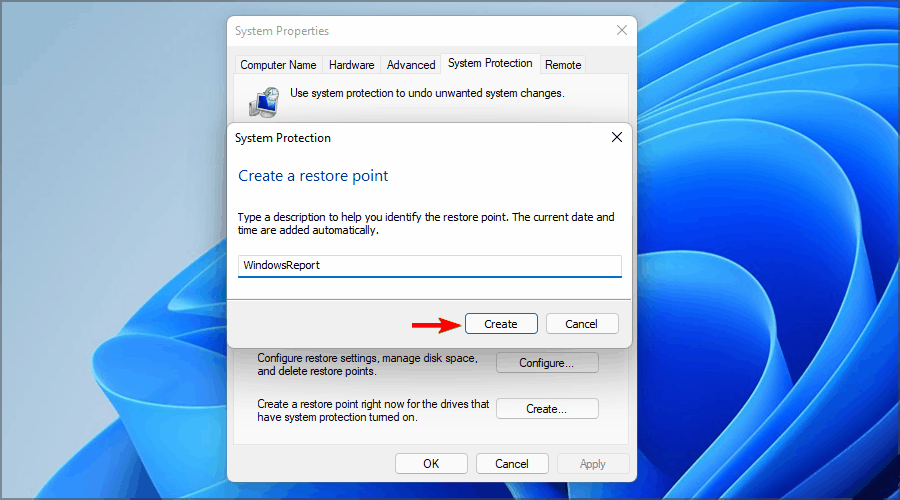
4. Enter the desired name for the restore point and then click the Create button.
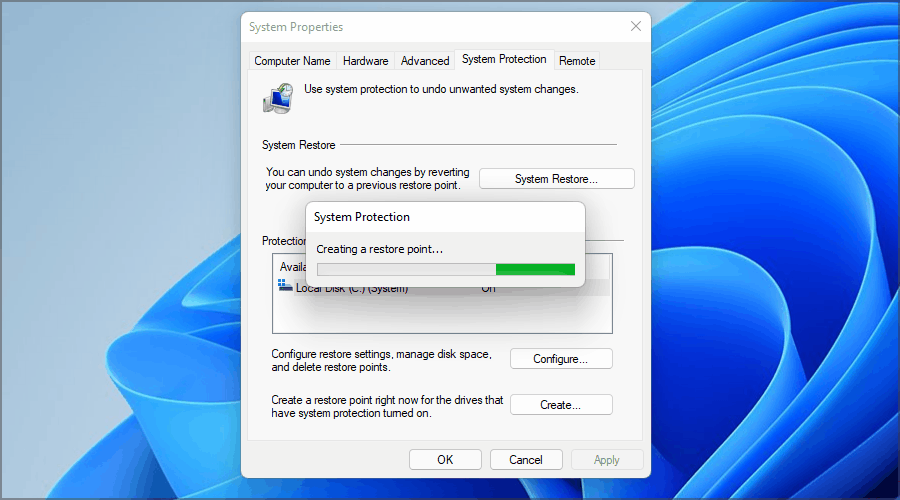
5. Wait while Windows creates the restore point.
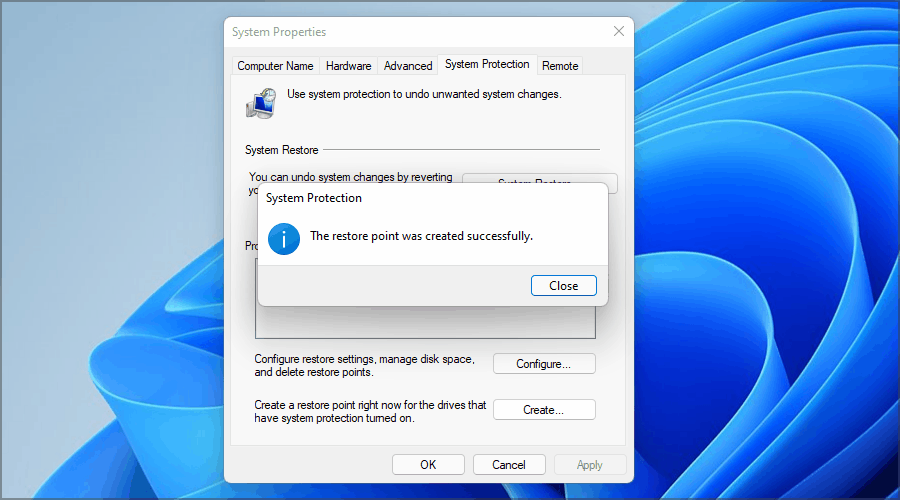
6. Once the process is done, you’ll get a confirmation message that the restore point has been created.
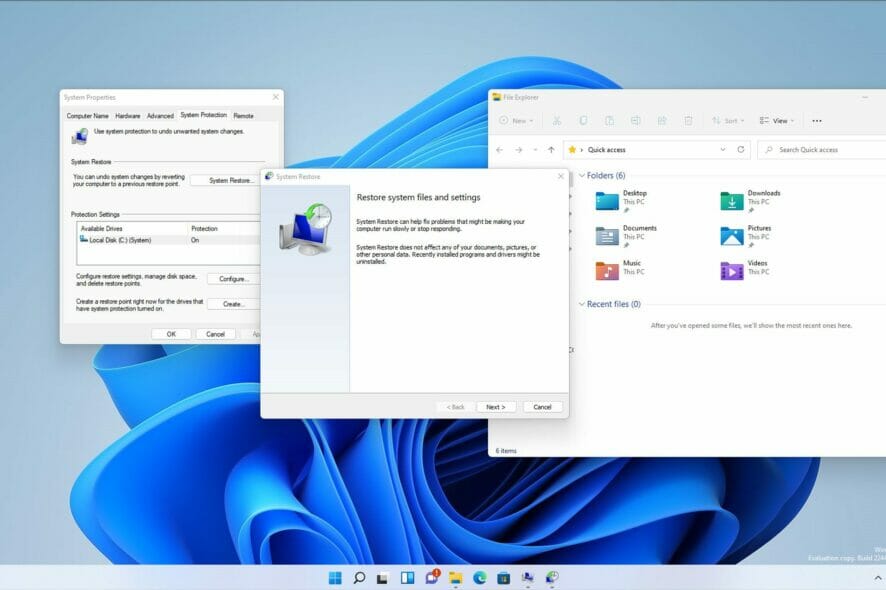
How can I restore my PC with System Restore?
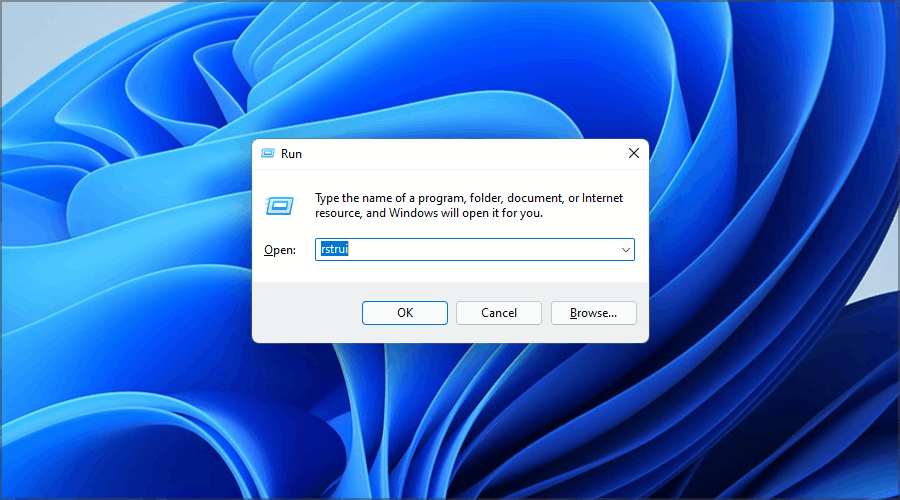
- Press Windows Key + R and enter rstui. Press Enter or click OK.
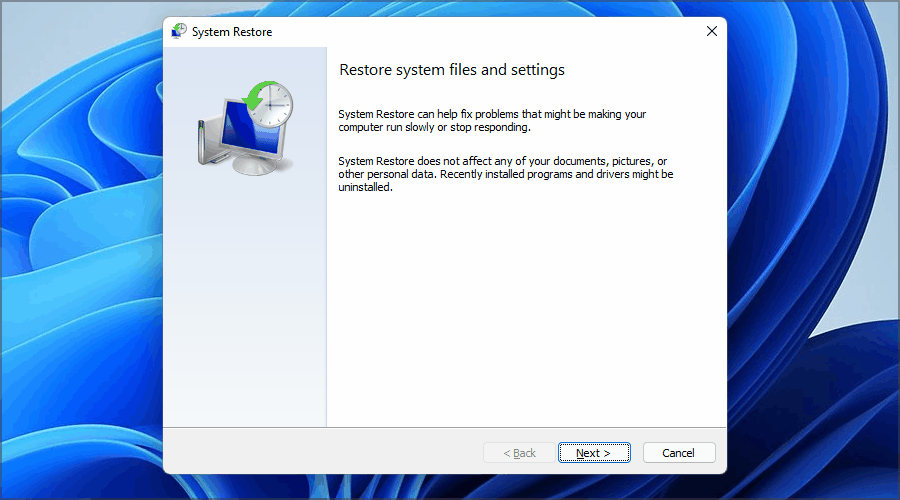
- System Restore window will now appear. Click on Next to proceed.
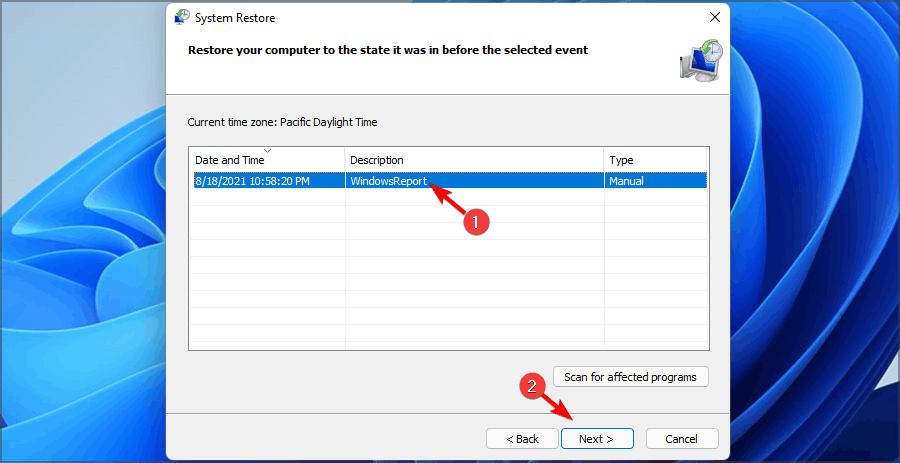
- Select the restore point you wish to revert to and click on Next.

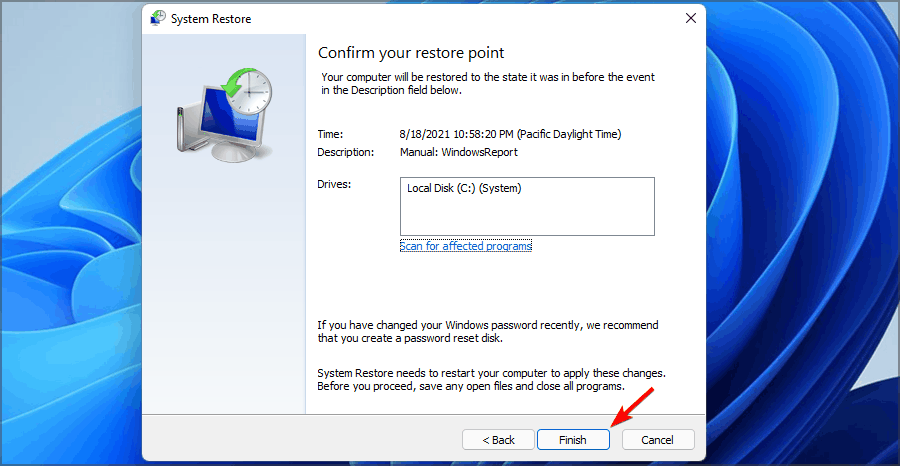
- Now click on Finish.

- Your PC will now restart and restore itself to the selected restore point.
How can I use System Restore if I can’t boot to Windows?
- Restart your PC a few times during the boot. Alternatively, on the login screen, hold the Shift key and select the Restart option.
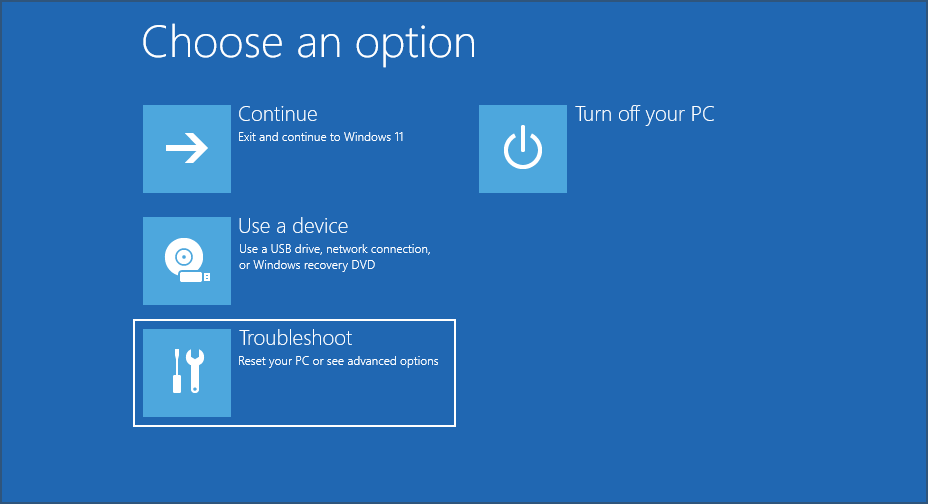
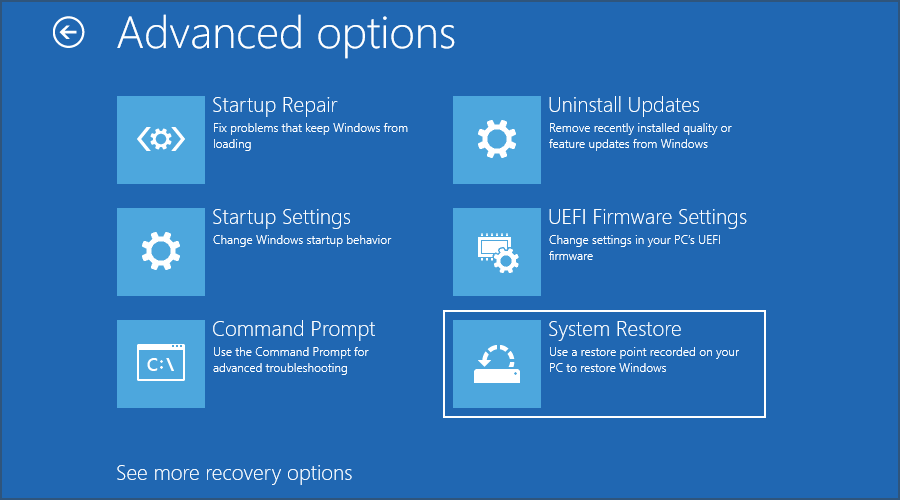
- Select Troubleshoot from the list of options.

- Now choose Advanced options.

- Select System Restore from the list of options.
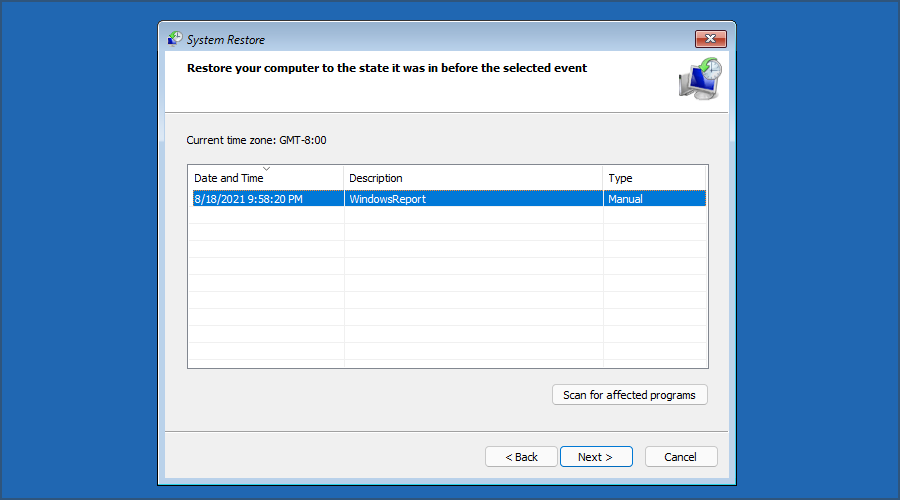
- Click Next and select your restore point.
- Click on Finish to start the restoration process.


Creating a Windows 11 restore point is simple and it only takes a minute, so be sure to create restore points regularly to avoid any serious issues.
Additionally, you can use dedicated repair software to scan your PC for potential issues such as missing DLL files, damaged registries, or malware.
Although this feature won’t fix all major problems, it’s always better to have a System Restore point ready in case any problems appear on your computer. Even more, take a look at our guide on what to do if Restore Point is not working.
You basically have to follow some general troubleshooting tips to make sure that it is properly enabled, run DISM, check your hard drives for errors, and not only.
How often are you using System Restore on your PC? Let us know in the comments section below.