Creating desktop shortcuts on Windows 11 hasn’t changed much since the instructions for Windows 10. However, there are even faster and easier ways to do it on Windows 11. We’ll walk you through all of the steps in this guide on how to create desktop shortcuts on Windows 11.
Create desktop shortcuts on Windows 11
If you want to create desktop shortcuts in Windows 11, you have several options. You can drag and drop from the Start menu, from File Explorer, your Windows 11 apps list, using the Create Shortcut Wizard, or make a Registry edit.
Let’s take a look at how to create desktop shortcuts on Windows 11.
#1 Drag and drop apps from the Start menu
Sometimes apps and files don’t work well in the Start menu and that’s why you need to create a shortcut instead. Here’s how to do it.
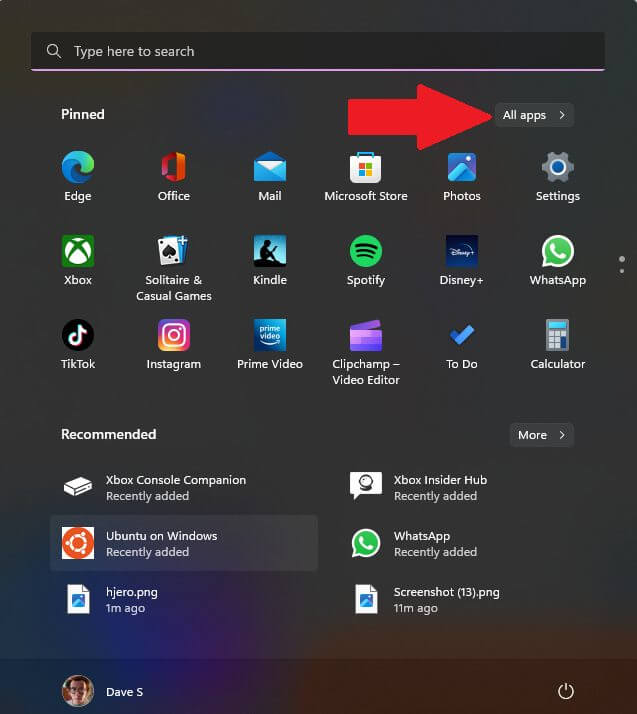
- Click Start and then click All apps. You can also locate apps using the Pinned section.

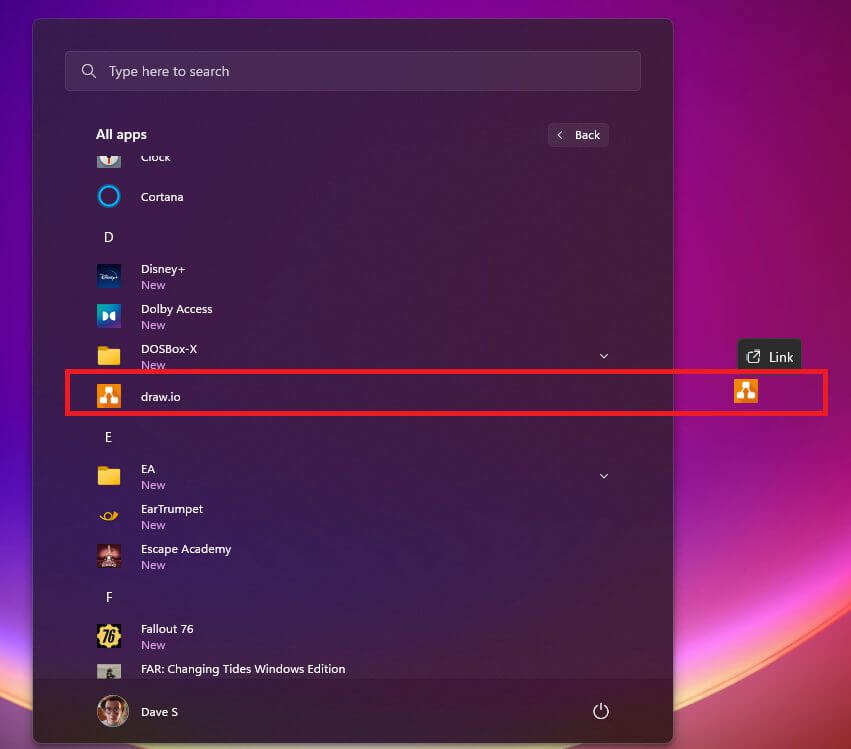
- Use your mouse to drag the app you want to use from the Start menu to the desktop. You may see a Link appear when you drag it to the desktop.

You should find the app icon on the desktop. You can drag it to a different location on your desktop or right-click any empty space on your desktop to use the Sort by option to arrange the icons.
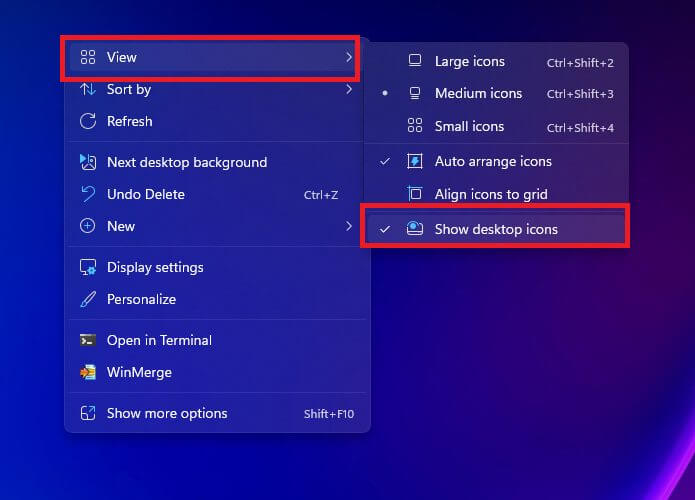
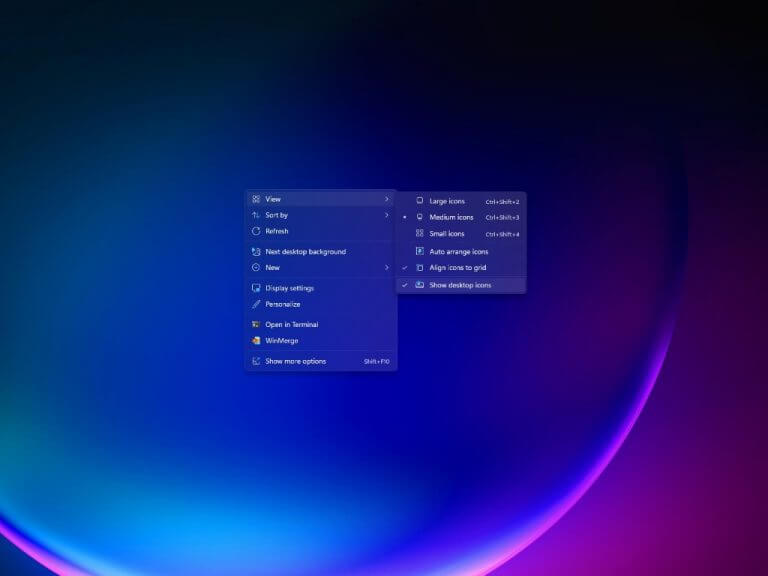
If you don’t see any desktop shortcuts on your desktop, right-click empty space on your desktop and click View, and make sure the Show desktop icons option is checked.
#2 Use Open file location in File Explorer
Another way you can create a desktop shortcut is by using File Explorer. Follow these steps:
- Click on Start or the Search icon in your taskbar and type the name of the app you want to create a desktop shortcut on your keyboard.
- Click Open file location. Alternatively, you can right-click some apps in the app list and choose the Open file location option, but this doesn’t always work as intended. It’s important to point out that some apps create desktop shortcuts automatically for you upon installation.
- Right-click the .exe file of the app you want to use, and click Show more options.
- Click the Send to option and then select Desktop (create shortcut).
#3 Applications folder in Run or Command Prompt
- Use the Windows key + R keyboard shortcut to open Run and type:
explorer shell:AppsFolder. Alternatively, you can open a Command Prompt (run as administrator), and use the same command. - Right-click the app you want and click Create shortcut.
Check your desktop and the app shortcut you just created should be there.
#4 Create Shortcut Wizard
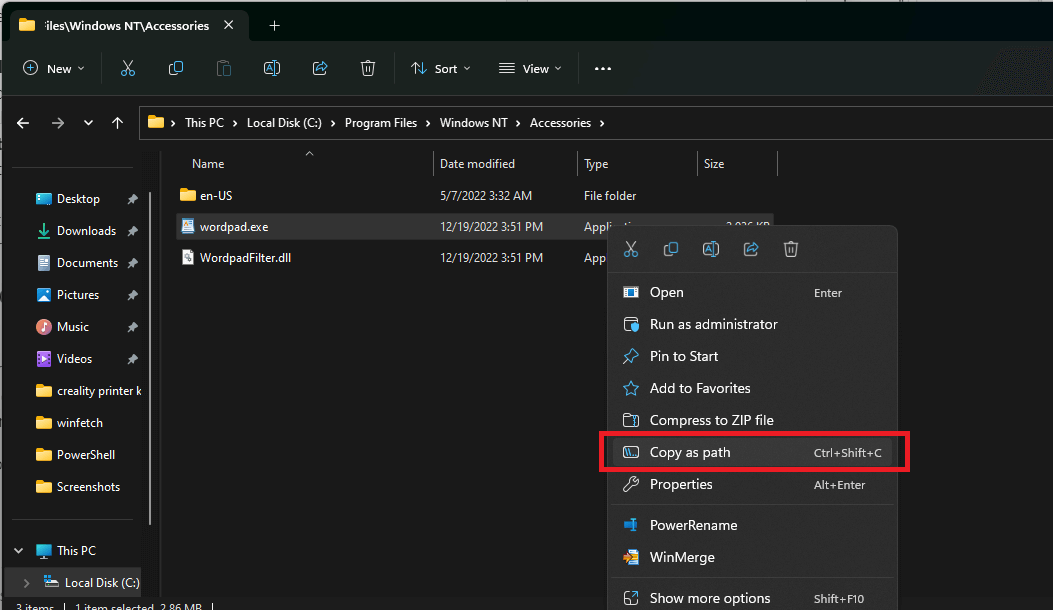
- Right-click on the app you want to create a desktop shortcut for and click Copy as path (Ctrl + Shift + C).

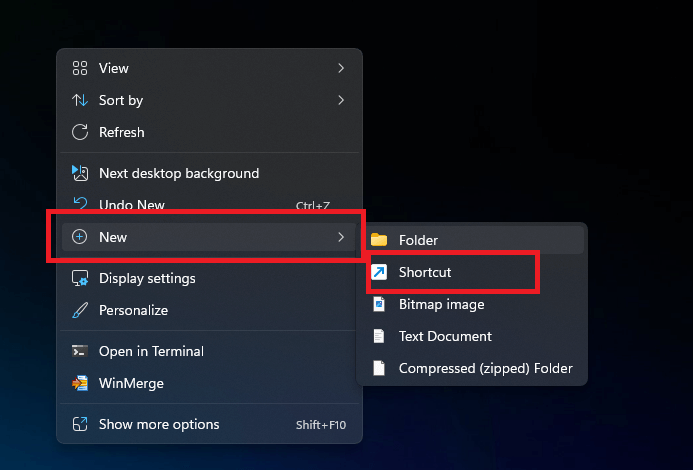
- Go to your Windows 11 desktop and right-click on any empty space and select New. Select Shortcut from the New menu.

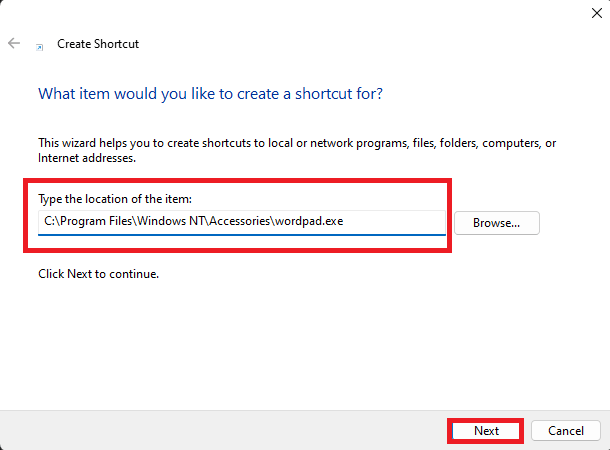
- Paste the copied app path in the Type the location of the item section and click Next.

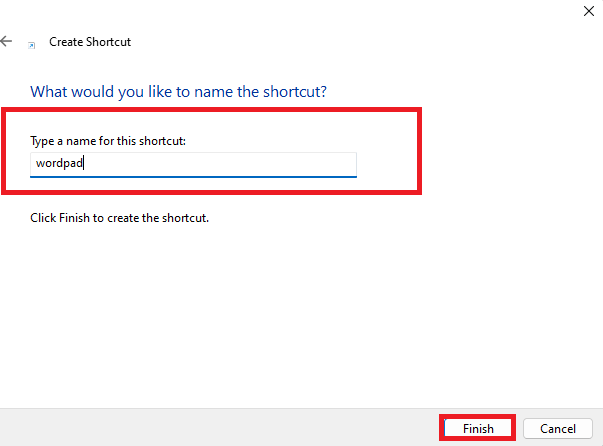
- Use a custom name in the Type a name for this shortcut field and click Finish.

The app you just created will appear on your desktop.
#5 Make an edit in the Registry Editor
If you run into any problems using any of the options above, you can use one last resort and make an edit to the Windows Registry. But, just remember to back up your system before you make any edits in the Registry. If you don’t back up your machine, there could be serious consequences.
Just as you created a desktop shortcut using the Create Shortcut Wizard, it’s important that you know the app location path that you want to create a desktop shortcut for as you will need this information to create a desktop shortcut using the Registry Editor.
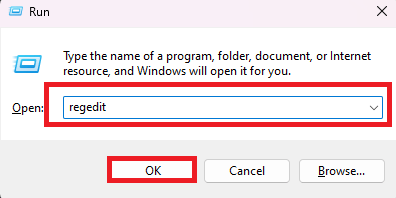
- Open the Registry Editor by using the Windows key + R keyboard shortcut to open Run.
- Type
regeditand click OK.
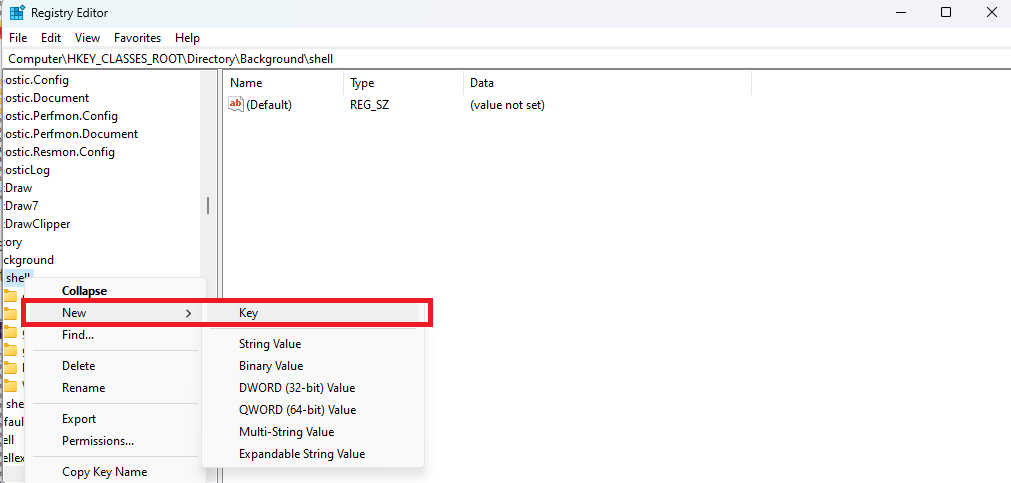
- In the Registry Editor, navigate to the following path:
Computer\HKEY_CLASSES_ROOT\Directory\Background\shell - Right-click on
shell, click New > Key to create a new key.
- Rename the new Key you just created with the application name you want to use for the desktop shortcut.
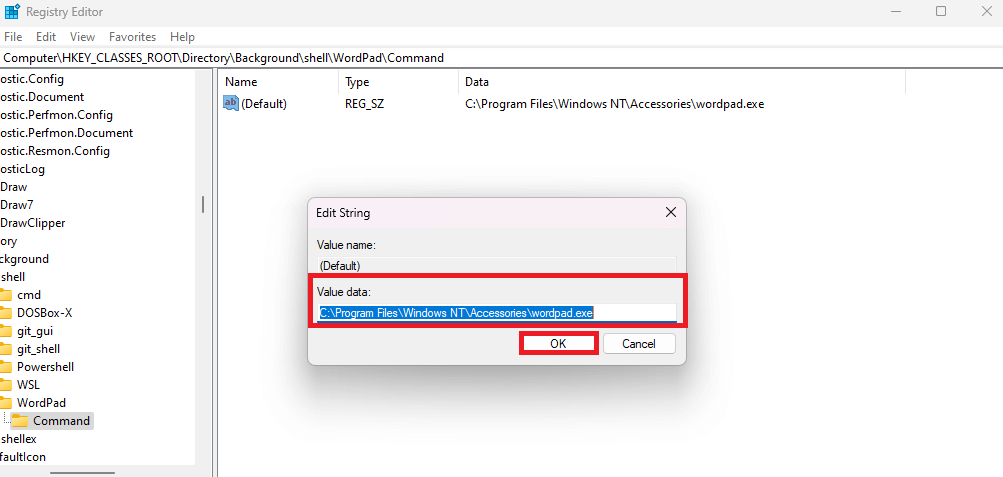
- Right-click the new key you just created and click New > Key again and rename the new key
Command. - Then open File Explorer and copy the app path as described in the 4th method on this list.
- Switch back to the Registry Editor and click on the
Commandkey and double-click the (Default) value and copy the app path in the Value data field and click OK.
The desktop shortcut will appear in the right-click context menu of the desktop and can be used whenever needed. 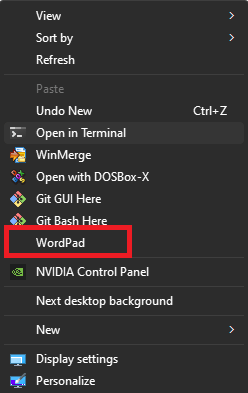
If you do not get an icon for a particular desktop shortcut, be sure to check out our guide on how to customize icons on Windows 10 and Windows 11. Tell us in the comment section which method worked best to make desktop shortcuts on Windows 11.