
The Windows operating system often comes with tons of fonts to choose from: Arial, Calibri, Corbel, Georgia, and so on; the list is endless. In fact, Microsoft has a complete font list on their website that you’re free to have a look at.
However, for many people, the default designs aren’t enough. Or perhaps they’re simply used to a font that isn’t available by default. Maybe you’re one of those folks as well. Thankfully, you don’t need to settle, as Microsoft has made it possible to install new fonts from third-party vendors.
Let’s learn how you can get started.
How to install new fonts in Windows 10 or Windows 11
Generally, there are two ways you can go about this. Either you can install the fonts through the Microsoft Store, or you can get them from third-party sources, often as a .zip file, and then install them on your PC.
To install the fonts from Microsoft Store, follow the steps below:
- Go to the Start menu search bar, type in ‘settings,’ and select the best match.
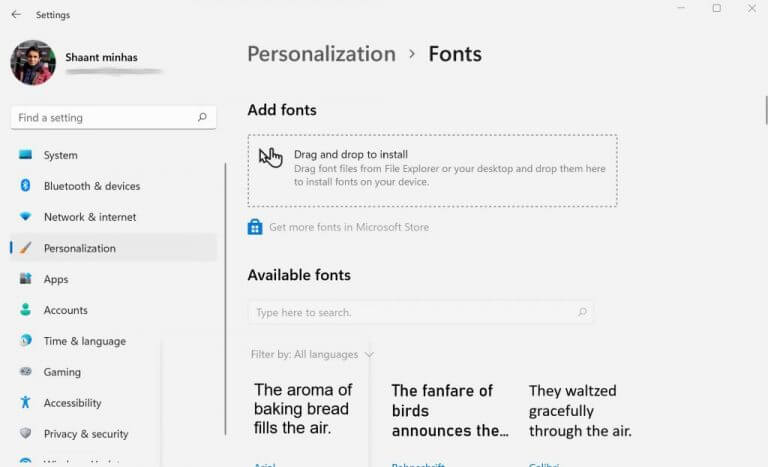
- From the Settings menu, select Personalization > Get more fonts in Microsoft Store.
- You’ll see a huge list of fonts available. Pick a specific font you’d like to install and click on Get.
As soon as you do this, the new font will be installed on your computer.
Install new fonts in Windows by third-party sources
You can also get new fonts through third-party sources. For instance, some of the most popular resources are Google Fonts and DaFonts.
As an example, in this article we’ll use the Noto Fonts from Google Font here. The first thing we’ve to do is install the font files. When you download the desired font family, it’ll most likely be in the .zip format. So, the first thing you need to do is completely extract your font files. To do that, right-click on the .zip file and select Extract All…
Now that you’ve installed the font, go to the font’s folder, right-click on it and select Show more options > Install.
Alternatively, you can go to the Settings menu and select Personalization > Fonts. Now drag the newly uncompressed font file to the specified area in Settings, i.e., right under the Add fonts section.
And, finally, there’s a third way, in which you can simply install the fonts manually in your PC. In this method, all you’ve to do is copy and paste the font file to C:\Windows\Fonts. You can do this for either a single or even multiple font files, and your font files will be installed.
Installing new font files in Windows 10 or Windows 11
Grabbing new fonts for your PC is one of the many ways to shake up the monotony of using the same PC day in, day out. There are, of course, other ways to make things more exciting. Tweaking your Windows theme, for instance, can play a big role in that, by helping you improve the UI of your PC in general. And then, we’ve also covered the best Windows 11 personalization settings in one of our previous piece, a must-read for anyone thinking of customizing their Windows 11 experience.