How to manage Virtual desktop in Windows 10
![]() 3 min. read
3 min. read
![]() Updated on
Updated on
Share this article

Improve this guide
Read our disclosure page to find out how can you help Windows Report sustain the editorial team Read more
Key notes
- Windows 10 Virtual desktop allows you to expand your desktop, organize groups of tasks, and switch between them.
- If you want to access the Virtual Desktop, you need to click on the Task View button (the old Timeline View). You can also use the Windows key + Tab to do that.
- To learn more about the virtual desktop concept, you can go to our Virtual Desktop section.
- We wrote so many guides and tutorials about the digital world! Check it out in our Tech Tutorials Hub.
Windows 10 Virtual desktop allows you to expand your desktop, organize groups of tasks, and switch between them.
How can I manage the Virtual desktop in Windows 10?
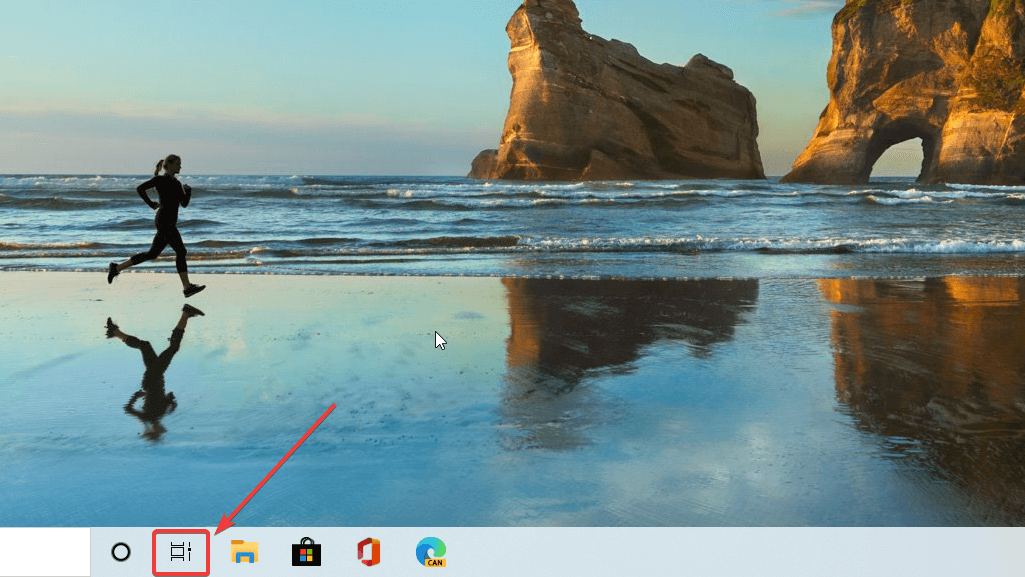
First of all, if you want to access the Virtual Desktop, you need to click on the Task View button (the old Timeline View). You can also use the Windows key + Tab to do that.
After pressing it, you will see the timeline of your tasks in the lower part. In the upper part, you will see the button for adding a new desktop. Also, if you click on the text above the desktop representation, you will be able to rename it.
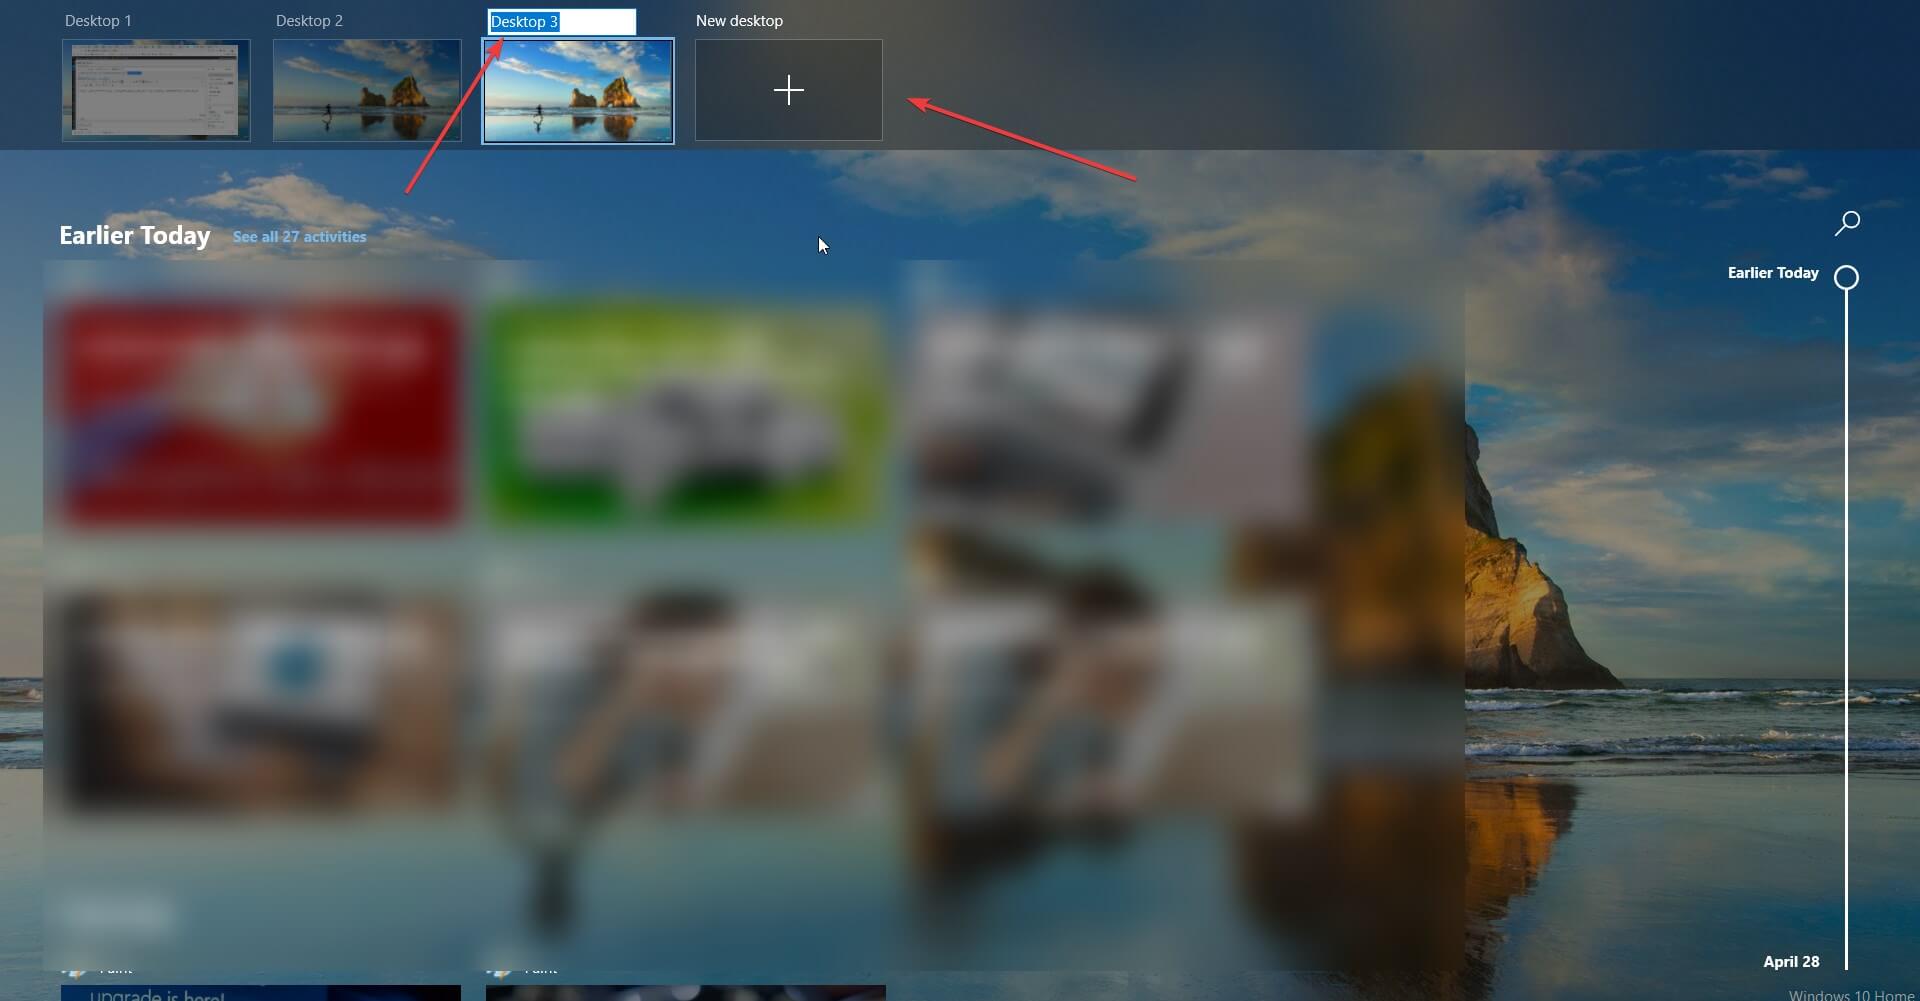
Of course, if you hover with your cursor over a desktop you will also see an X button to delete that desktop. You can set them up and rename them how you please in order to organize your work better.
Closing applications before deleting the desktop
Be careful because if you delete a desktop before closing the applications in it, all of them will go automatically to the main desktop. So make sure you close any open applications from a desktop before closing it.
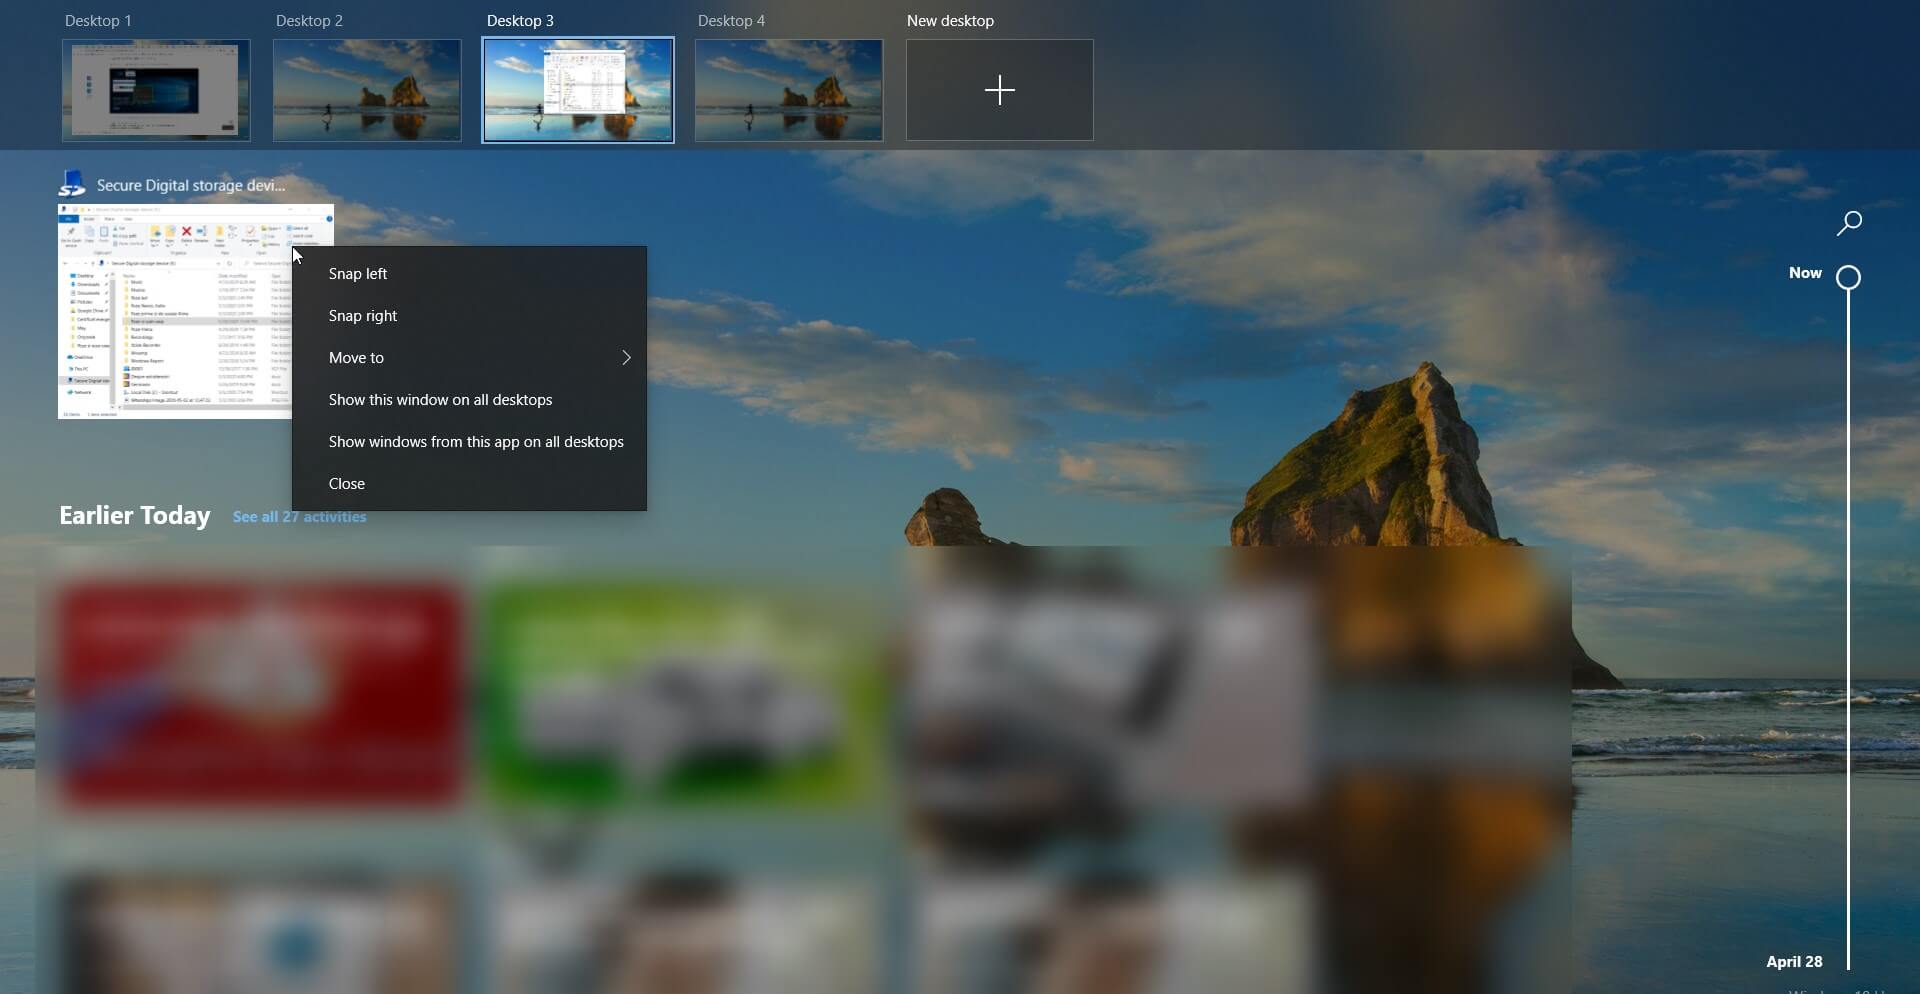
Moving applications within desktops
If you right-click on an application while you’re in the virtual desktop view, you will be able to move it to another virtual desktop, snap it on the left or right sides of the screen, show it lol all desktops or show windows from the app on all desktops.
Virtual desktop shortcuts
If you press the Windows key + Ctrl + Left or Right arrows, you will be able to move quickly between the virtual desktops.
Pressing the Windows key + Ctrl + D you will immediately create a new virtual desktop without going through the Task View.
The classic Alt + Tab will show you all the current applications opened individually. If you keep pressing Tab while you keep holding Alt, you will switch between them.
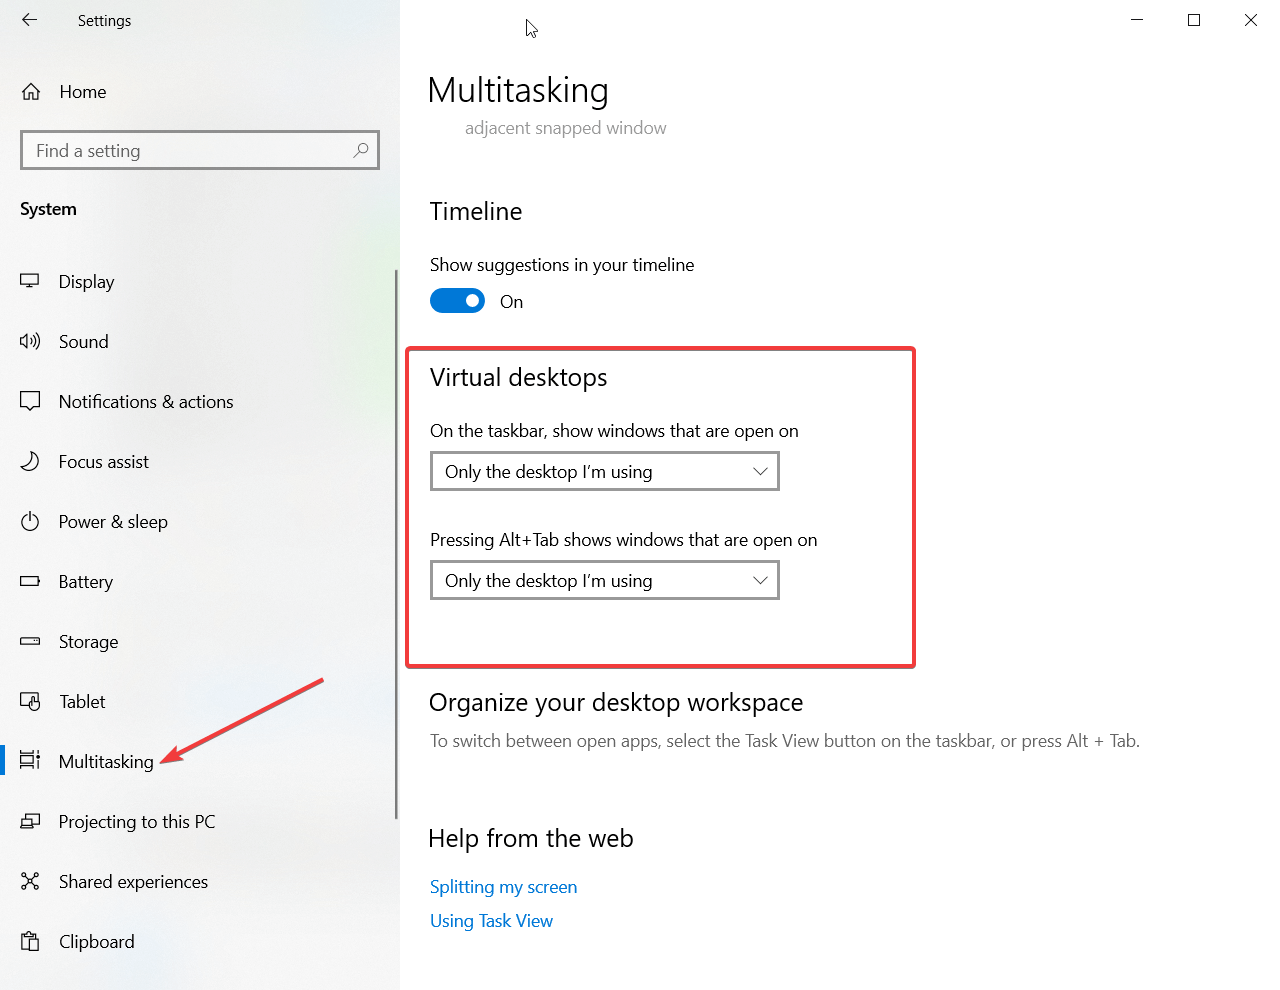
Virtual desktop settings
There are also two more settings that you can tweak.
- Go to Settings (Windows key + I) and click on Systems, select Multitasking, then scroll down until you see Virtual desktops.

- By default, on the taskbar, you will only see the apps opened on that desktop. you can switch that to show up on all desktops.
- When you hit the Alt + Tab shortcut you will only toggle through the apps opened in the active desktop. You can change that to toggle through all the open apps from all desktops.
Do you like using Virtual desktop? What do you think about it? Let us know how you feel about it in the comments.
[wl_navigator]