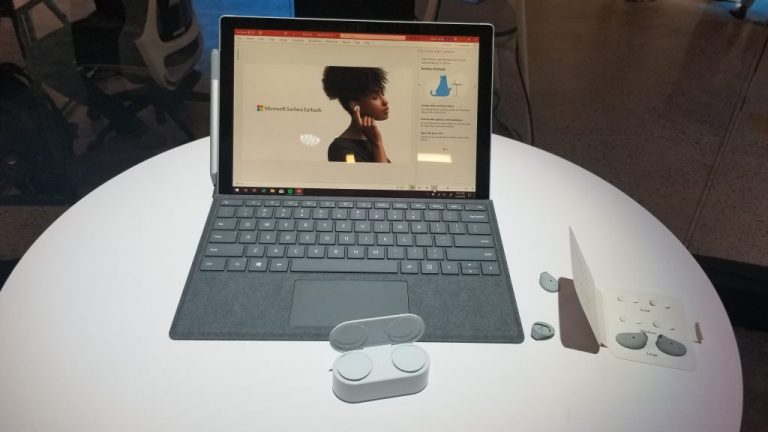
One of the features that make Microsoft’s new Surface Earbuds quite unique is their integration with the company’s Microsoft 365 service. With a valid subscription, and when the Earbuds are paired over Bluetooth LE, you can use the Earbuds to dictate documents and emails, live caption PowerPoints, and even play your emails on iOS devices. If you just purchased your own Surface Earbuds, here’s a look at how that works and how you can get started with it all.
Dictation

With two microphones per earbud, the Surface Earbuds are perfect for skipping your computer’s in-built microphone and using your new Earbuds for some higher quality voice dictation. You can set this up in Microsoft Word and Outlook by first making sure you’ve paired your Earbuds with your PC with Bluetooth LE.
If you haven’t already paired, to get started, open the case, put your Earbuds in the case and press the button on the bottom for 5 seconds to put the Earbuds in pairing mode. You should then head into Bluetooth settings in Windows 10, and search for your Headphones and pair to it. If your PC is compatible, you’ll also see a notification appear on your screen as soon as the Earbuds enter pairing mode, allowing you to pair without having to go through settings.
Once paired, you can now head to the Office app that you want to use dictation with. Head up to the top Home bar and then choose Dictate from the list. You might be prompted to enable the microphone permissions. When done, a microphone icon will appear, you’ll want to wait for it to turn on before you start speaking. You’ll be able to insert punctuation as you speak by saying them explicitly. When done, you can exit dictation with the close button in the toolbar.
Live Caption in PowerPoints

Just like using the Earbuds for dictation, getting Live Captions in PowerPoints is quite easy, too. When enabled, you’ll be able to have captions appear on the screen as you talk during your presentation. There’s also a portion to translate the captions in real-time to another language, too, which we will discuss later.
To get started with Live Captions, you’ll want to first open the PowerPoint presentation. Then, select Slide Show and then head over to From Beginning. From there, you can then right-click anywhere in the slide and choose the Start Subtitles option.
Just to be safe, before speaking, you’ll also want to make sure that you’ve chosen the Earbuds as your Microphone. To check this, right-click again on the slide and choose Subtitle Settings and then choose More Settings. In captions & Subtitles, for the microphone, you’ll want to choose Headset (Surface Earbuds Hands-Free AG Audio). You can then begin the presentation.
If you want PowerPoint to translate your voice while speaking into a different language, you’ll want to look at the Slide Show ribbon tab and select Subtitle Settings. Check to make sure that Spoken Language is set to the one you’re speaking, and then check Subtitle Language to the one you want to appear in translations. There are also additional controls under the Subtitle Settings menu which will help you set the desired position for captions or subtitles. Typically it’ll appear under the bottom side of the screen by default. Also, keep in mind that PowerPoint for Microsoft 365 can display captions or subtitles on-screen in any of more than 60 languages. You can see the full list at the bottom of this Microsoft Support page.
Play your emails aloud in Outlook on iOS
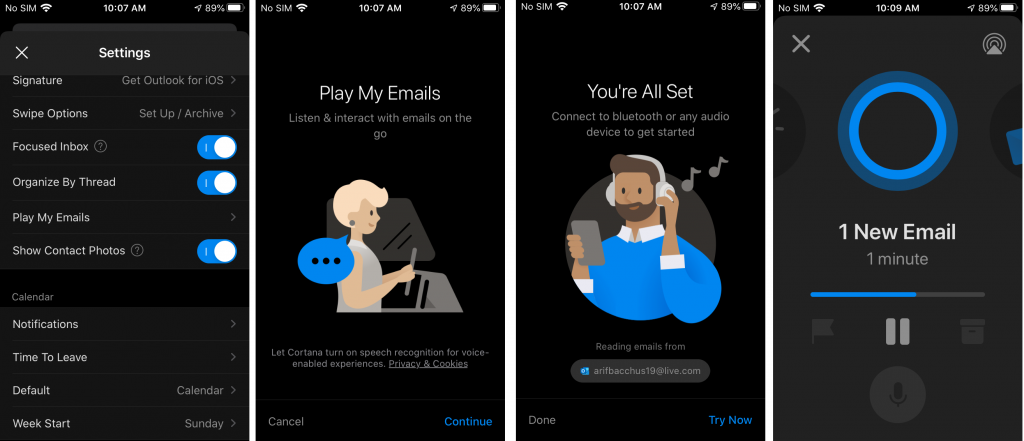
So far the two features we’ve described only work on Windows 10, but, if you’ve got yourself an iOS device, you also have access to a unique feature for your new Surface Earbuds. You can use them with your iPhone or iPad to manage your emails when on the go and reply to messages, delete them, and more.
As usual, you can get started by connecting your Earbuds to the iPhone over Bluetooth. Do this by putting your Earbuds back in the case, and press and hold the button on the bottom of the case for 5 seconds. When done, head into Settings, on your iOS device and then tap on Bluetooth. Turn Bluetooth on if it isn’t already, and then tap on Surface Earbuds. You’ll be connected now.
Pairing done, head into the Outlook app and swipe from the left side of the screen. Select Settings and then tap on Play my Emails. You’ll then want to grant Outlook the permissions to use your Microphone, and then finish setting it up. From now on, you can Play your Emails by swiping left and tapping the play button in the sidebar.
While your emails are playing, you can use some of these gestures to control them. Double-tap on either earbud to stop or play messages. To go to the next message, swipe forward on the left earbud. To go to the previous message, swipe backward on the left earbud. Finally, to adjust the volume, on the right earbud, swipe up on increase volume, and swipe down to decrease volume.
Are you enjoying Surface Earbuds?
With this integration with Microsoft 365, the Surface Earbuds are more productivity-centered than any other earbud in the market. Do you find these features useful? Or do you just use your Earbuds for music and conference calls? Let us know in the comments below and stay tuned to OnMSFT for our full Surface Earbuds review in the coming days.