How to use OneNote 2016 with Outlook for your productivity advantage
![]() 6 min. read
6 min. read
![]() Published on
Published on
Share this article

Improve this guide
Read our disclosure page to find out how can you help Windows Report sustain the editorial team Read more
If you’re using OneNote 2016, there is one advantage to the desktop app compared to the counterpart available on the Microsoft Store or MacOS App Store. As you’re writing emails or other things on Outlook, you can turn them around and put them into your OneNote notebook. In this guide, we’ll show you how you can do that, and some more so you can use the Microsoft note-tasking app to your productivity advantage.
How to make sure the OneNote 2016 add-in is active in Outlook
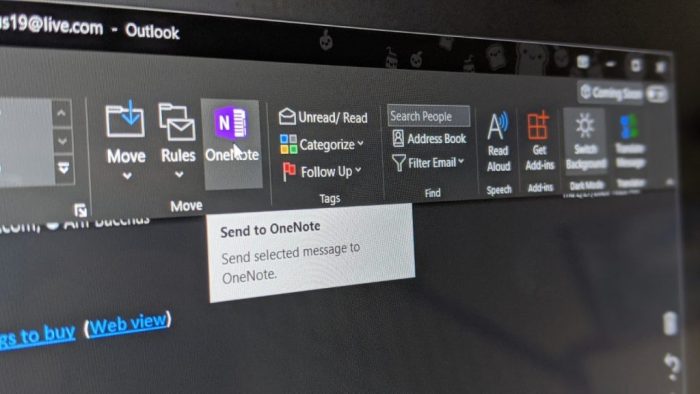
To begin, you’ll want to sure that the OneNote add-in is active in Outlook. If it is active, you should see a OneNote icon in the Home tab in Outlook right under Move. This is typically on by default, but if it is not, you might need to enable it in the Outlook settings. Here’s how.
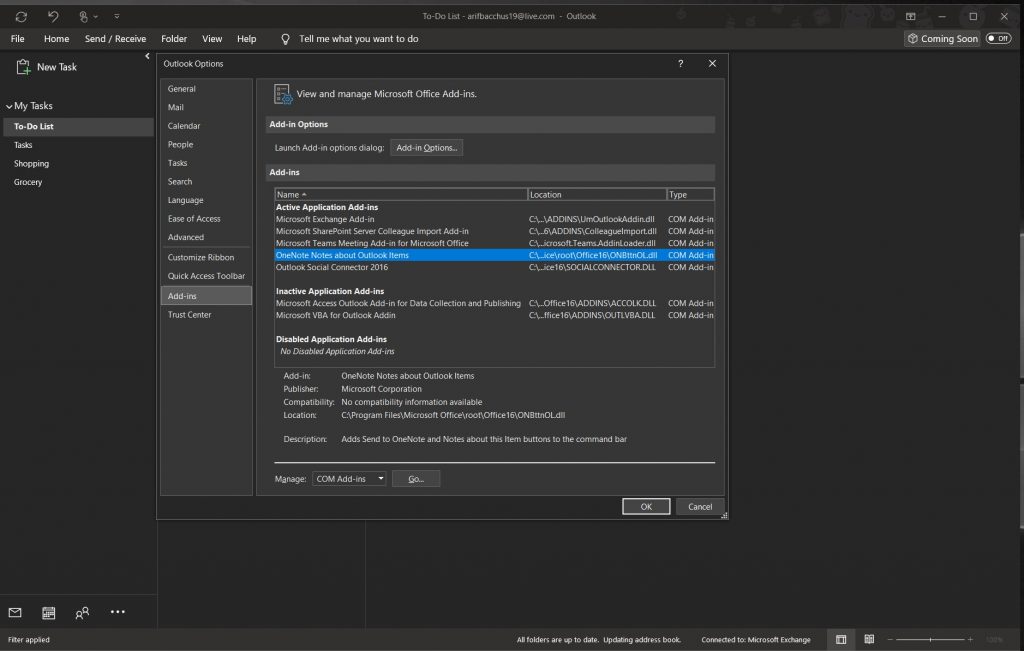
- Click the File tab
- Click Options to the left
- Click Add-ins
- Click Manage Com Add-ins on the bottom of the page. Then, click Go.
- Make sure that the box for OneNote Notes about Outlook Items is checked and click OK.
Once enabled, you are good to go. We’ll be showing you three things in this guide. In the first part, we’ll look at how to send an Outlook email to OneNote 2016. Then, we’ll show you how you can how to send meetings to OneNote 2016, and take notes that you can send out to everyone else. Finally, we’ll give a look at how you can use OneNote to add a new task to your Outlook Tasks list. Let’s dig in!
How to send your Outlook item to OneNote 2016
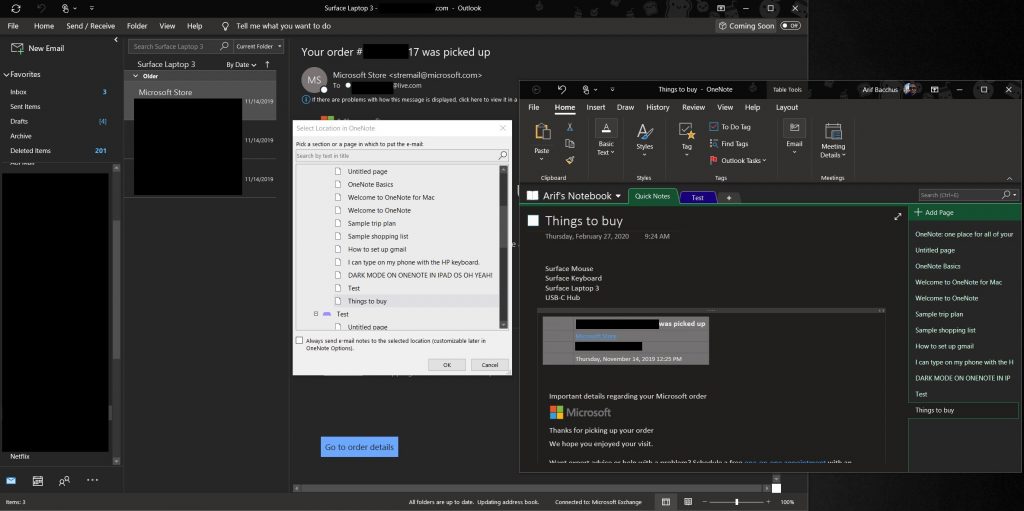
Now that the OneNote add-in is active, you will be able to send the email that you’ve worked in Outlook to OneNote. Doing this is a quick and easy process. It might even help you be more productive, as you’ll have a copy of the email handy in your OneNote Notebook during a meeting where you typically might take notes and mark up certain items. You also can use this method as a way of backing and saving up a copy of your emails in your OneNote Notebook.
To get started, all you need to do is open an email that you want to send to OneNote. After that, click the Home tab and choose OneNote under the Move section. You should then see a pop-up asking you where to send it. Choose the specific Notebook, and then click OK. Once you do that, the email will automatically be inserted into the OneNote notebook you selected. OneNote 2016 will also open up, and you’ll be able to peek at the email in your Notebook.
How to send an Outlook meeting to OneNote 2016
Sending emails to OneNote is just the start. You also can add a meeting to OneNote, too. This will help you save time, and you’ll be able to connect a meeting you’ve got on your calendar, take notes, and email those notes to the other people in the meeting, all at the same time. Here’s how.
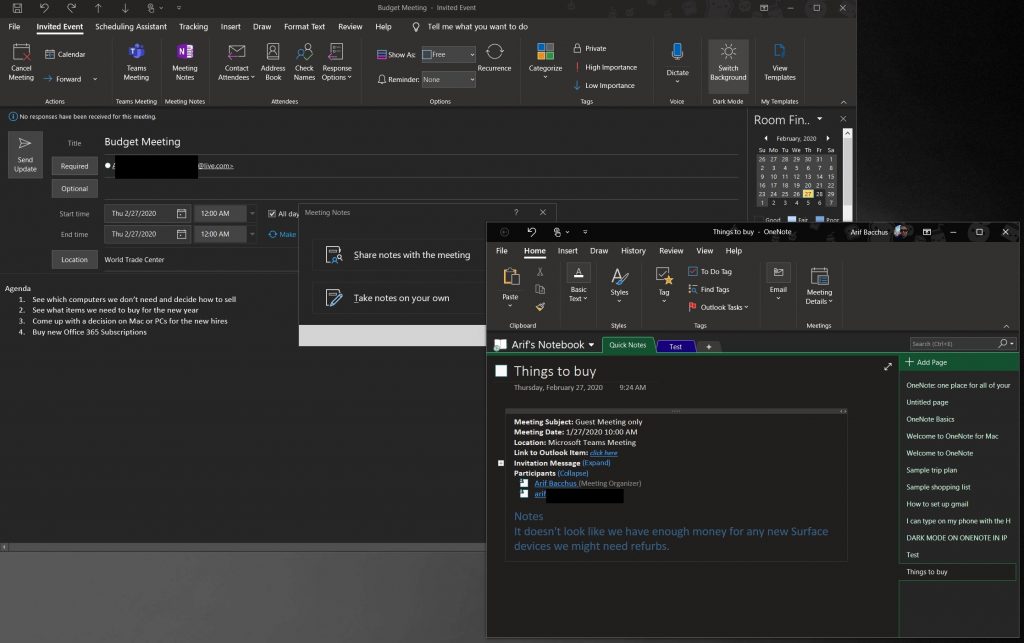
To begin, you’ll want to find the meeting that you want to add to OneNote. Open your calendar in Outlook, and double click it to open the meeting, and check the Invited Event window. You should see an option for OneNote Meeting Notes under the Meeting tab.
You’ll want to click this and then choose one of the two options: Share notes with the meeting or Take notes on your own. To share notes with the meeting, you must have a shared OneNote notebook already set up. If you choose the take notes on your own option, these notes will only exist in your private notebook until you share them through email. This is the option we use.
Once you choose your option, you’ll be prompted to choose which Notebook you want the meeting notes to open in. Choose one, and then click OK. You should then enter your notes below where it says Notes. When done, you’ll want to click the Email Page button under the Email section of the Ribbon. This will then send you back to Outlook, where you’ll see a traditional email that has meeting information and attendees at the top and your freshly added notes at the bottom.
How to create Outlook tasks in OneNote
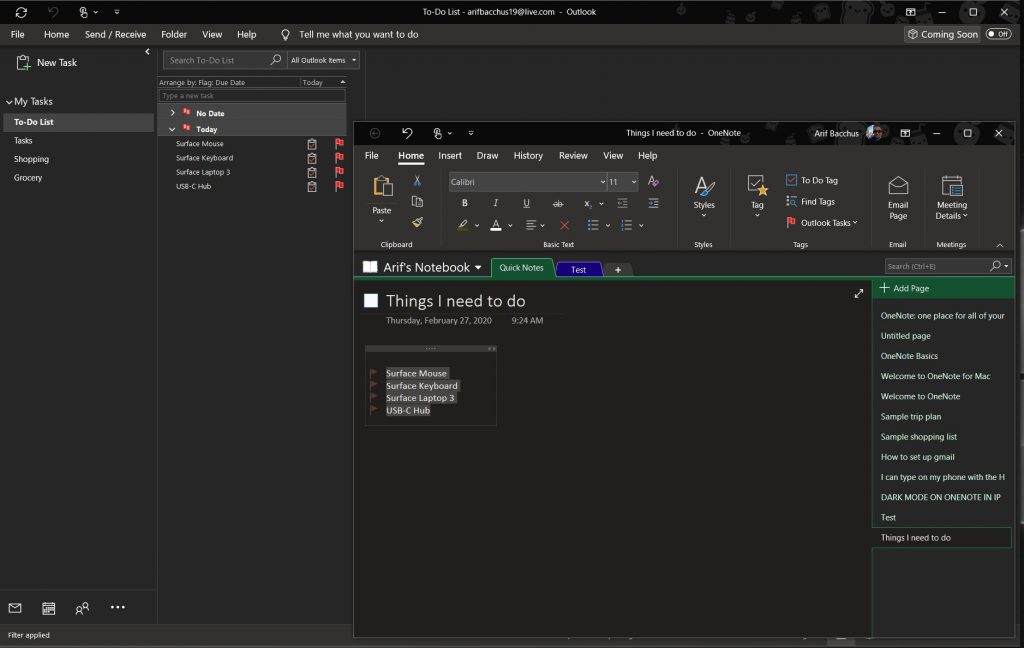
Creating Outlook Tasks in OneNote 2016 is the simplest task of them all (no pun intended.) To get started with this, you’ll want to start a new note in OneNote. You’ll want to make sure, though, that you choose the To Do Tag option from the Tags section of the Home tab.
Once done, you can create a list of items as usual. When the list is complete, you’ll want to highlight everything, and head back to the Home tab. Look for the option that says Outlook Tasks and then choose it. You can then pick a day for the task. As a reminder, you always can delete the task by highlighting everything, going back to this menu, and choosing Delete Outlook Task.
Heading back into Outlook, you can see the task you just created in Outlook by heading to the navigation bar in the bottom right corner of the screen and clicking the . . . button. An option for Tasks should then appear. Click it, and you’ll see your task! Alternatively, you can also see the task by highlighting it in OneNote 2016 and clicking Open Task in Outlook. This will also let you edit it to change the date or add more details.
How do you use OneNote 2016?
These are the top three ways to use OneNote 2016 to your own productivity advantage. Although the UWP version of OneNote is the way to go these days, OneNote 2016 obviously has the most links to Outlook and the rest of Office 365. It isn’t going anywhere, and Microsoft will be merging the code bases over time, with extended support through 2025. How do you use OneNote 2016? Let us know in the comments below.