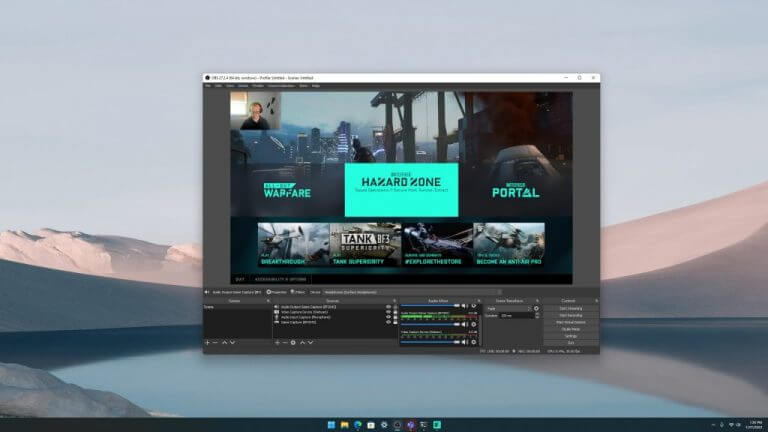
OBS (Open Broadcaster Software) Studio is free and open-source software for video recording and live streaming on Windows 11, Mac, or Linux.
Just like the Xbox Game Bar, OBS Studio can record and live stream your favorite video games on Xbox Game Pass, capture a specific window on your desktop, or capture and broadcast everything as it appears on your PC’s desktop display.
OBS will work fine alongside the Xbox Game Bar, but if you want to remove Game Bar from your system, check out our post on how to do just that.
Download and install OBS Studio
Instead of Microsoft making the decision for you with the Xbox Game Bar, you can choose what you want to record and capture with OBS instead. You have a few options to download it, including:
According to the quick start guide, first-time users should run the auto-configuration wizard for a faster setup experience. The first time you launch it, the auto-configuration wizard will automatically open.
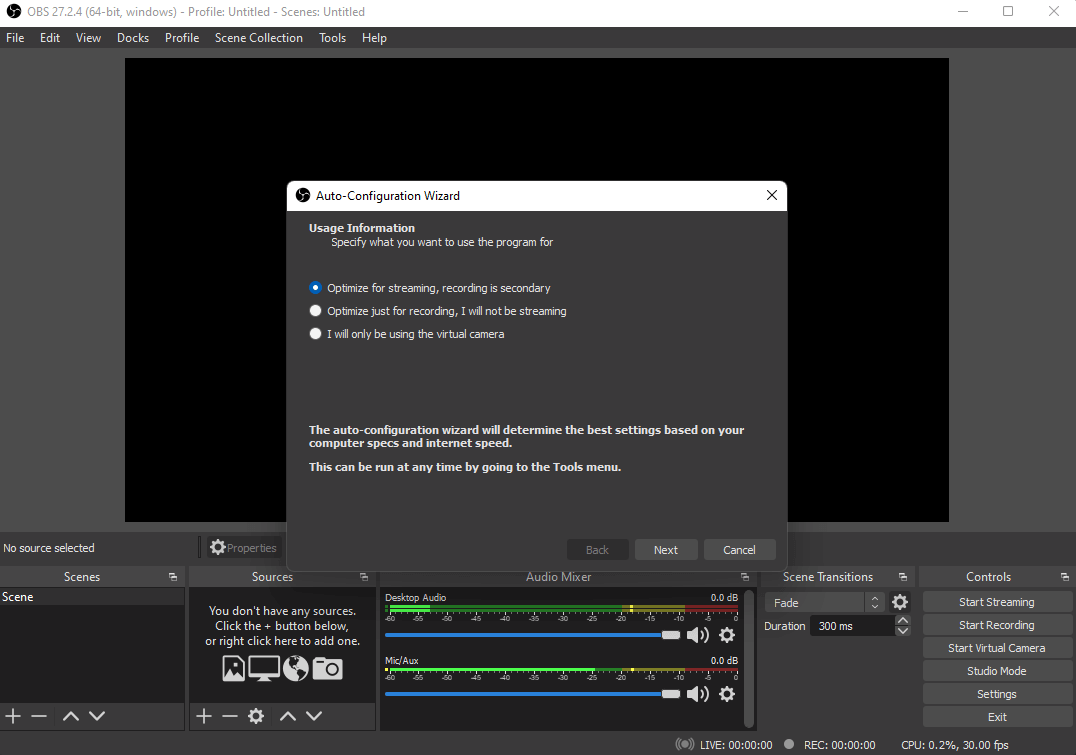
Here, you can decide whether you want to use OBS Studio to optimize for streaming, optimize for recording, or “I will only be using the virtual camera.” The wizard will then walk you through the best settings for your PC.
I implore you to bypass the auto-configuration wizard if you want to separate your PC desktop audio and video sources to capture the audio and video you want.
Add audio sources
OBS will automatically detect and set your default desktop video and audio settings in the Audio Mixer.
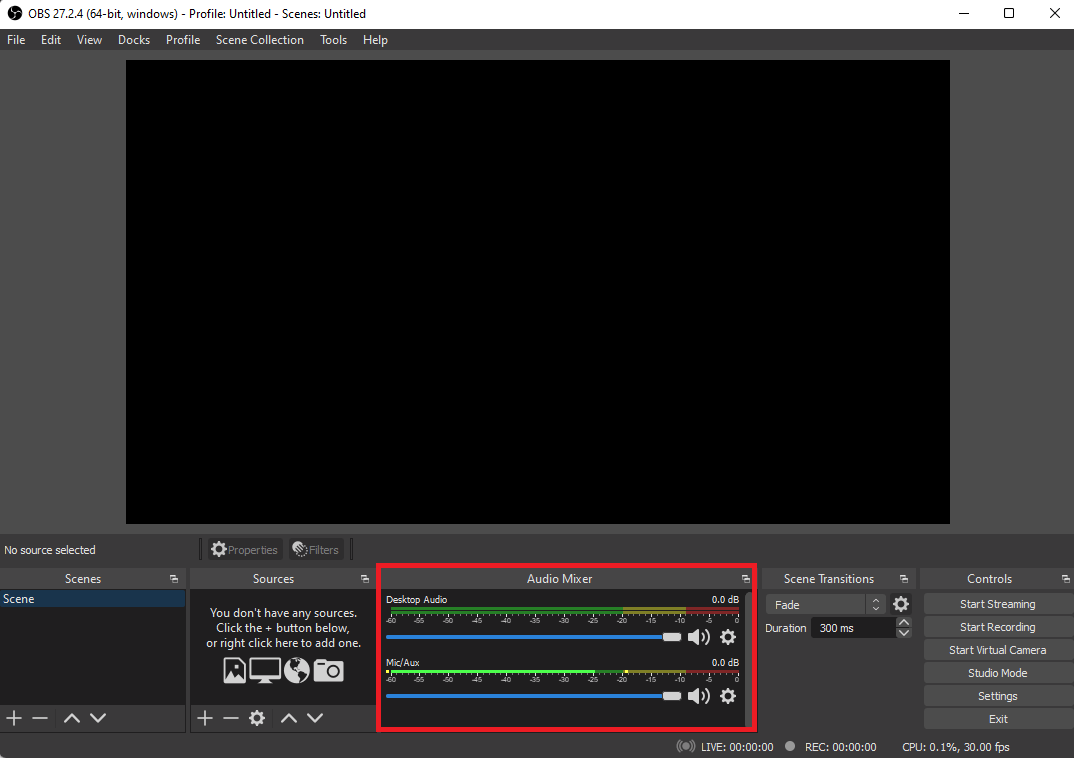
The one issue with this is that you may not want to stream or record the audio that comes from those sources, so it is better to change them to a specific device or disable audio completely. Here’s what to do.
- Open Settings
- Go to Audio
- Pick your specific default desktop audio and microphone from the dropdown menu or disable the sources under Global Audio Devices.
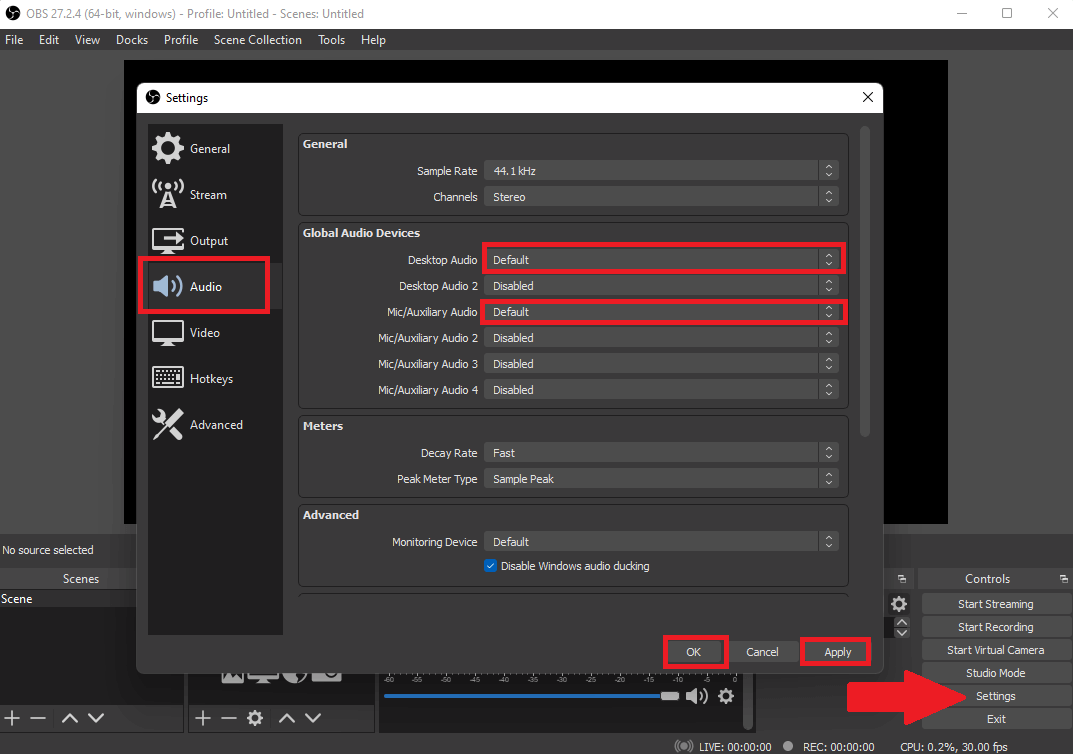
4. Click Apply to confirm your changes and click OK to close Settings.
If you choose to disable your default audio sources, you can pick and choose specific audio and video sources that you want to stream or record via the Sources menu.
Add video sources
Once you choose (or disable) your default audio sources in Settings, you can add your video sources. OBS does not capture any video sources on your PC by default.
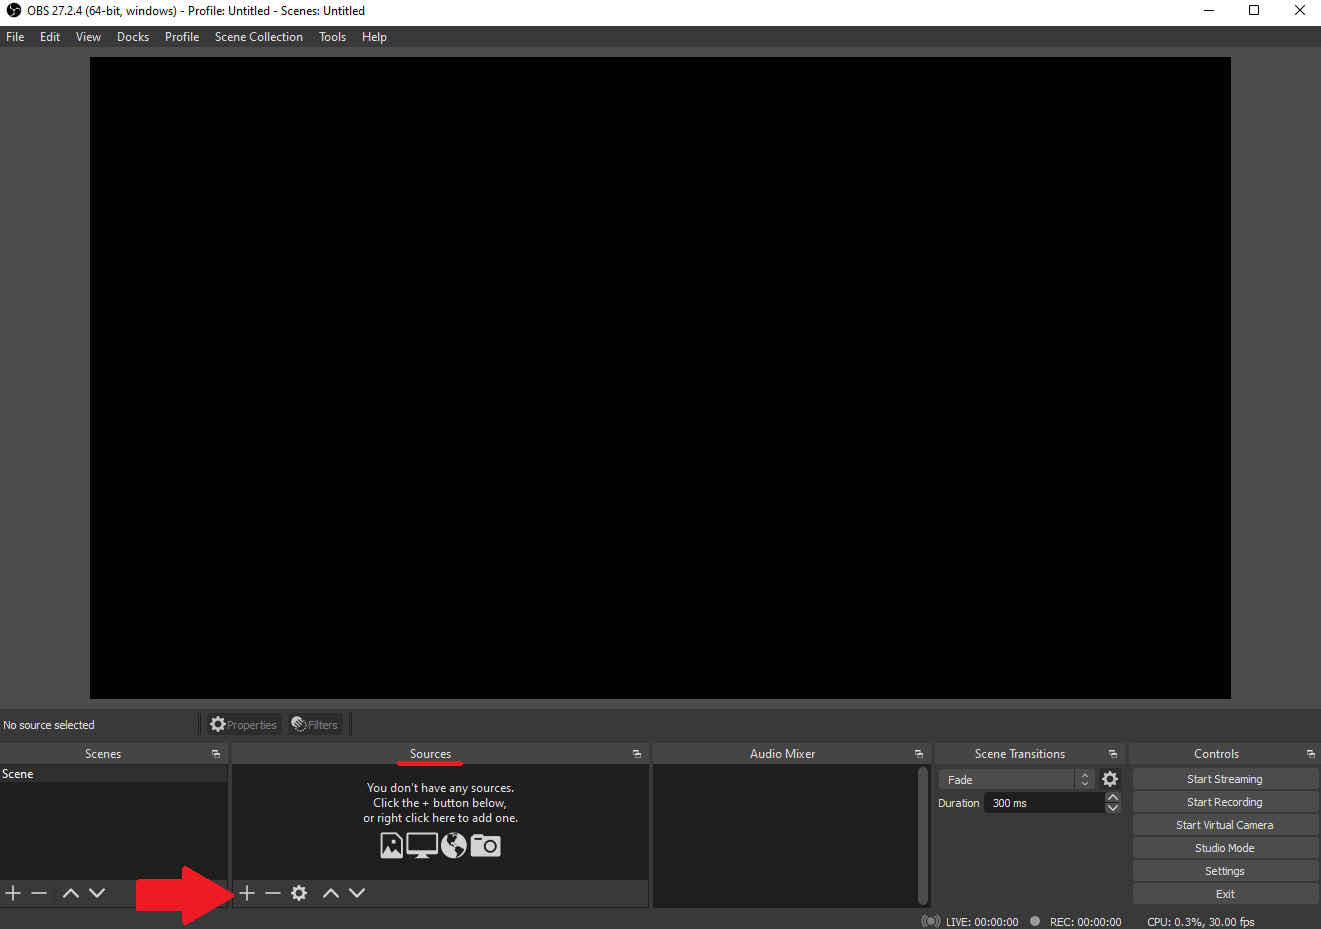
If you want to capture or record video sources, you need to add them by clicking the + sign at the bottom of the Sources window.
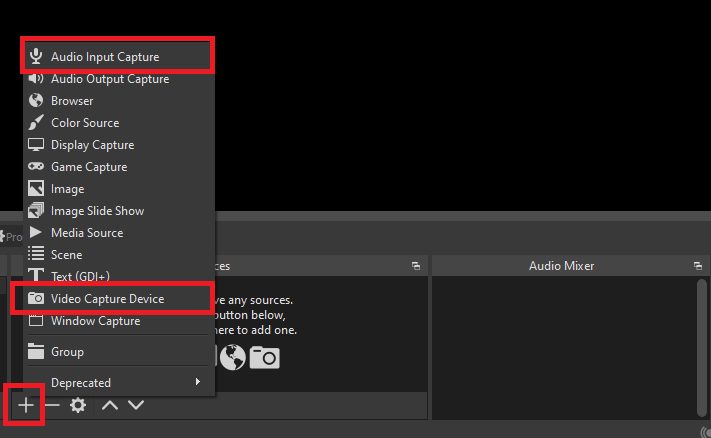
As an example, I will add my microphone and webcam to the Sources menu.
To add my microphone, I will use Audio Input Capture and to add my webcam I will use
Video Capture Device.
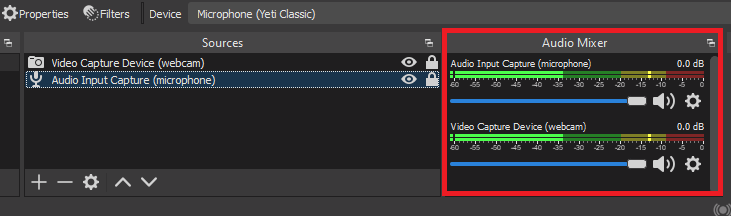
Once you add your sources and pick the specific video and audio device you want to use. your new sources will appear in the Audio Mixer menu to the right of Sources.
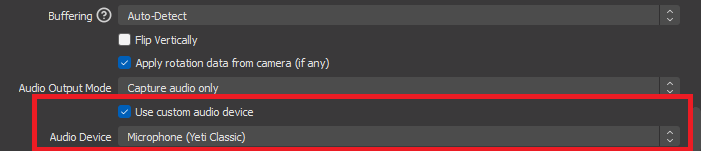
If you add a video source, OBS will automatically enable the video source as an audio capture too. So, you may need to go into the Video Capture Device properties to set the audio source to your preferred audio input device.
Use community plugins to customize your setup
Whether you want to record or stream, the choice is yours. If you are interested in specific plugins to use, I suggest checking out this OBS plugin list.
If you need extra help or inspiration on how to use OBS Studio, Reddit has a vast community of beginner and experienced OBS users to help with specific troubleshooting questions. You can also get help from the OBS community forums or reach out via Discord.
Do you use OBS Studio to record and stream? Let us know in the comments!