2 Quick Ways to Always Show Scrollbars on Windows 11
Get rid of those unnecessary mouse movements
![]() 3 min. read
3 min. read
![]() Updated on
Updated on
Share this article

Improve this guide
Read our disclosure page to find out how can you help Windows Report sustain the editorial team Read more
Key notes
- The Windows 11 scrollbar auto-hides after inactivity, but you can configure it to always show up.
- Check this guide to find out all the ways, be it from Settings or the Registry.
Windows 11 has been a massive upgrade from the previous iterations, both in terms of functioning and UI. But changes to the scrollbar behavior don’t seem to go well with the users. Many want to configure things such that the scrollbar always shows up in Windows 11.
This is useful if you rely on the Settings app, the Search menu, or even some third-party Microsoft Store apps where Windows 11 hides the scrollbar after inactivity. Remember, this is an intentional change from Microsoft, and simply hovering the cursor over the vertical scroll bar should activate it.
Keep reading to find out the two ways you can always show the Windows 11 scrollbar.
How do I force Windows 11 always to show scrollbars?
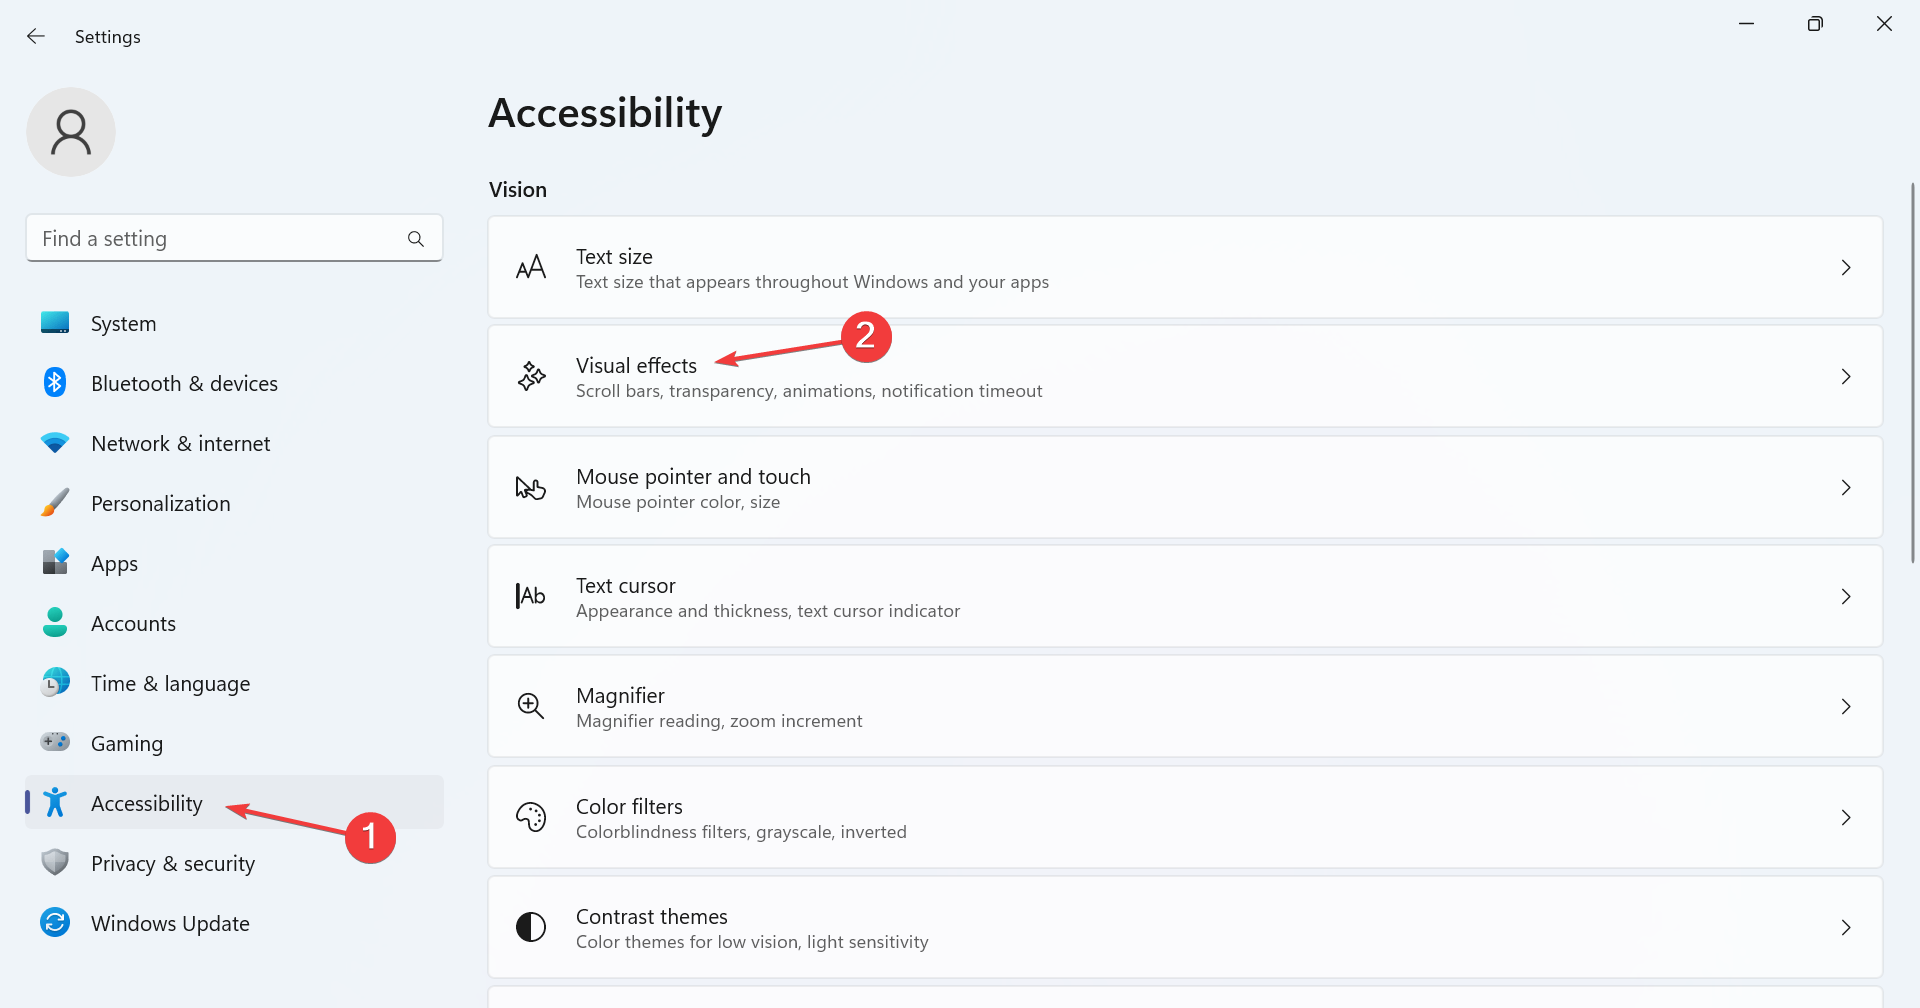
1. Change the Accessibility settings
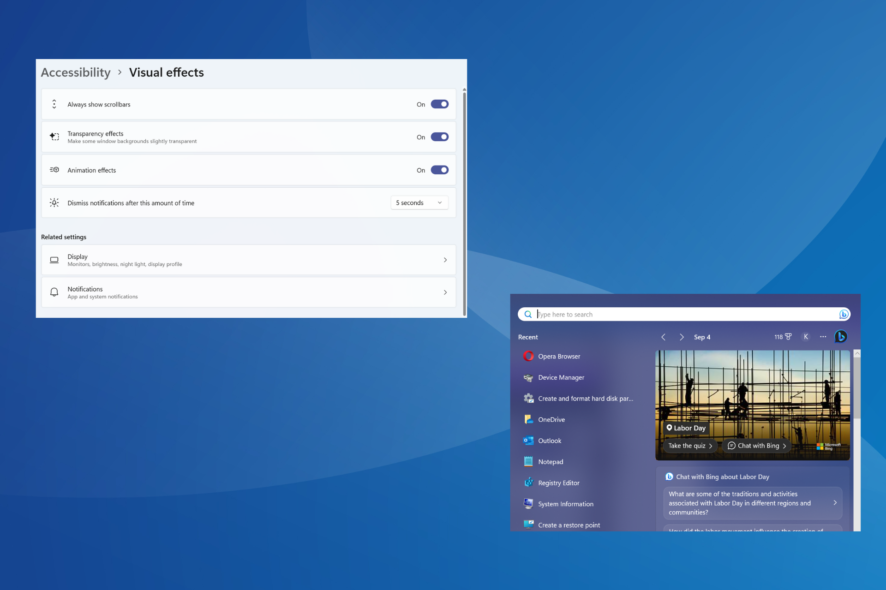
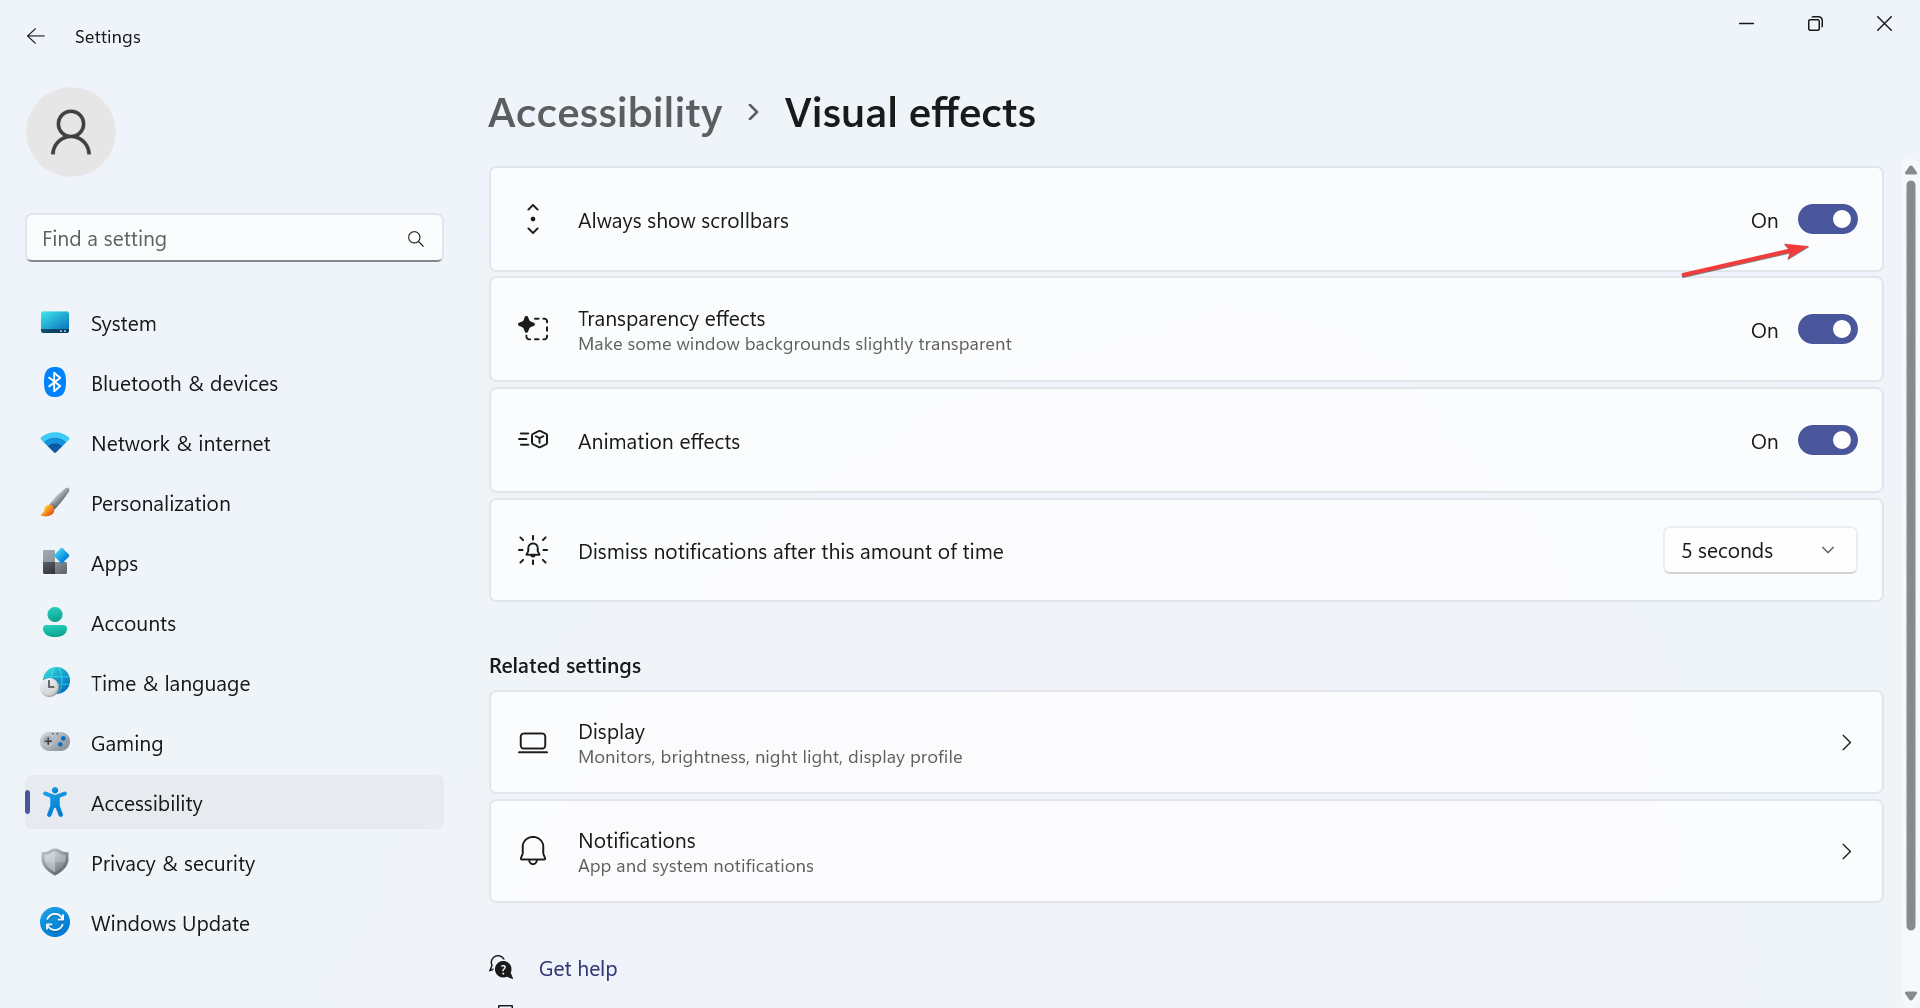
- Press Windows + I to open the Settings app, go to Accessibility from the navigation pane, and click on Visual effects.

- Now, enable the toggle switch for Always show scrollbars.
To enable inactive scrollbars and get rid of the default behavior, reconfigure the Windows 11 scrollbar settings and get it to always show up. This is, by far, the simplest method and should be the preferred approach.
2. Modify the Registry
 Tip
Tip
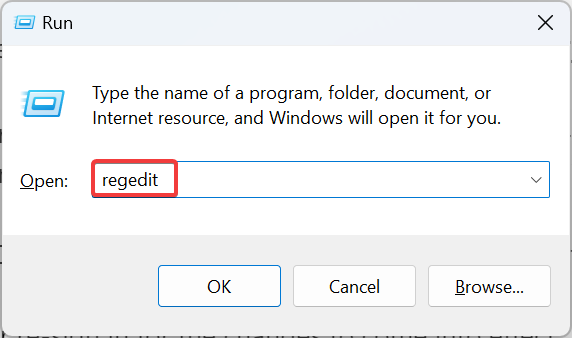
- Press Windows + R to open Run, type regedit in the text field, and click OK.

- Click Yes in the UAC prompt.
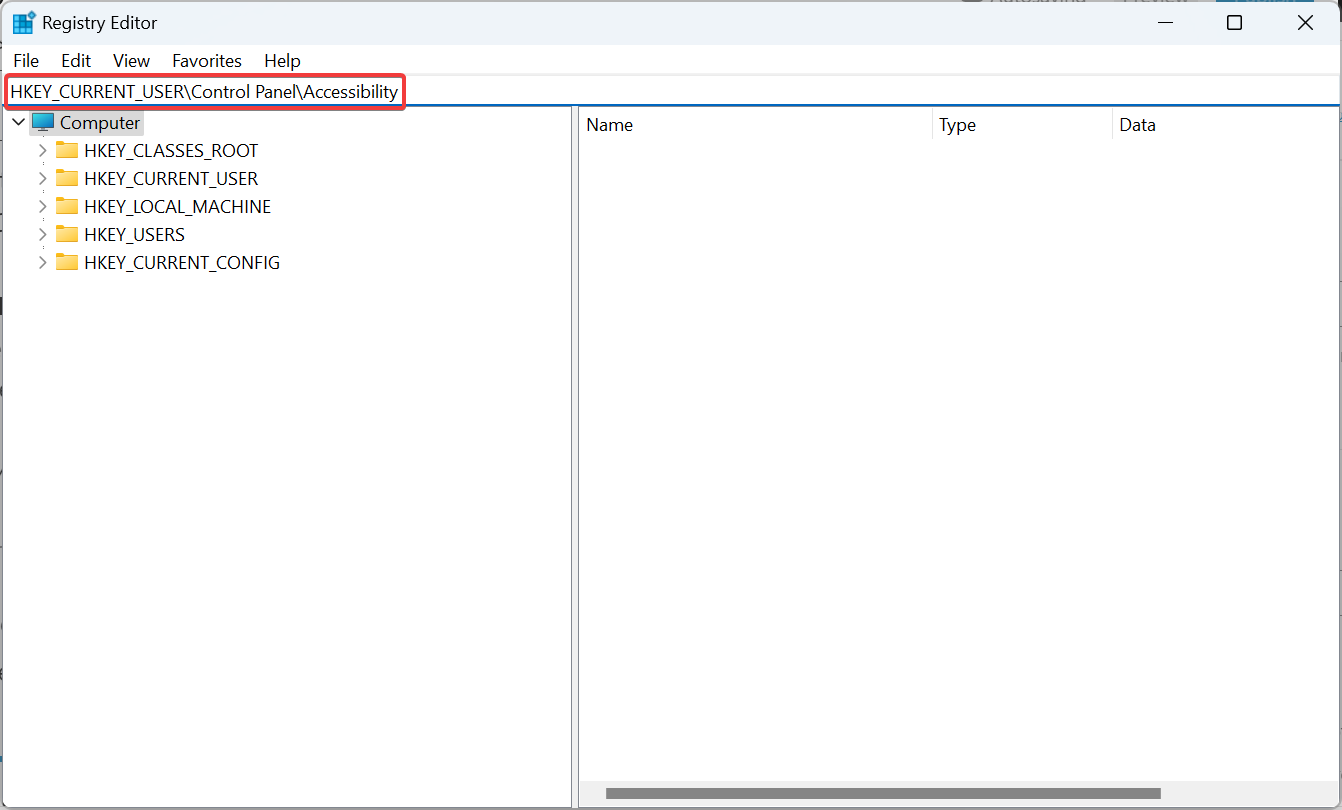
- Paste the following path in the address bar at the top, and hit Enter:
HKEY_CURRENT_USER\Control Panel\Accessibility
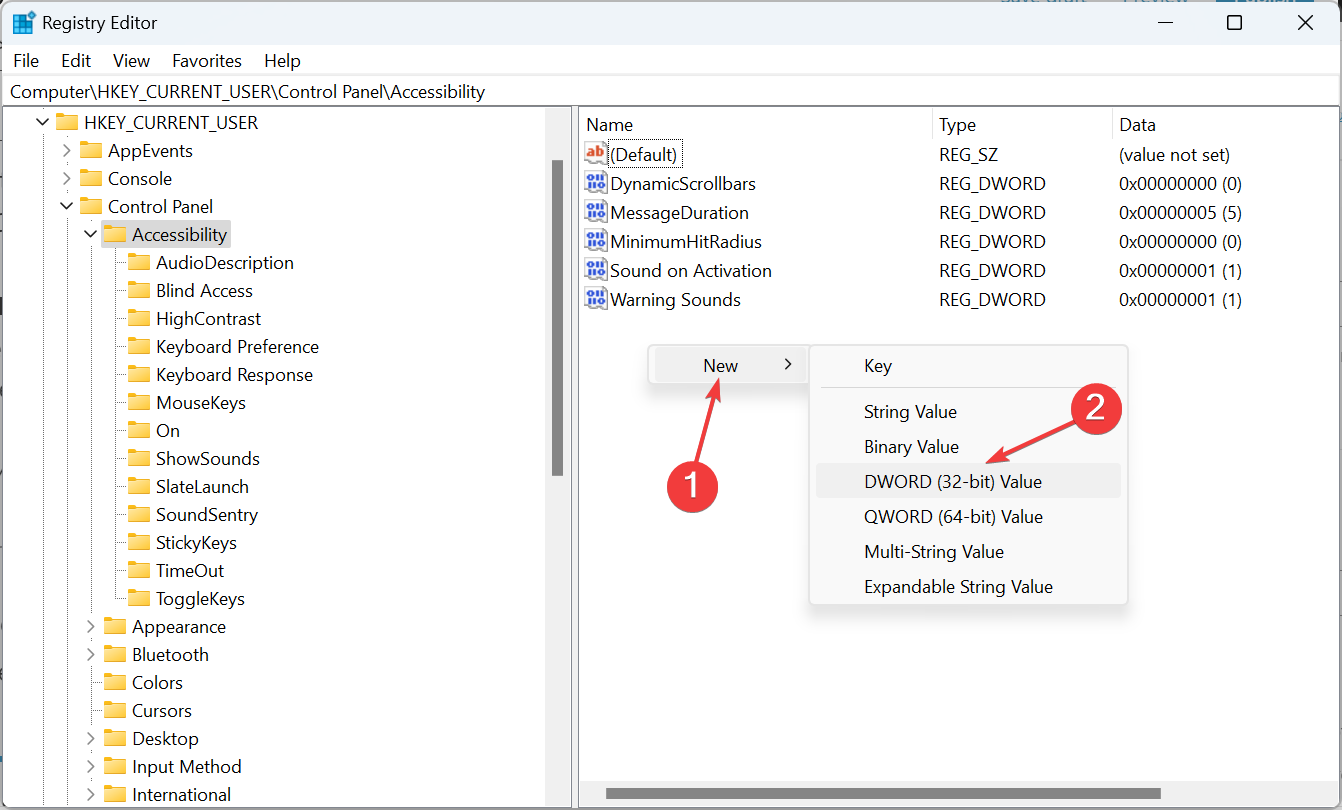
- Now, check whether the DynamicScrollbars DWORD exists on the right. If not, right-click on the empty portion, hover the cursor over New, select DWORD (32-bit) Value, and name it DynamicScrollbars.
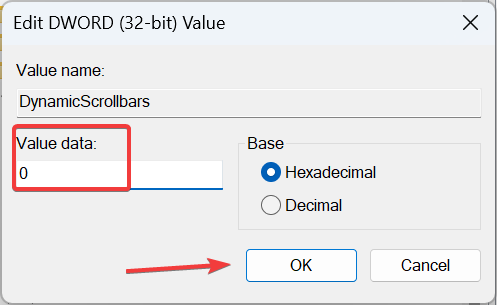
- Double-click the DynamicScrollbars DWORD, enter 0 under Value data, and click OK to save the changes.

- Make sure to restart the computer or re-sign in for the changes to come into effect.
When the Always show scrollbar setting in Windows 11 is not working, another option is to reconfigure the Registry Editor. These changes tend to override any inconsistencies and force show the vertical scrollbar in Windows 11.
How do I change the scroll behavior in Windows?
When it comes to the scrollbar, there are a wide array of customizations available in Windows. You can change the scrollbar size in Windows 11 or even configure the scroll direction.
Besides, many prefer the Smooth Scrolling feature for browsers, which makes the task feel more natural and seamless. Lastly, you can choose how many lines to scroll at a time or get inactive windows to respond when you hover the cursor over them.
The two methods listed here will allow you to have the Windows 11 scrollbar always show up. This also applies to the scrollbar for applications. But we recommend you go with the default setting since that’s best for productivity!
Apart from the scrollbar, there are several other changes to make Windows 11 faster. So, do check them out and witness a drastic improvement in performance.
If you face any issues with the process, drop a comment below, and we will get back at the earliest.