Quickest Ways to Set a Default Printer on Windows 11
Set a default printer with a couple of clicks.
![]() 3 min. read
3 min. read
![]() Updated on
Updated on
Share this article

Improve this guide
Read our disclosure page to find out how can you help Windows Report sustain the editorial team Read more
Key notes
- If you have multiple printers connected to your Windows 11 device, it will automatically select the most recently used printer as the default.
- The default printer is where all printing tasks are automatically sent unless the user specifies otherwise.
- It can be set through the Settings app, Printers folder, or command line.
When you have multiple printers connected to your Windows 11 computer or network, setting a default printer in Windows 11 allows your documents to be automatically sent to the default printer unless you specify otherwise.
Moreover, it can be really annoying to deal with multiple printers when the default printer keeps changing all the time.
Unless you want to send the wrong document to the wrong printer, check out this article to quickly set a default printer on your Windows 11 device.
What is Default Printer?
A default printer is a device automatically selected as the primary choice for printing documents or files from your computer.
Setting a default printer can be helpful because it saves you from having to select a printer whenever you want to print something.
To set a default printer, you must have the printer installed on your device. If you’re having trouble installing a printer, check out our guide on fixing printer installation issues.
How to set the default printer in Windows 11?
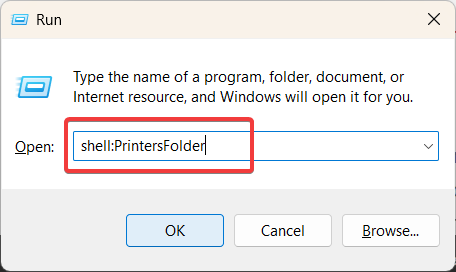
1. Set the default printer from the Printer folder
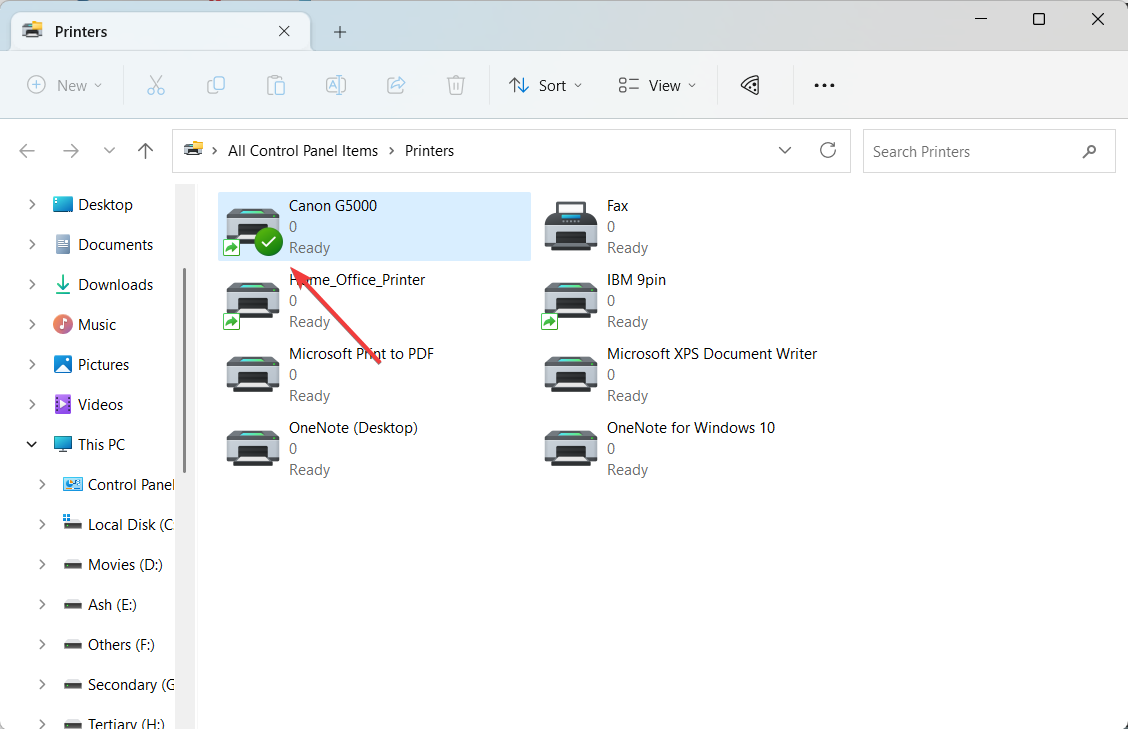
- Press Win + R to open the Run command box, then type shell:PrintersFolder and hit Enter.
- In the Printers folder, right-click on the preferred printer and select Set as Default Printer.
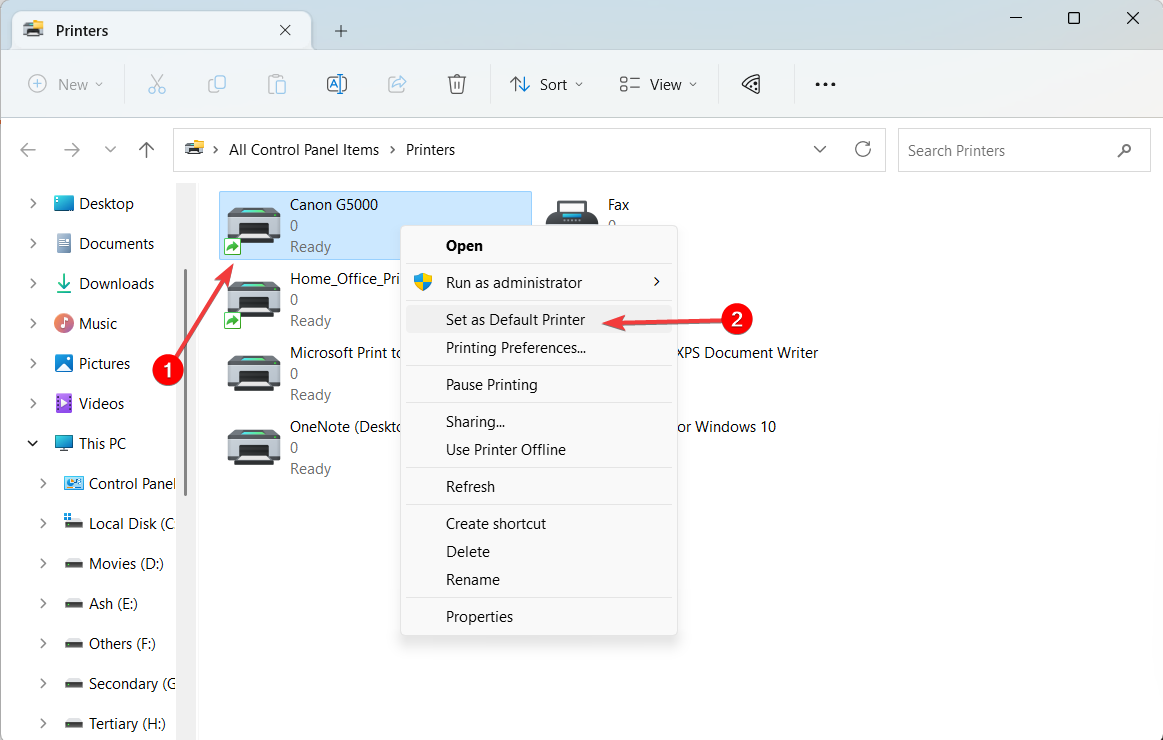
- Confirm that the printer’s icon has a checkmark indicating it as the default printer.
2. Configure the default printer using the Command Prompt
 NOTE
NOTE
- Press the Windows key, type cmd in the search bar, and select Run as Administrator.
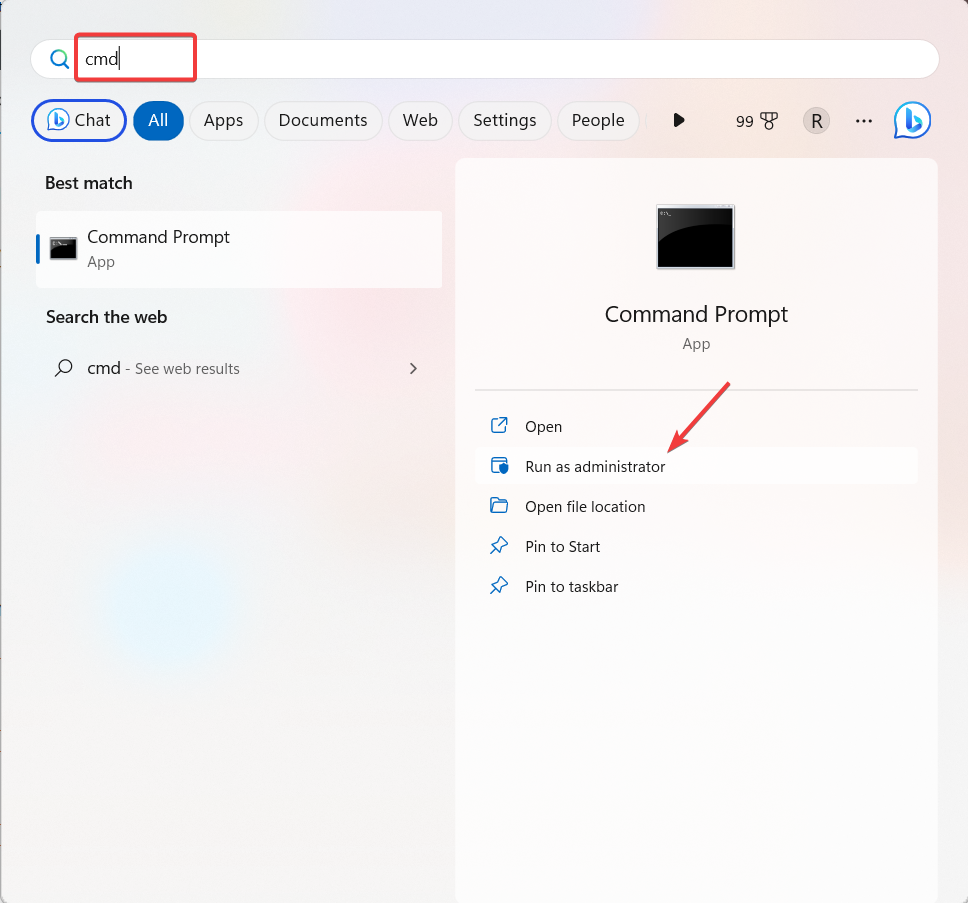
- If a User Account Control (UAC) window appears, click Yes.
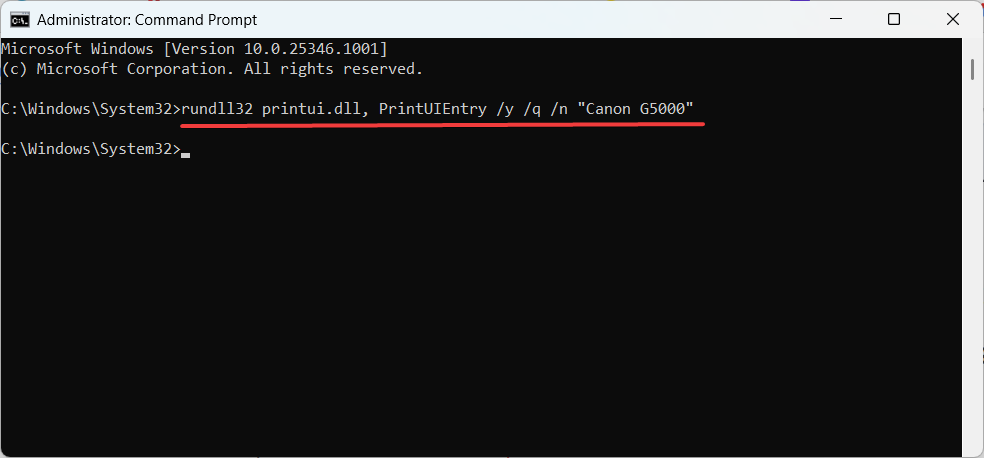
- Type or copy+paste the following command into the window:
rundll32 printui.dll, PrintUIEntry /y /q /n "Printer name" - Make sure to replace the Printer name with the name of the printer installed on your system.
- To confirm your default printer using Command Prompt, run the below command:
wmic printer get name,default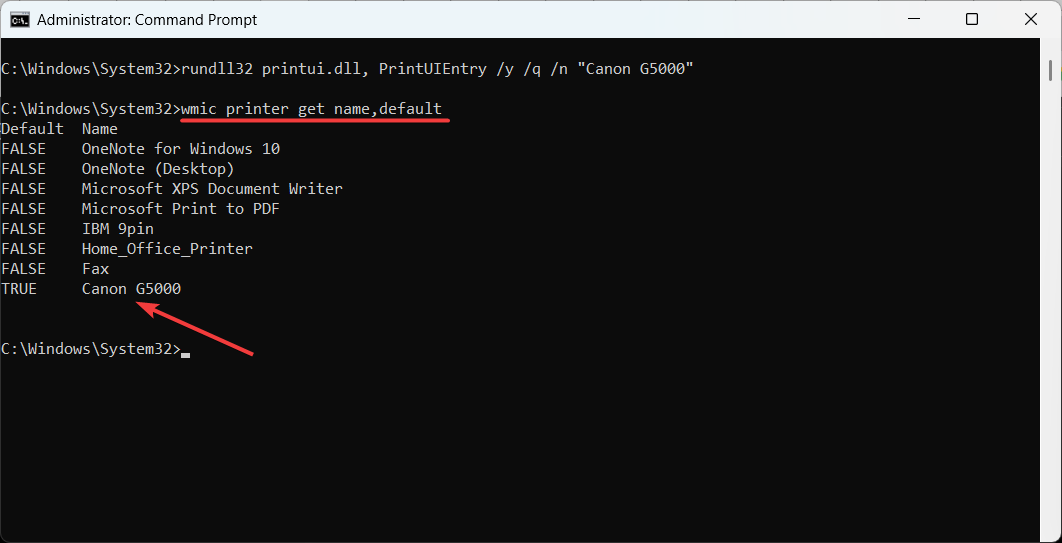
- You will see a list of printers installed on your computer. Look for the printer that is marked as TRUE in the Default column. This indicates that it is the default printer.
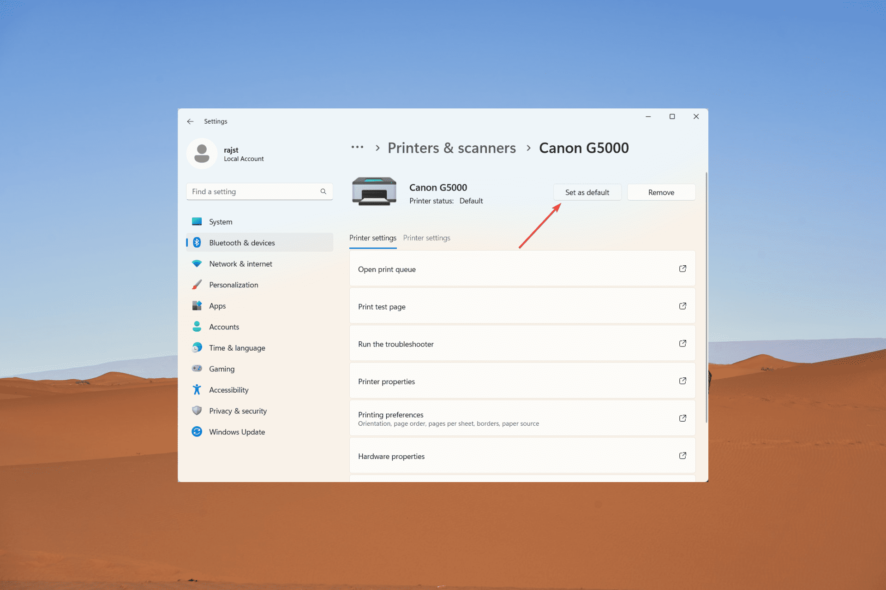
3. Set a default printer from the Settings app
- Click the Start button and select the Settings tile on the Start menu.
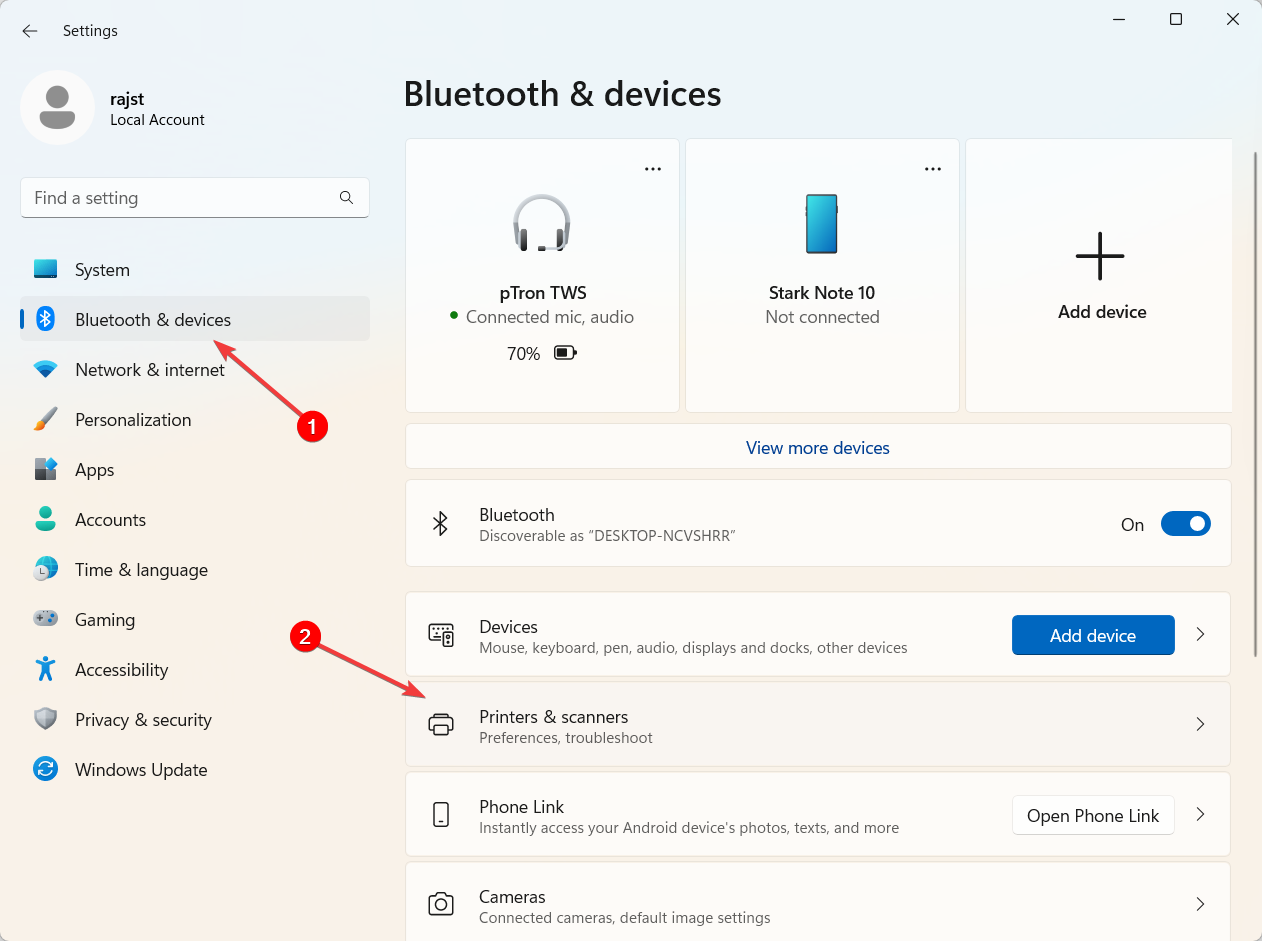
- In the Settings window, click on the Bluetooth & devices tab and select the Printers & scanners tile on the right.
- Scroll down on the Printers & scanners settings page and turn off the Let Windows manage my default printer option under the Printer preferences section. By doing this, Windows will no longer change your default printer automatically.

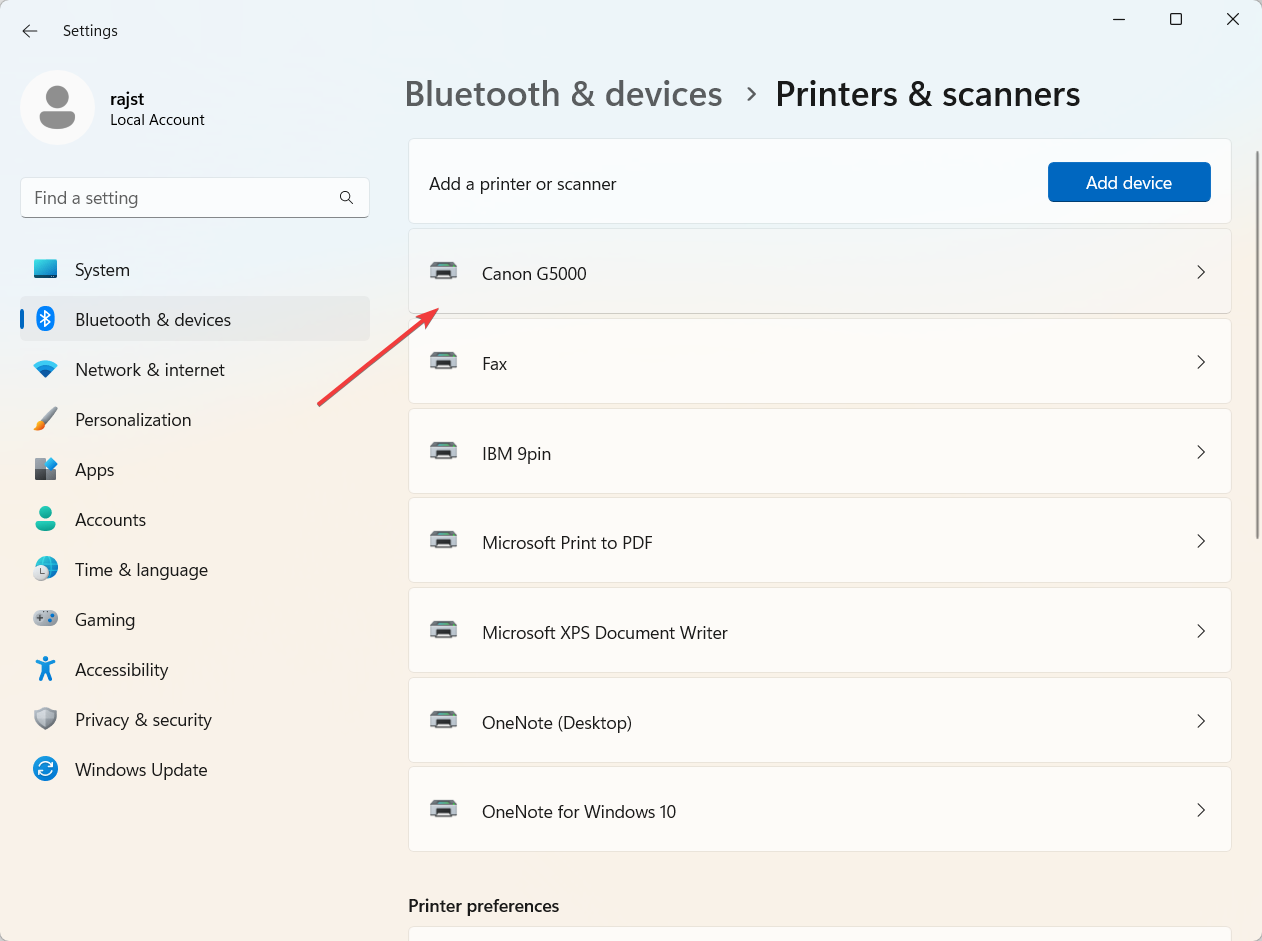
- Once you have turned off the automatic default printer option, find and click on the specific printer tile that you want to set as the system default.
- On the printer properties page, click the Set as default button.
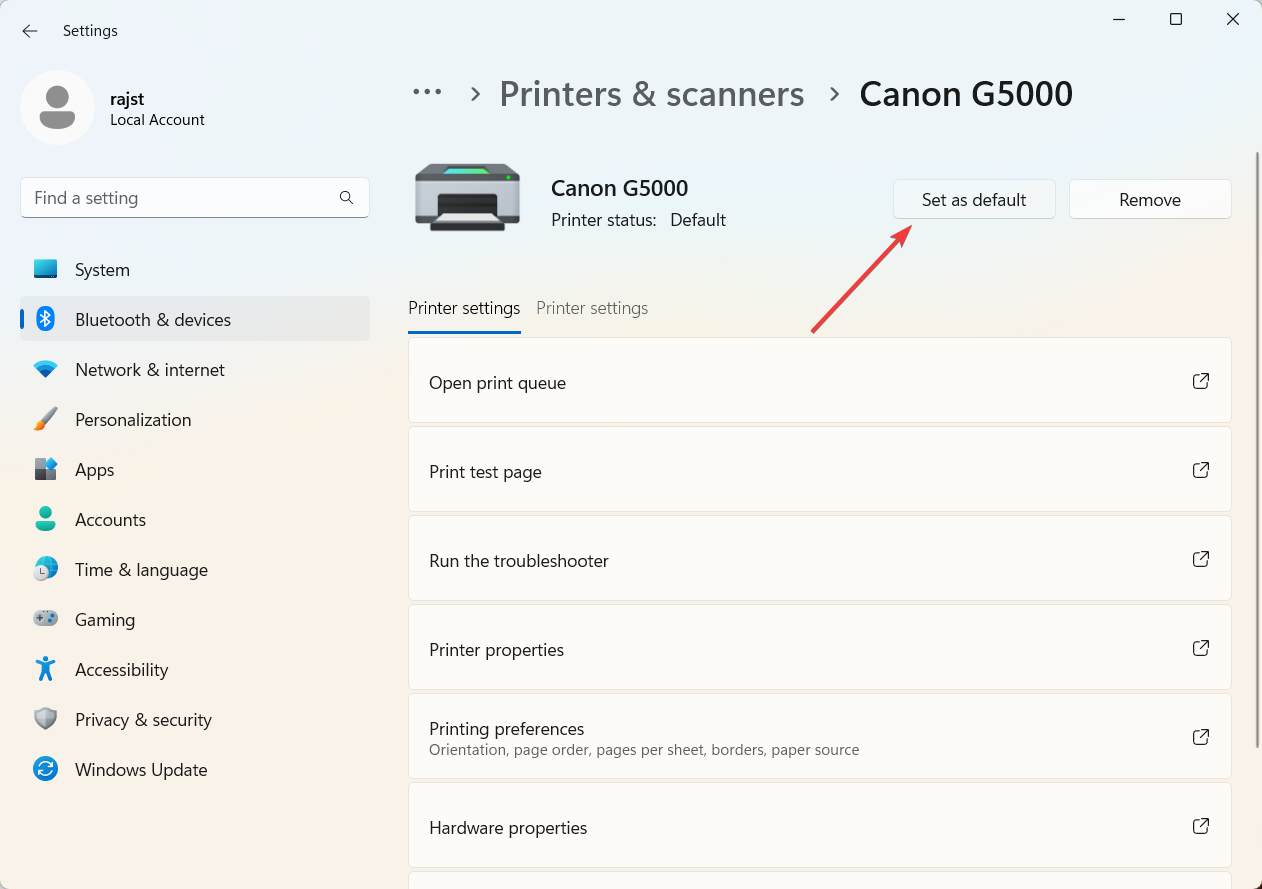
- This will set the selected printer as the system default.
Sometimes, you might encounter errors when trying to set a printer as the default in Windows 11. These errors display a message saying Operation could not be completed (error 0x00000709). If you encounter this issue, find some quick ways to resolve the error code 0x00000709.
If you have questions or suggestions, feel free to leave them in the comments section below.