How to Limit or Change the Bandwidth on Windows 11
Use bandwidth limiters for comprehensive data usage control
![]() 6 min. read
6 min. read
![]() Updated on
Updated on
Share this article

Improve this guide
Read our disclosure page to find out how can you help Windows Report sustain the editorial team Read more
Key notes
- A lot of people don't realize how much bandwidth they're using, and that can lead to problems when they hit their monthly data limit.
- If you use a lot of bandwidth, you should set limits to monitor and manage your usage over a given time period.
Setting the bandwidth on a Windows PC may help you limit how much data your computer can transfer at any given time. This is especially important if you’re trying to save money on your Internet bill.
If you have more than one computer on your network, they’ll always compete for available bandwidth. This can lead to slower performance and occasional connection dropouts if you don’t manage it properly. Here’s how to set limits and better manage your data usage.
Why do I need to enforce bandwidth limits on my PC?
A bandwidth limit is the maximum amount of data allowed to pass through your computer network connection. You may have noticed that your system is using too much data, making it hard for you to keep up.
When setting a bandwidth limit on your PC, you should know that this can cause problems with some applications.
Nonetheless, there are still some reasons why you should set up bandwidth limits:
- Keep track of your usage – If you’re on an unlimited plan, then you should still keep track of how much data you’re using every month — just in case something goes wrong with your ISP’s network.
- Bandwidth theft – Bandwidth theft is when someone uses your Internet connection without your permission or knowledge. This can happen if your router has been hacked.
- Avoid overage charges and extra fees – If your ISP has a monthly limit on how much data you can use before being charged extra fees, then setting a bandwidth cap will help ensure that you always stay under your limit.
- Prevent saturation – If your computer is constantly downloading or uploading data, this can cause problems with other programs. Bandwidth limits prevent network congestion and keep bandwidth-intensive applications from monopolizing your system resources.
How do I set bandwidth limits in Windows 11?
1. Use in-built router settings
Some routers can be configured to control bandwidth usage. For example, you can set your router to block any device that exceeds a certain percentage of your total bandwidth. This is useful to ensure that no one uses too much bandwidth at any time.
If your router does not have this option, you can opt to upgrade to a new router or proceed to the other recommended methods.
2. Use Settings
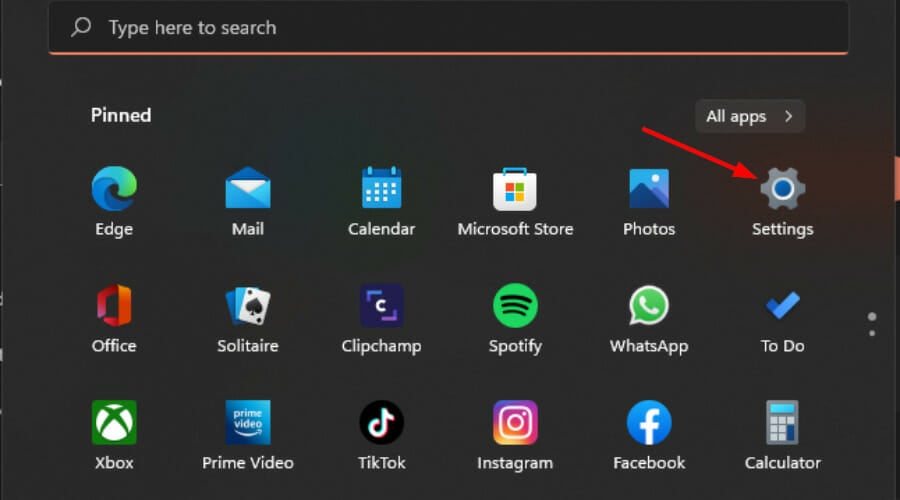
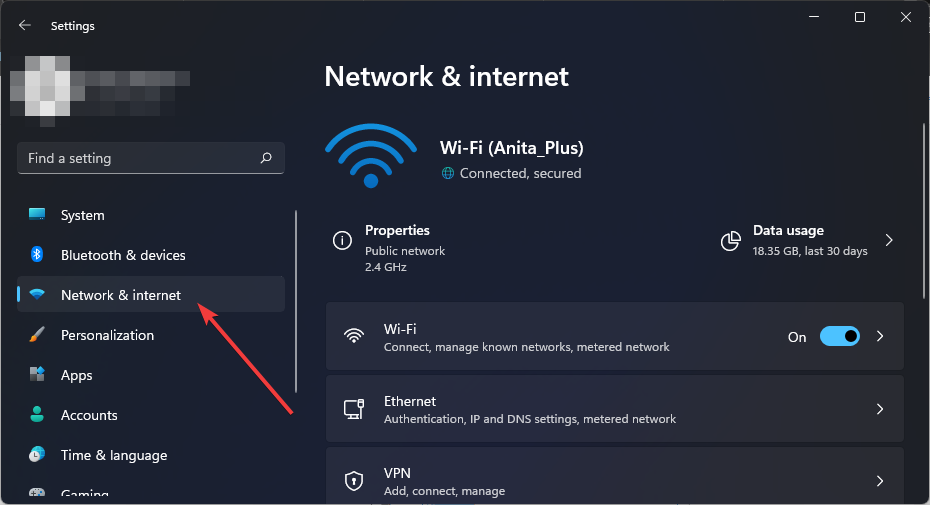
- Hit the Windows key and select Settings.

- Click on Network & internet on the left pane.

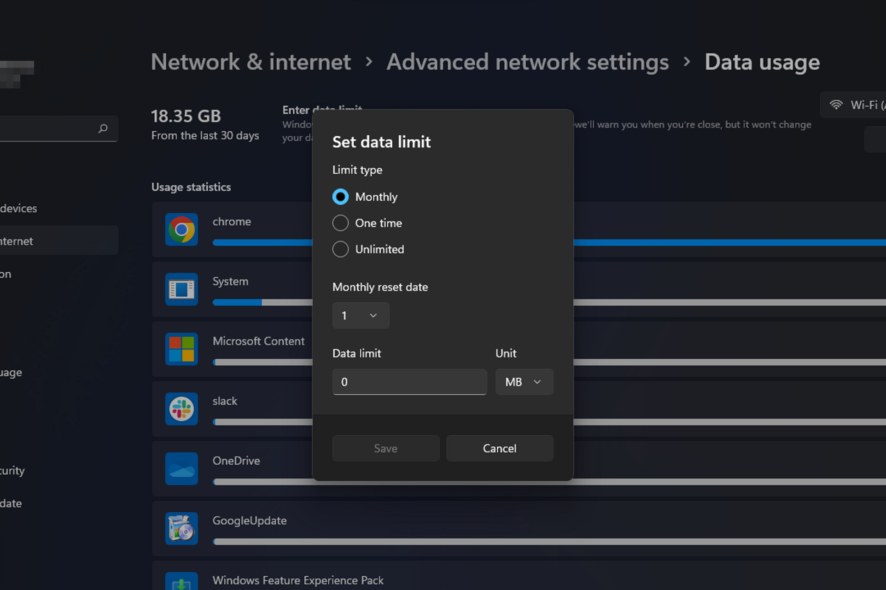
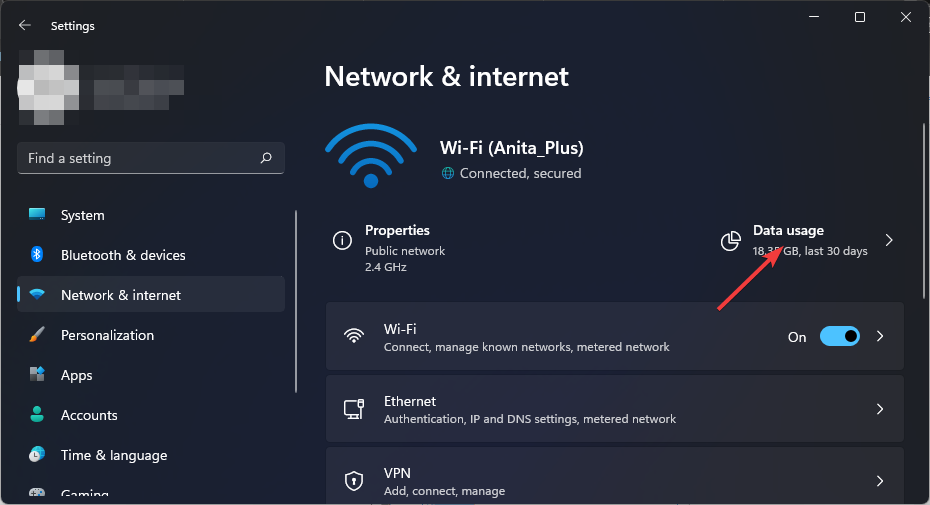
- On your current Wi-Fi connection, click on Data usage.
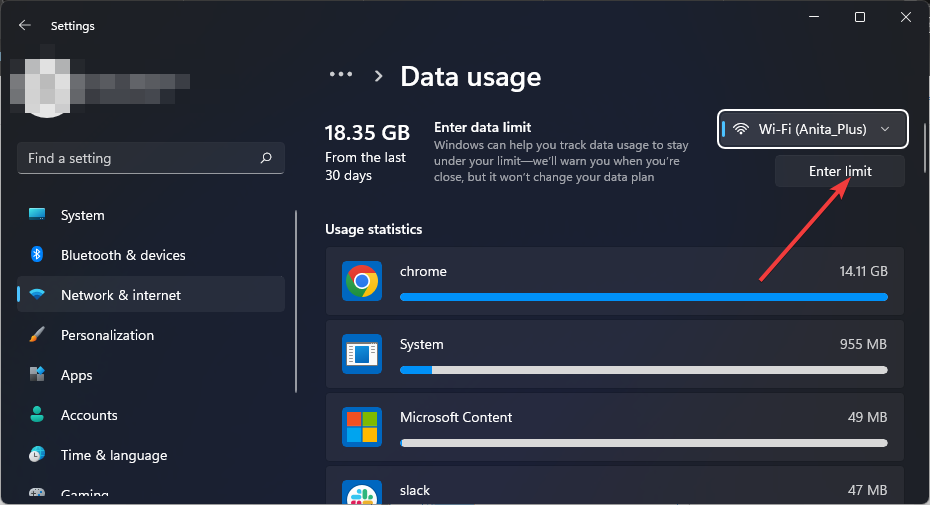
- Select Enter limit.
- Set the limit type, from the choices ranging from Monthly to unlimited.
- Choose the date for the data to be reset every month from the drop-down menu under Monthly reset date.
- Now input the data limit and choose whether to limit in MB or GB and finally, click on Save.


3. Use Group Policy Editor
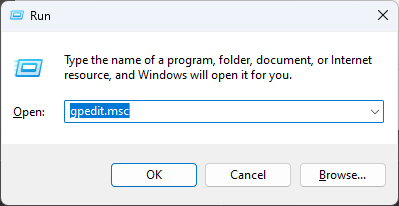
- Hit the Windows + R keys to open the Run command.
- Type gpedit.msc in the dialog box and hit Enter.

- Navigate to the following location:
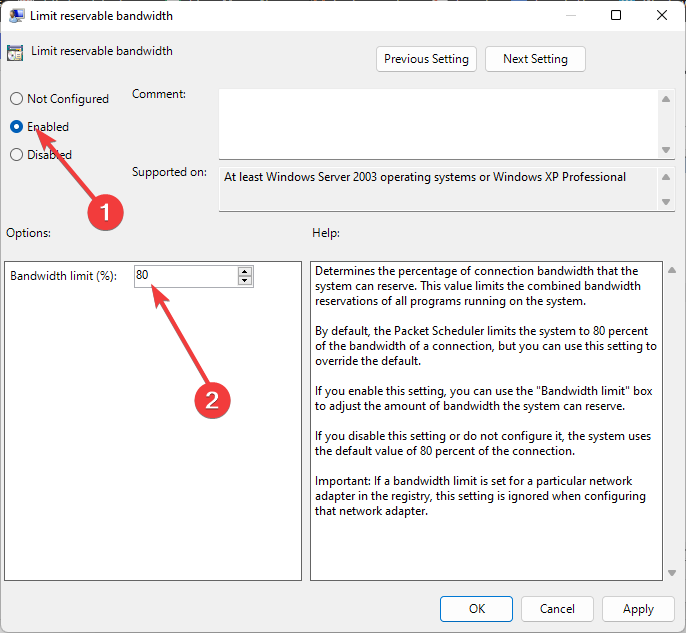
Computer Configuration/Administrative Templates/ Network/QoS Packet Scheduler - On the right pane, double-click on Limit reservable bandwidth.

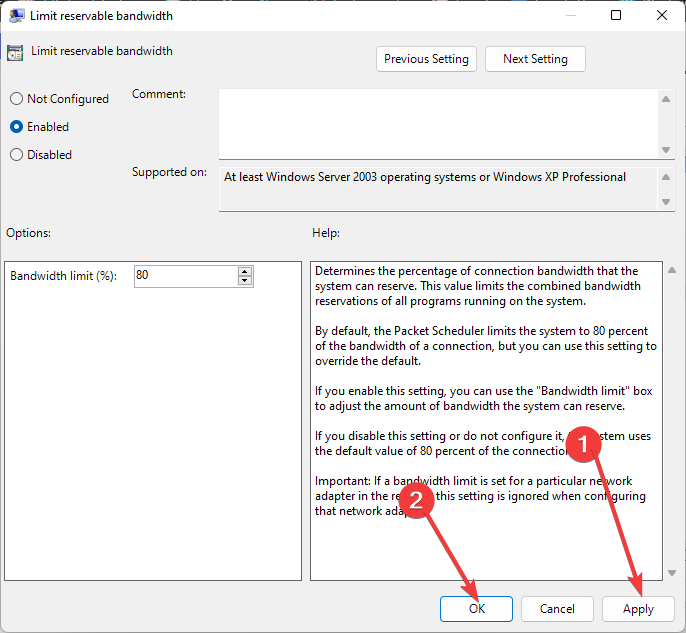
- In the Limit reservable bandwidth window that opens, select the Enabled option and enter a number between 1 and 100 under the Bandwidth limit option.

- Click Apply and OK to save the changes.

4. Use the Registry Editor
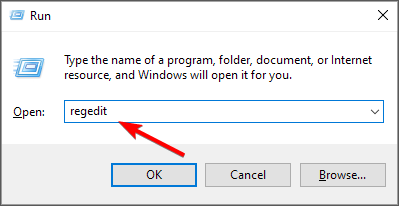
- Hit the Windows + R keys to open the Run command.
- Type regedit in the dialog box and hit Enter to open the Registry Editor.
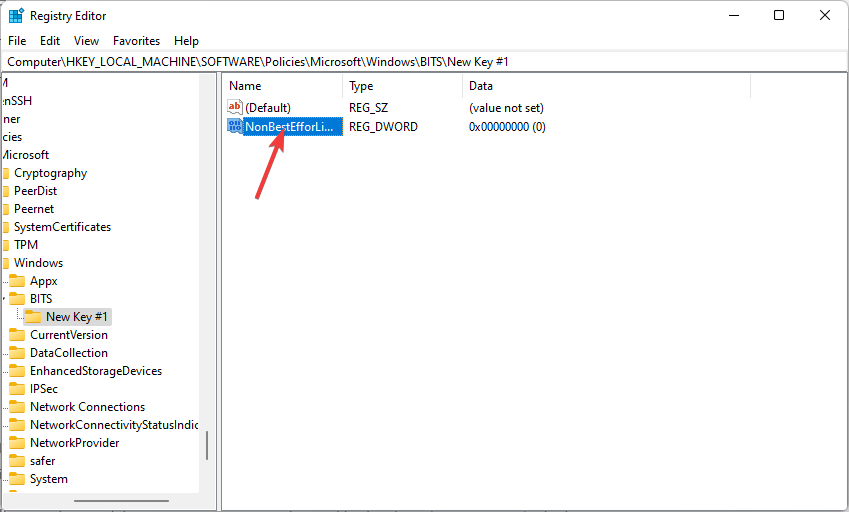
- Navigate to the following location:
Computer\HKEY_LOCAL_MACHINE\SOFTWARE\Policies\Microsoft\Windows - Double-click on NonBestEfforLimit. If unavailable, right-click on an empty area on the right pane and select New DWORD (32-bit) then rename it as NonBestEfforLimit.

- Set the Value data to any number between 1-100 then click on OK.


Remember that editing the registry manually can have serious, unintended consequences that can render your PC inoperable. You should back up the registry before making any changes to it.
If you make a mistake, you can use a previously saved backup to restore your registry to its previous state. If you’re not comfortable editing the registry, don’t do it. You can use a third-party tool to edit the registry for you. Otherwise, skip this section and move on to the next solution.
5. Use third-party tools
If you want more control over how to limit bandwidth usage, third-party tools will come in handy. Bandwidth monitoring tools can help you determine what kind of bandwidth you’re currently getting and how much more you need.
You can also use bandwidth limiter tools to limit access by specific users or applications so they don’t hog your available bandwidth.
To give you an idea, one program we stand for is PRTG Network Monitor because by using it, you can set channel limits to adjust threshold values and set off notifications when surpassed.
Moreover, it is a complex software with customizable band-limiting features, and you can keep track of connections and applications with the most bandwidth.
Can I limit application bandwidth usage in Windows?
Although the above methods will help you limit bandwidth usage on your Windows 11, they may not be what you’re looking for. Some applications use internet bandwidth heavily.
You may want to limit their bandwidth usage to prioritize bandwidth usage for other apps. Windows 11 does not have any built-in way to control bandwidth usage for an application.
However, for Windows 10 users, there is a workaround that lets you limit the bandwidth usage of any program. You can easily switch off the data consumption of an app and switch it back on whenever you want to use it. It’s not a perfect solution, but it works in most cases.
To limit bandwidth on an application basis, you need to use one of the bandwidth monitoring tools. Alternatively, you can opt for low-bandwidth browsers.
While you’re still here, check out how to change your network band to boost your internet speeds and enhance the overall performance.
Hopefully, you’ve been able to set appropriate limits on your bandwidth usage with the help of this article.
Let us know which method you prefer to set bandwidth limits on your Windows 11 in the comment section below.