Password Protect a Folder in Windows 11 [2 Ways]
Find out everything you need to lock folders and files on your PC
![]() 2 min. read
2 min. read
![]() Updated on
Updated on
Share this article

Improve this guide
Read our disclosure page to find out how can you help Windows Report sustain the editorial team Read more
One of the goodies that came with Windows 11 is the improved security. And a significant part of that is the ability to lock your folder to secure it. This is especially useful if you share your PC with other users. In this guide, we will show you how to password-protect a folder on Windows 11 and take advantage of the excellent security.
Does Windows 11 have a secure folder?
Windows 11 does not have a secure folder per se. However, the Ransomware protection feature of Windows Security has a Controlled Folder Access option. This allows you to secure the select files and folders from unfriendly apps. Also, you can encrypt your folders. However, this folder will only be protected from other user accounts.
How can I lock a folder in Windows 11?
 Tip
Tip
1. Via the folder Properties
You can easily password protect your files from the prying eyes of others by configuring the Properties settings. Here is a guide step-by-step:
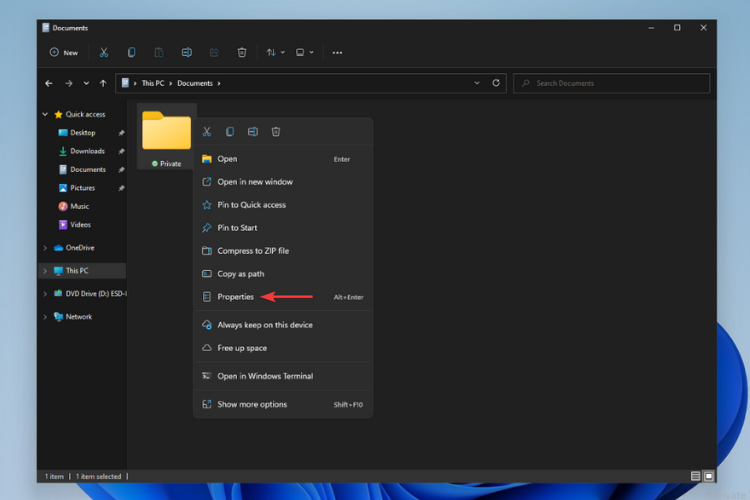
- Right-click on the file you want to protect and select Properties from the drop-down menu.
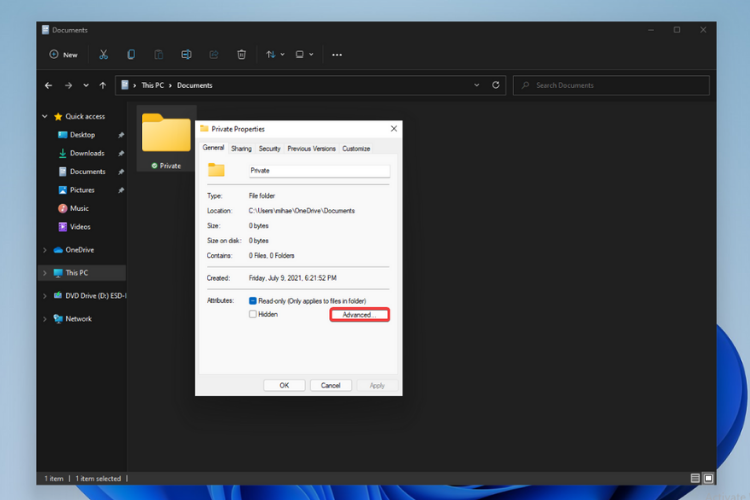
2. A window will open. Here, click on Advanced.
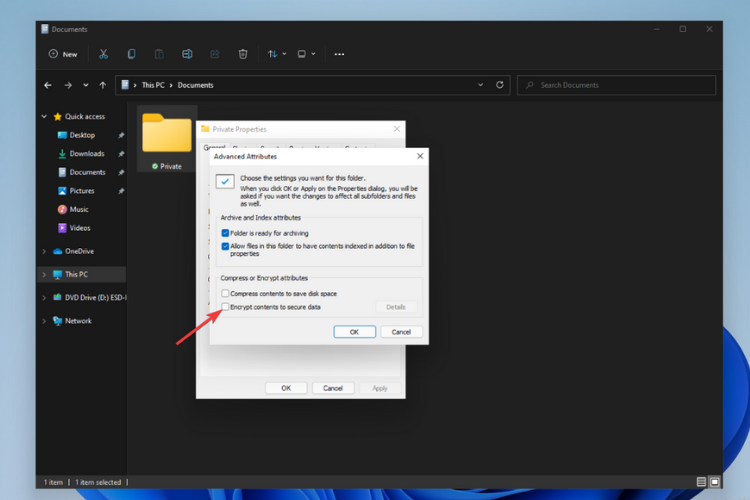
3. Tick the box next to Encrypt contents to secure data and then click OK.
4. After you click on Apply, a pop-up will open asking you if you want to back-up your file. Make your selection and the pop-up will close.
5. If you are encrypting a folder, you will be asked to choose whether you want all folders within that directory to be password protected. When you’ve decided, click OK.
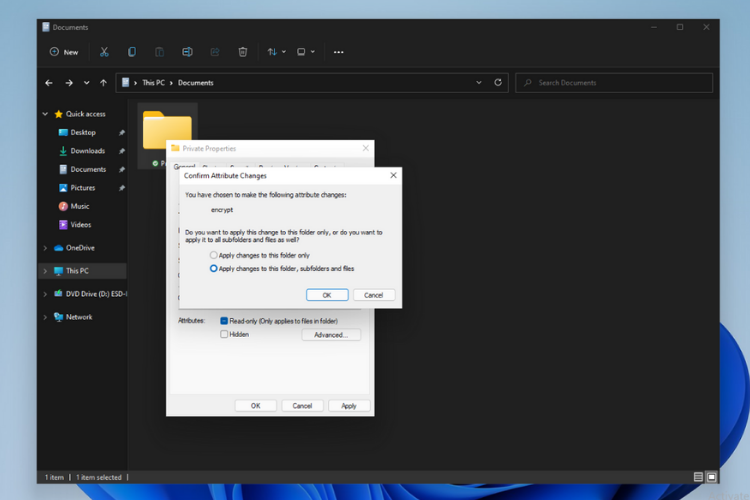
6. Your folder is now password-protected by your account as you can see by the little padlock symbol. Note that if you ever add new content to that folder, it will automatically be encrypted too.
 NOTE
NOTE
2. Use a dedicated tool
If you wish to know how to lock and encrypt a folder on Windows 11 with a password, your best bet is to use a dedicated tool WinZip. This tool protects your folder and files even on your user account.
With this, even if someone has access to your account, they won’t be able to open the secured folder. It gives you complete control of who can access the folders and files on your PC.
Therefore, you’re able to utilize this highly useful file management tool that can efficiently encrypt your folders on Windows 11 devices.
WinZip
Handle all your Windows 11 files with this complete compression and password-protection tool.That’s everything on how to lock a folder on Windows 11. Also, you now know why the option to encrypt a folder in Windows 11 is greyed out and the workarounds for it.
Similarly, if you need a list of the best folder locker for Windows 11, check our curated guide. Besides, read more about disabling BitLocker in Windows 11.
Feel free to let us know the option you prefer and why in the comments below.