Windows 11 Snipping Tool Missing: 6 Ways to Get it Back
Our solutions are verified and confirmed to work by users
![]() 5 min. read
5 min. read
![]() Updated on
Updated on
Share this article
This article is translated in

Improve this guide
Read our disclosure page to find out how can you help Windows Report sustain the editorial team Read more
Key notes
- Snipping Tool is an excellent in-built tool that lets you take screenshots on your Windows 11, but many who upgraded to the latest iteration found it missing.
- A bug in the OS triggered the problem, while some faced the issue due to corrupt system files.
- To fix things, update Windows 11, turn on notifications for the tool, or reinstall it using PowerShell, amongst other solutions.
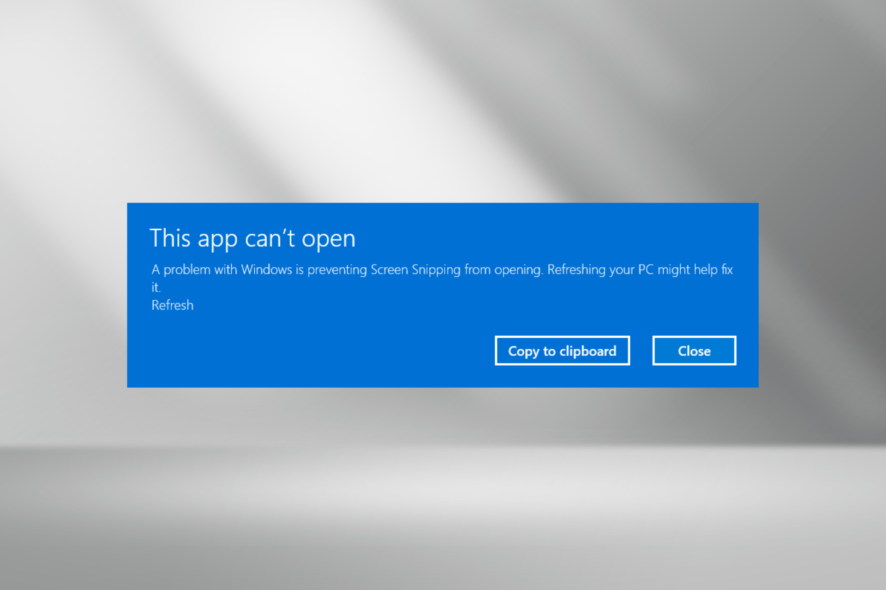
Have you recently upgraded to Windows 11 only to see the Snipping Tool missing or not working on your PC? Many reported the problem, but strangely, others seemed to have the tool running just fine.
There are various reasons the Windows 11 Snipping Tool is not working. But there are some quite strange solutions, as you will later find out. So, let’s find out all about the problem.
Why can I not find the Snipping Tool in Windows 11?
Here are some of the reasons the Windows 11 Snipping Tool is missing:
- A bug in the OS – Users who reported the problem early on when Windows 11 was released found a bug in the OS itself that caused the problem, and an update for it was released.
- Corrupt system files – If the system files are corrupt, chances are that Snipping Tool and a bunch of other pre-installed apps would fail to work.
- Misconfigured settings – There are certain settings that, when disabled, will affect the tool’s functioning.
How can I fix the missing Snipping Tool on Windows 11?
Before we try the slightly complex solutions, here are a few quick ones that might work:
- Restart the computer and check if you can access the Snipping Tool.
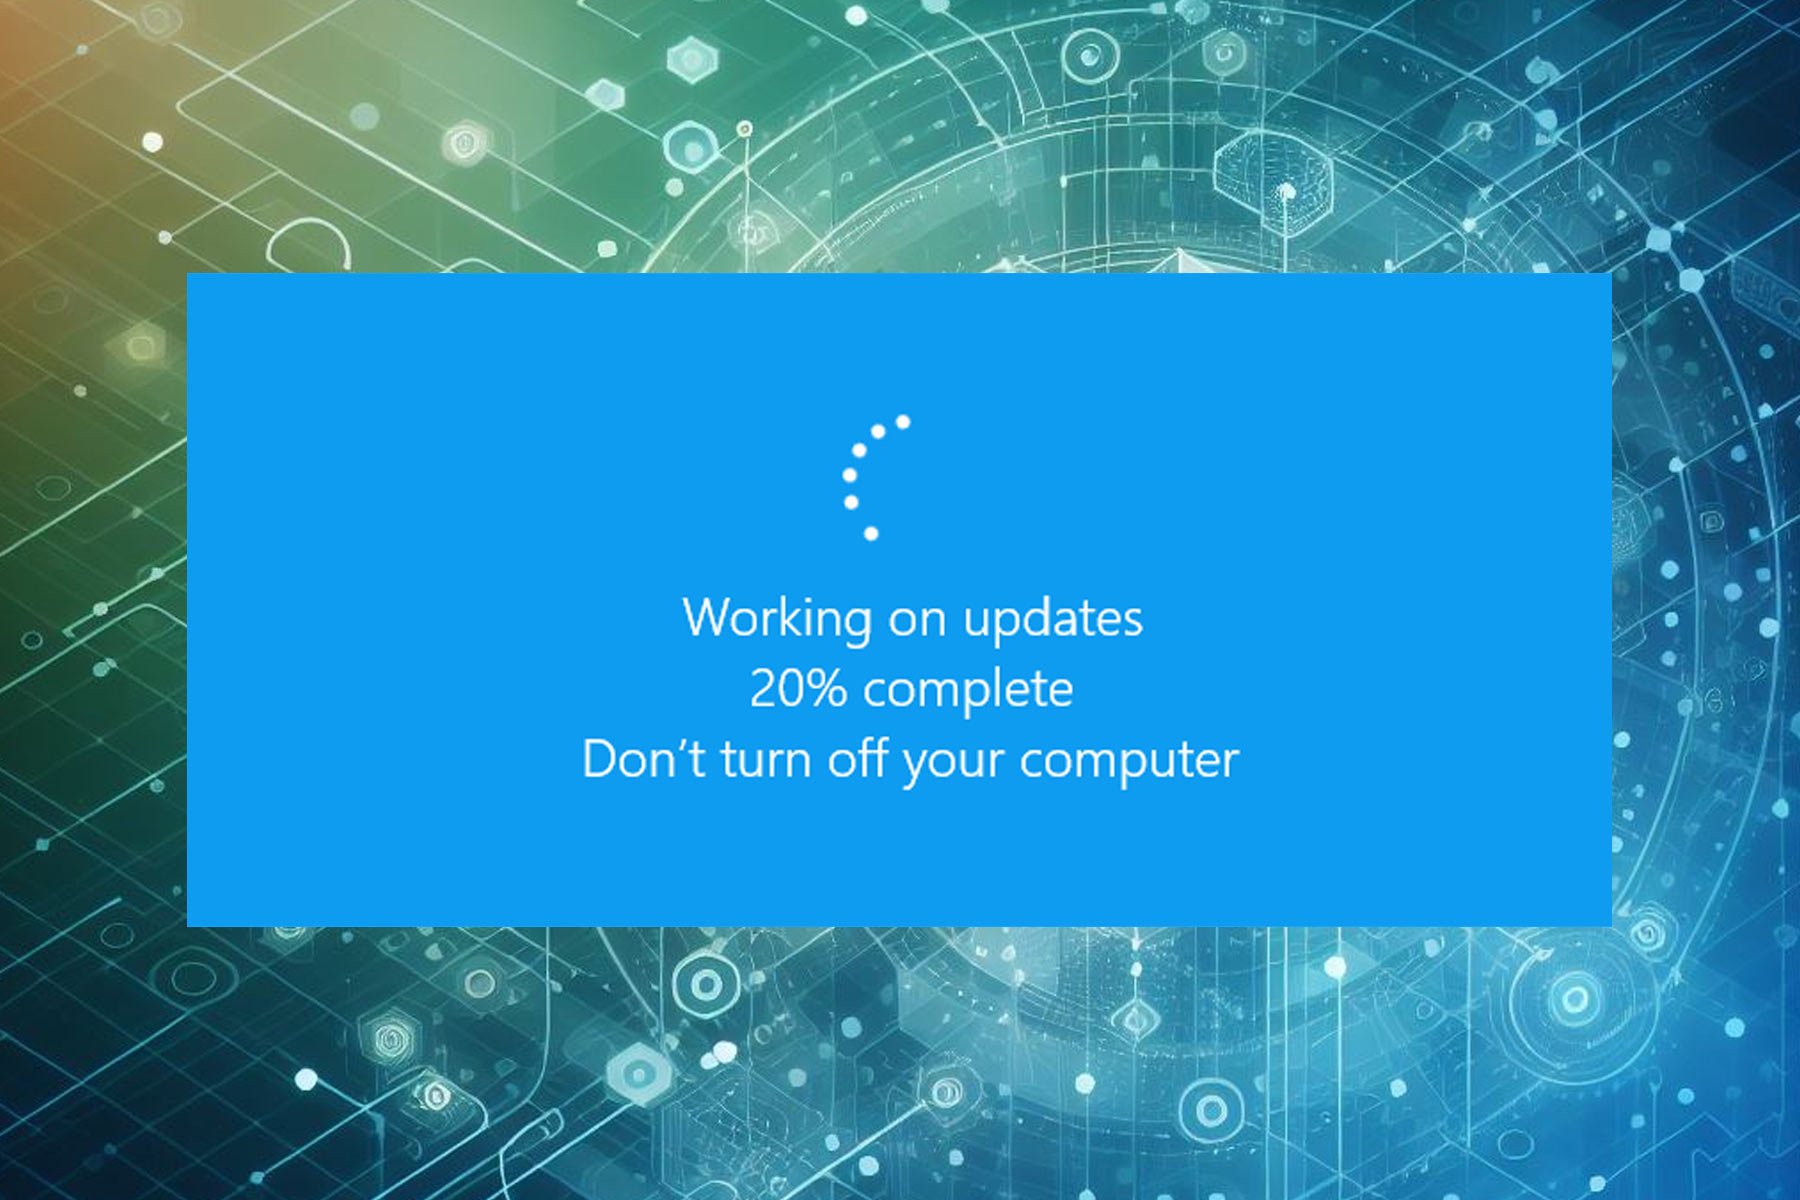
- Update the OS to the latest available version since a patch was released for a bug that led to the Snipping Tools not running in Windows 11.
- Scan your PC for malware and viruses using the built-in Windows Security. Also, you could use a reliable and effective antivirus. These are generally up-to-date with the recent bugs and threats and help seamlessly eliminate them.
If none of these work, head to the fixes listed next.
1. Open it from Windows.old folder
- Press Windows + E to open File Explorer, navigate to the C: drive, and then open Windows.old directory.

- Select the Windows folder, and then open the System32 folder.
- Search for Snippingtool.exe and launch the program.
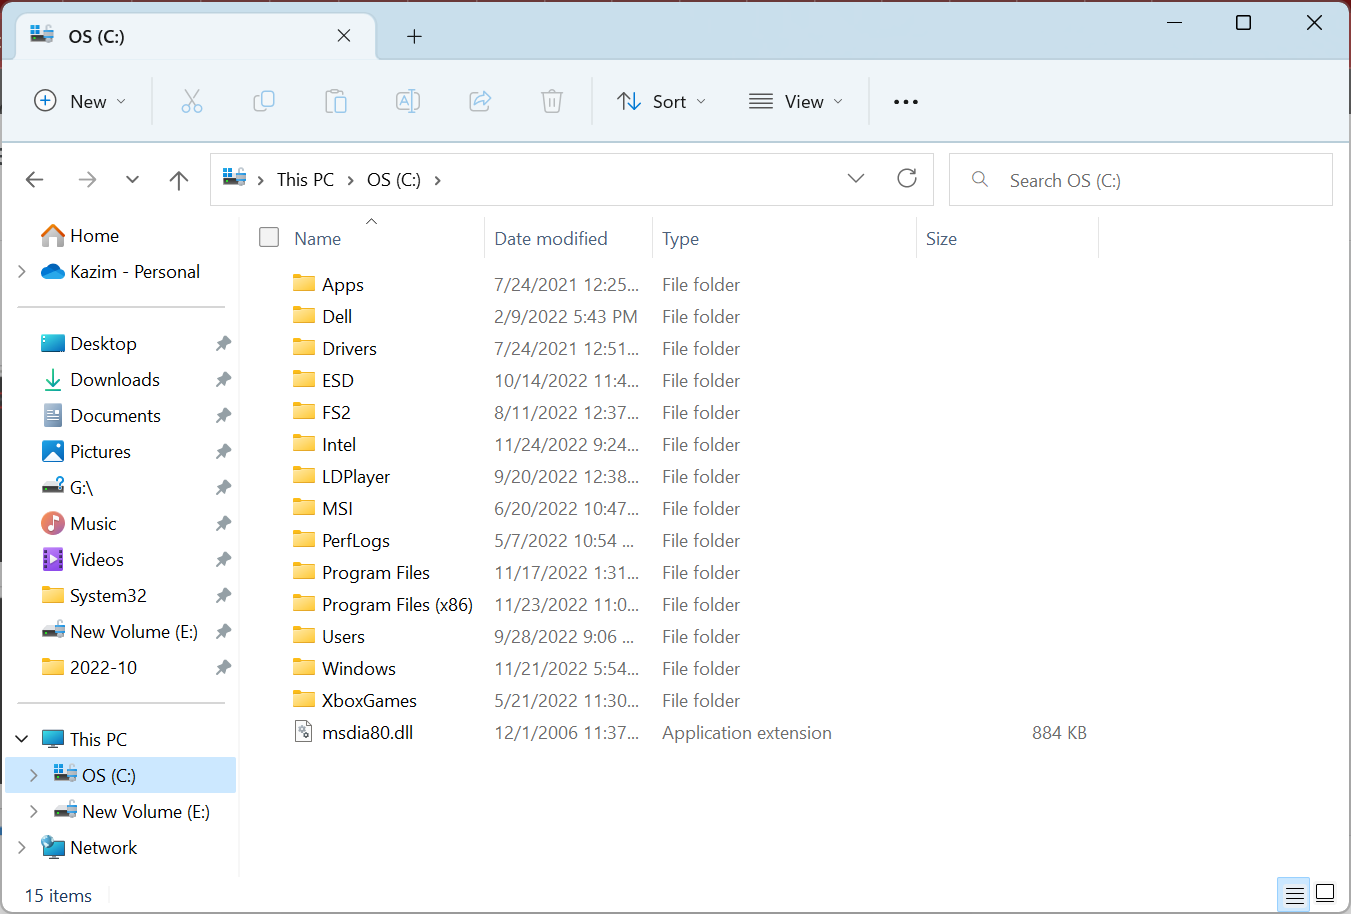
If you recently upgraded to Windows 11, there must be a Windows.old folder with the Snipping Tool shortcut. And you can run it directly from here. If the folder doesn’t exist or you deleted it, head to the next fix.
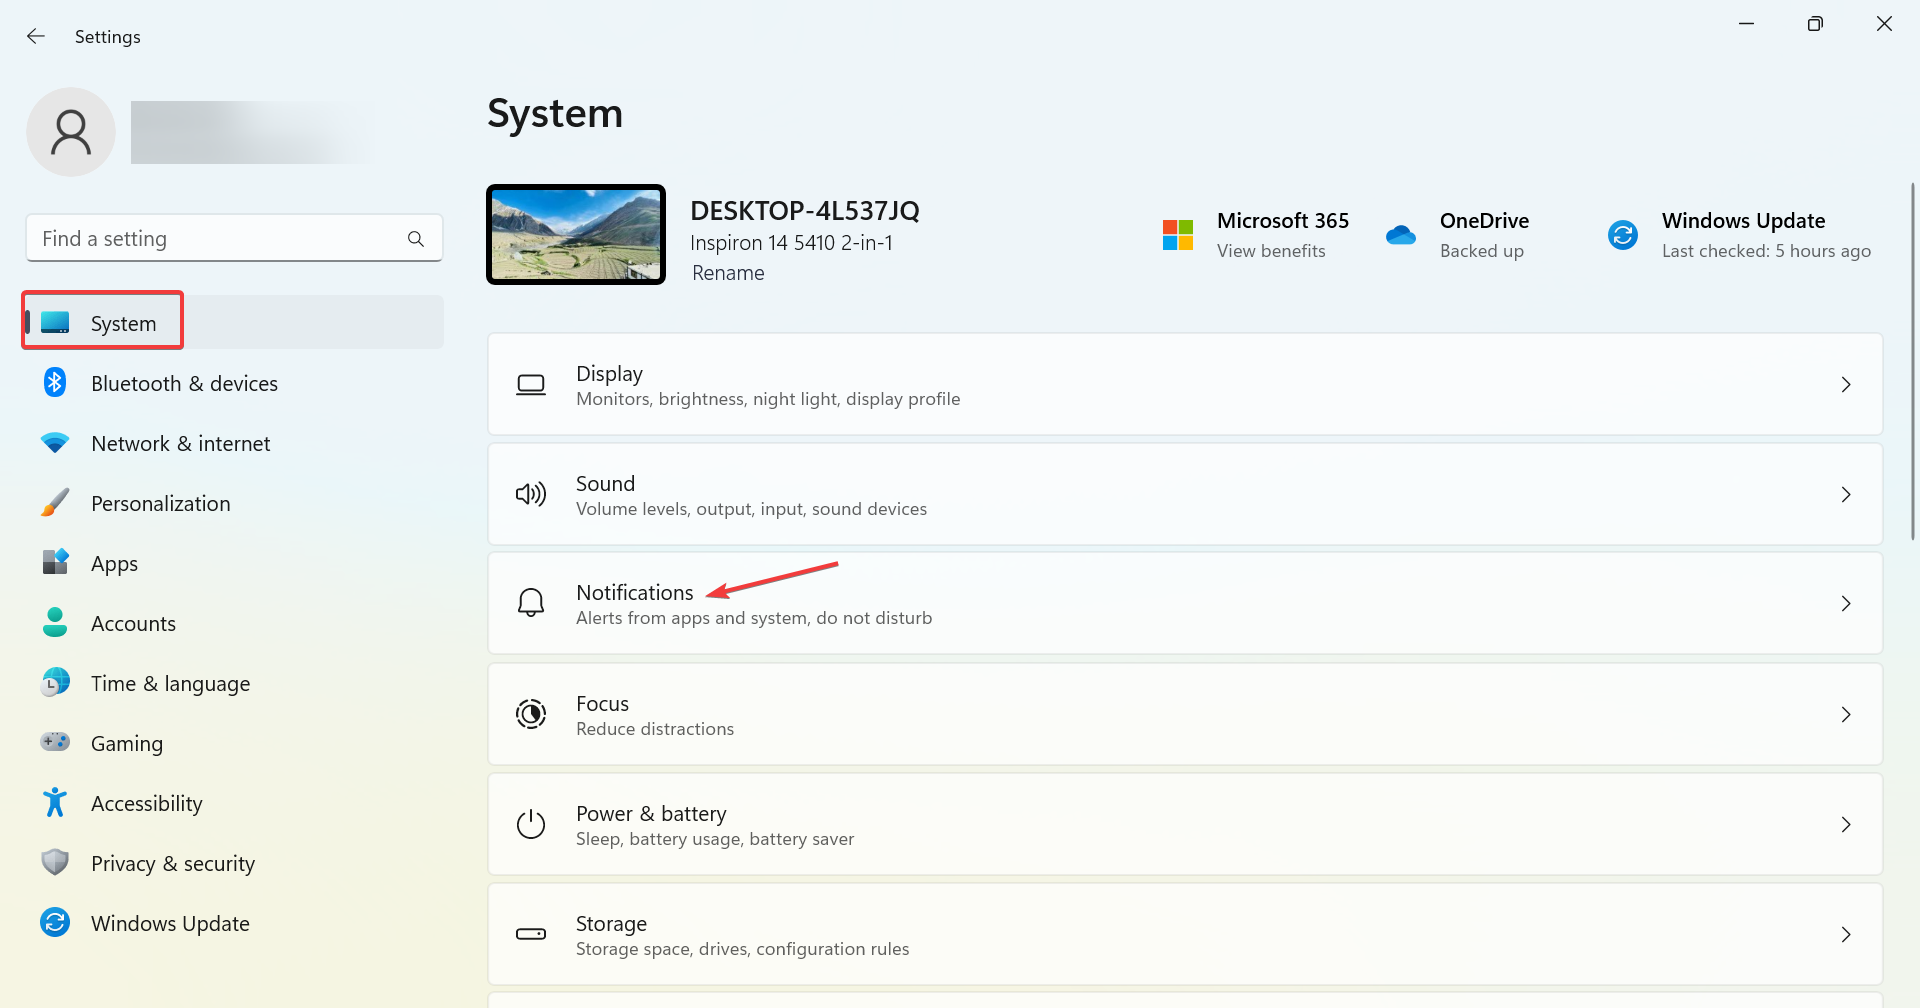
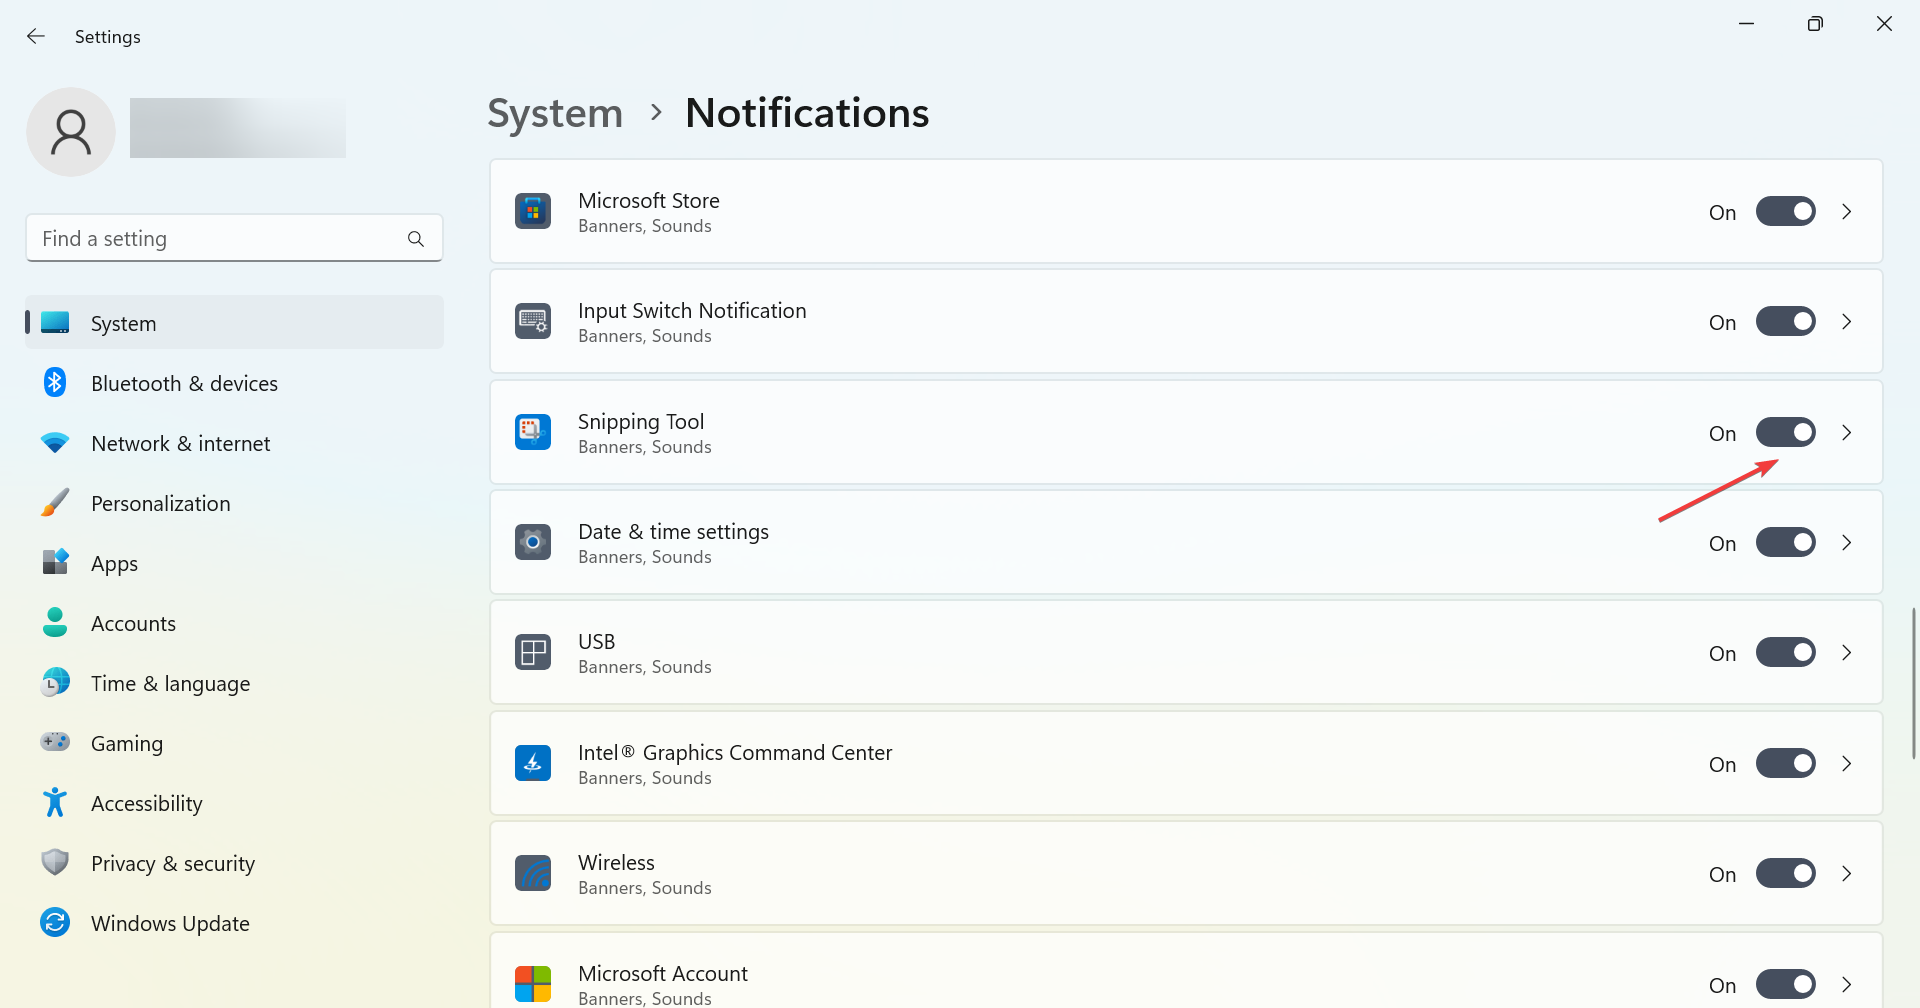
2. Turn on notifications
- Press Windows + I to open Settings, and click on Notifications in the System tab.

- Now, make sure the toggle for Snipping Tool is enabled.
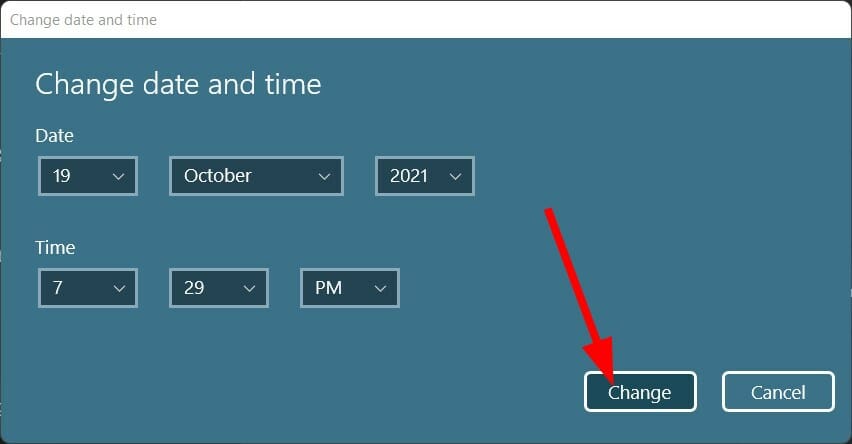
3. Change the date and time
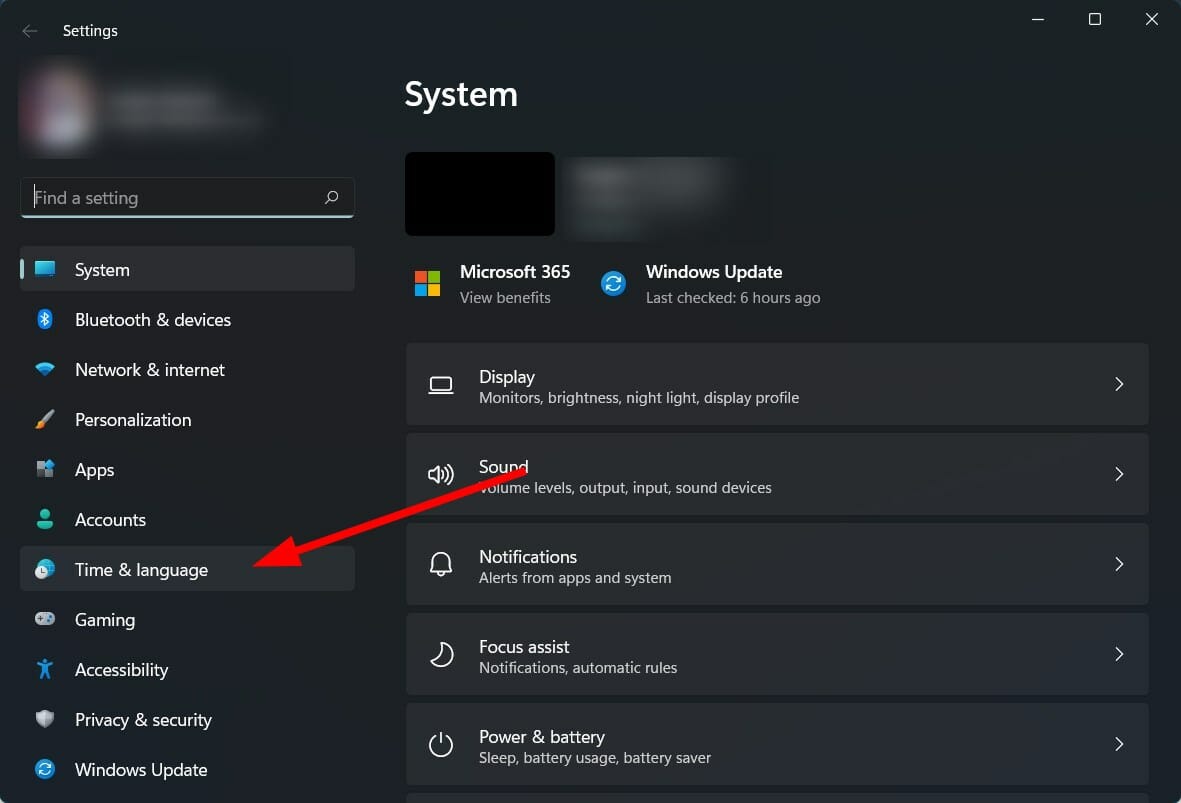
- Press Windows + I to open Settings, and select Time & language from the navigation pane.

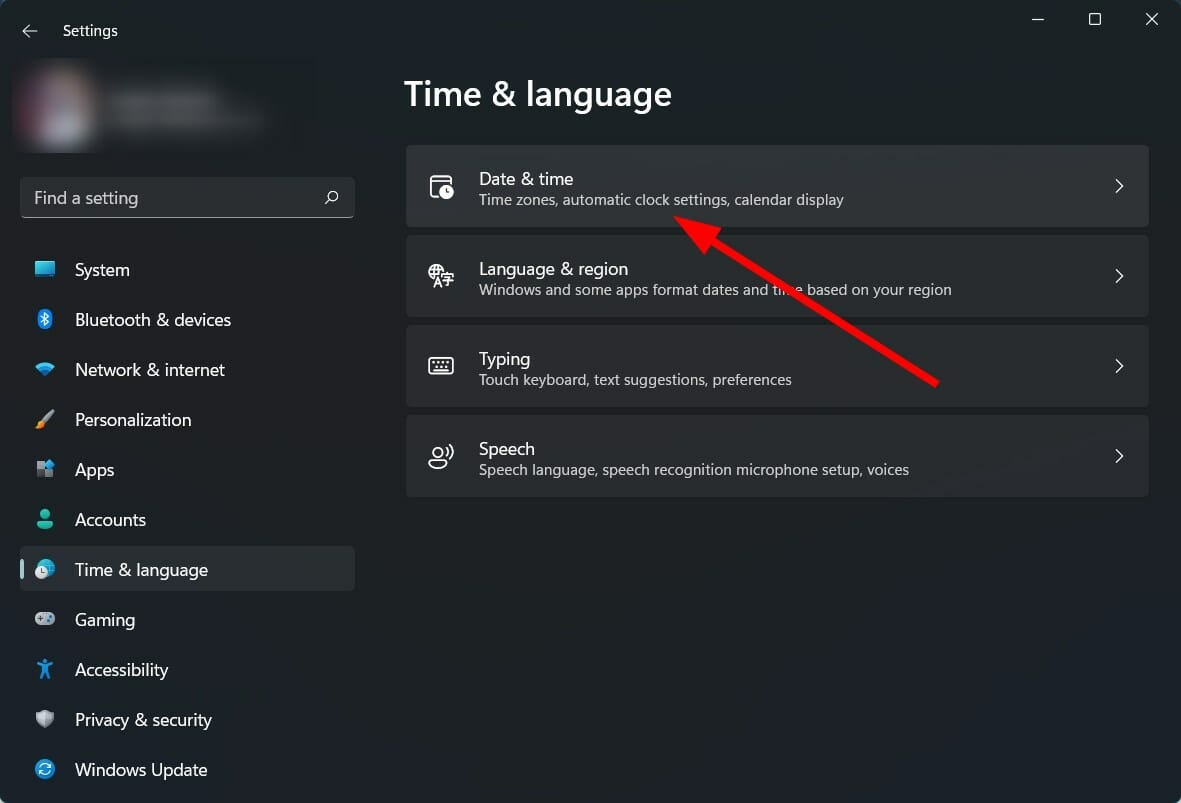
- Choose Date & time.
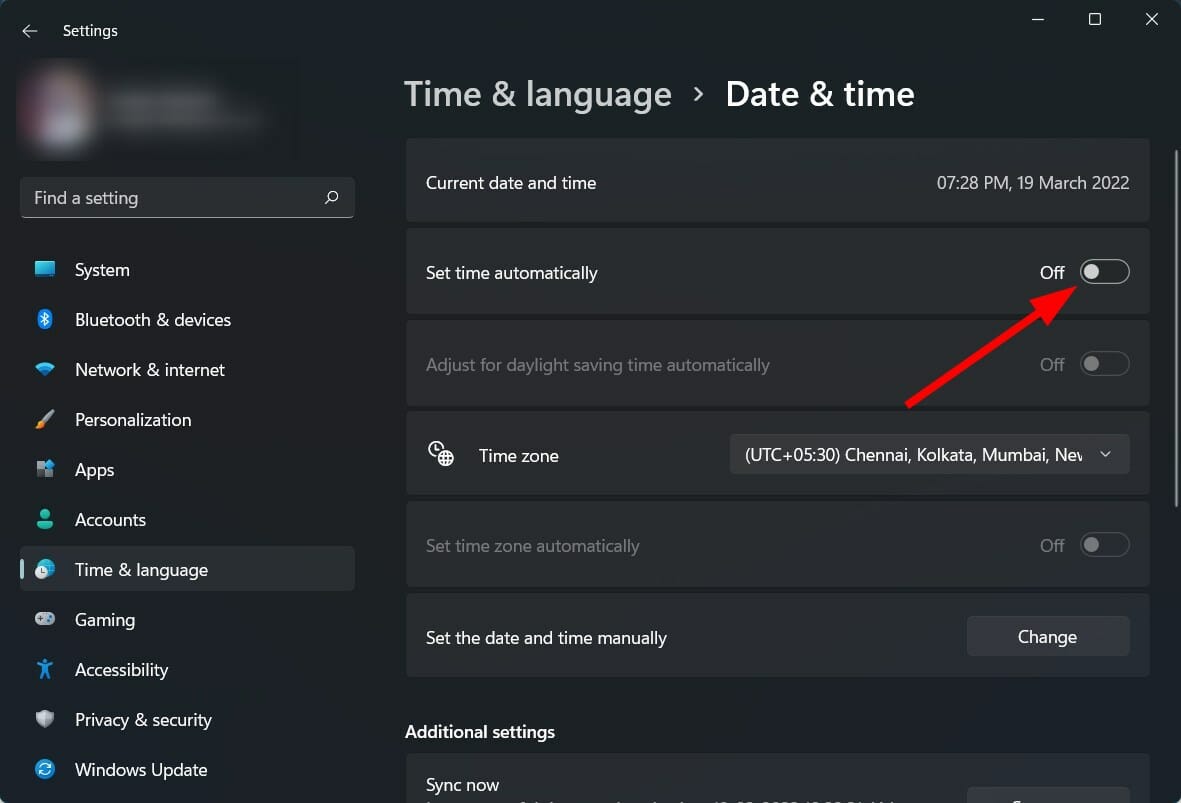
- Toggle off the switch for Set time automatically.
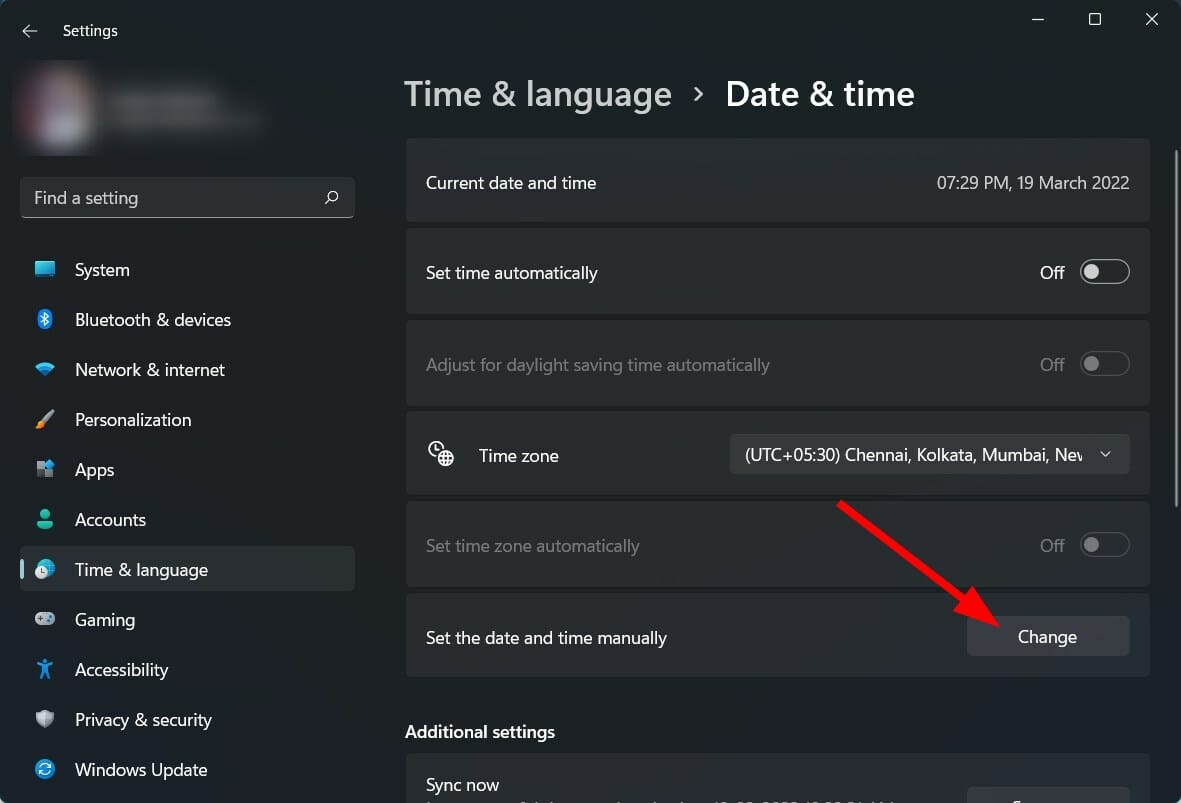
- Click on the Change button next to the Set the date and time manually option.
- Set the time to anything before October 30, 2021.

- Click Change and check if this fixes the problem or not.
There is another temporary solution provided by the Microsoft tech community. If the Snipping Tool isn’t working on your Windows 11 PC, change the date on your PC to anything before October 31, 2021.
This specific date is advised because of the app’s digital certificate, which was valid till October 31, 2021. However, a new update solved the problem, but if you are still experiencing it, then changing the date and time would be worth a try.
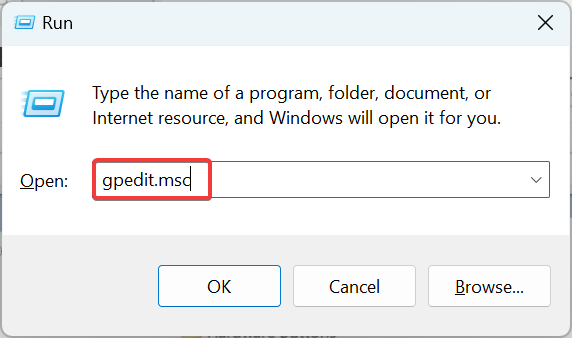
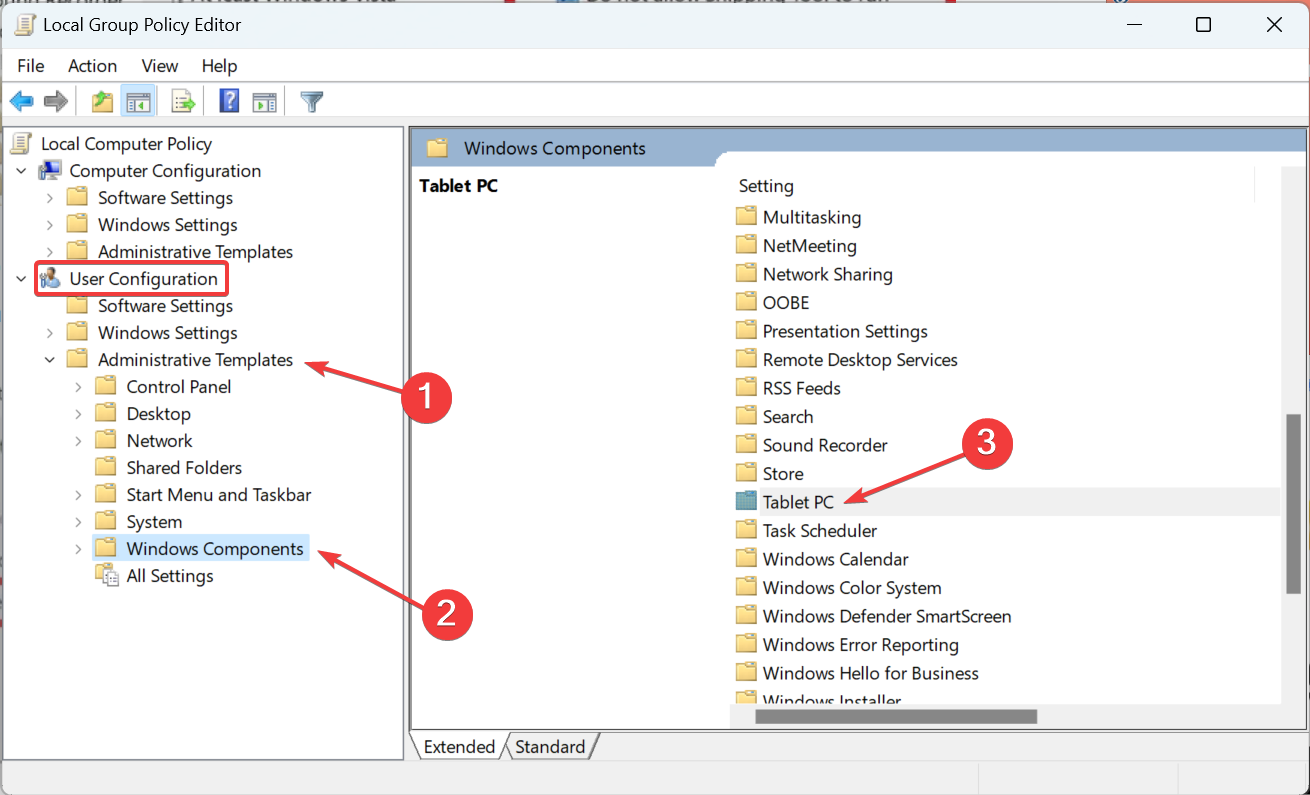
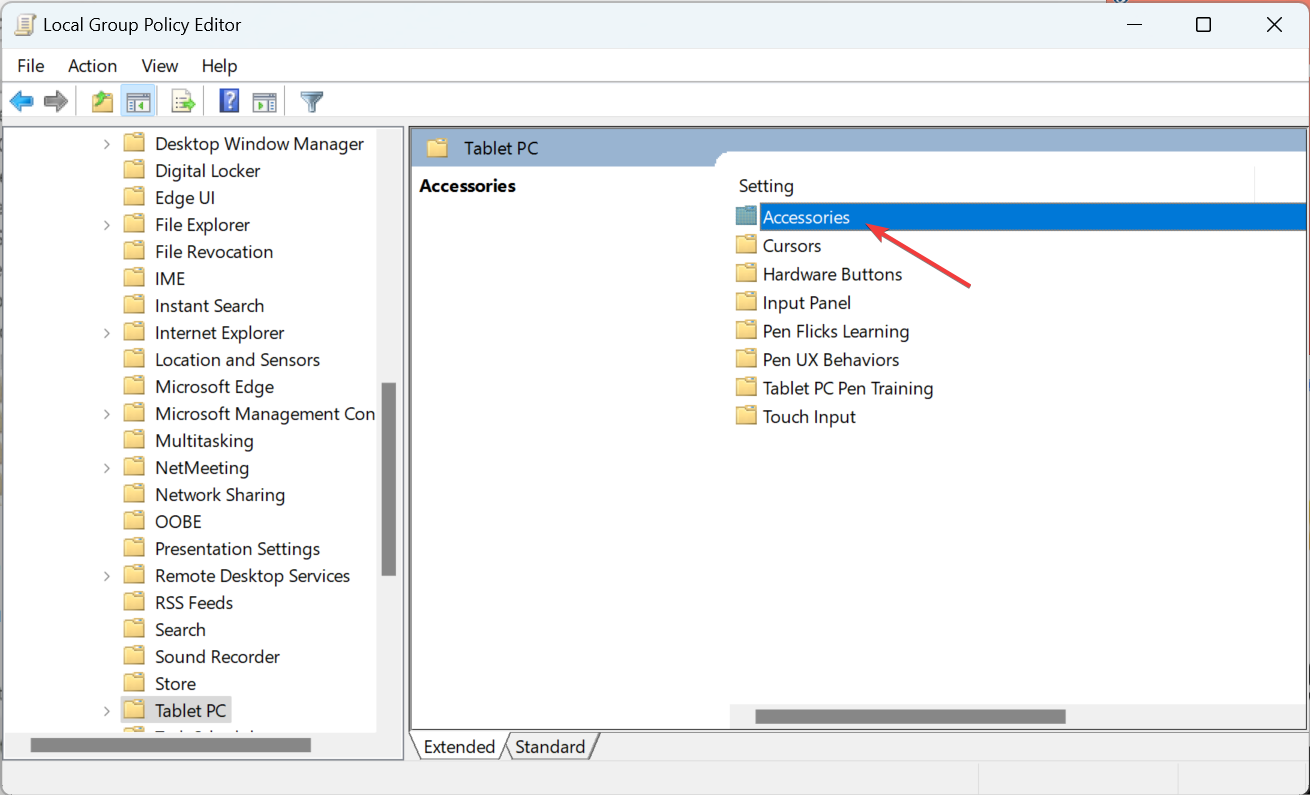
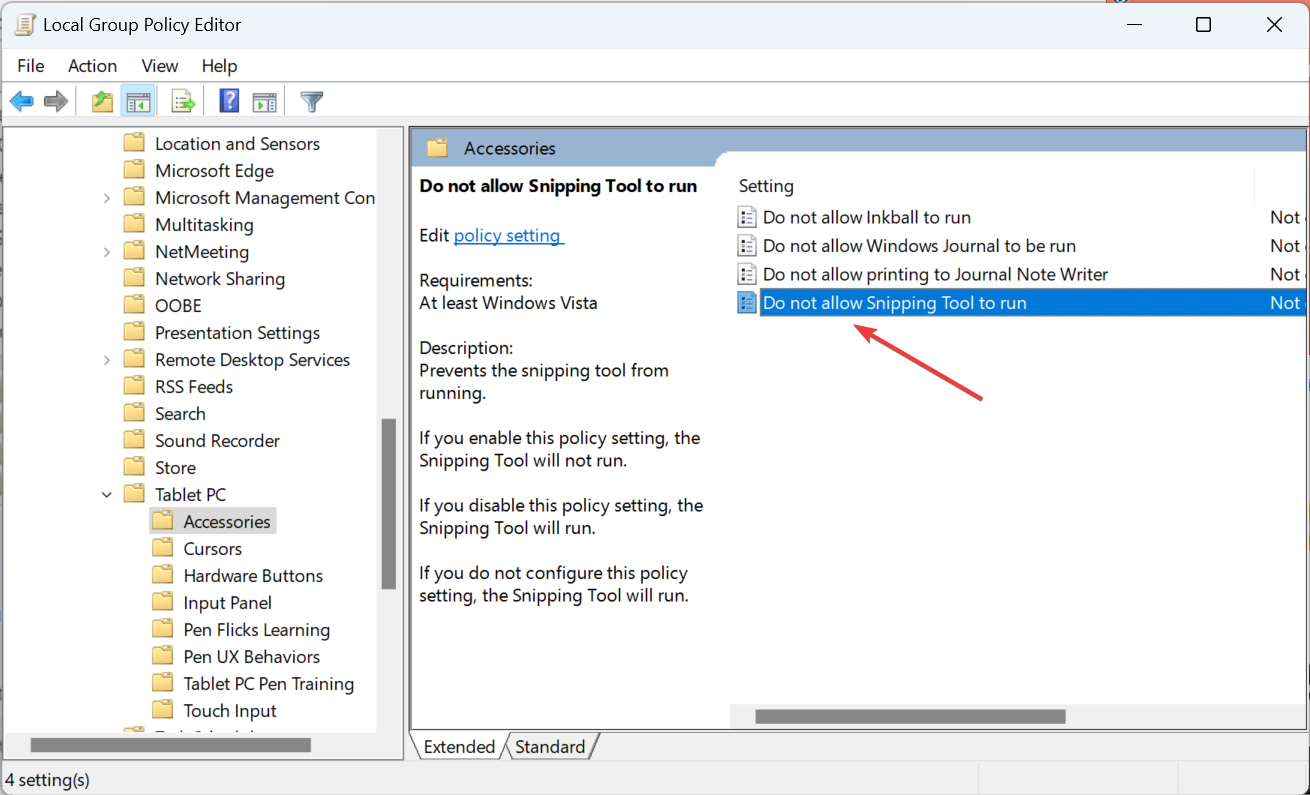
4. Modify the Group Policy Settings
- Press Windows + R to open Run, type gpedit.msc in the text field, and hit Enter.

- Under User Configuration, expand Administrative Templates, select Windows Components, and then choose Tablet PC on the right.

- Select Accessories.
- Now, double-click on the Do not allow Snipping Tool to run policy.
- Next, choose Disabled from the options at the top, and click on OK to save the changes.

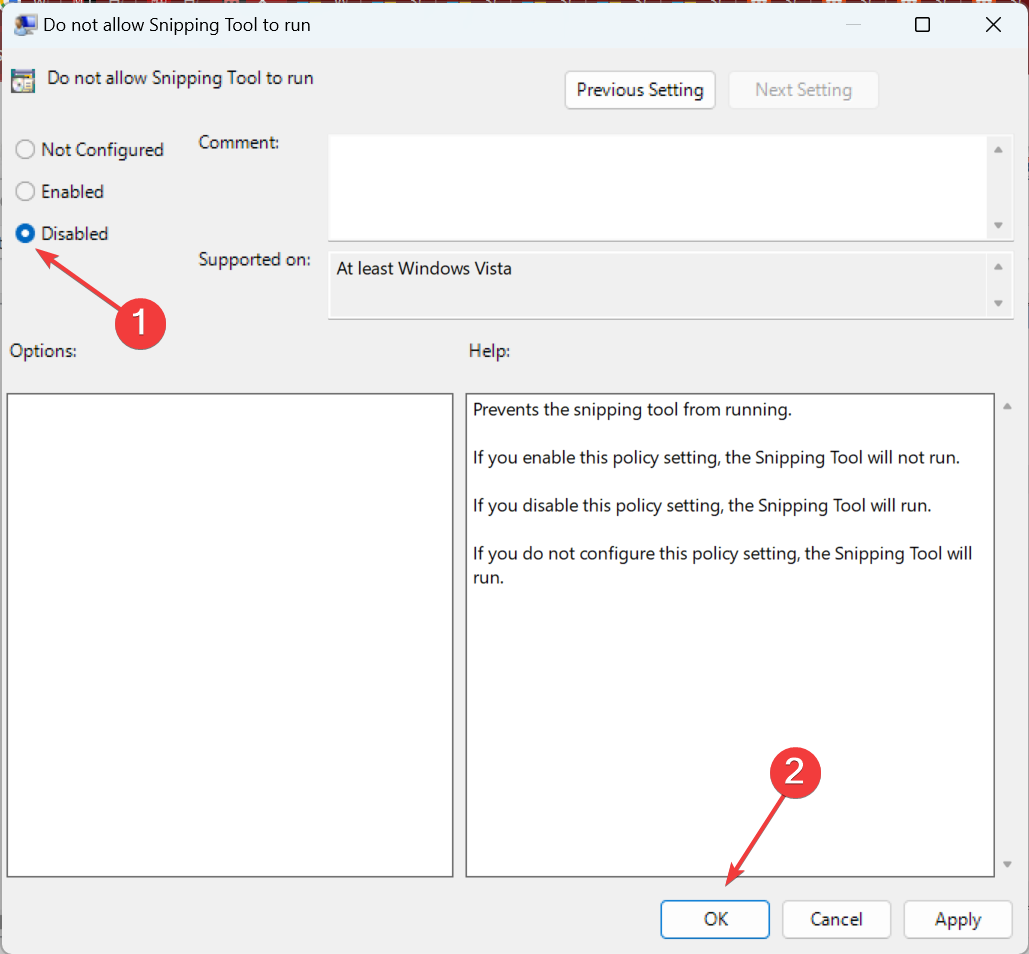
That’s it! If nothing had worked and Snipping Tool was still missing in Windows 11, it could have been a misconfigured policy to blame. But the problem will be fixed by now.
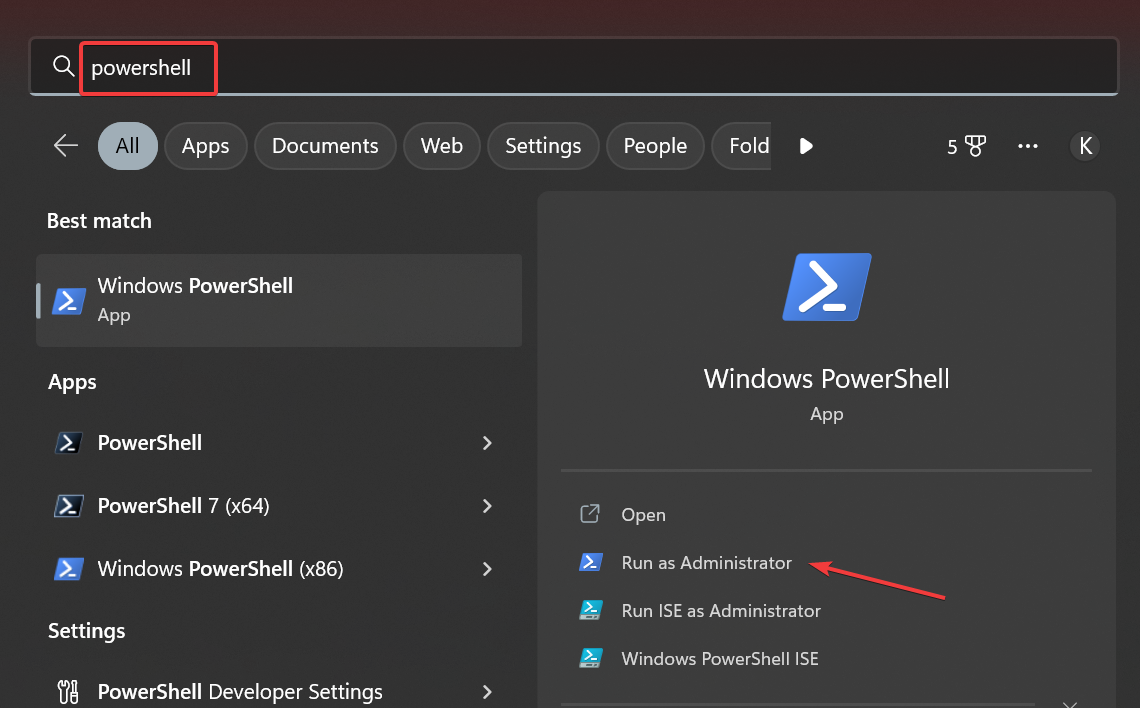
5. Reinstall Snipping Tool in Windows 11 via PowerShell
- Press Windows + S to open Search, type PowerShell in the text field, and click on Run as administrator.

- Click Yes in the UAC prompt.
- Paste the following command and hit Enter:
get-appxpackage Microsoft.ScreenSketch | remove-appxpackage
- Once done, execute the following command:
Get-AppXPackage Microsoft.ScreenSketch -AllUsers | Foreach {Add-AppxPackage -DisableDevelopmentMode -Register “$($_.InstallLocation)\AppXManifest.xml”}
- Once done, restart the computer for the changes to come into effect.
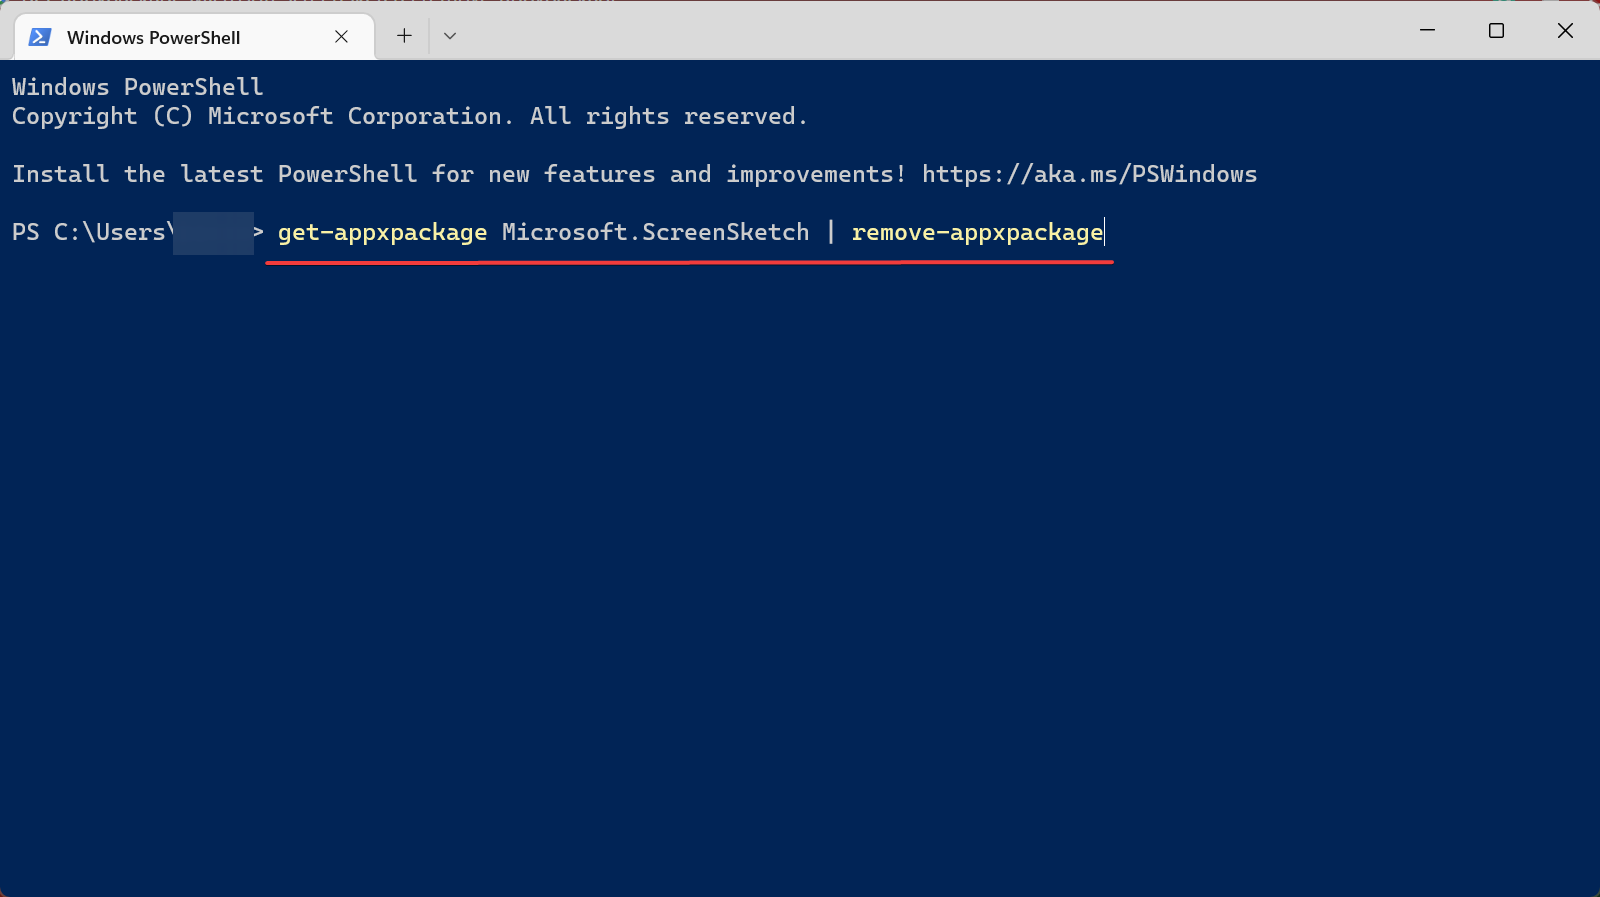
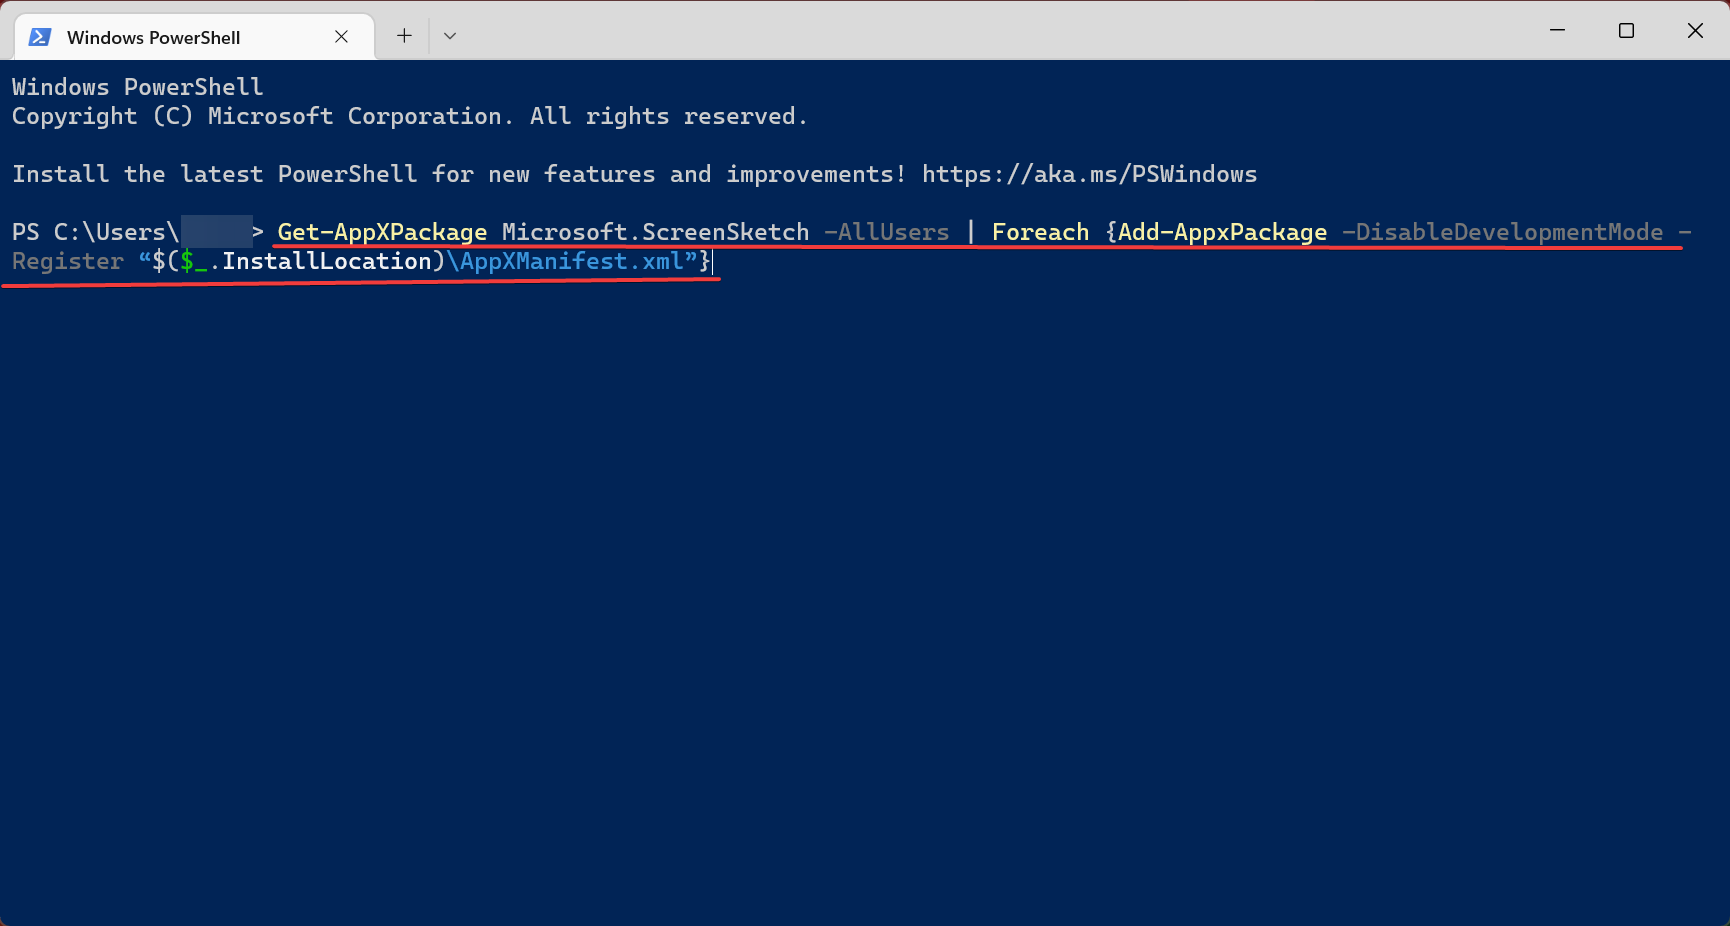
You can also install Snipping Tool in Windows 11 using PowerShell when missing, a method that has worked for many users.
6. Download from Microsoft Store
- Press Windows + S to open Search, type Microsoft Store, and click on the relevant search result.

- Search for Snipping Tools, and click on Install to get it.
- Once the installation is complete, you can easily open and access Snipping Tool.
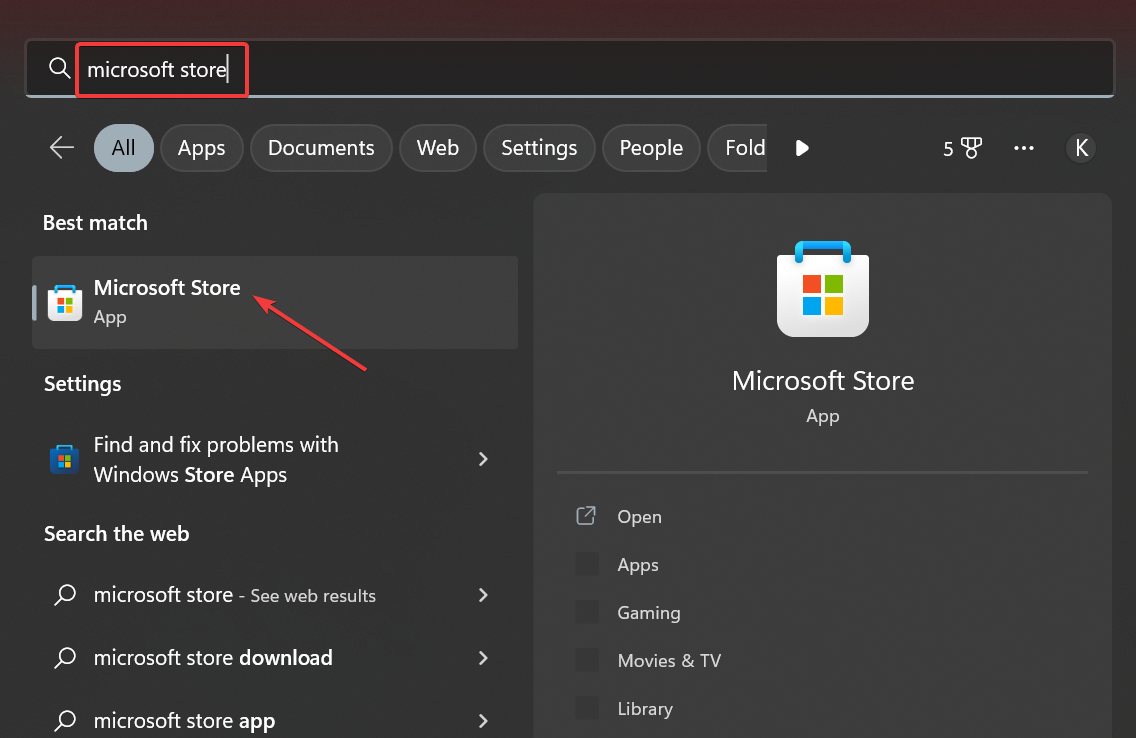
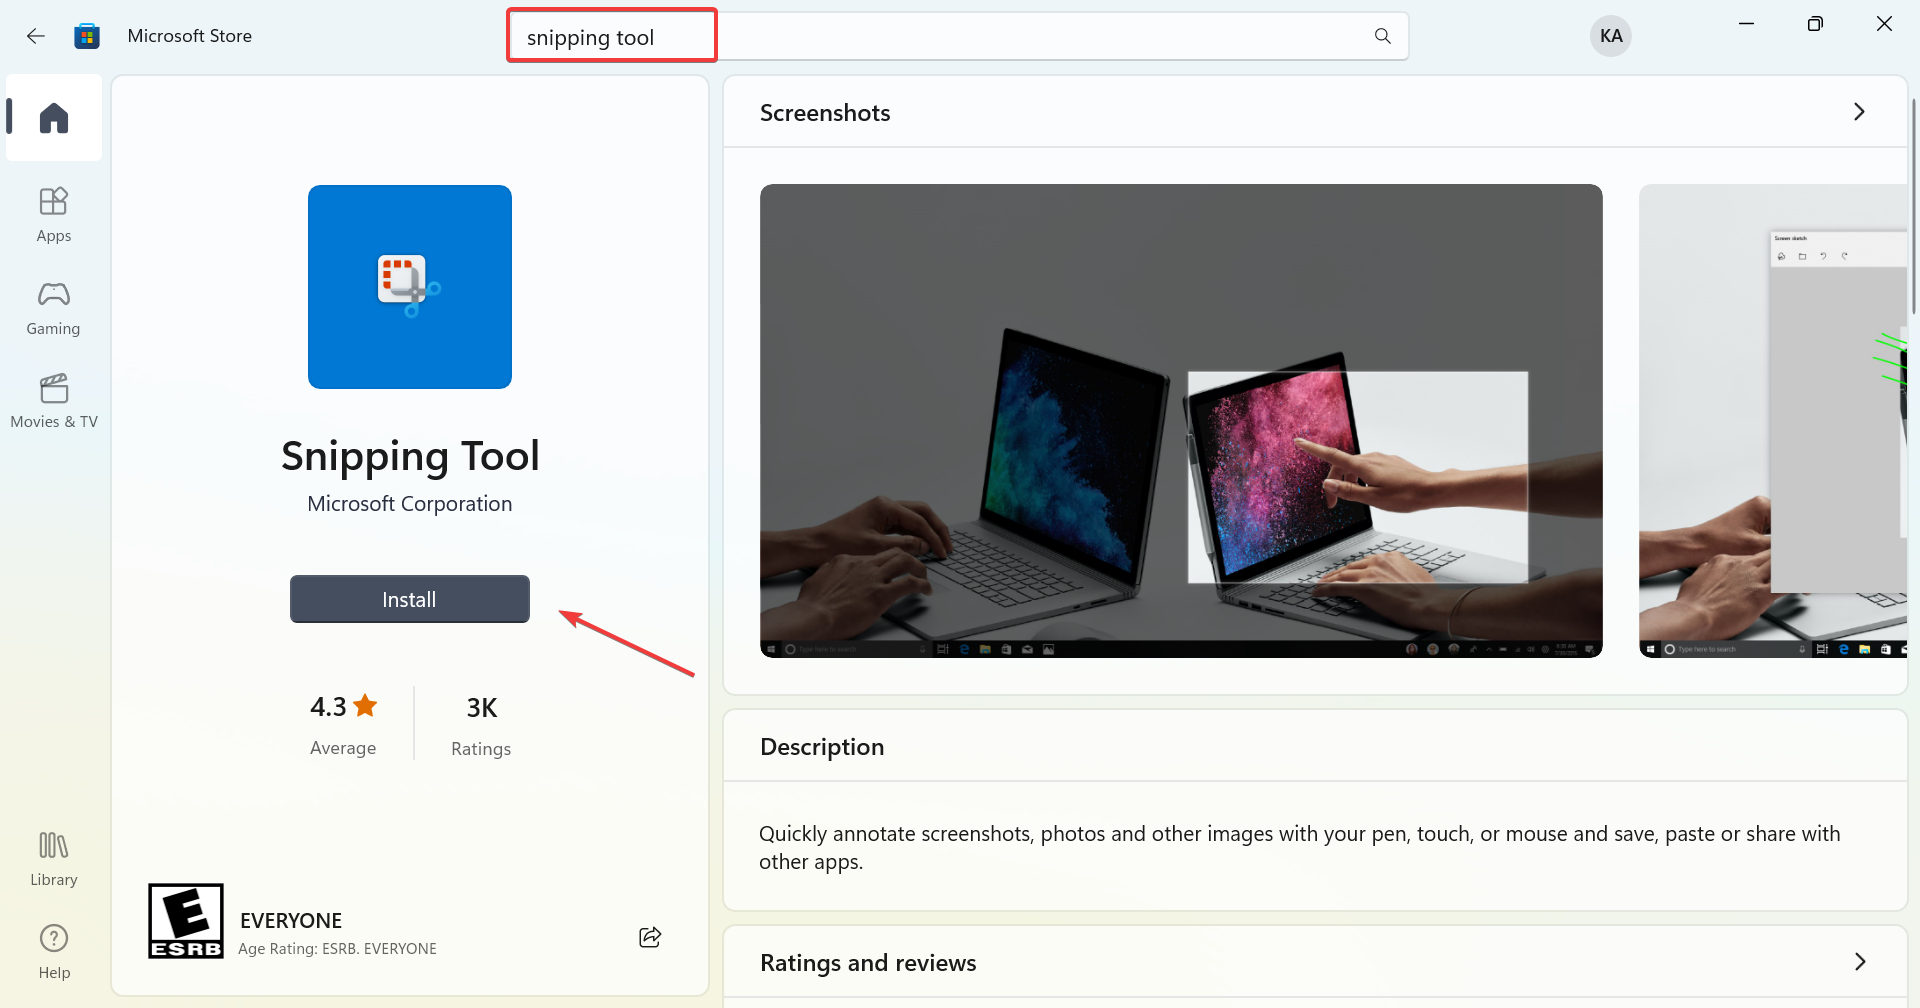
Also, if you can’t find Snipping Tool, search for Snip and Sketch, though the two have been integrated and go by the former’s name in Windows 11.
If nothing works, we recommend you wait for an update from Microsoft. Until then, use effective screenshot-capturing software.
Do not forget to share other solutions that fixed the issue in the comments section and help fellow Windows 11 users.