How to Install Windows 11 on a M1 or M2 Mac With UTM
Here's a free and faster way to get Windows 11 on your Mac
![]() 4 min. read
4 min. read
![]() Updated on
Updated on
Share this article

Improve this guide
Read our disclosure page to find out how can you help Windows Report sustain the editorial team Read more
Key notes
- Tired of running Windows 11 on your Apple M1 through Parallels and want a free and faster experience?
- The UTM virtual machine is the tool to look out for, and it seems users are more than pleased with their results.
- Windows 11 runs smoothly, and absolutely everything works fine, so here's a guide on how to do so yourself in case you want to have a go.

Ever since Windows 11 was revealed to the world, and even before, we’ve been talking about running it on Apple PCs with the help of Virtual Machines (VM). Users have gotten used to installing it using Parallels, on Apple M1 devices, and the OS even received exclusive x64 Windows on ARM emulation.
We’ve seen the OS installed on all sorts of devices, from smartphones to NUCs, so it should come as no surprise. However, the question is how well Windows 11 runs on an Apple M1 device through a UTM VM. Let’s find out, shall we?
Can you install Windows 11 on M1 Mac?
Even though Windows 11 doesn’t run badly at all when you emulate it through Parallels, the answer to the question above will surely please you even more. Yes, you can install Windows 11 on an M1 Mac.
While this may sound like great news in face view, it doesn’t exclude the stringent system requirements that your device should meet to run the OS. This also applies to Mac users. One of the most important features required is TPM.
Microsoft does not officially support the hardware, so some issues may arise when installing Windows 11 on the device. However, if the computer meets the minimum requirements for the operating system, then it should be able to run Windows 11 without any problems.
Also, judging from the first few trials, the attempts were all met with success, and the OS performance was an unexpected bonus.
A recent Reddit post that caught our attention, discussing the same subject, further explains just how efficient Windows 11 seems to be on these Apple M1 chips if you use the right VM for the job.
Everything is snappy and fast, including heavier programs like Microsoft Teams. Sound and video also work perfectly.
How can I run Windows 11 for free on M1 or M2 Mac?
Before you get to installing Windows 11 on your Mac, ensure your device meets the following requirements:
- Make sure your computer meets the minimum requirements for running Windows 11.
- Check for compatibility issues with any hardware or software installed on your Mac.
- Ensure you have enough space in your hard drive, preferably 100GB or more.
Once you’ve fulfilled these requirements, proceed to the next step.
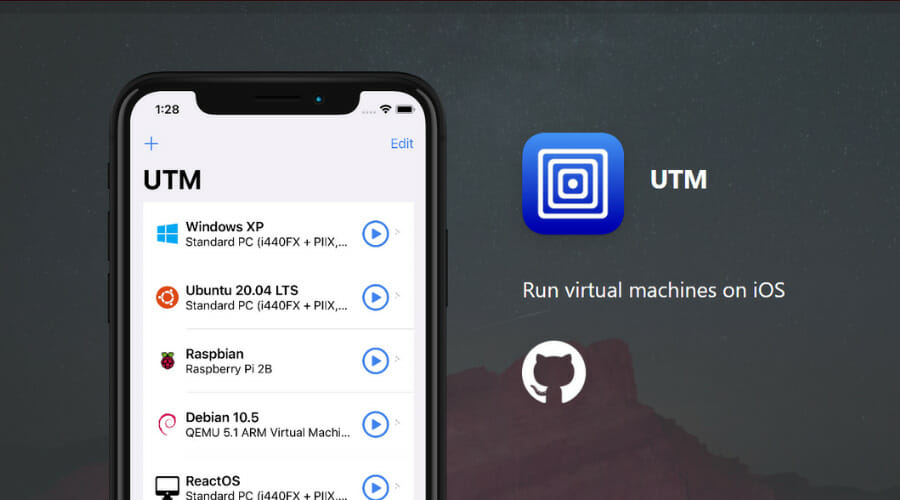
- Navigate to your browser and download the UTM application.
- Wait for the program to complete download and launch it.
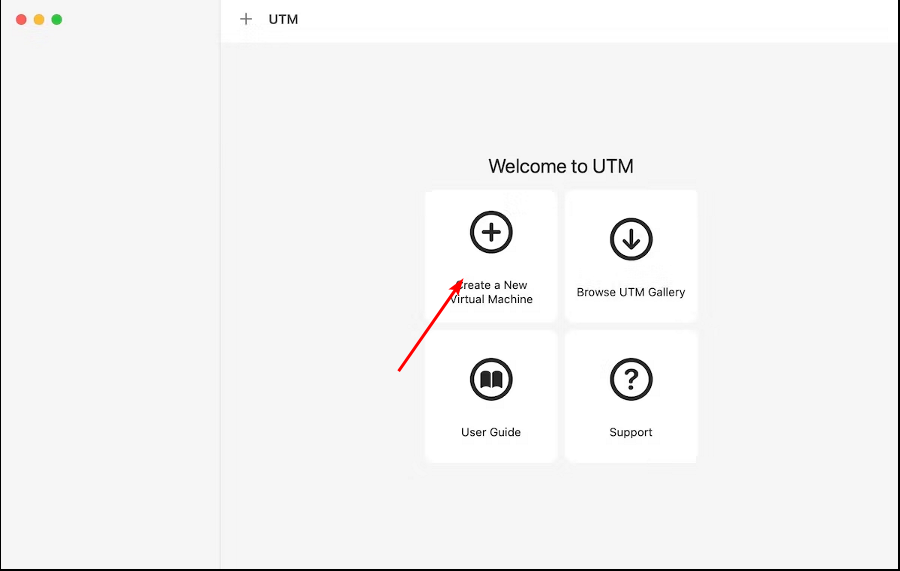
- Click on the + sign to Create a New Virtual Machine.

- You will need the Windows 11 ISO files so ensure you download them beforehand.
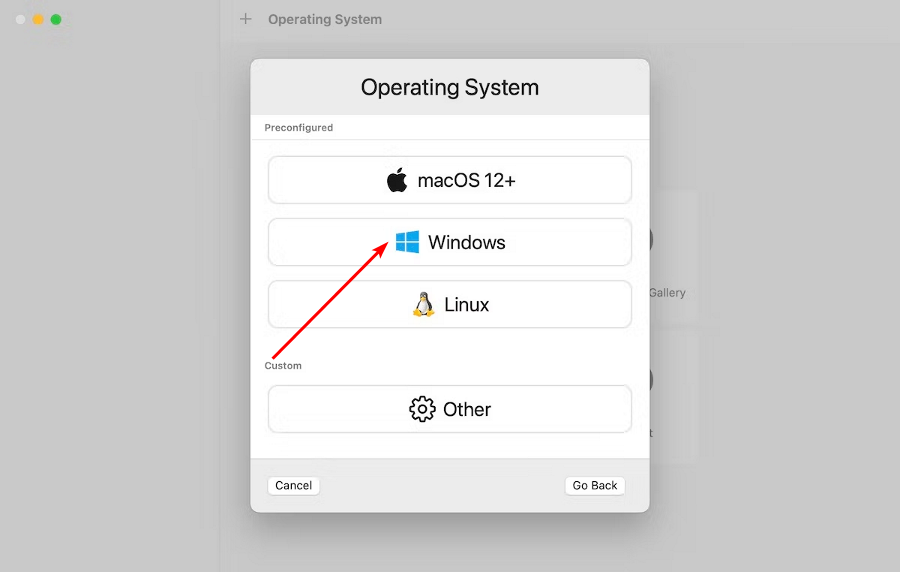
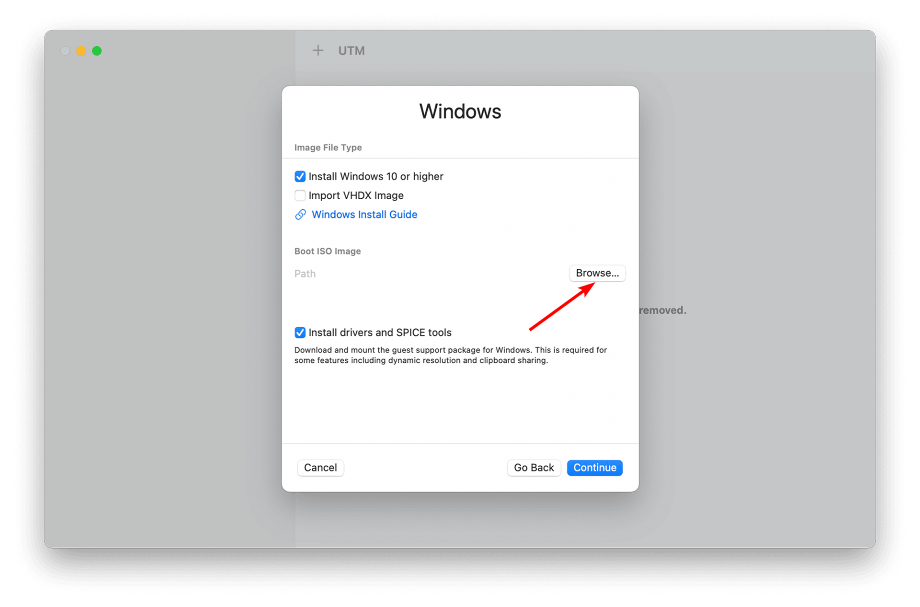
- Select Windows as the operating system you wish to virtualize.

- Click on Browse and select the Windows 11 ISO image, then hit Next.

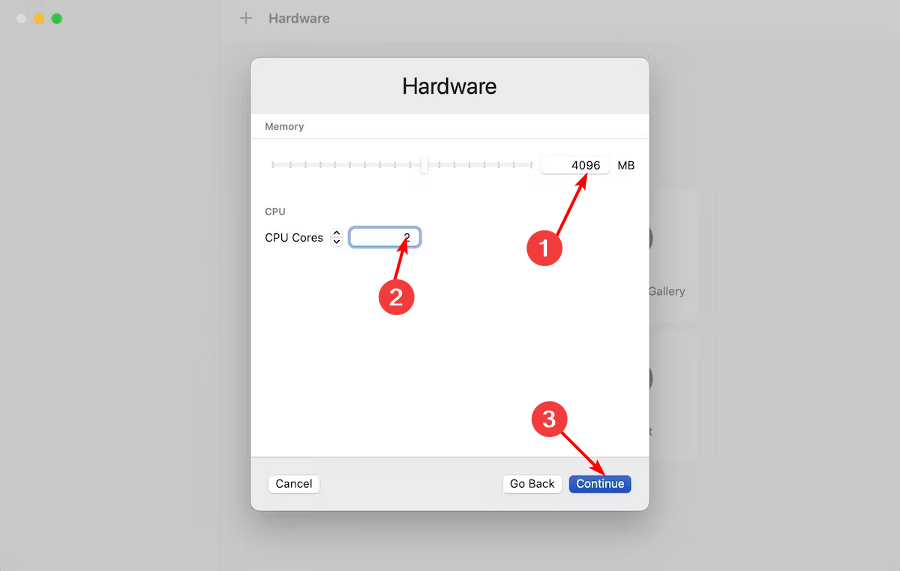
- You’ll be required to set the amount of RAM and cores for your OS. We recommend selecting anything from 8GB upwards for a smoother performance. The amount will depend on how heavy your activities are. Once set, click on Continue.
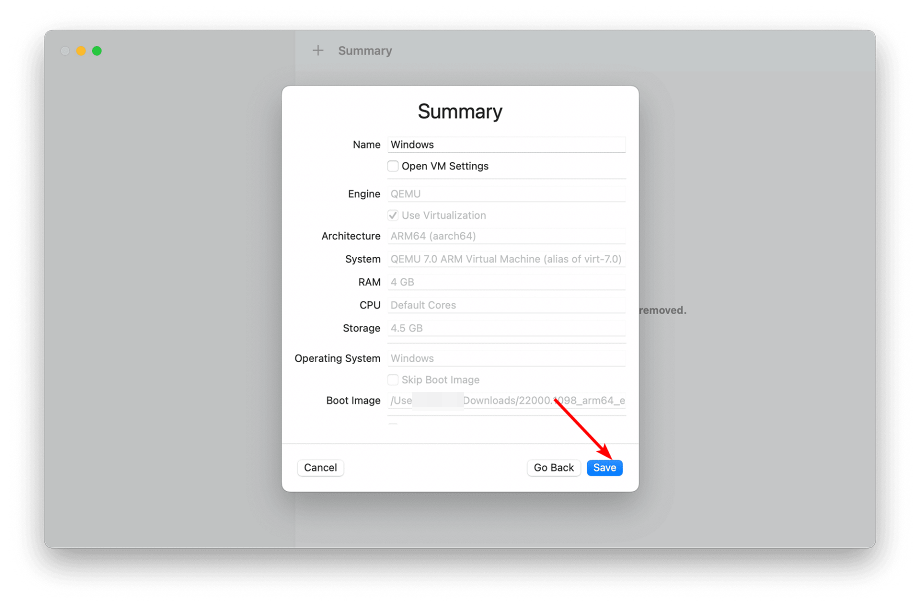
- Confirm everything is correct from the Summary page, then click Save.
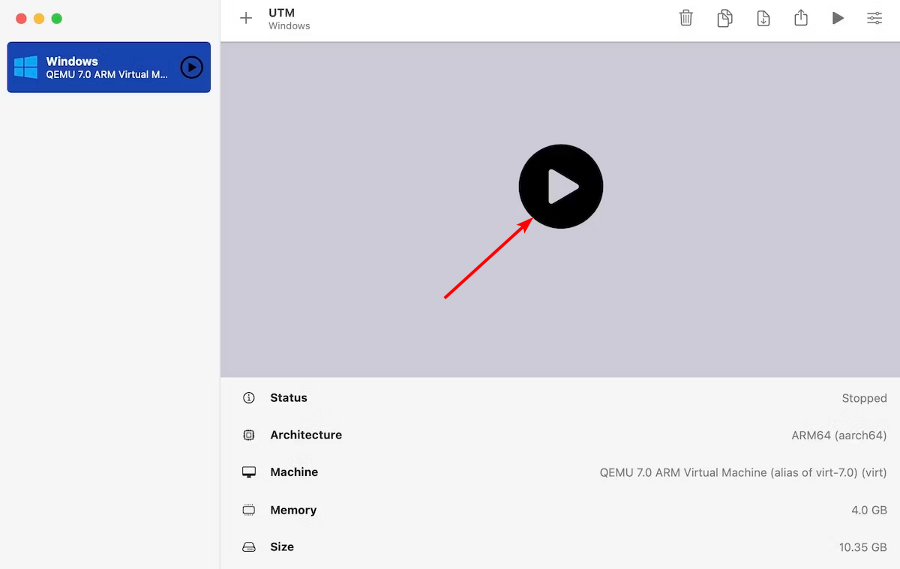
- A play button will appear on the next screen, so click on it to boot your device.

- Once it boots up, you’ll be taken through the usual Windows setup, so follow the on-screen instructions to complete the setup.
Is the UTM virtualizer app good for Mac M1?
One of the greatest reasons why UTM is the better choice is that it is free. Of course, there exists the paid version for $10 on the Mac Store, but they are basically the same thing. The only difference is that with the free version, you’ll have to keep checking for updates and download them manually.
Another winning feature is that it is open-source, which means developers are at liberty to tweak some of its settings to meet their needs. Needless to say, this is a great option for those who also need to run Windows on their Mac for work or otherwise.
Options like Bootcamp have since become limited to Intel processors making them less available. Apple is slowly or rather quickly moving to ensure that their Macs run exclusively on Apple silicon processors: M1 and M2.
Parallels, however, requires you to get money out of your pocket. Depending on the version you chose to upgrade to, you can easily part with up to $100 for the Pro version.
Yes, in case you haven’t catched it yet, the VM we mentioned in this article, which is UTM, is free. This seems to be a great choice for making good use of the Redmond tech giant’s latest OS on an incompatible device.
Windows 11 and macOS have many similarities, so there’s no reason why you should limit yourself to only one when you can have both.
Have you tried installing Windows 11 using UTM? Share your experience with us in the comments section below.