
Generating SSH keys in a Windows environment used to be a convoluted process which required the installation of third-party tools. Since the Windows 10 April 2018 update, Windows has shipped with a preinstalled OpenSSH client, which means you can use ssh-keygen to generate SSH keys. Read on as we walk you through the entire process.
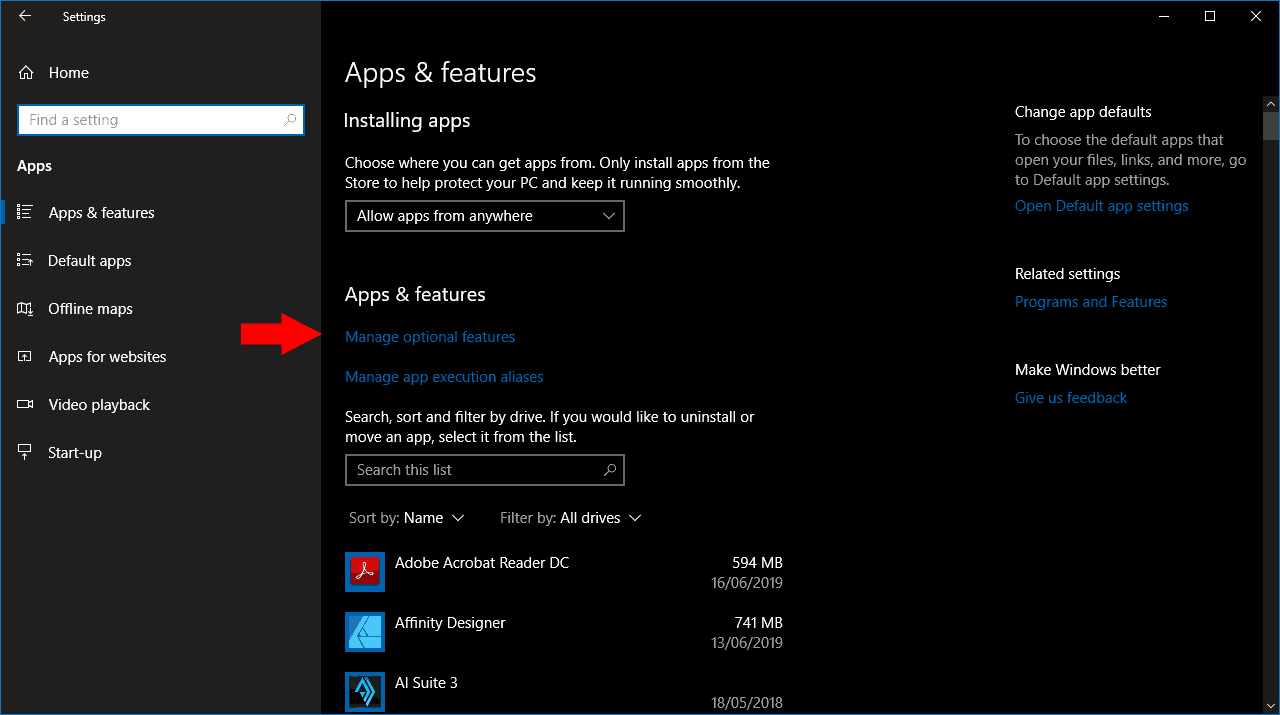
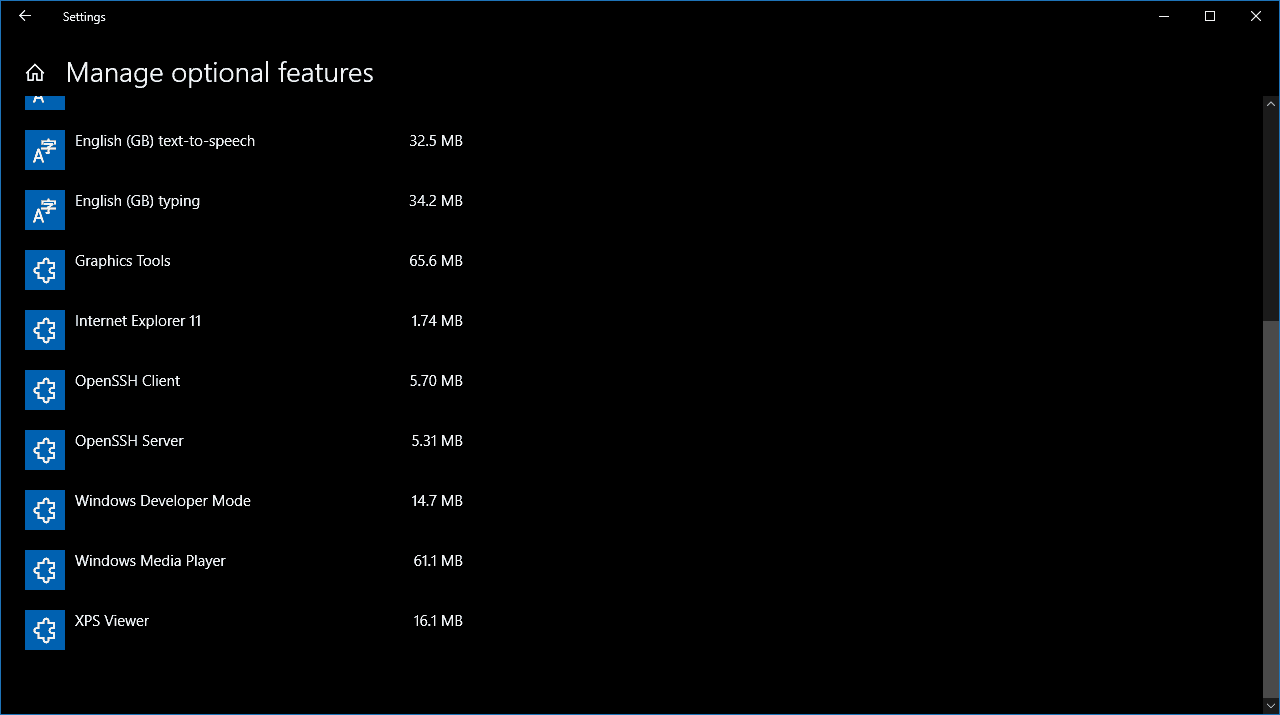
First, you’ll need to make sure OpenSSH is installed on your machine – if you upgraded from an earlier version of Windows 10, you may need to manually enable it. Launch the Settings app and click the “Apps” category. Next, click the “Manage optional features” link. If you don’t see “OpenSSH Client” in the list which appears, click the “Add a feature” button and install it. You might need to reboot your PC after the installation.
Once OpenSSH is installed, you’re ready to proceed. Open Command Prompt from the Start menu. Type “ssh-keygen” (without the quotes) into the terminal window and press enter. You’ll be prompted to confirm the save location. We recommend pressing enter to use the default location in your user directory. Otherwise, type a path to save the key in and then press enter.
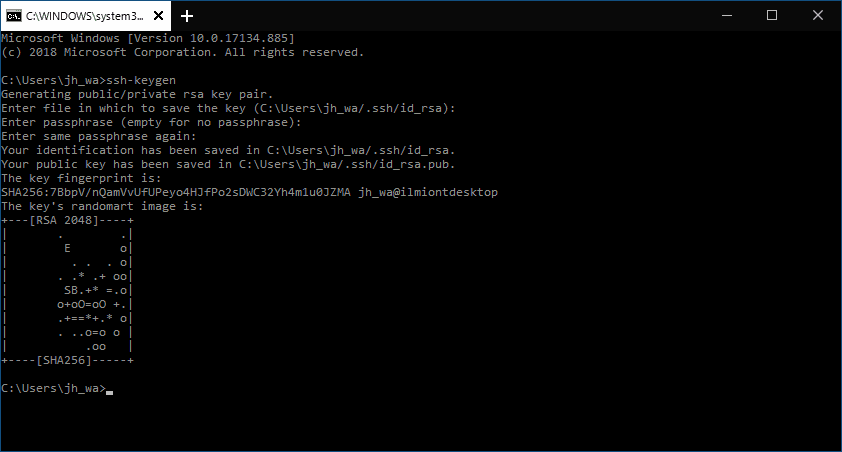
You can now choose to add a passphrase (password) to the key. If you add one, you’ll need to supply it whenever you use the key. Either type a passphrase and press enter or press enter immediately to proceed without one.
Windows will now generate your RSA public/private key pair. The public key will be stored as “id_rsa.pub” in the directory you specified. Upload this key to any machines you need to SSH into. You can then open a connection using Windows’ built-in SSH client – type “ssh user@hostname” to connect and authenticate using your generated credentials.