How to Find IP Address on Windows 11 [6 Different Ways]
IP addresses are combinations of four numbers
![]() 5 min. read
5 min. read
![]() Updated on
Updated on
Share this article

Improve this guide
Read our disclosure page to find out how can you help Windows Report sustain the editorial team Read more
Key notes
- There are various ways you can find the IP address in Windows 11, both the internal and external ones.
- To find the internal IP address or the one specific to the device, use the Settings app, Control Panel, Command Prompt, or other methods here detailed.
- For the external IP address, you can use a reliable and free online tool.
Every device connected to the Internet or a local network has a unique IP (Internet Protocol) address assigned to it. And, there are times when you may need need to find this IP address in Windows 11.
There are two standards for IP addresses, IPv4 (Internet Protocol Version 4) and IPv6 (Internet Protocol Version 6). The former has been there for quite some time while the latter is new and advanced. Also, IPv6 can accommodate a lot more addresses.
Now, that you know the two standards, let’s find out how an IP address works, and the various ways you can it in Windows 11.
How does an IP address work?
An IP address looks something like this, 192.181.1.1, a combination of four sets of numbers. Each of these sets can range between 0 to 255. These sets are actually read as binary numbers by the computer.
Amongst the various types, there are four that require thorough understanding, it’s Static and Dynamic IP addresses and Internal and External IP addresses.
A Static IP address, as the name suggests, is one that does not change and is set manually. On the other hand, a Dynamic IP address is automatically assigned to each device on the network and can change over time.
The internal IP address refers to the one for a particular device on the network and is unique for each. It is assigned by the modem or router and is generally dynamic. The external IP address is common for all the devices on the network and is what people on other networks see.
Now that you have a basic understanding of the concept, let’s walk you through all the ways to find an IP address in Windows 11.
Quick tip:
A well-established and trusted VPN provider is Private Internet Access (PIA). It offers advanced network settings and has an outstanding app interface with strong speed scores. In case you want to hide your IP address, PIA helps by rerouting your internet traffic through one of its servers.
Furthermore, PIA provides an unbreakable security against IP trackers with a strict no-logs policy where it doesn’t record traffic or store any browsing data from its users at all. It also blocks ads and malicious websites for a safer and faster online experience. You can control your online privacy and fully encrypt your connection with a static IP address where only you can have your way in.
⇒ Get Private Internet Access (PIA)
How can I check the IP address in Windows 11?
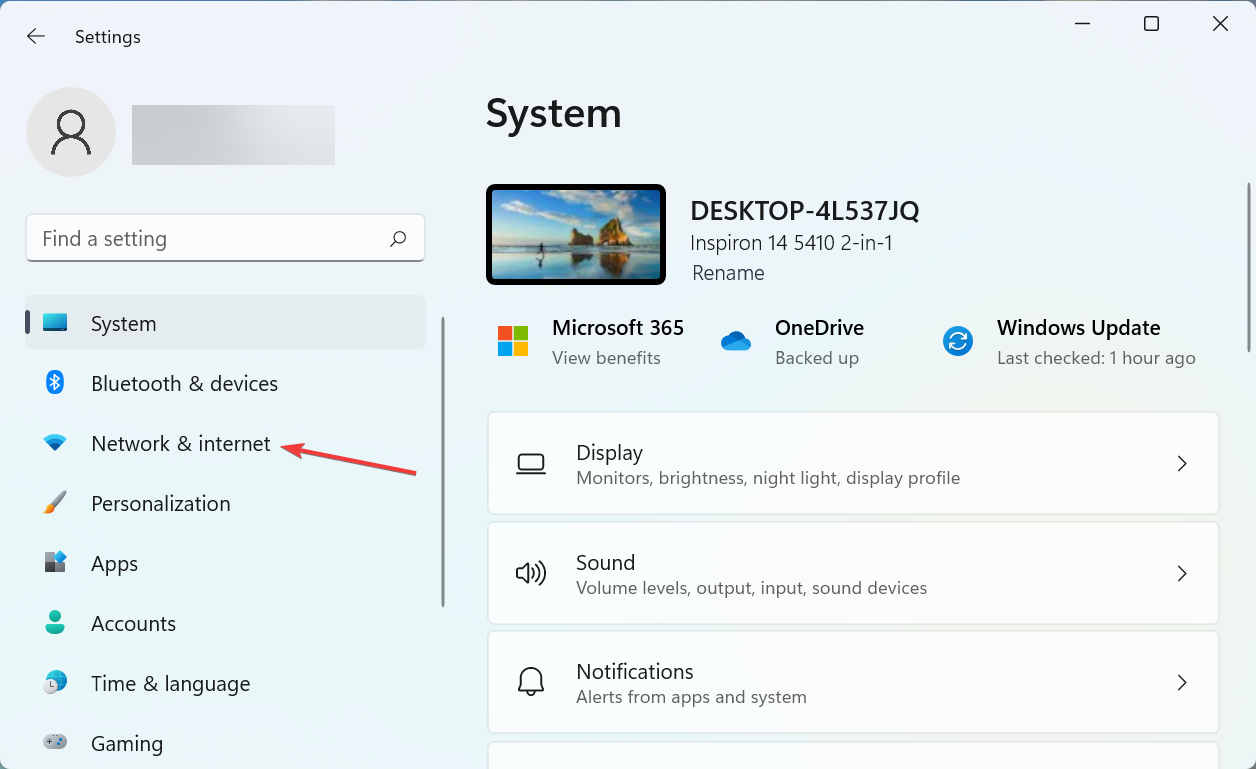
1. Use Settings
- Press Windows + I to launch the Settings app, and select Network & internet from the tabs listed in the navigation pane on the left.

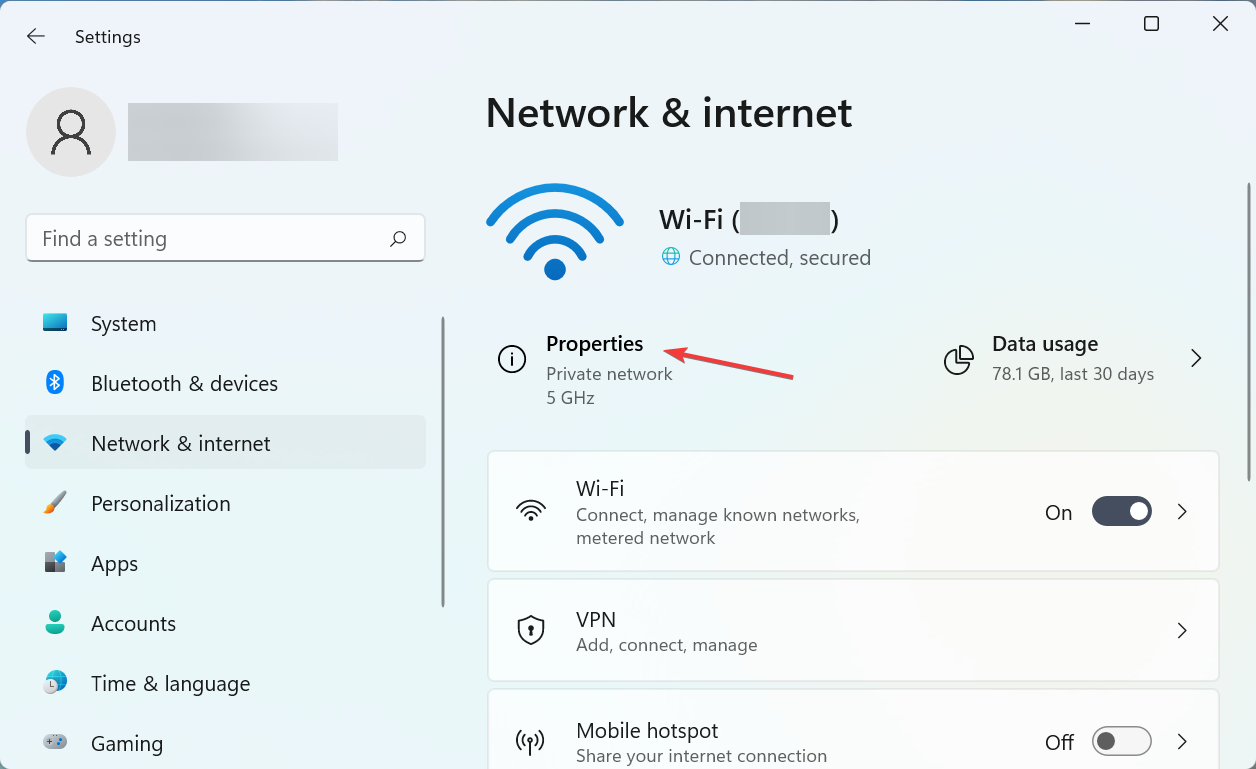
- Click on the Properties option on the right to view these for the currently connected network.
- Now, scroll down to the bottom and locate the IP address.
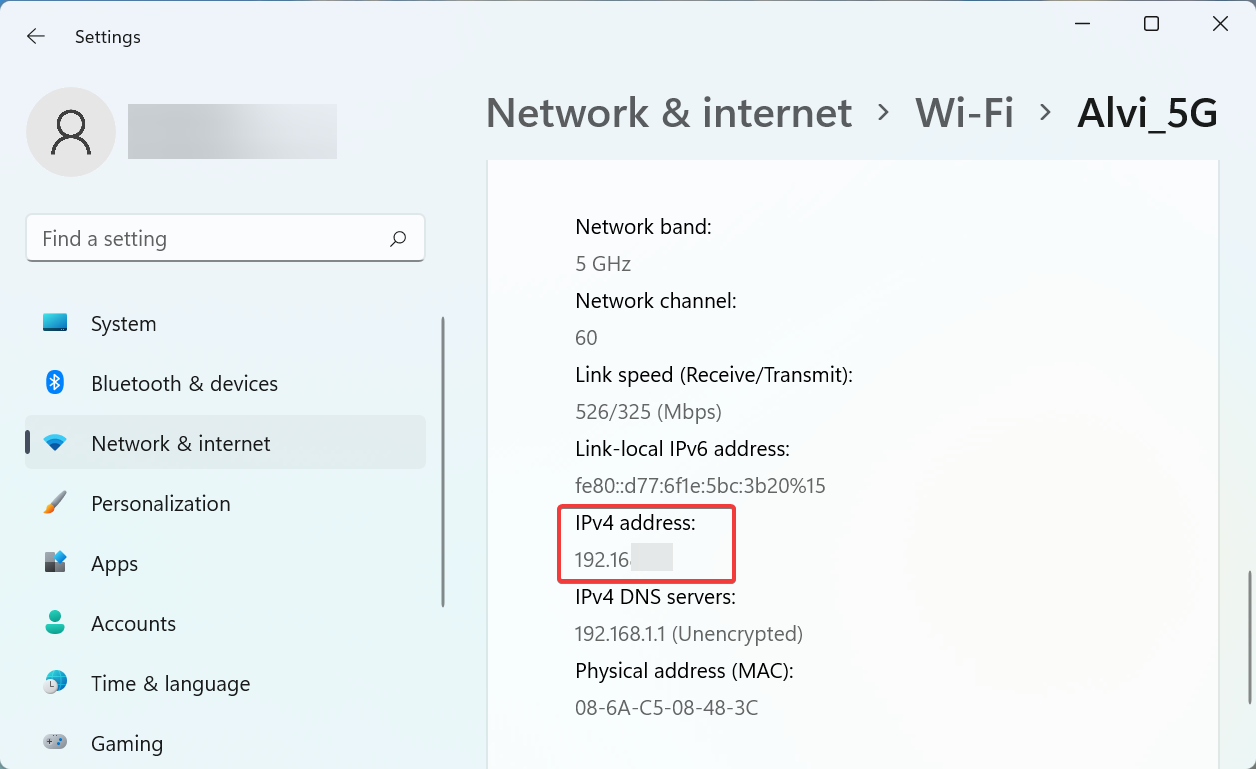
This is probably one of the simplest methods and several users find it the most suitable to find the IP address in Windows 11.
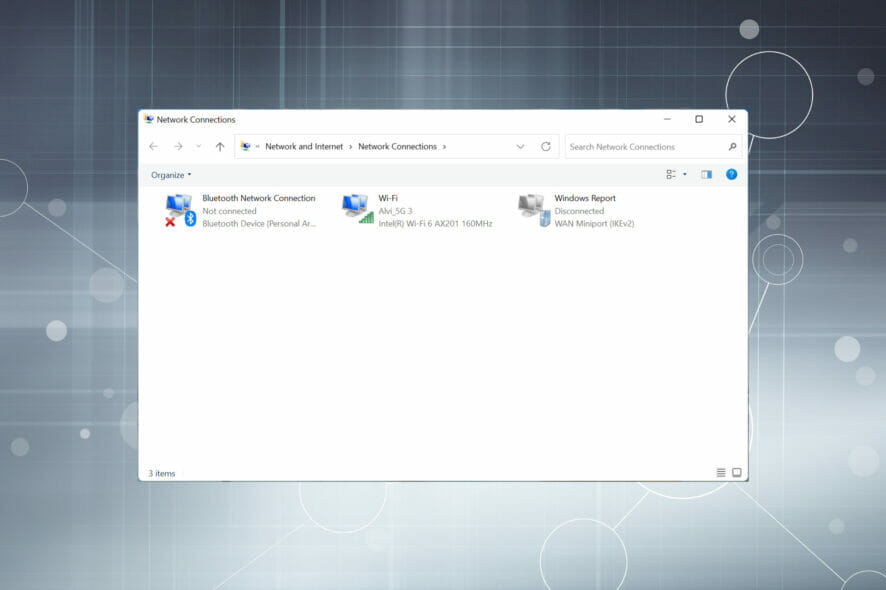
2. Use Control Panel
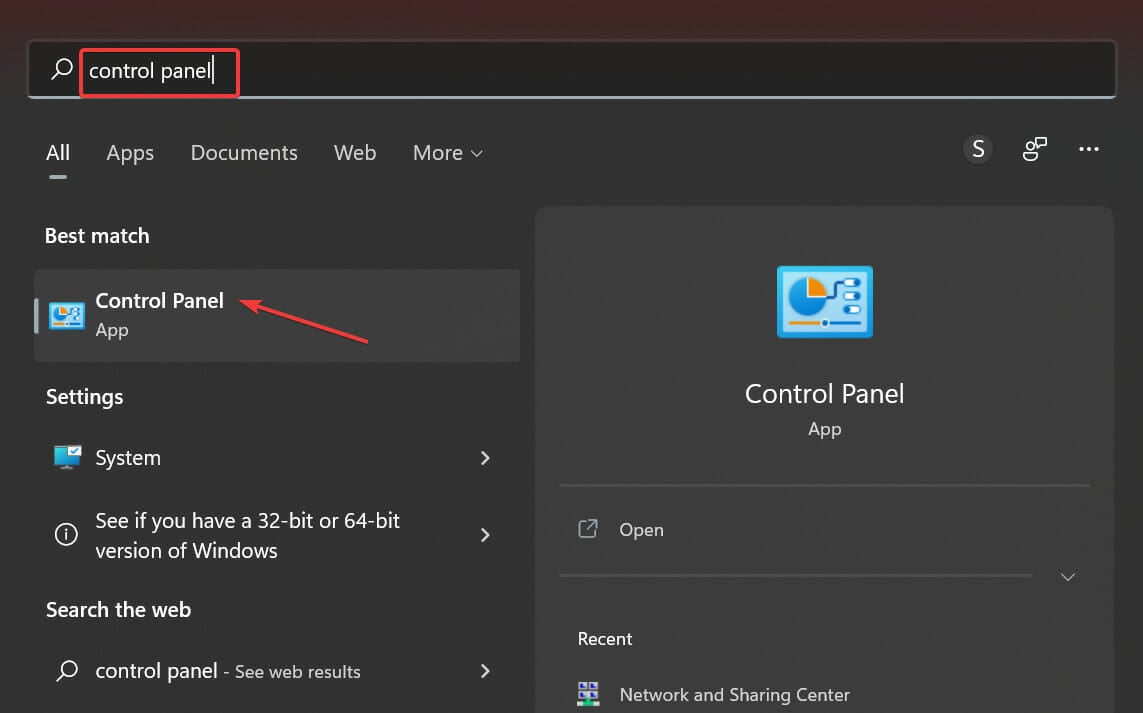
- Press Windows + S to launch the Search menu, enter Control Panel in the text field at the top, and click on the relevant search result that appears.

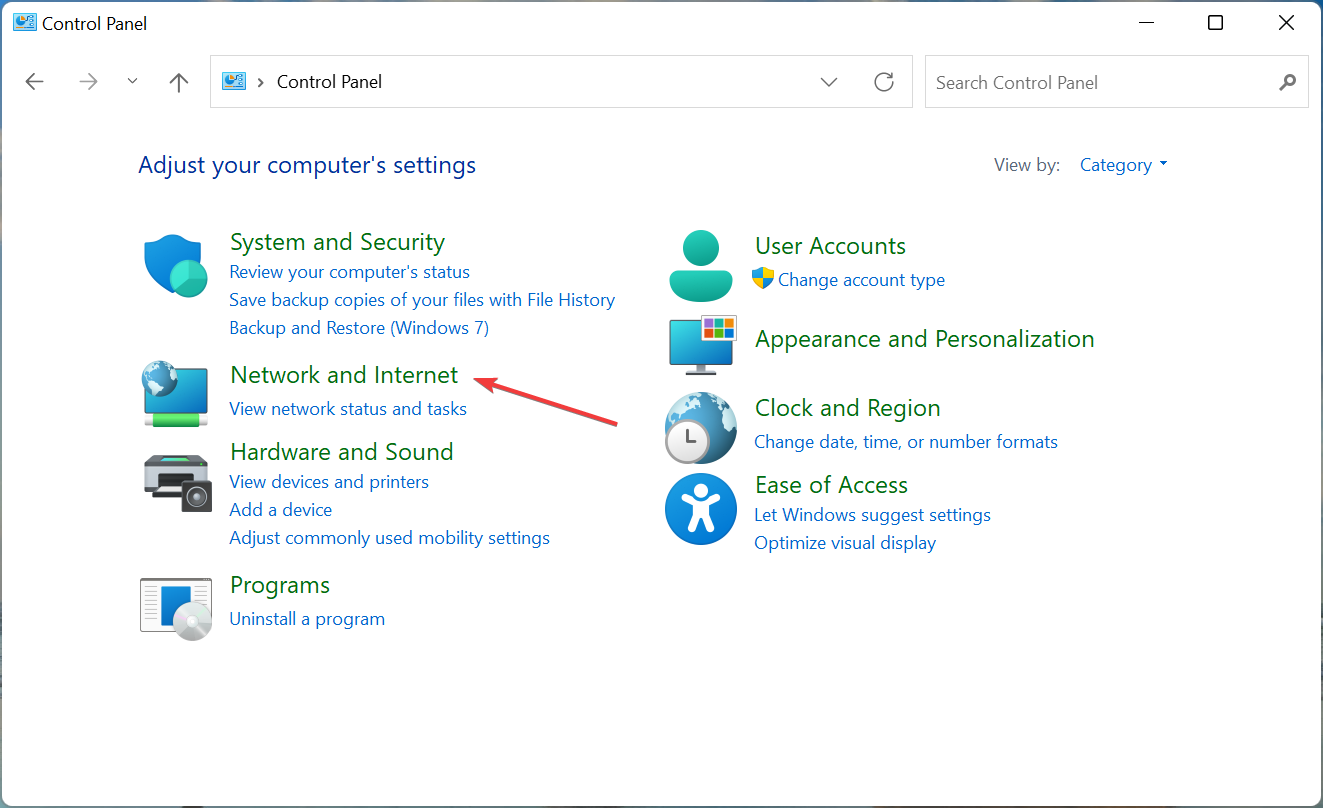
- Next, click on Network and Internet from the options listed here.

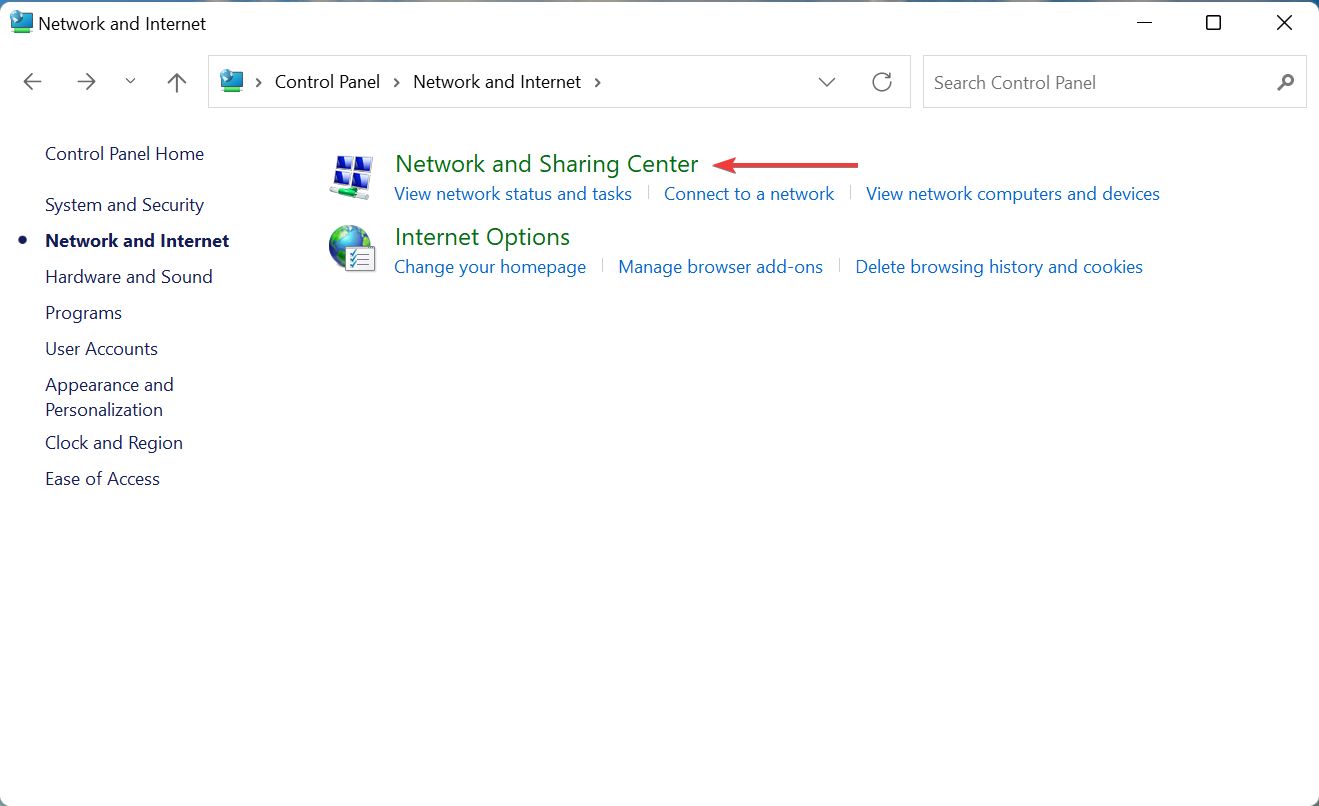
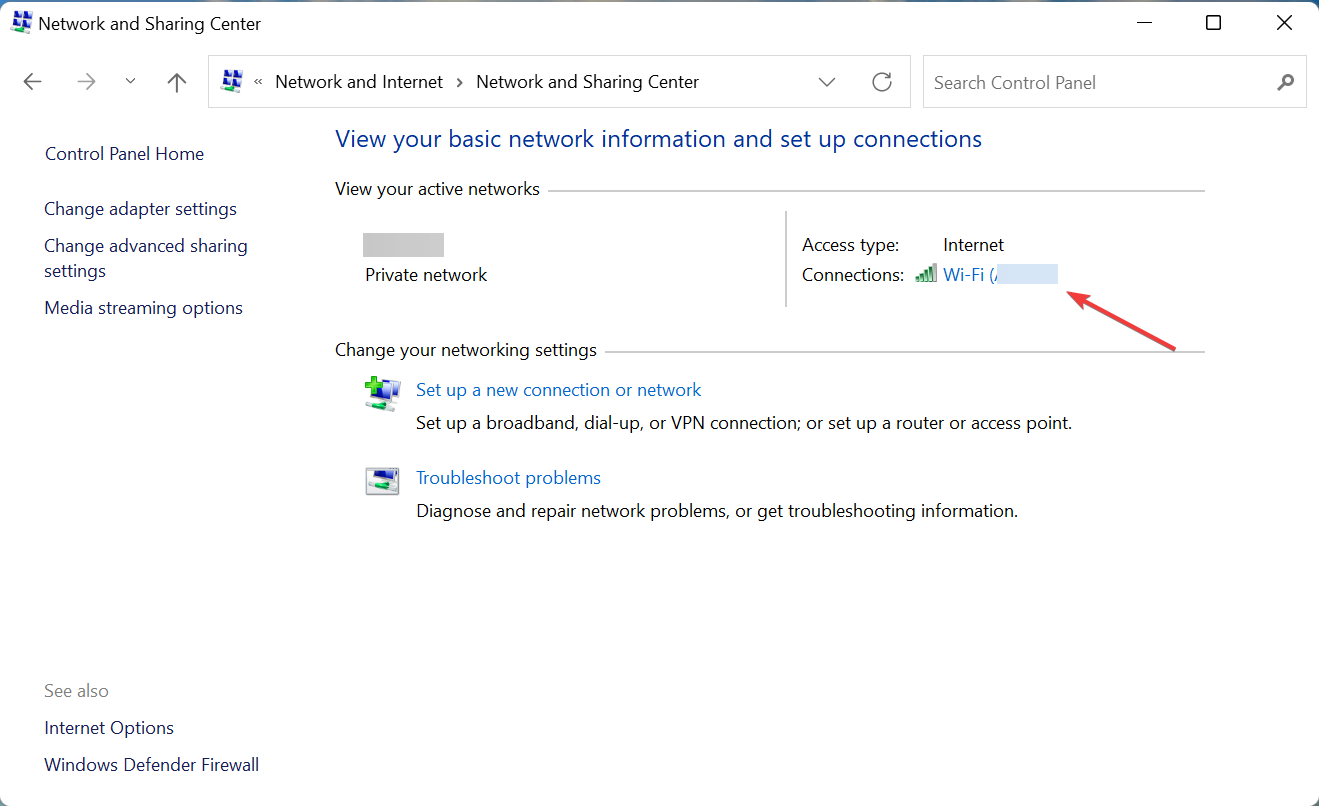
- Click on Network and Sharing Center.

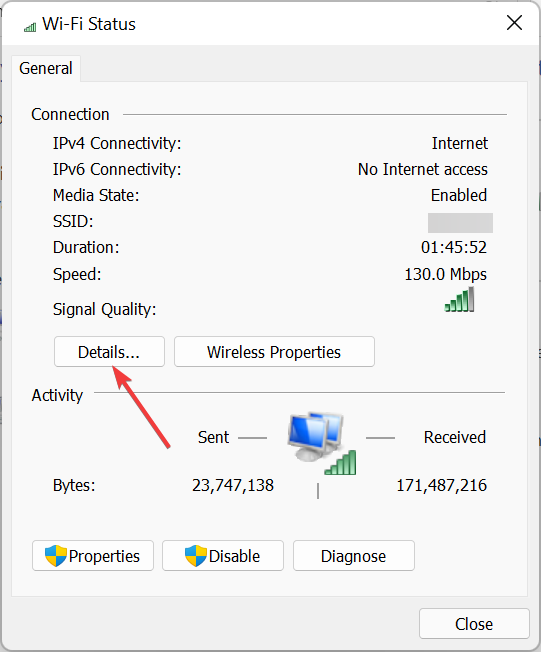
- Now, click on the network you are connected to get its status.
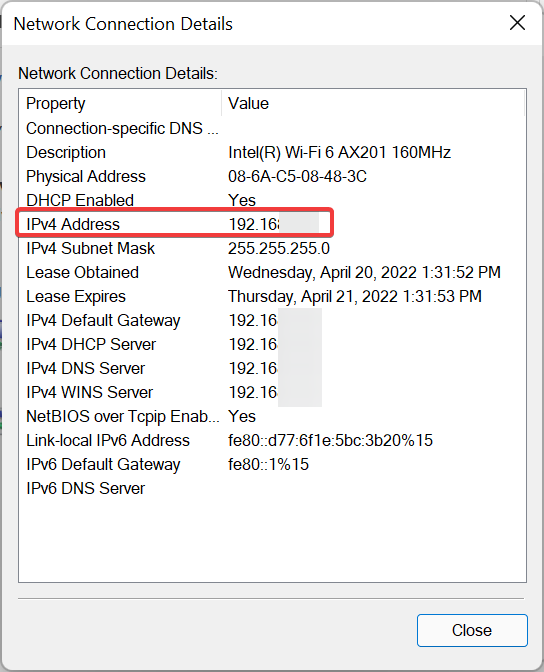
- Click on the Details button.

- You will find the IP address listed here.

3. In Task Manager
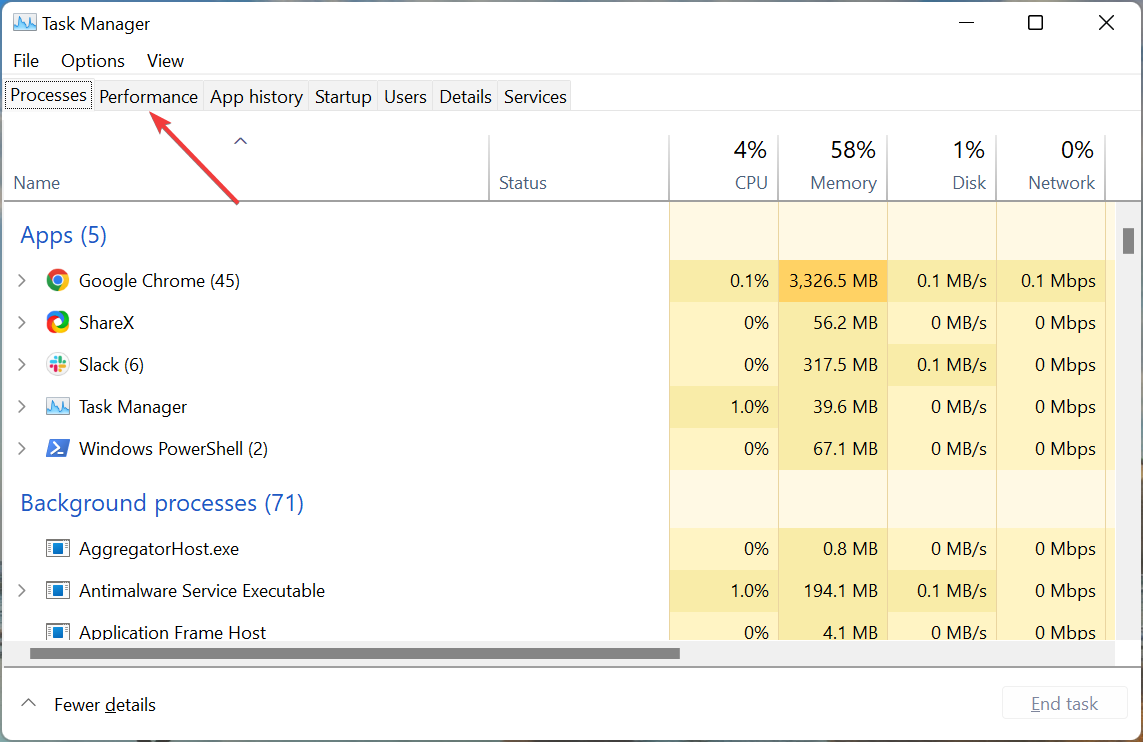
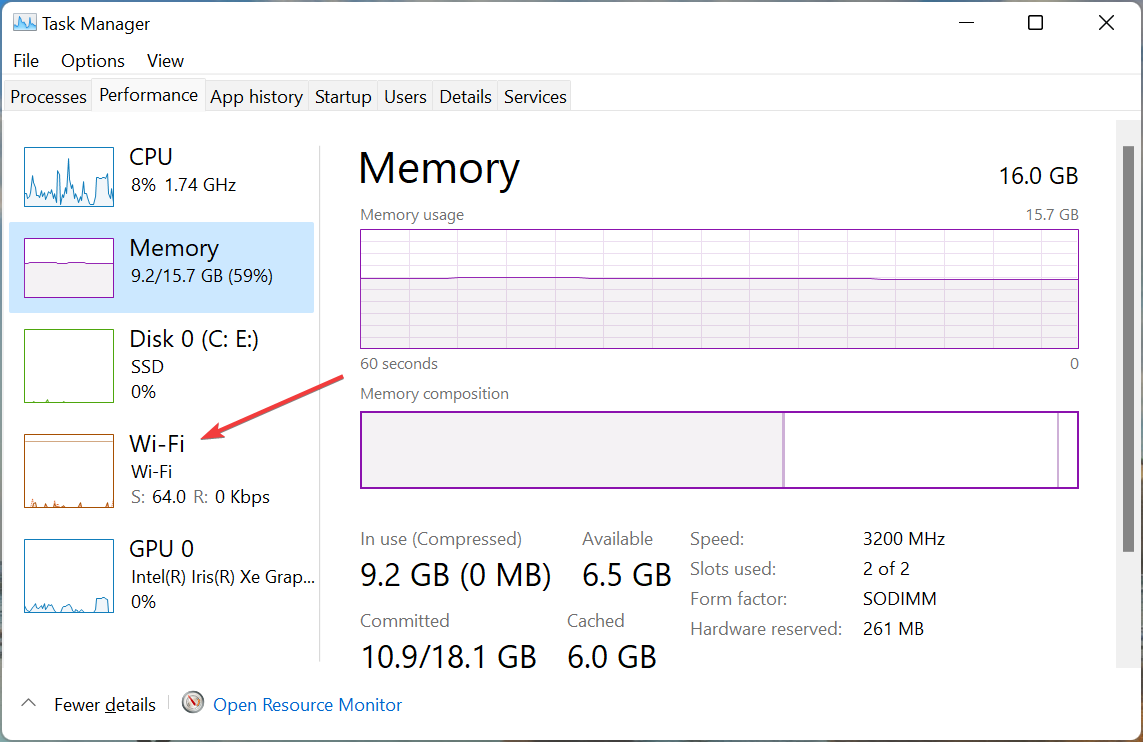
- Press Ctrl + Shift + Esc to launch the Task Manager and navigate to the Performance tab from the top.

- Next, click on the Wi-Fi entry from the options on the left.
- The IP address will now be listed on the right.
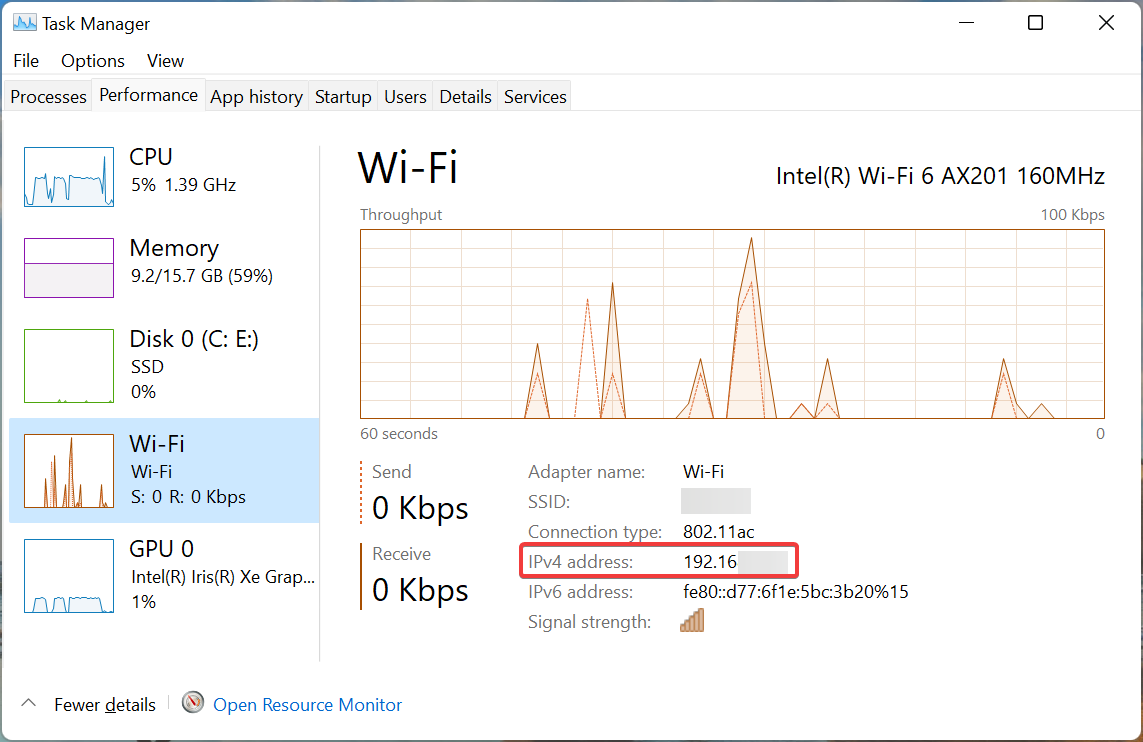
This method is probably the quickest of all to find the IP address in Windows 11.
4. Via the System Information app
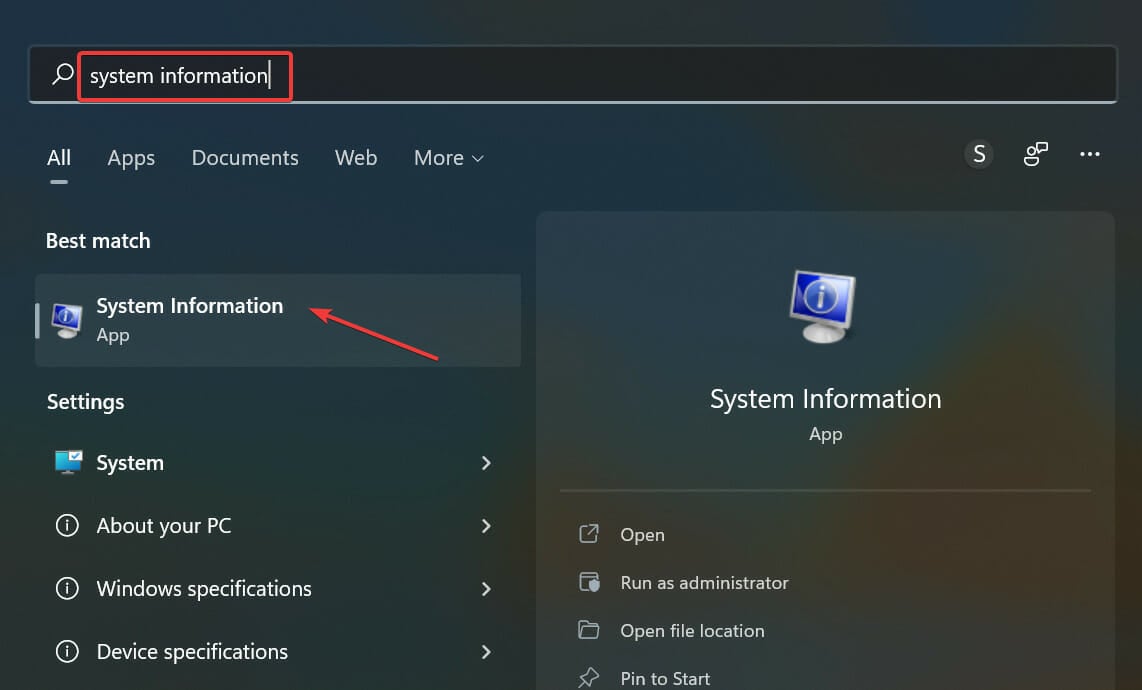
- Press Windows + S to launch the Search menu, enter System Information in the text field at the top, and click on the relevant search result.

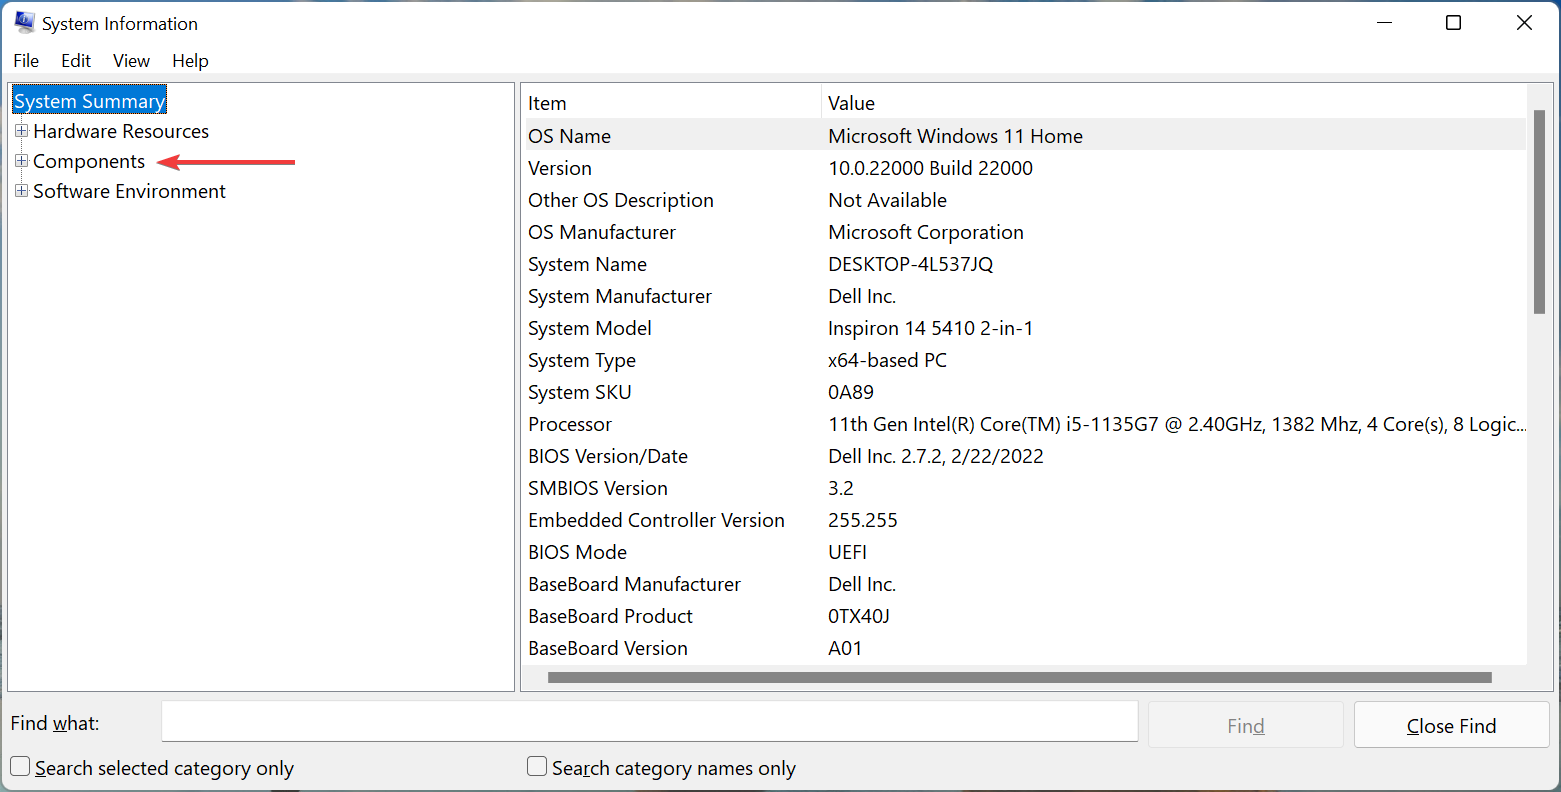
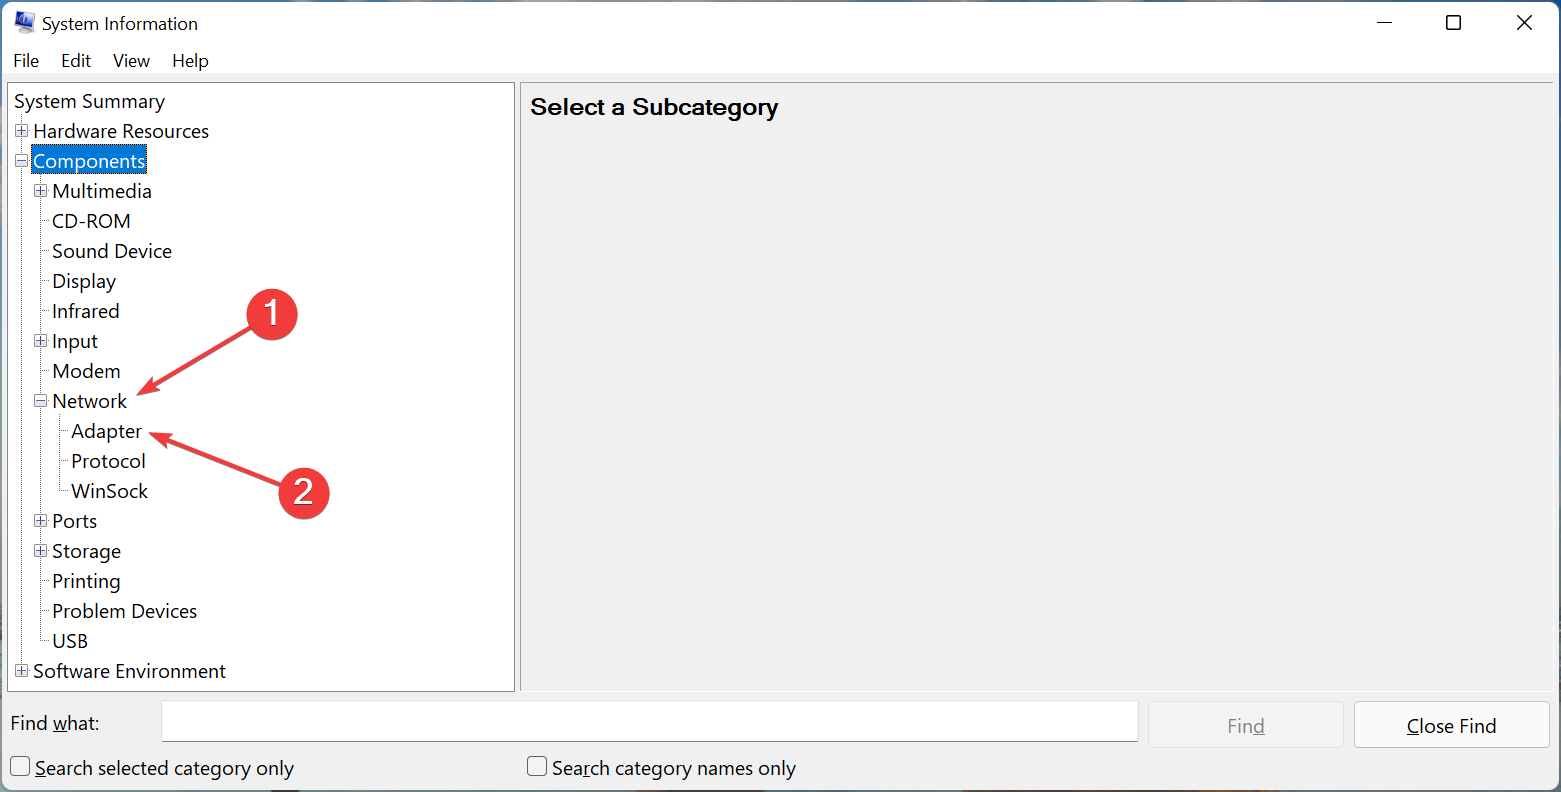
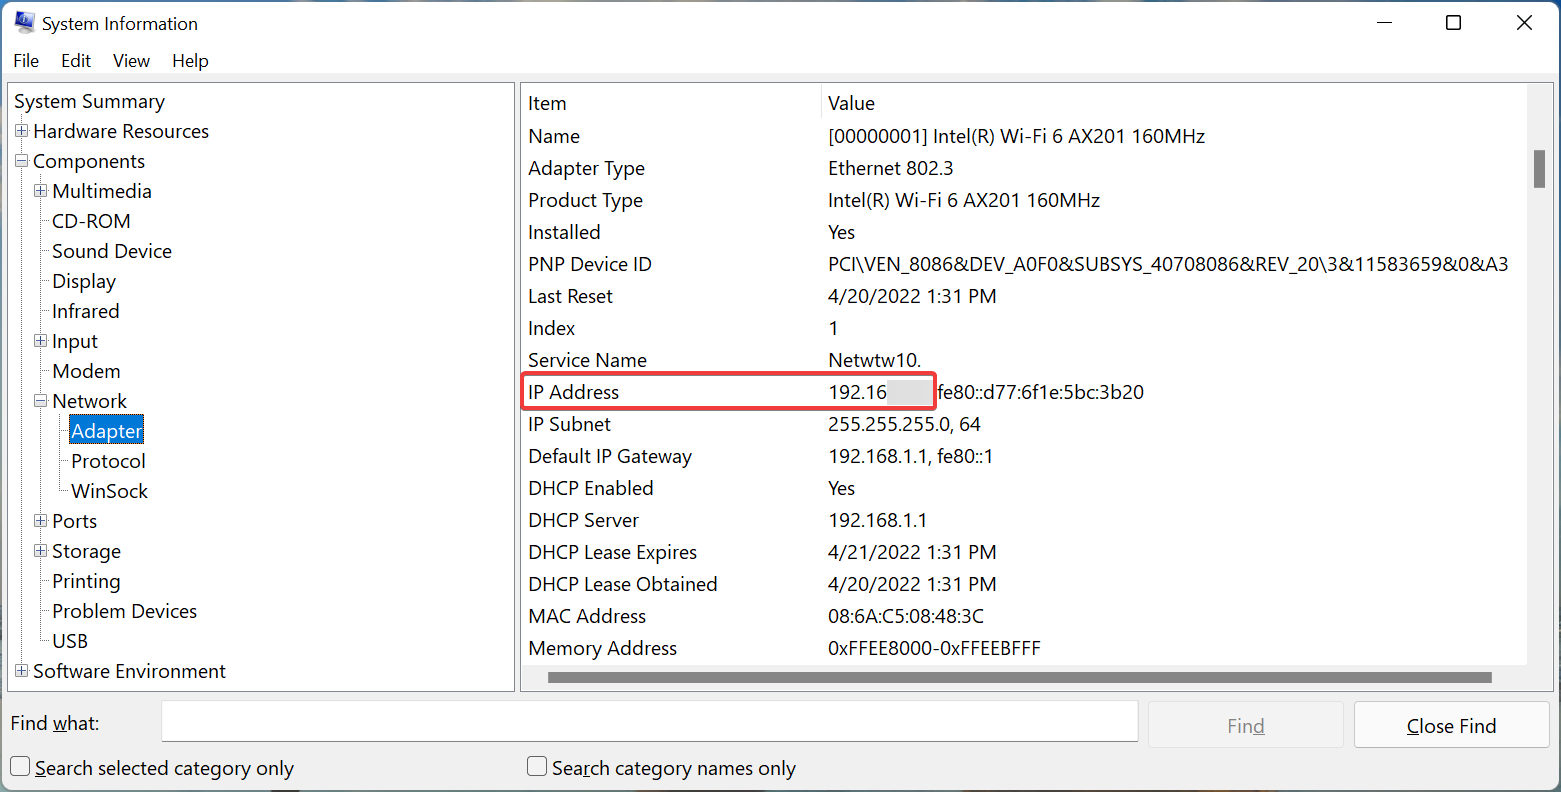
- Double-click on Components in the navigation pane on the left to expand and view the categories under it.

- Now, double-click on Network and then select Adapter under it.
- You should now find the IP address under the active network adapter on the right.
5. Use an online tool to find the IP address
Another method to check the IP address is by using a reliable online tool on a secure browser in Windows 11. A simple Google search should list various such tools, and you can use any of these. In most cases, Google itself should list the IP address at the top.
Do remember that this method will list the external IP address which may be different from the ones you found in the previous methods, which was the internal IP address or that of the individual device.
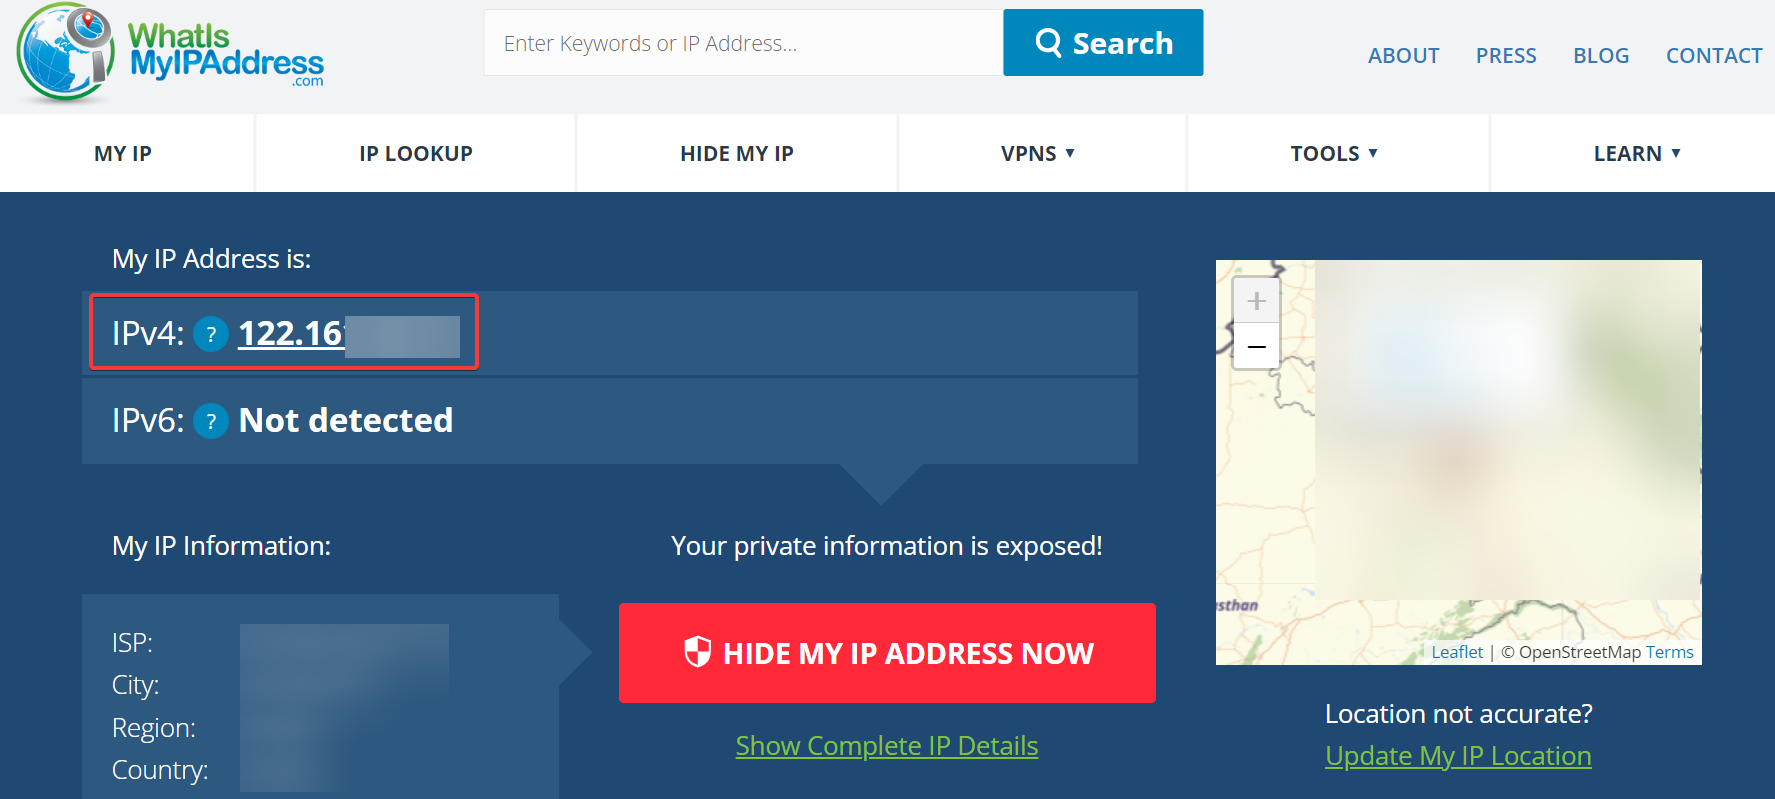
You can also use other tools like What is my IP or IPConfig.in to find your IP address in Windows 11. Also, several third-party apps might help you find the IP address as well.
6. Via Command Prompt
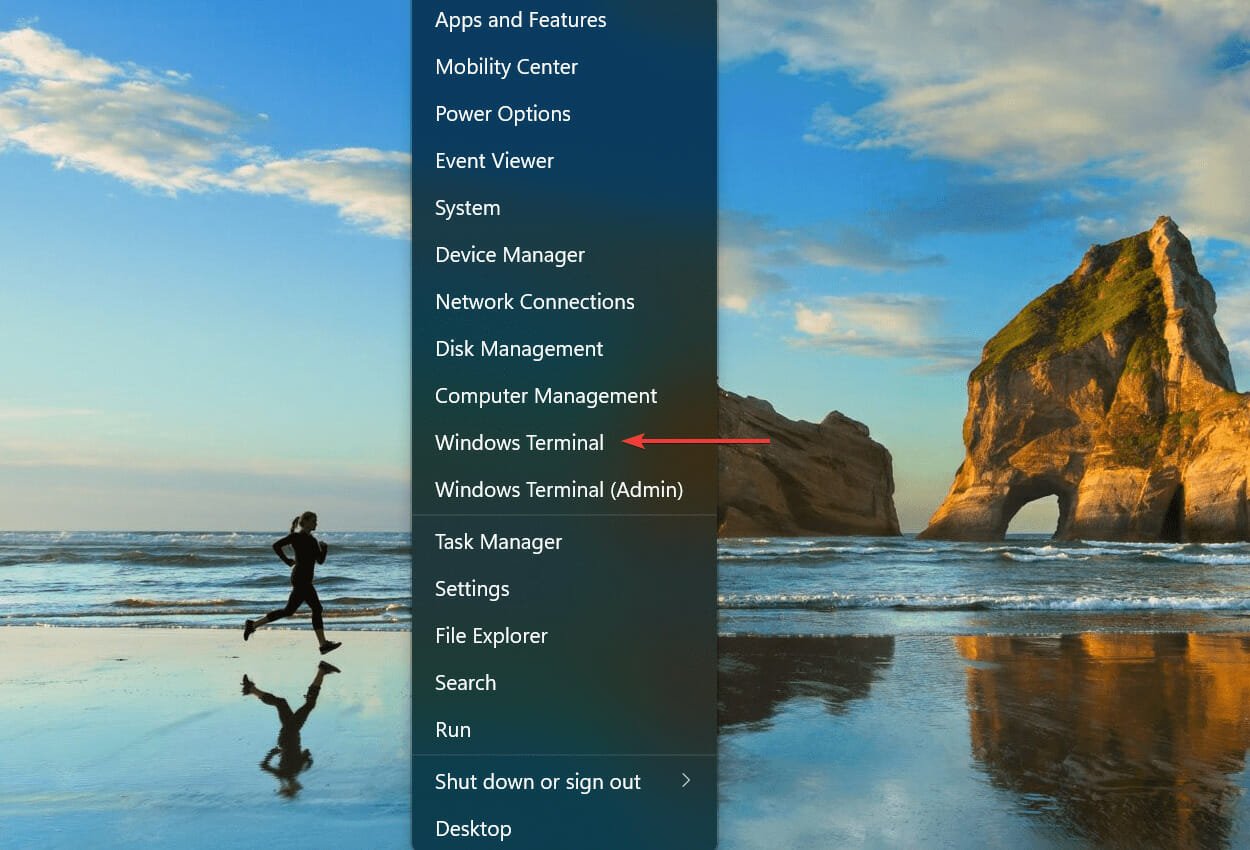
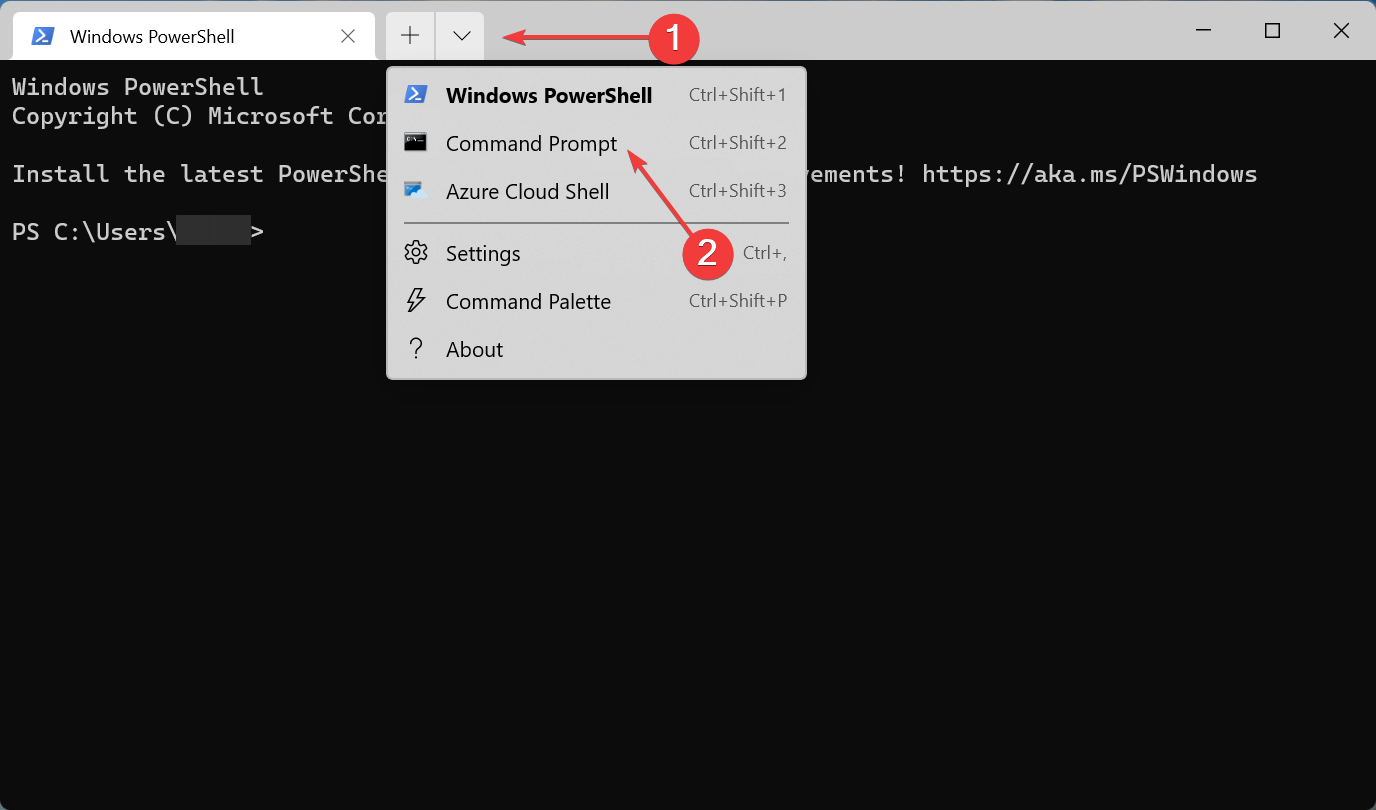
1. Press Windows + X or right-click on the Start icon to launch the Power User menu. Depending on your default command tool, you will see Command Prompt, Powershell or Windows Terminal here.
2. Click on the result to open it. In our example, we have Windows Terminal on our PC. It is a tool that merges command line shells.
3. If you are already in Command Prompt, skip this step and jump to step 4.
If you use Windows Terminal, click on the downward-facing arrow and select Command Prompt from the menu. Alternatively, you can hit Ctrl + Shift + 2 to launch cmd in a new tab.
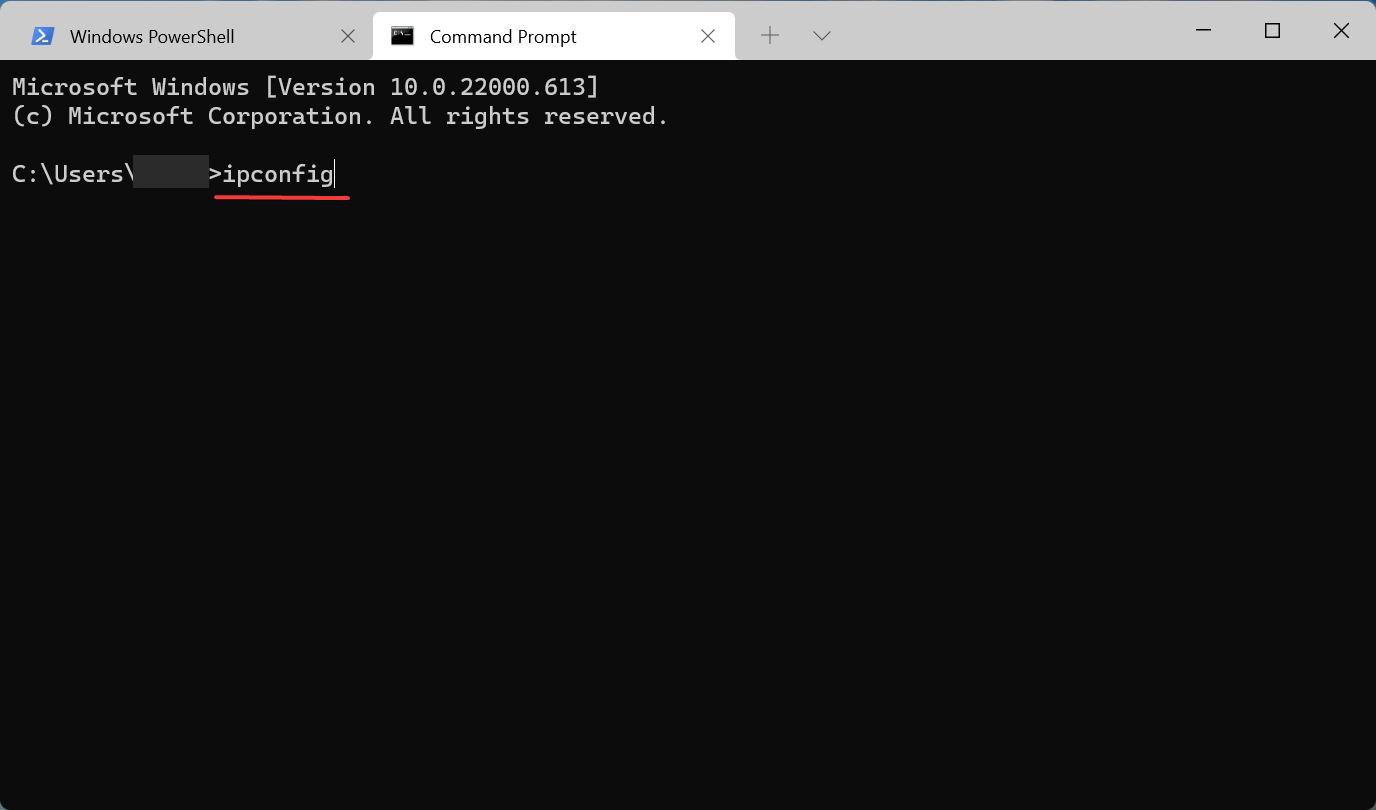
4. Now, paste the following command and hit Enter: ipconfig
5. You will now find the IP address listed under the network adapter currently being used.
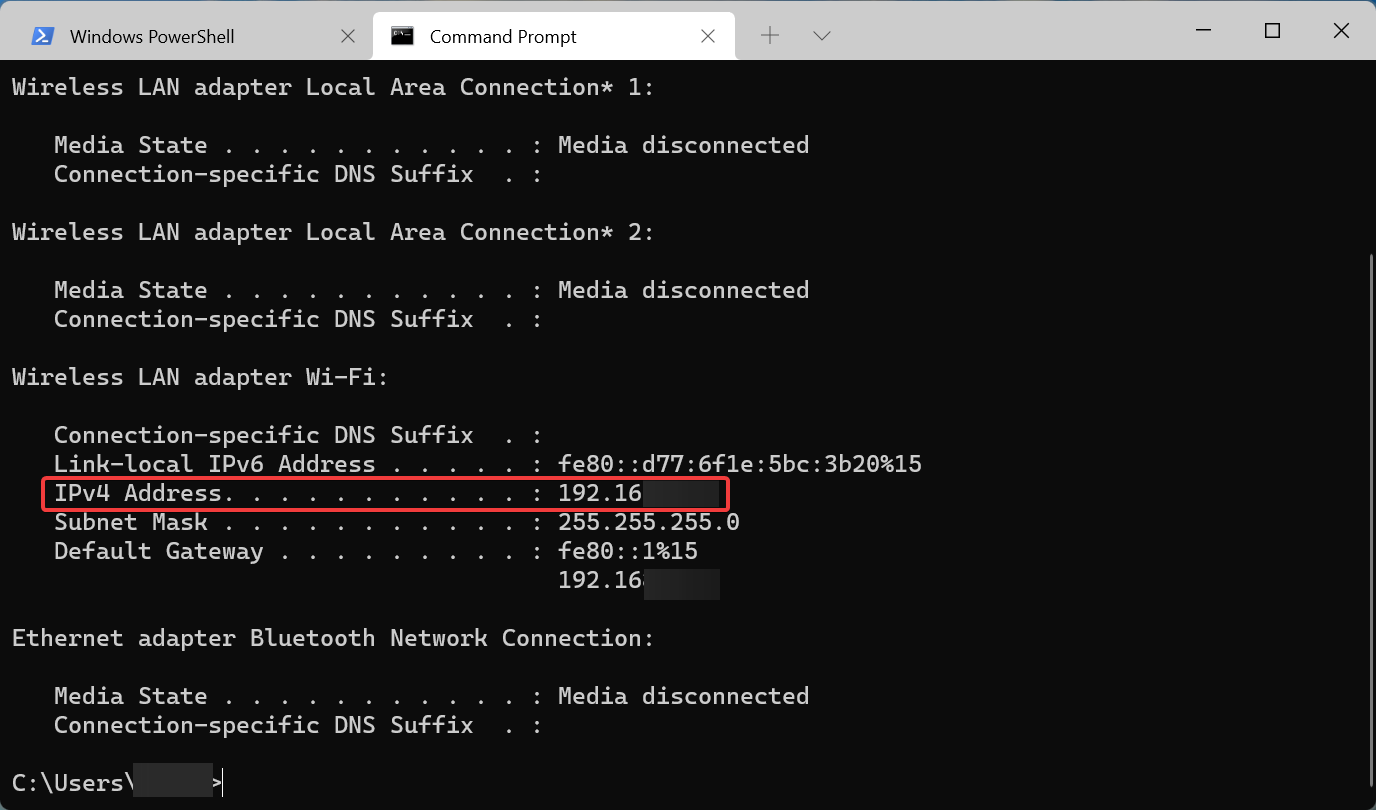
Several advanced users prefer Command Prompt over the conventional methods to find the IP address in Windows 11. Also, the same command would work in PowerShell as well, or any other command-line tool.
By now, you realize that finding the IP address is not intricate as it sounds. From the six methods listed here, choose the one that you are the most comfortable with and that takes minimum time.
Also, learn how to set a static IP and add a secondary IP address in Windows 11 from our guides.
If you have any further queries, drop them in the comments section below.