How to export your data from Microsoft Health, now that it’s about to close
![]() 3 min. read
3 min. read
![]() Published on
Published on
Share this article

Improve this guide
Read our disclosure page to find out how can you help Windows Report sustain the editorial team Read more
After last week’s announcement that Microsoft Health will be taken offline on May 31, you might feel like now’s the time to start exporting your health data. Once support ends, you won’t be able to access any data which has been synced from your Microsoft Band or Lumia Motion Data. If you want to create an archive of all your Microsoft health stats, read on to find out how.
You can’t export data from within the Microsoft Band mobile app. Instead, head to the Microsoft Health web dashboard at dashboard.microsofthealth.com. Login with your Microsoft account if you’re prompted to authenticate.
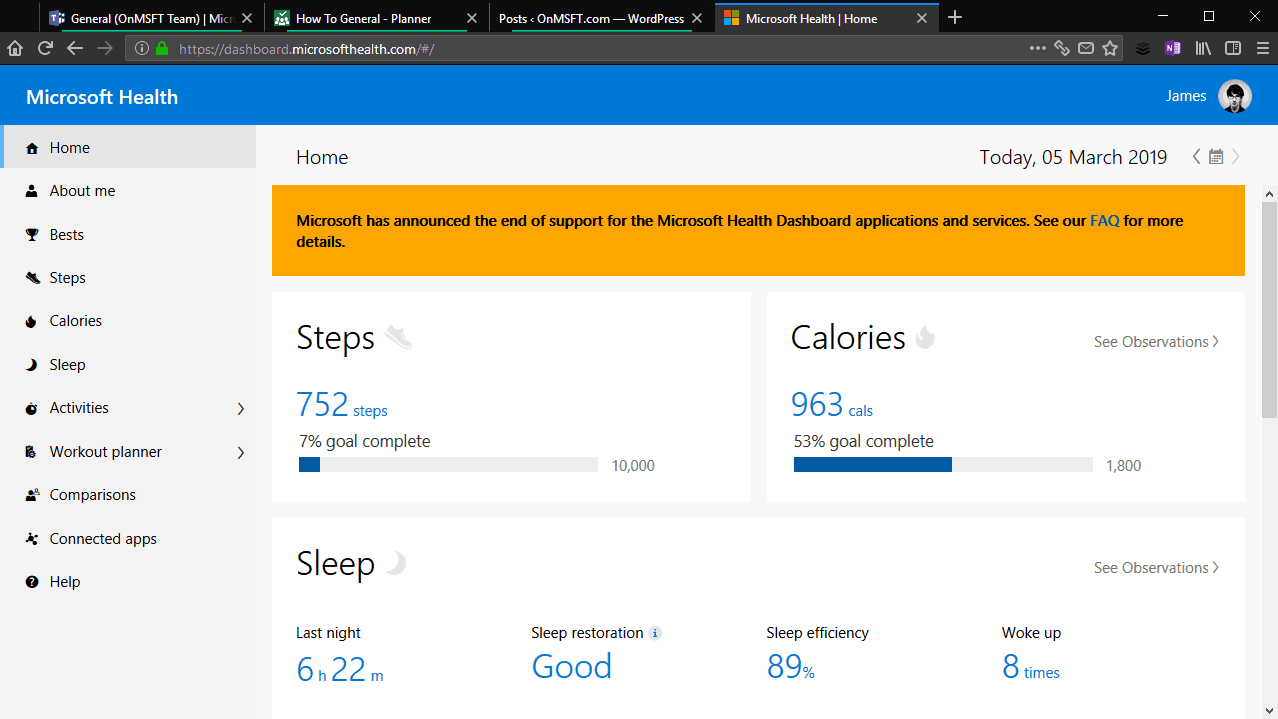
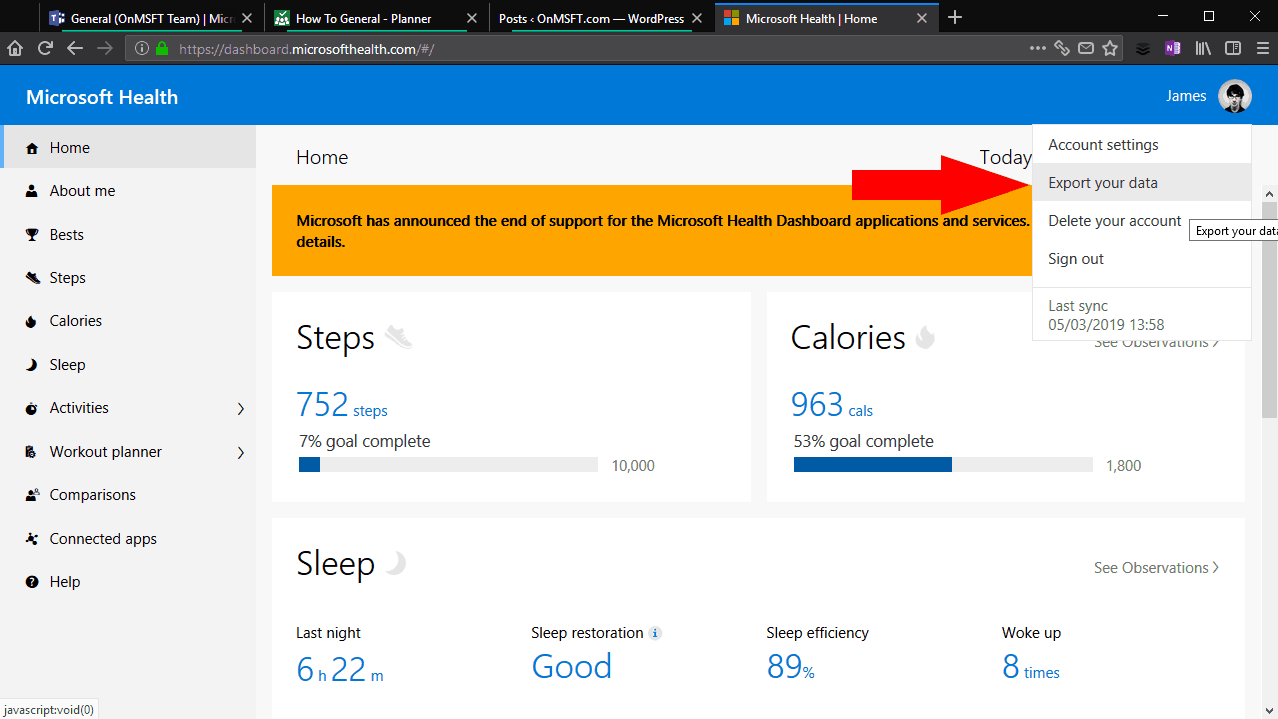
You’ll arrive at the Microsoft Health dashboard homepage. Click your user profile picture in the top-right corner to reveal the profile menu. Next, click the “Export your data” link in the menu. It’s worth noting that this panel also shows when your Band last synced to the cloud. If it was a few hours ago, you might want to force a sync before exporting your data, to ensure your latest activities are included.
After clicking “Export your data,” you’ll see an overlay appear in your browser. Here, you can choose which types of data to export, as well as the time period to include. Generally, you’ll want to include every possible activity type to create a complete archive of your Microsoft Health profile. However, if you never used an activity, or just don’t want to retain it, feel free to exclude it from the archive.
The panel gives you a variety of time range options for the export. You can choose from the past week, month or year, or configure your own custom time range. Unfortunately, you can’t select a timespan that lasts longer than a single year. Consequently, you’ll need to repeat this procedure multiple times – once for each year you used the service – to export all of your data.
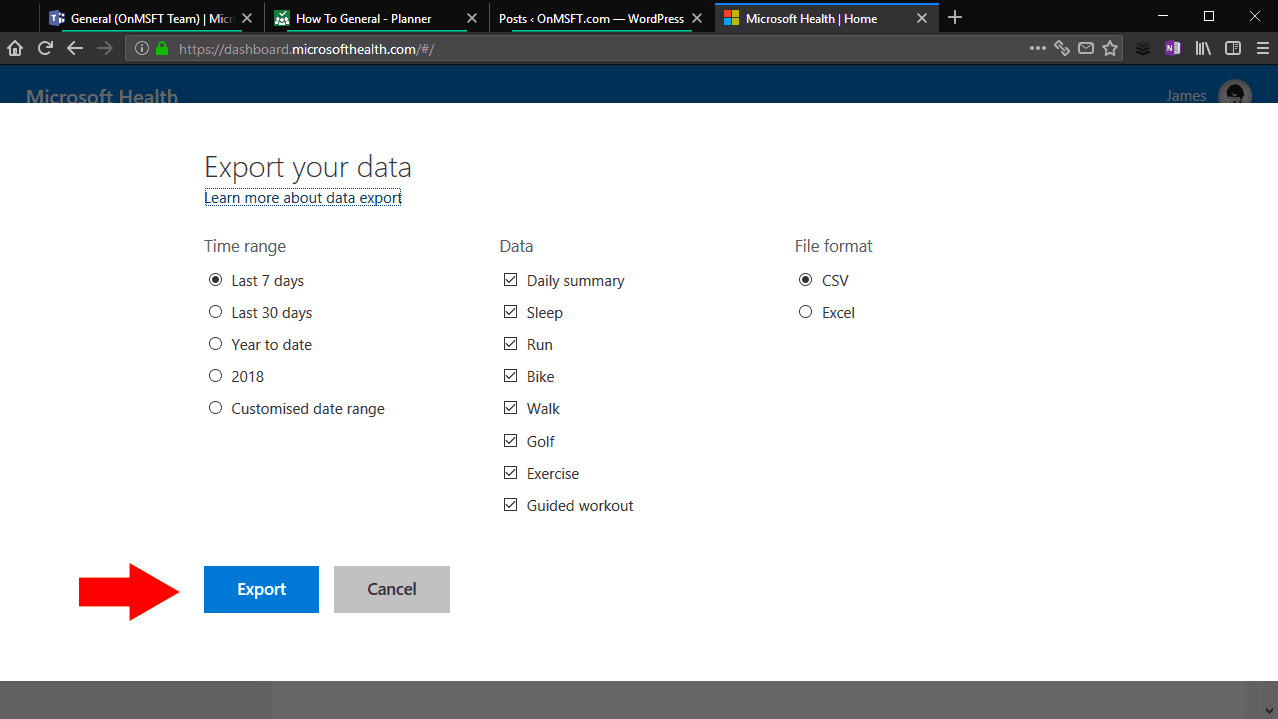
The final option lets you choose the file format to produce the export as. Selecting “Excel” will generate a formatted Excel spreadsheet which can make it easier to consume the data. However, this won’t be compatible with other applications, such as third-party services which can import fitness data. We’d recommend sticking to CSV – you can still open and format these files in Excel, and they can be readily parsed by other applications too.
Click “Export” to export your data. A new browser tab will open to handle the download. You’ll be left waiting for a few moments while your data is collated and prepared. After a minute or so, you should see the file download begin in your browser. It will be delivered as a ZIP archive containing your CSV or Excel files. Now your activities are exported, you can open the files in a spreadsheet app such as Excel, or start scraping them in your own applications to manually parse the data.