Windows 11 Variable Refresh Rate: How & Why to Turn it On
Learn to turn this feature on and off whenever you want
![]() 5 min. read
5 min. read
![]() Updated on
Updated on
Share this article

Improve this guide
Read our disclosure page to find out how can you help Windows Report sustain the editorial team Read more
Key notes
- Microsoft continues to constantly improve everything that Windows 11 stands for, with a lot of helpful features.
- The latest addition to Windows 11 is a feature called Dynamic Refresh Rate, a feature that helps conserve battery life for laptops.
- All your existing games will continue to run and perform like they always have, as DRR does not apply to games.
- There are of course some requirements for the feature to work, which you will find in this article.
It’s time to discuss one of the new features that Microsoft brings to the table with its latest operating system. This one is dedicated to users who use laptops for their everyday needs.
So, for the first time, Microsoft is introducing a new Dynamic Refresh Rate feature designed to save laptop battery life and boost refresh rates when needed.
From what we’ve seen and heard so far, it seems that the Redmon-based tech company is trying to send us performance-wise to the future with Windows 11.
What is Dynamic Refresh Rate on Windows 11?
Firstly, if you want to know the actual Dynamic Refresh Rate and Variable Refresh Rate meaning, you should know that Dynamic Refresh Rate differs from the Variable Refresh Rate, which has been a part of Windows 10 for quite a while, a feature that focuses on gaming to prevent screen-tearing.
Some new generation laptops are now equipped with 120Hz displays, making the OS much smoother while scrolling, enhancing animations, and eating up a lot of power.
Know that the Dynamic refresh rate feature can now be found in Windows Insider builds on the Dev channel, available for all supported devices, as Microsoft’s Ana Martha explains.
As the name suggests, DRR lets your device set the refresh rate dynamically. This means that Windows 11 will seamlessly switch between a lower refresh rate and a higher refresh rate based on what you’re doing on your PC. This helps to balance performance and power consumption. For example, with a Dynamic (60 Hz or 120 Hz) mode, your display will refresh at 60 Hz for everyday productivity tasks, such as email, writing a document, and so forth to conserve battery life. It will then seamlessly switch to 120 Hz for tasks such as inking and scrolling, to provide a smoother and more responsive experience.
What you should also keep in mind is the fact that all your existing games will continue to run and perform like they always have because DRR does not apply to games.
What Microsoft promises to deliver via this new and interesting feature is:
- Smoother inking: Microsoft Office, Microsoft Edge, Microsoft Whiteboard, Microsoft Photos, Snip & Sketch, Drawboard PDF, Microsoft Sticky Notes, Adobe Acrobat, Adobe Illustrator, Microsoft To-Do, Inkodo
- Smoother scrolling: Microsoft Office
How do I use Dynamic Refresh Rate?
First and most importantly, you’ll need a laptop that supports DRR and 120Hz or above refresh rates.
Also, note that this feature will make tasks such as writing emails or documents run at 60Hz, at this point, DRR will kick in and boost the screen to 120Hz for inking and scrolling.
Another factor worth considering is that Apps will need to support DRR, and during the Windows 11 preview, DRR is limited to just Office as far as the scrolling boost goes.
Apps such as Office, Microsoft Edge, Microsoft Whiteboard, Microsoft Photos, Snip & Sketch, Drawboard PDF, Microsoft Sticky Notes, Adobe Acrobat, Adobe Illustrator, Microsoft To-Do, and Inkodo will all support DRR for inking as well.
Make sure your display drivers support DRR
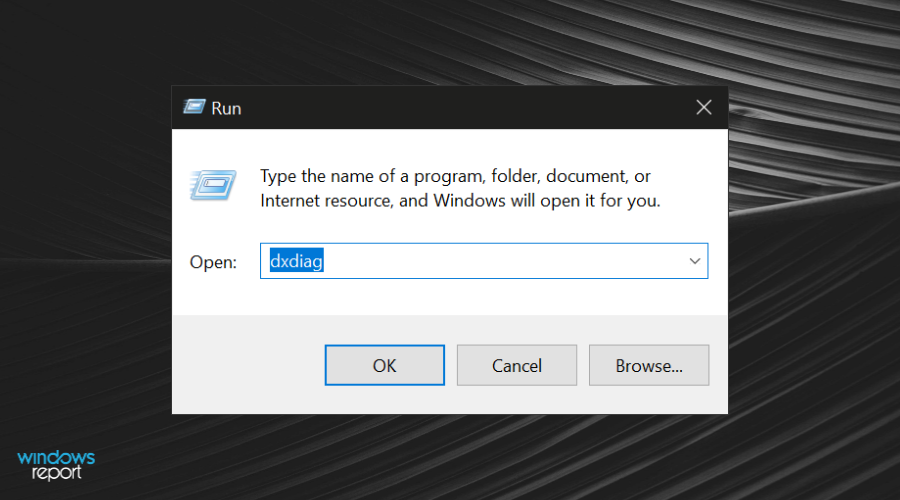
As DRR is still a relatively fresh implementation, the first step would be to check if your graphic driver supports Windows Display Model 3.0. To do that, we need to access the DirectX Diagnostic Tool.
Make sure that your graphic drivers are up to date and then follow the steps below:
- Press the Windows key+ R to open the Run dialog box.
- Enter dxdiag and click ok.

- Select your active display in the top ribbon.
- Under the Drivers section, check the Driver model.
- If it’s under WDDM 3.0, then your display does not support DRR yet.
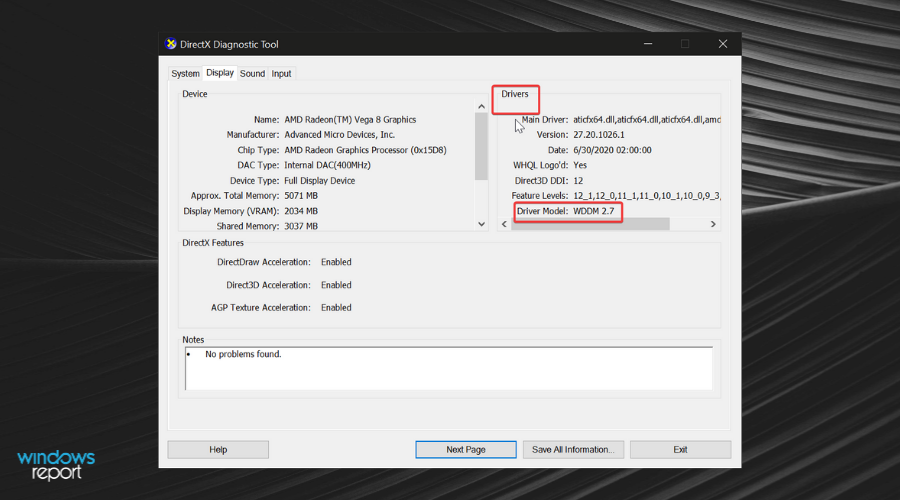
Windows has not yet released new driver versions for all displays. We recommend you keep track of your drivers and check the WDDM version in the future.
If you run a compatible driver, we can move on and enable Dynamic Refresh Rate on your Windows 11 PC.
Users of Windows 11 can easily enable and disable dynamic refresh rates from the Settings panel or from Intel’s Graphics Command Center.
How to enable Dynamic Refresh Rate in Windows 11?
1. Enable DRR from Windows Settings
1. Press the Windows key and write settings in the search box, then press Enter to open the app.
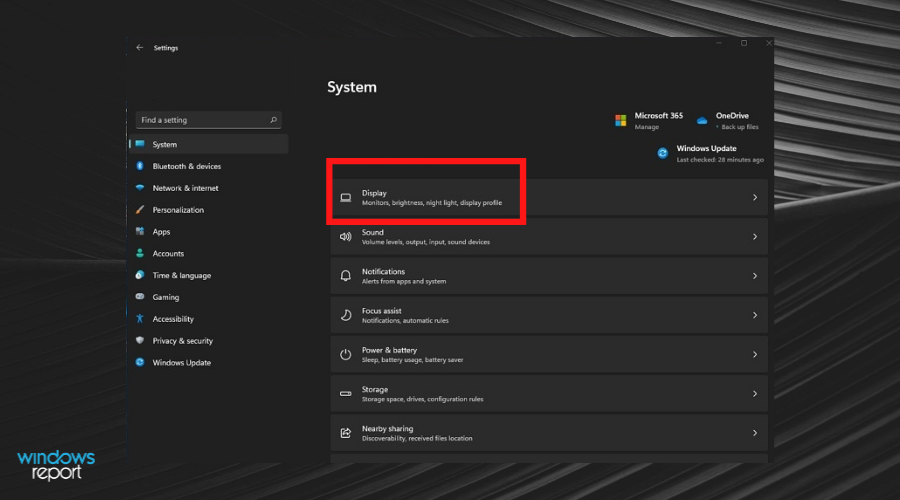
2. Go to System.
3. Select Display from the list.
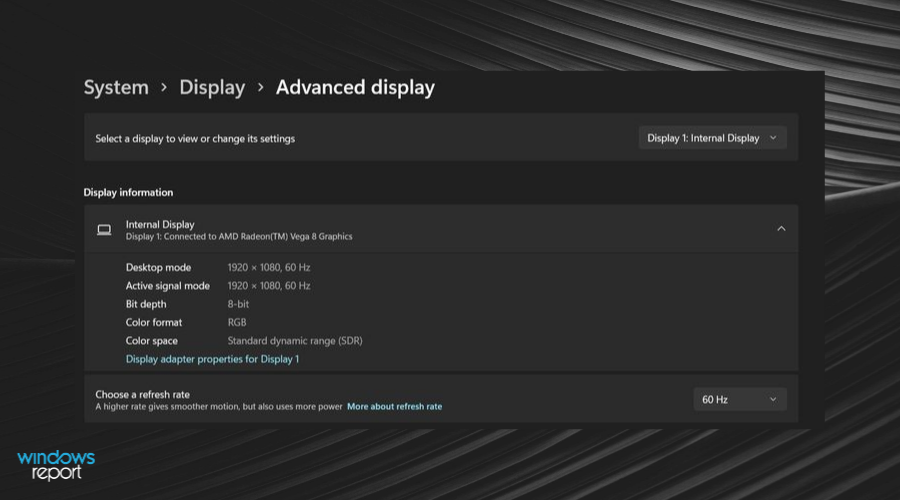
4. Scroll to the Advanced display settings category.
5. Select the display device you want to set up.
6. Now scroll down to Choose a refresh rate. You can choose whichever refresh rate you want, according to your monitor’s capabilities.
In order to get a dynamic refresh rate on your Windows 11 PC, all you need to do is navigate to Settings and choose another refresh rate from there.
Do keep in mind that the maximum refresh rate you can choose depends on your monitor’s specs. If your monitor can support an 144hz refresh rate, then you can choose whichever refresh rate you want from 60hz, 75hz, 120hz or 144hz.
If you want to disable DRR, follow the same process but select a static refresh rate, such as 60 Hz.
2. Enable DRR from Intel Graphic’s Command Center
- Type Intel Graphics Command in the taskbar and open the panel.
- Select the System submenu.
- Select the Power tab.
- Enable the Dynamic Refresh Rate Switching option.
- Select a preferred refresh rate. You can play around with this option until you are satisfied with the result.

To disable DRR, just toggle the button from On to Off.
All in all, this seems like a pretty solid and much-needed feature, which will likely make a lot of Windows users happy. Refresh rate features have their issues, and they can make your monitor stuck at 60Hz on Windows 11, so keep that in mind.
Everything that can improve performance for the hardware needed to run this demanding software is a welcome upgrade.
What is your opinion on this new feature that Microsoft is introducing with Windows 11? Let us know in the comments section below.