Disable the Lock Screen on Windows 11 With 3 Simple Steps
Learn to customize your Windows 11 device to your liking
![]() 5 min. read
5 min. read
![]() Updated on
Updated on
Share this article

Improve this guide
Read our disclosure page to find out how can you help Windows Report sustain the editorial team Read more
Key notes
- Some users might prefer to disable the lock screen in Windows 11, and there are three different ways you can do that.
- You can turn off the lock screen in Windows 11 by manually editing the registry.
- In Windows 11 Pro and Enterprise editions, you can disable the lock screen with a Group Policy setting.
- Some third-party customization apps also include disabling lock screen Windows 11 options.
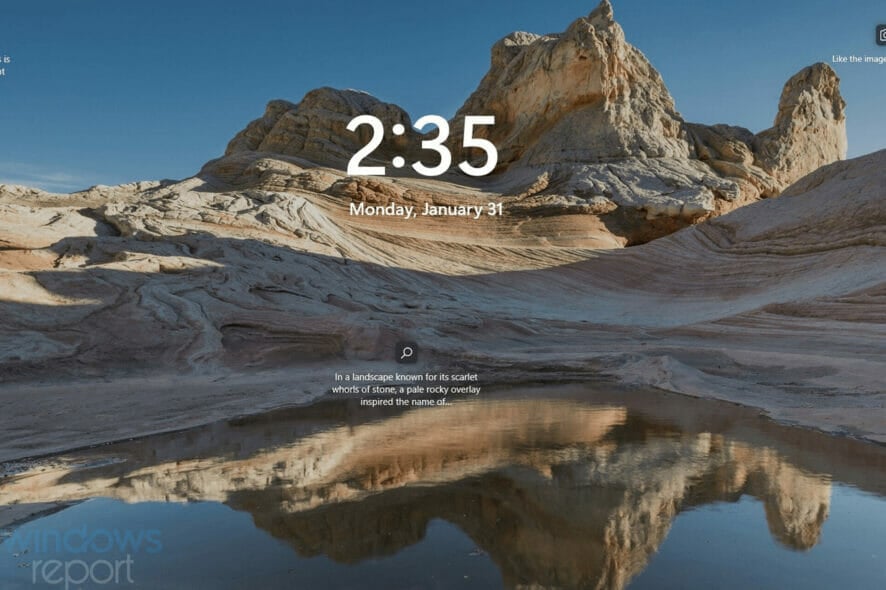
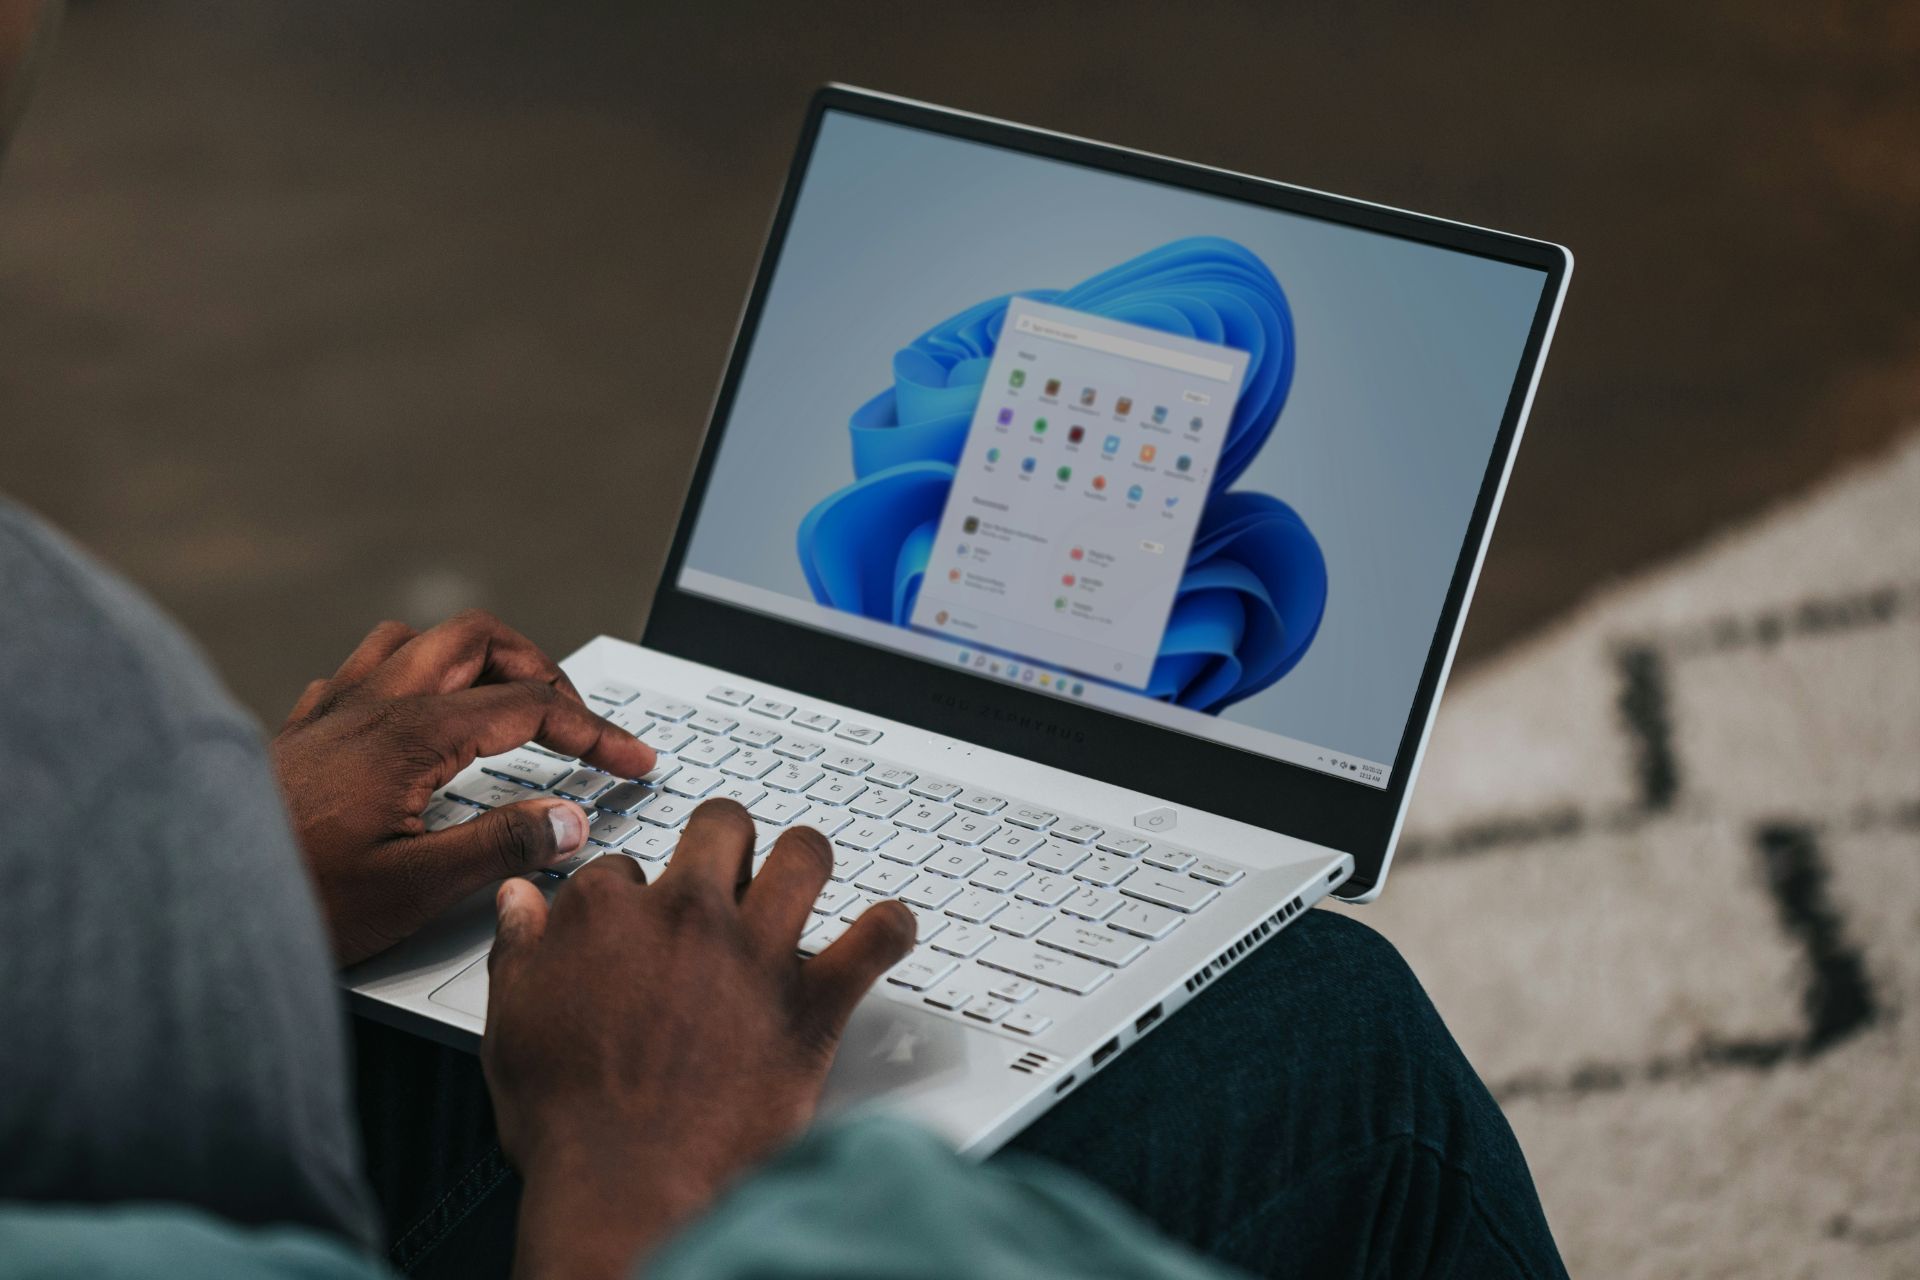
Windows 11, like other platforms in its series, has a lock screen you’ll see just before logging into your user account.
That lock screen displays the time, date, one app status icon, and a magnifying glass icon. Clicking on the magnifying glass icon brings up the login text box and screen.
The lock screen also has a Windows + L keyboard shortcut. Pressing that hotkey returns you to a lock screen, from where you’ll need to click and then log back into Windows.
Do I need to have the lock screen enabled on my Windows 11 PC?
Although the lock screen displays date/time info and an app status icon, it’s hardly a necessity. Some users might prefer to disable it so they don’t need to click to reach the login screen.
There isn’t an option in Settings that turns off the lock screen, but you can still disable it with the methods below.
Has the lock screen changed in any way in Windows 11?
Microsoft has made some relatively minor changes to Windows 11’s lock screen. It has a new default Windows 11 background wallpaper for one thing. However, you can change that wallpaper via Settings.
You’ll also notice the date/time info has changed position on Windows 11’s lock screen. Now it displays that info at the top center of the screen instead of the bottom left corner. The clock time text also has a bolder font type.
However, those are only small changes Microsoft has applied to the lock screen. There isn’t that much difference between the lock screens in Windows 11 and 10.
So, it’s unlikely users who didn’t want Windows 10’s lock screen enabled will want to keep it after upgrading to 11.
How can I turn off the lock screen in Windows 11?
1. Edit the Registry
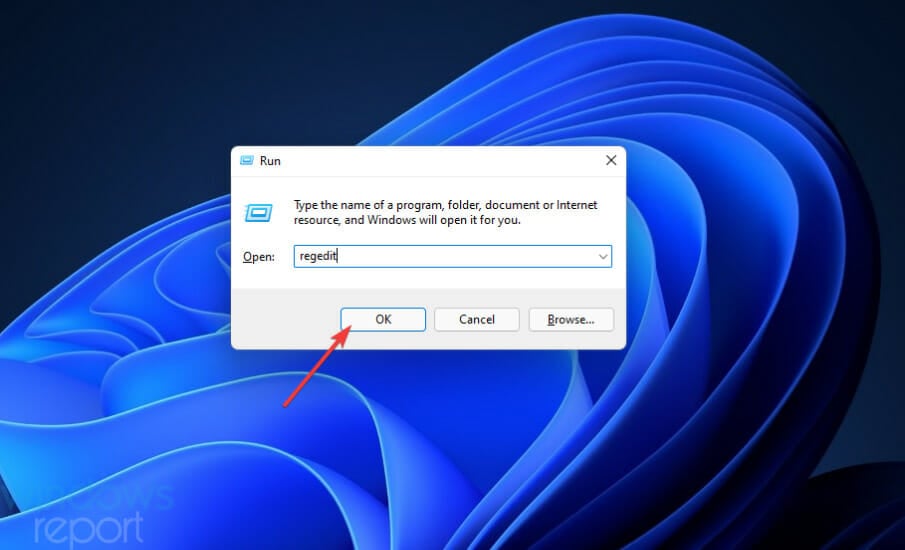
- Right-click the taskbar button for the Start menu and select Run.
- To open the Registry Editor, input the following text and press Enter:
regedit
- Next, open this registry location:
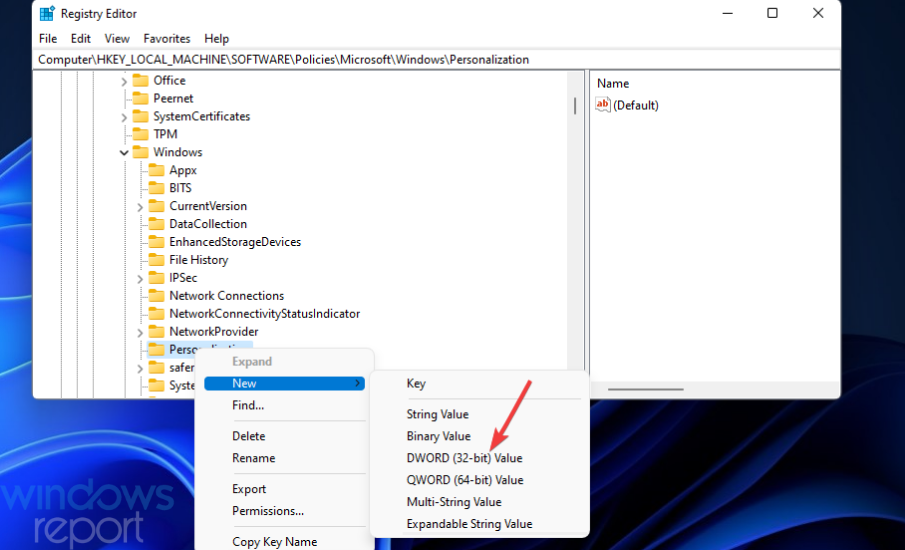
HKEY_LOCAL_MACHINE\SOFTWARE\Policies\Microsoft\Windows - Right-click Windows on the left side of the Registry Editor and select New > Key.
- Type Personalization in the key’s text box.
- Right-click the Personalization key and select the New > DWORD (32-bit) value options.
- Enter NoLockScreen to be the DWORD’s title.
- Double-click NoLockScreen to open an Edit DWORD window for it.
- Input 1 within the Value data text box, and click OK to apply.

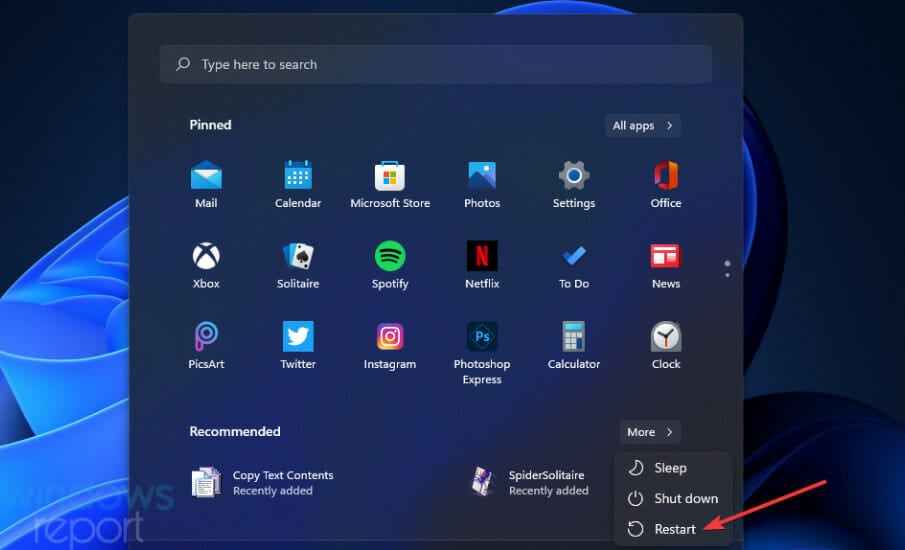
- Open the Start menu, select Power, and click Restart.


2. Use the Group Policy Editor
1. Bring up the Run dialog (it has a Windows + R keyboard shortcut).
2. Open Group Policy Editor by entering this command and clicking OK:gpedit.msc
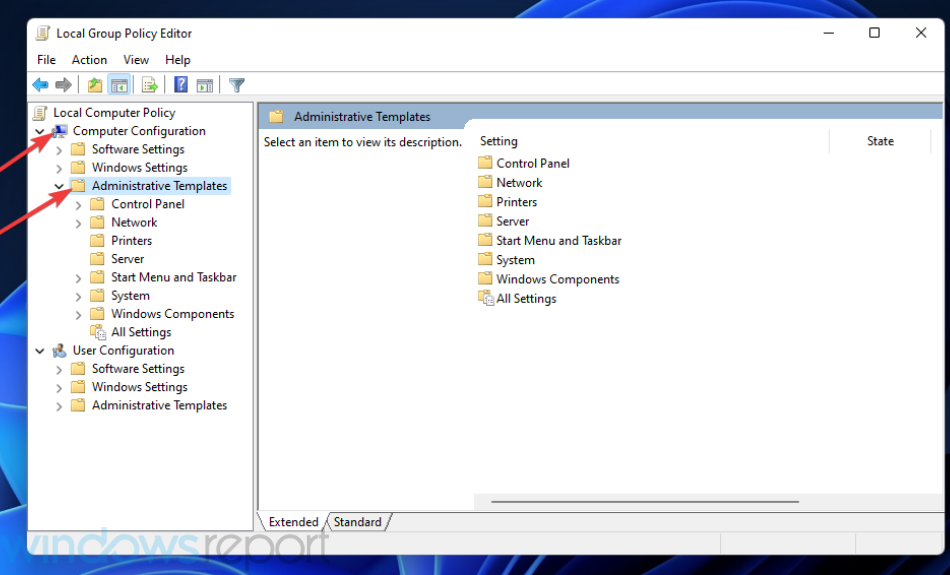
3. Next, click Computer Configuration and Administrative Templates.
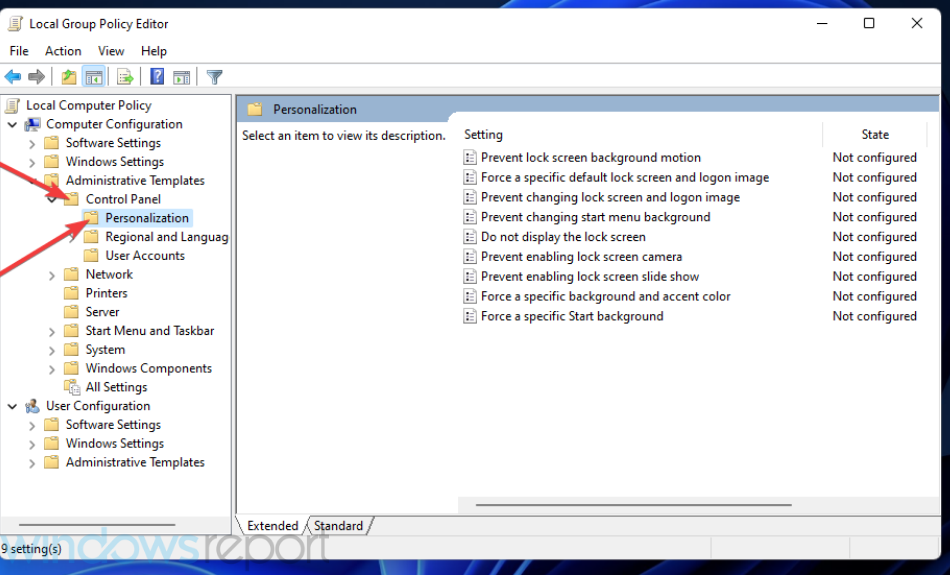
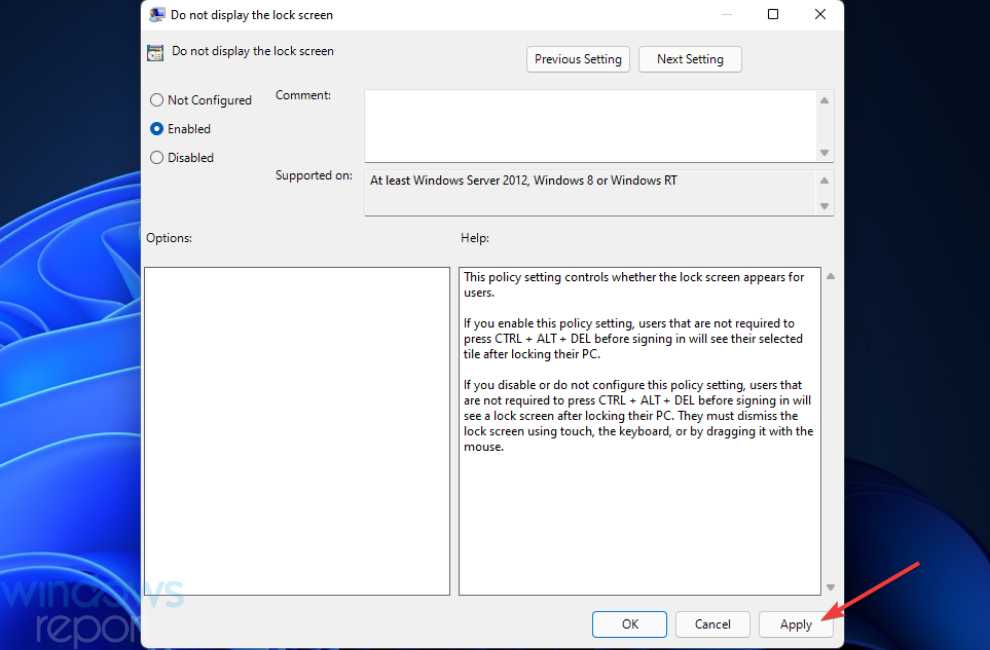
4. Select Control Panel > Personalization to open the policy setting shown directly below.
5. Double-click the Do not display the lockscreen policy.

6. Then select the Enabled radio button.
7. Press the Apply and OK buttons to save the setting.
A great tool you can use to turn off Windows 11’s lock screen is none other than the Group Policy Editor. It is built-in on your PC and can be safely used to tweak any PC options you want to.
 NOTE
NOTE
3. Disable the lock screen with Winaero Tweaker
- Open the Winaero Tweaker page, and click the Download Winaero Tweaker link there.

- Press the File Explorer button on the taskbar.
- Open the folder the Winaero Tweaker downloaded to, and double-click the winaerotweaker file to open it.
- Press the Extract all button that’s on the command bar.
- Click the Show extracted files when complete checkbox shown directly below to select that option.

- Select Extract to do so.
- Double-click WinaeroTweaker-1.33.0.0-setup to open the setup wizard and install the software.

- Open the Winaero Tweaker window, and double-click the Boot and Logon category.

- Select the Disable Lock Screen option on the left of the window.
- Then click the Disable Lock Screen checkbox on the right.


Can I disable the Windows login screen as well?
Not exactly, but you can bypass the login screen by configuring Windows to automatically sign in for you. Then you won’t ever need to manually log in to Windows.
To do so, you’ll first need to edit the registry and deselect the User must enter a user name and password to use this computer as follows.
- Open Registry Editor as covered within the first two steps of method one.
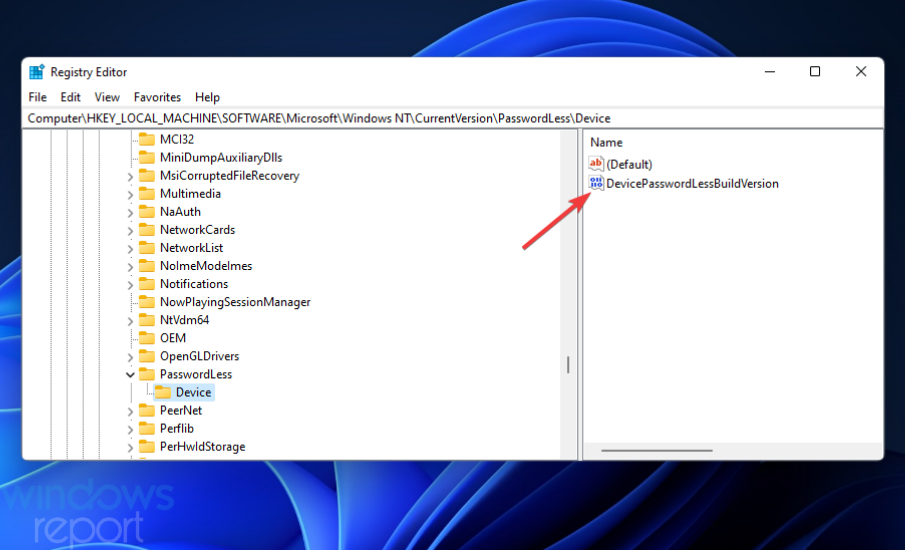
- Go to this registry key location:
HKEY_LOCAL_MACHINE\SOFTWARE\Microsoft\Windows NT\CurrentVersion\PasswordLess\Device - Double-click the DevicePasswordLessBuildVersion DWORD for the Device key.
- Then erase the current value from the data box, and enter 0 to replace it.
- Click OK to confirm.
- Thereafter, close the Registry Editor.
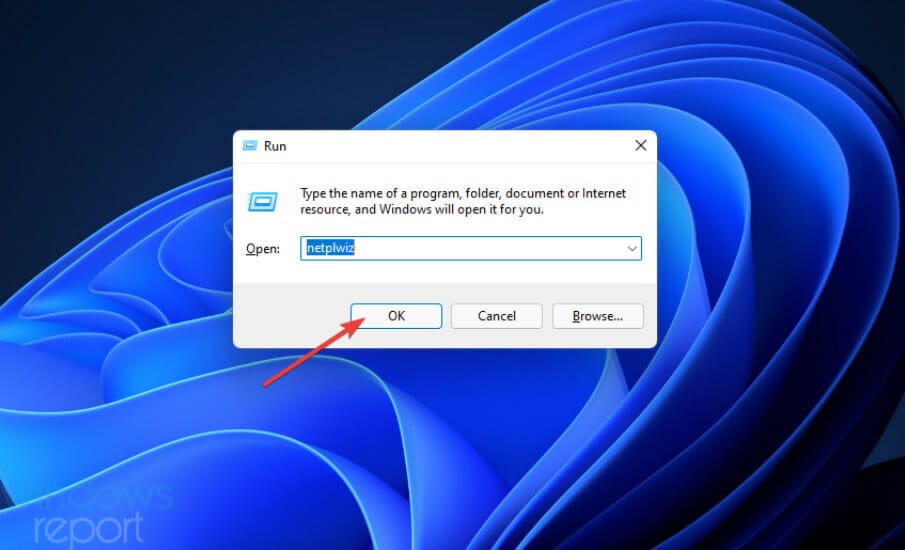
- Open the Run dialog.
- Enter this Run command and click OK:
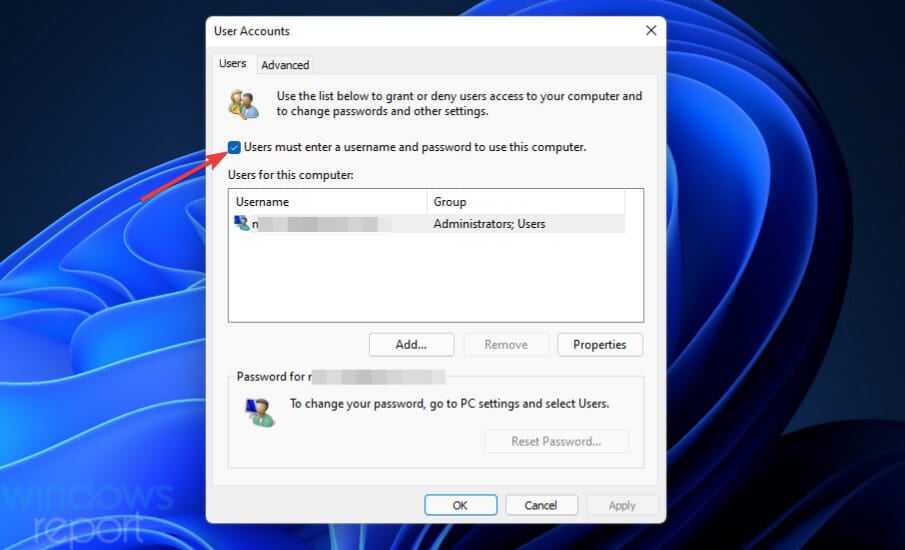
netplwiz - Deselect the Users must enter a username and password to use this computer checkbox.
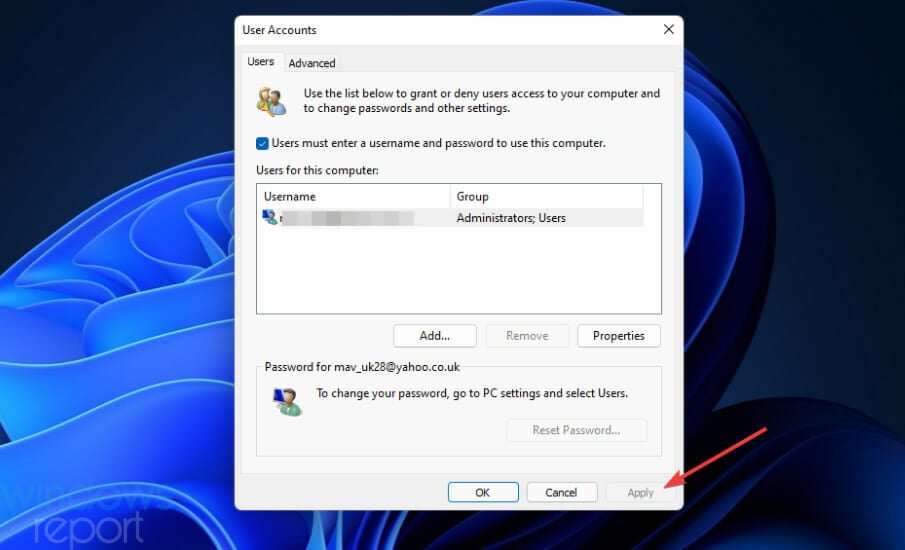
- Press the Apply button to save the new settings, and click OK to close the window.

You can also disable the lock screen on Windows Server with different methods. Our how-to Disable Lock Screen on Windows Server guide provides full details on how you can do so.
So, that’s how you can disable the lock screen in Windows 11 with three different methods. It’s relatively straightforward to enable that screen by editing the registry as outlined above. You can also set up a System Restore point beforehand just in case.
If you prefer not to edit the registry, however, you can disable the lock screen with Winaero Tweaker instead. That’s a great freeware customization app with which you can customize Windows 11/10 in many ways. So, it’s worth checking out Winaero for much more than just disabling the lock screen.
We hope you managed to successfully turn off Windows 11’s lock screen using our methods. Write to us in the comments section below if you have any thoughts you want to share with us.