
Focused Inbox is a recently-launched Outlook feature that automatically sorts your email to show you only the messages that are actually important. Automated newsletters, invoices and confirmation emails are siphoned off into the “Other” tab, leaving communications from colleagues and friends “focused.” Although it can keep your inbox tidy, some users may find the automation frustrating. Luckily, it can easily be turned off.
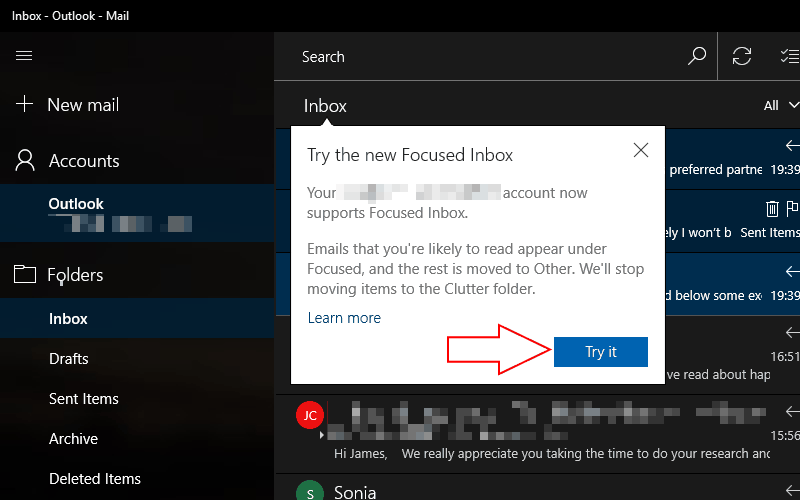
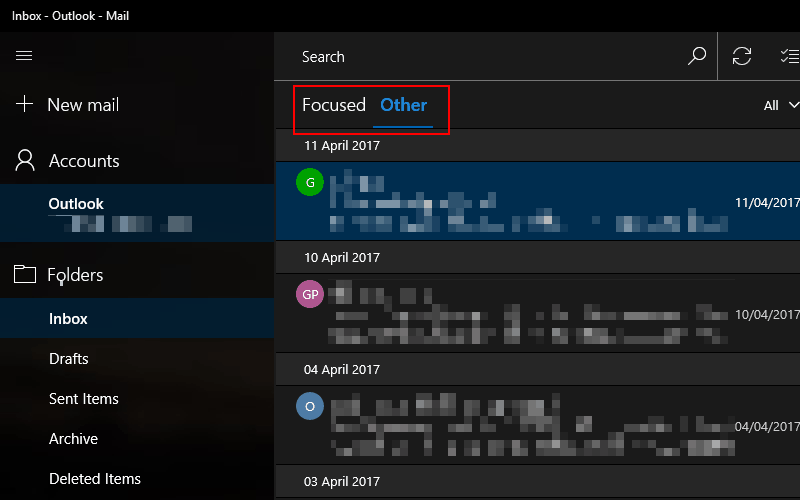
Focused Inbox is rolling out in waves to Outlook users so there’s a chance you still haven’t seen it yet. When it arrives, you’ll be informed with a popup message when you open the Outlook app or website. Click the “Try it” button to enable the feature and the app will reload with your messages sorted into the “Focused” and “Other” categories.
Because Microsoft wants you to try Focused Inbox out, there isn’t an obvious way to turn it off. Once you have the update, you’ll need go to Outlook’s settings to manually disable the feature. The exact procedure varies depending on the Outlook client you’re using.
Outlook Mail for Windows 10
In the Outlook Mail app that comes preinstalled on Windows 10 and Windows 10 Mobile, you can disable Focused Inbox by opening the Settings menu with the small cog icon in the bottom-left corner of the app. Head to the “Reading” category and scroll down to the “Focused Inbox” section to manage the feature.
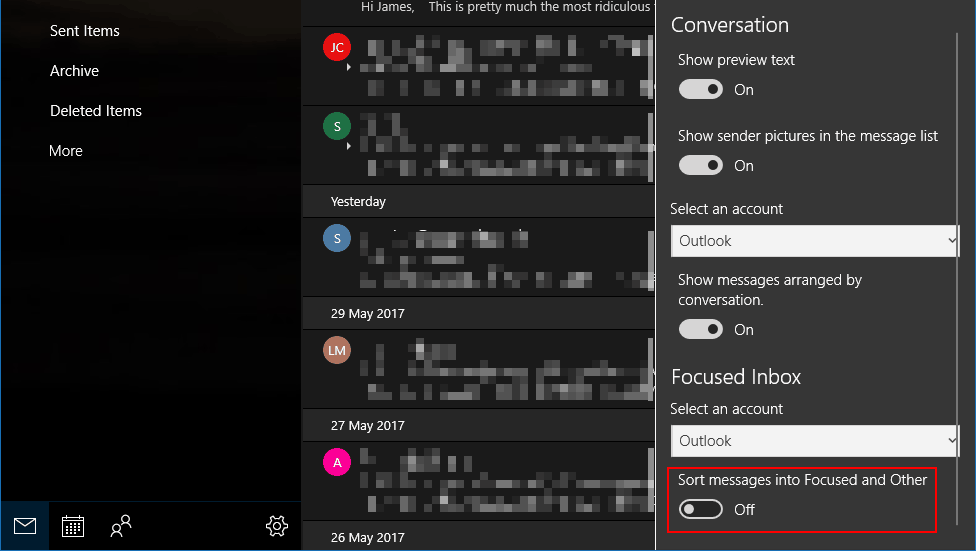
You can enable Focused Inbox individually for each of your accounts. Select the account you want to change from the dropdown menu and click the toggle button to disable the feature. Turning it won’t delete any of your emails. They’ll be moved back into the single Inbox view formerly used in Outlook.
Outlook.com and Office 365
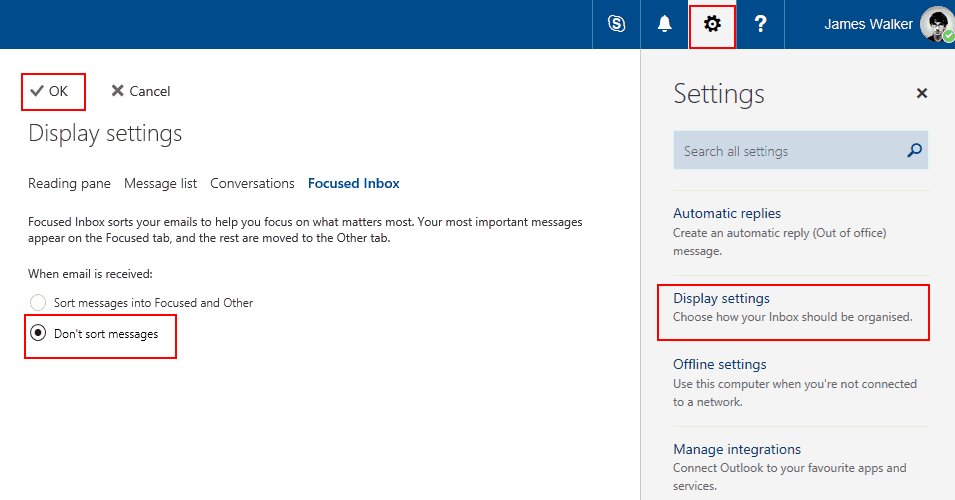
If you’re using Outlook on the web, you can control Focused Inbox by clicking the Settings cog in the top-right corner of the app and clicking “Display settings.” Navigate to the “Focused Inbox” tab and you’ll see the option to disable the feature. To turn it off, change the setting to “Don’t sort messages.” When you press the “OK” button, you’ll see your inbox reload as Outlook disables the filtering.
Outlook 2016
Focused Inbox is also available in Outlook 2016, Microsoft’s desktop-based email client. When it’s available, you’ll see the Focused and Other tabs appear at the top of your inbox. To remove them, navigate to the “View” tab on the Ribbon and click the “Show Focused Inbox” toggle button under the “Arrangement” setting. Focused Inbox will disable itself.
If you’re using Outlook 2016 for Mac, the setting is in a similar place. Navigate to the “Organize” tab of the Ribbon and click “Focused Inbox” button to toggle the feature’s state.
Controlling Focused Inbox
Focused Inbox will be enabled by default when it rolls out to your account. You don’t have to keep it turned on though. Although Microsoft thinks you’ll benefit from having most of your email clutter hidden, you can easily get your old inbox back if you prefer to work in a single pane.
If Focused Inbox appeals but it’s sorting your important emails into the “Other” category, you can press the “Move to Focused” button to override the behaviour. You can also choose to automatically sort all emails from the sender into Focused in the future, ensuring you won’t miss any messages again. Likewise, you can manually sort lower priority emails into Other if they appear in Focused, letting you tune your inbox to your liking.