How to Disable Reserved Storage in Windows 10
If you want to save space, it's smart to disable reserved storage
![]() 2 min. read
2 min. read
![]() Updated on
Updated on
Share this article

Improve this guide
Read our disclosure page to find out how can you help Windows Report sustain the editorial team Read more
Key notes
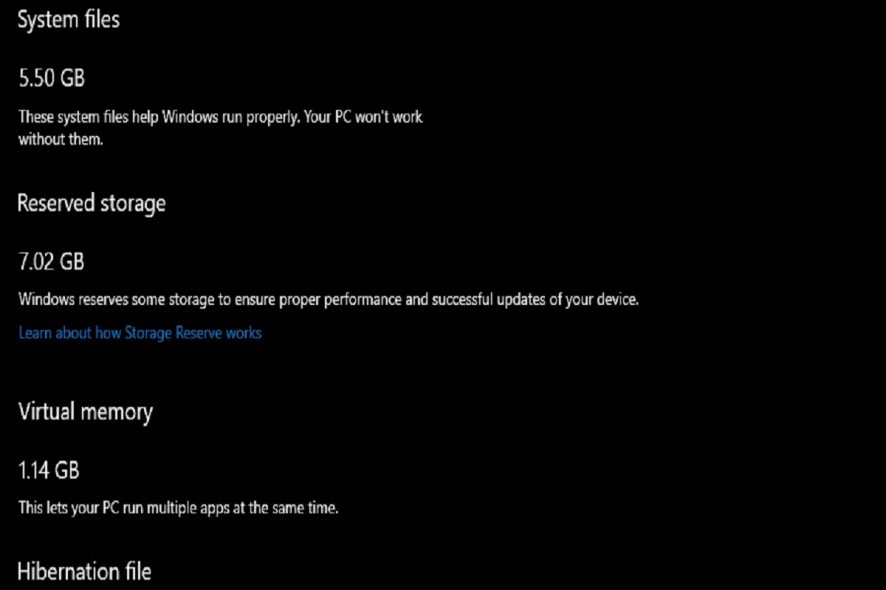
- Windows 10 reserves usually about 7 GBs in reserved storage.
- Many Windows 10 users do not like the concept of reserved storage and are looking for ways to turn it off from their PCs.
- You can manually disable unwanted optional apps from your PC or disable reserved storage altogether.
Microsoft released many new Windows 10 builds in January that provide a further glimpse of what spring’s 19H1 update has in store for the platform.
Reserved storage (otherwise Storage Reserve) is one of the new things that preview build showcases to Windows Insider users.
The reserved storage holds back a certain amount of hard drive storage to ensure there’s enough HDD space for Windows 10 updates.
What is reserved storage used for?
Windows 10 requires some space to be able to operate correctly. Though it can do a lot with a small amount, being close to your storage limit is likely to restrict performance and result in failed updates that could contain critical fixes.
Reserved storage is a new feature introduced to Windows to combat that method. The new reserved storage consists of reallocated temporary files.
Those temporary OS files will then be erased when Windows 10 needs the storage space for its updates. The current default value for reserved storage is about seven gigabytes.
How do I disable reserved storage in Windows 10?
1. Press the Windows + R hotkey on your keyboard to open the Run dialog.
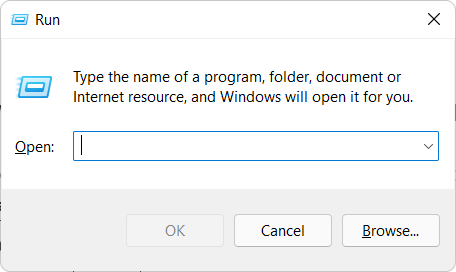
2. Enter regedit in Run, and then press the OK button.
3. Navigate to the following:HKEY_LOCAL_MACHINE\SOFTWARE\Microsoft\Windows\CurrentVersion\ReserveManager
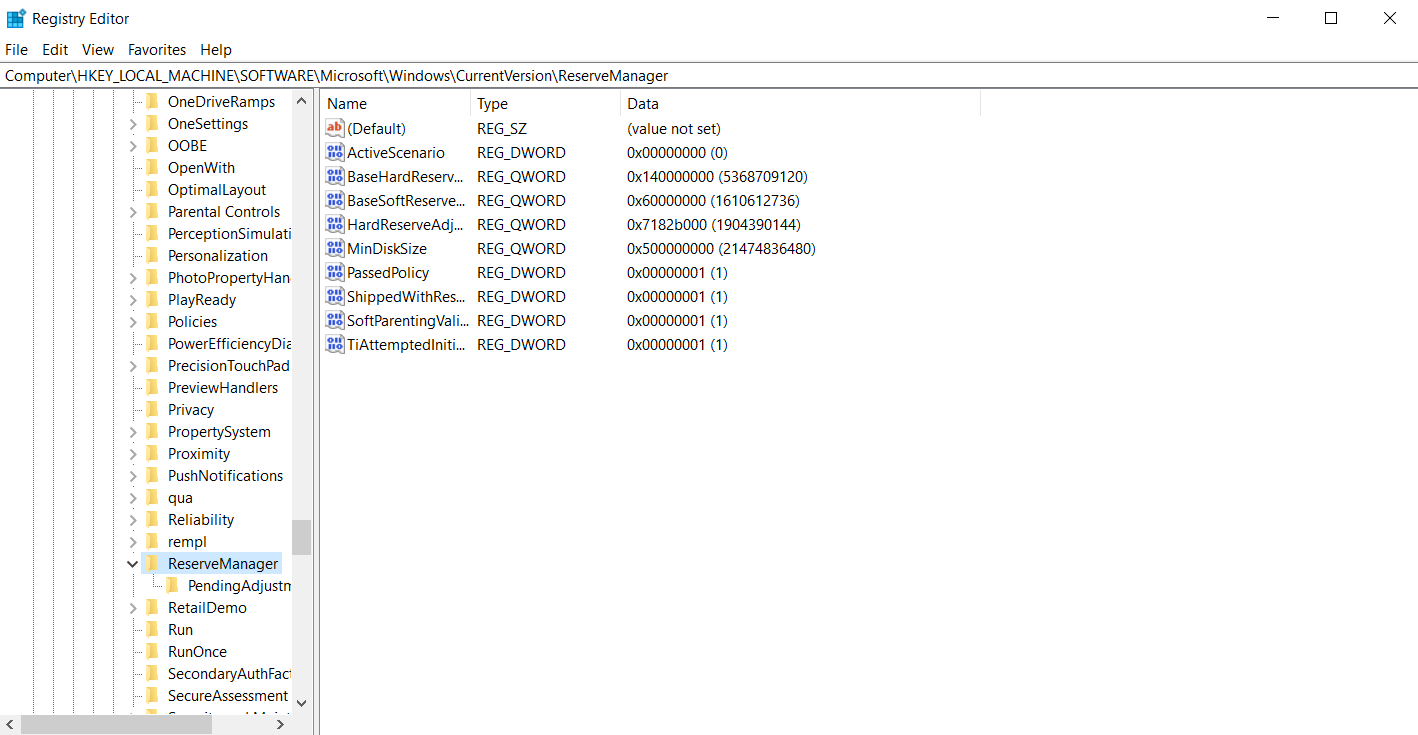
4. Double-click the ShippedWithReserves DWORD to open its Edit DWORD window.
5. Adjust the value in the Value data box to 0.
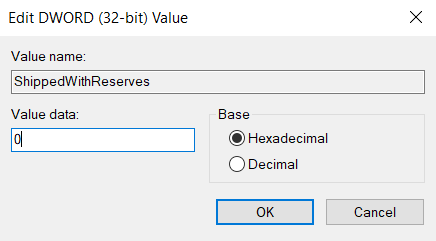
6. Click OK to close the Edit DWORD window.
7. Finally, close the Registry Editor window.
Reserved storage can be easily disabled using the built-in Registry Editor. In just a few clicks, you can perform the Registry tweak and get rid of the unwanted feature.
Note, however, that Windows Insiders need to enable reserved storage by adjusting the ShippedWithReserves DWORD value to 1.
Thus, Windows Insider users don’t need to turn off reserved storage unless they’ve already enabled it.
How can I manage reserved storage in Windows 10?
The amount of reserved storage primarily depends on pre-installed optional features. As such, users can configure the amount of reserved storage by removing optional features.
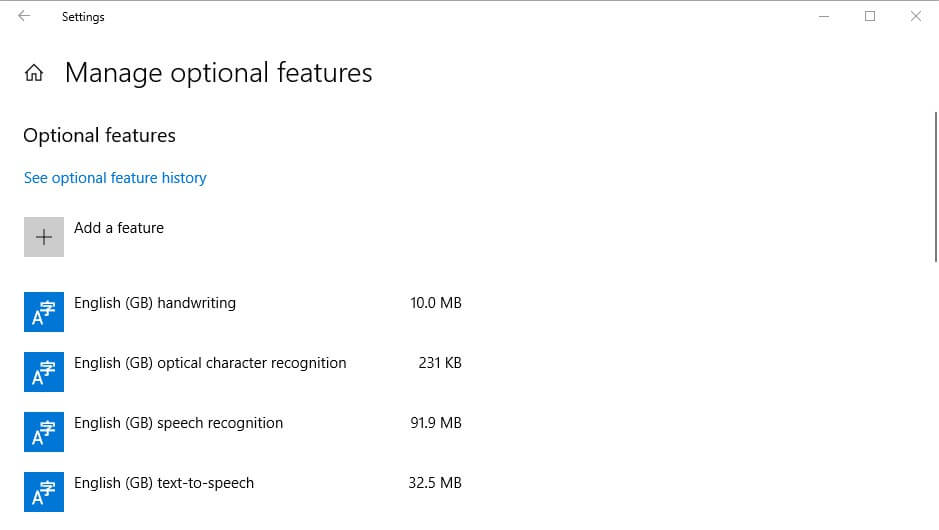
To do that, enter the keyword optional in Cortana’s search box. Then users can click on Manage optional features to open the menu from which they can manually uninstall optional features one by one.
It is more useful to manage your reserved storage space than entirely disabling it. You can organize it by removing the installed optional features that are no longer needed.
Nevertheless, reserved storage will be enabled by default in Windows 10 version 1903.
Let us know in the comments section below if you found this article useful and managed to disable reserved storage from your Windows 10 PC.