How to create a Flow in Microsoft Teams
With Power Automate and Microsoft Flow, you can create certain “Flows” to help you keep track of your business, and help boost your productivity. Here’s how.
- Set up the Power Automate app on Microsoft Teams by installing it from the App catalog in the left-hand sidebar of Teams
- Once set up, you’ll be taken to the Home page in Power Automate. Click the New Flow button. Then, choose one that fits with Microsoft Teams.
- Be sure to connect your accounts with the Flow, to make it light up green
- Continue and follow the instructions on the screen and then click Create Flow
- The Flow will populate in Teams, and it will appear in the list on the main Power Automate page
Applies to
Have you ever wanted to get a notification on activities happening inside Teams relating to documents being uploaded, forms being signed, or even tasks being completed in Planner? Usually, you might have to check each of these Microsoft 365 apps individually to get up to speed on things. However, with Power Automate and Microsoft Flow, you can create certain “Flows” to help you keep track of your business, and help boost your productivity. Today, we’ll be showing you how you can do that.
Adding Power Automate to Teams
First things first, you’ll need to add Power Automate to Microsoft Teams to proceed. To do this, click the Apps section in the Teams sidebar. From there, search for Power Automate. Then, choose the Power Automate app that opens up and choose the purple add button. If you want flows in a specific channel or an entire team for all users, you also can choose the down arrow, and pick Add to team, if you have the privileges to add an Automation for everyone. Once done, you should see the Power Automate app open up in the sidebar in Teams.
Creating a premade, “popular” Flow in Teams
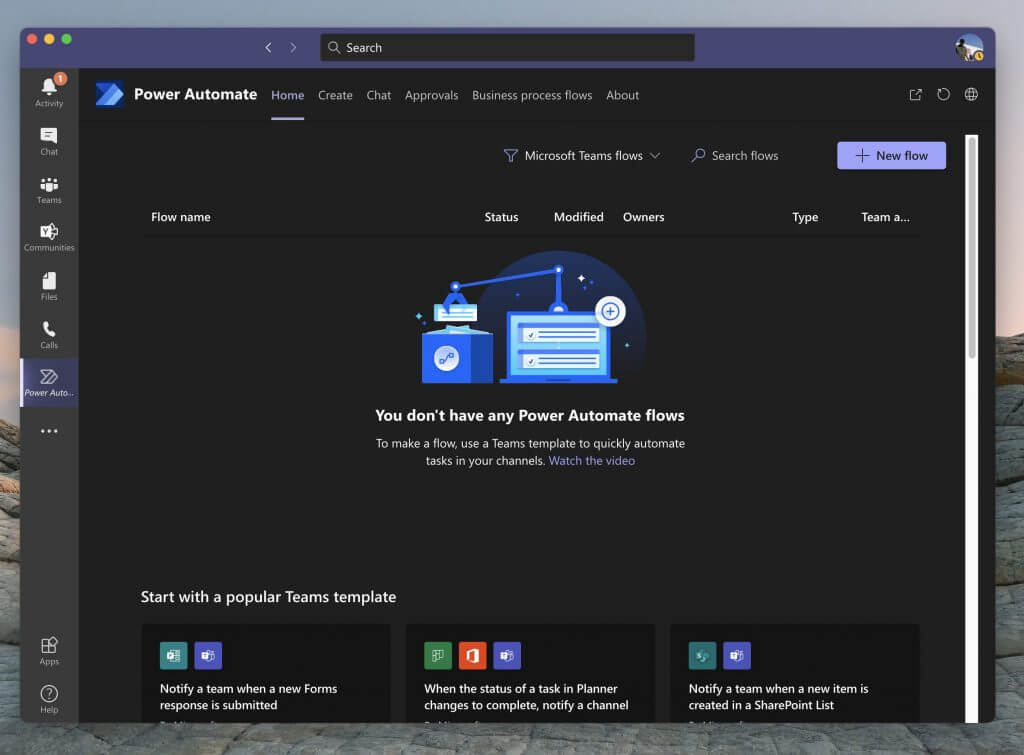
Next up, you should be taken to a filtered option showing you only Microsoft Teams Flows and Templates. You can filter to other Flows if you want to by clicking the filter button next to the Search Flows button (but more on that later.) Anyway, you also should notice some popular templates for Flows in Teams. These are pre-made templates by Microsoft, that you can enable with just a few clicks, no coding required!
We’ll focus on these first, as these are the most popular and help address some of the most common needs for notifications in Teams. Here’s a list below, but keep in mind you can see a list of all the Teams flows by choosing to See all Teams templates at the bottom of the Power Automate app. Generally speaking, any of the Flows in the Teams list will be straight forward to set up, needing just a few simple steps.
- Notify a team when a new Forms response is submitted
- When the status of a task in Planner changes to complete, notify a channel
- Notify a team when a new item is created in a SharePoint List
- Save a message to OneNote
- Create a work item from a message
- Notify a team when a new task is added to a Trello board
- Notify a team when the status of a work item changes in Azure DevOps
- Notify a team when an alert is triggered in PowerBI.
If the Flow you want is in this list, then click it. You’ll get a popup message, allowing you to configure it. We’re using the Flow for task changes in Planner, as an example. Usually, you should see a box letting you name the flow. Then, under that, will be a list of sign-ins (or connectors) that you’ll need. Make sure you sign in, to each one, and then click continue and follow the on-screen instructions. In our case, we’ll need to configure and choose the Planner group ID, the Plan ID, the Teams Team, and then the Channel to continue.
When done, you can choose Create Flow. And you should then see a popup message saying Your workflow has been created. It now appears in the list of Flows on the main Power Automate page! And it will run automatically from now on.
Creating other, and custom Flow in Teams
Thanks to Power Automate, you’re not just limited to Flows themed towards Teams. If you want, you also can create other Flows, too. You can toggle to these by clicking the Filter button at the top of the screen, next to the search box, and choosing All Templates. Then, look to the left to choose a category. The steps will be the same, requiring you to sign in and connect accounts, as we did above.
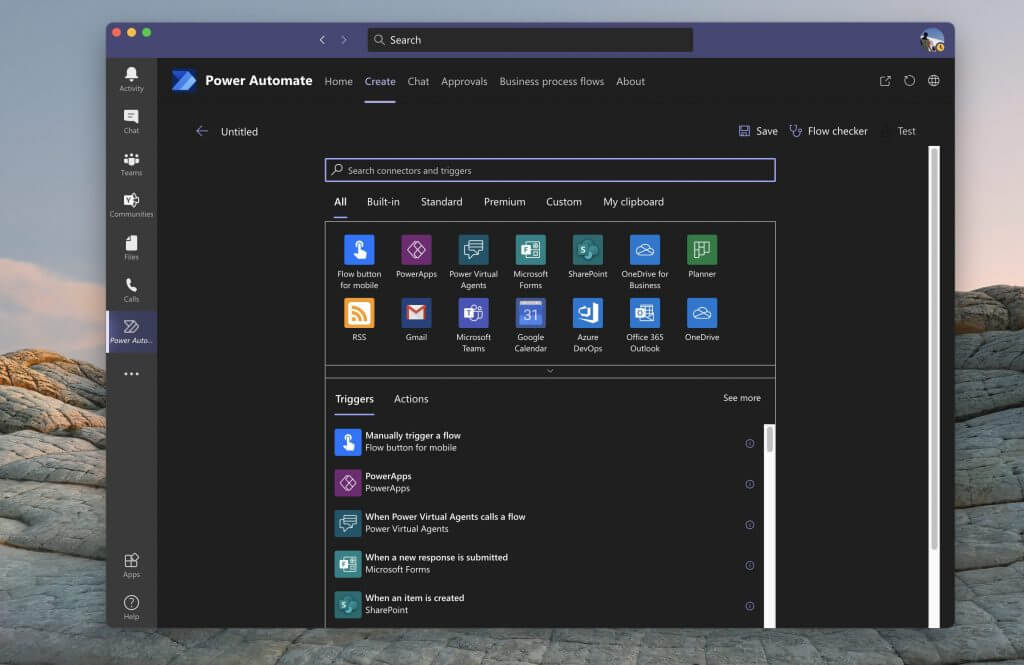
If you’re a more advanced user, you also can create a blank Flow, on your own, not following a template. Click the Create tab in Power Automate, and then choose to Create from blank. From there, you’ll see a list of triggers and actions. You’ll also see some themes, under All. Pick your theme, to filter the trigger and actions.
Then, choose a trigger, following the instructions on the screen. After the trigger is finished, set up the action by following the instructions and the wizard on the screen. Each Flow has a different set of instructions, but it’s pretty straight forward to understand. You can then Test the flow by clicking the Test button on the top. You also can check the flow for errors by choosing Flow Checker too. When ready, click Save and your Flow will be put into action.
Checking and deleting Flows
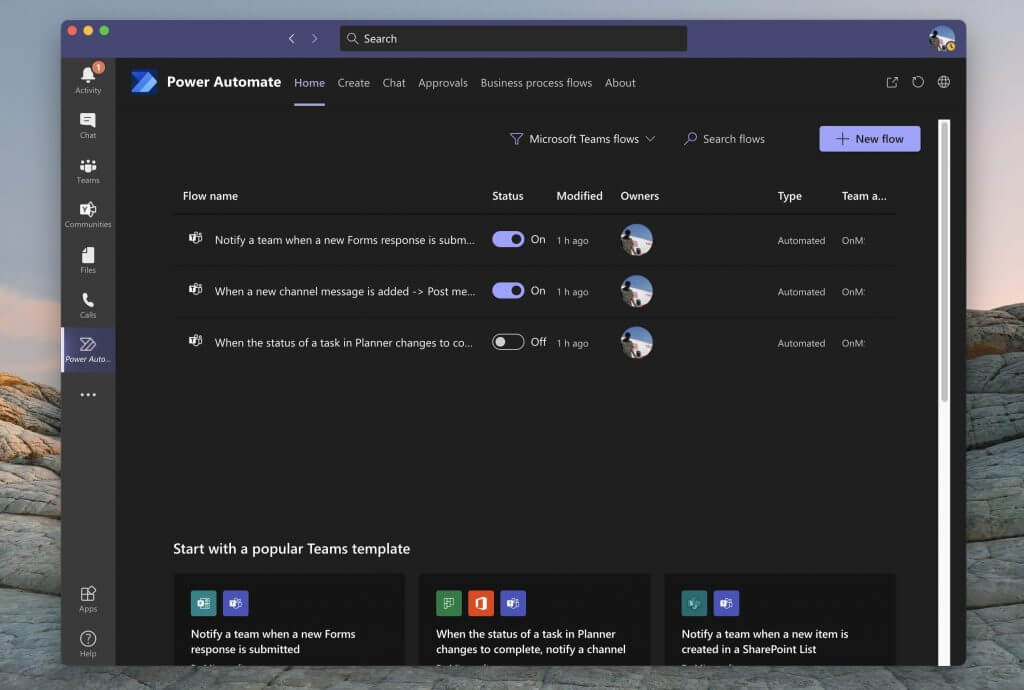
Now that you’ve created your Flows, you can easily delete them, or edit them, too. Simply open up the Power Automate app in Teams by clicking the ( . . .) in the Sidebar, and then clicking the Home tab. From there, you should see a list of your Flows. You can move your mouse to the far right, and click the three dots in the list and then choose Edit or Delete to delete the Flow. More importantly, you also can check the Run History to see how it’s running, of it has gone rogue.
Just the start of endless possibilities!
Creating Flow in Teams with power Automate is just the start of the possibilities. Microsoft has a platform known as PowerApps, which lets you create your own custom apps for your business using similar templates. You can learn more about that here. And remember, check our Microsoft 365 hub for more news and information.