
Clean up Windows 10 disk space
- Open Settings>System>Storage
- Choose a drive
- Choose a category, and then choose the options to free up space
- You can also use Windows 10 Storage sense to automate disk cleanup
Applies to All Windows 10 Versions
Running out of disk space is one of the most common and frustrating issues faced by PC users. Thankfully, you don’t always need to resort to deleting your files in an effort to reclaim a few empty gigabytes. Windows 10 comes with a set of tools which can help you in your quest to clear out the clutter, without having to touch any precious personal files.
Cleaning up
If you are running out of disk space, your first step should be to determine which kinds of files are responsible for the excessive usage. Open the Settings app (cog icon above the power button in the Start menu) and click the “System” category on the main page. From here, click the “Storage” link in the left navigation menu.
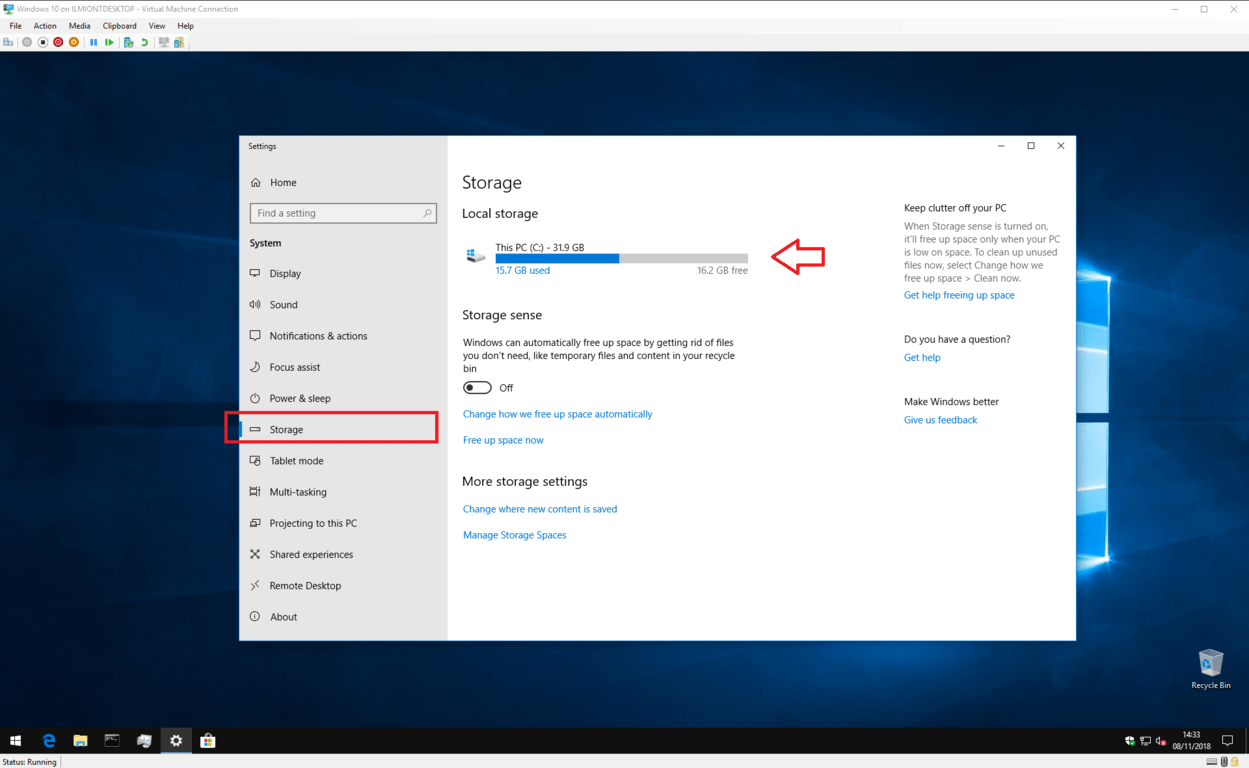
On this screen, you’ll see an overview of all the storage drives connected to your device. Click the one you want to declutter. We’ll assume you’ll be using your main system drive for this tutorial – the one where Windows is installed – as it’s the most likely to run out of room. After a few moments, you’ll be shown a breakdown of storage usage by content type.
You can click any of the categories to see a more detailed overview of how they’re using space. Most pages will also give you a set of options to take immediate action and free up space. Some of these might be quick fixes – you may decide to part with some of your never-played music tracks, or delete emails older than a year.

The most important category for our purposes is “Temporary files.” Over time, Windows 10 creates a large number of internal system files which can be removed without any negative consequences. Click the category to be shown an overview of the temporary files stored on your system.
In some cases, you might be able to free up several gigabytes of space, depending on when you last ran this procedure. The largest space savings are usually found in the Windows Update and Delivery Optimisation categories. By default, Windows keeps downloaded updates saved even after they’ve been installed. They can be safely removed though, allowing you to store more of your own content.

The kinds and sizes of temporary file displayed here will vary with your individual system. Review the file types displayed and click the checkbox next to each one to mark it for deletion. Press the “Remove files” button at the top of the list to start the deletion process. If there’s a lot of content, it might take some time to completely clean everything up.
It’s also worth reviewing the Maps category as Windows 10’s optional offline maps can consume several gigabytes of your drive. It might be worthwhile to delete maps you’ve previously downloaded if you no longer use them. Likewise, using the “Apps & games” list to remove infrequently used apps is a simple way to cut down on bloat without touching your own files.
Storage sense
Hopefully, your storage drive is now feeling a little roomier. There’s still more work to do though if you’re to stop it filling up again. Windows 10 includes a feature called Storage Sense which can automate the task of cleaning up your hard drive when the free space starts to run out.

You can find its settings back on the main “Storage” settings page. Just click the toggle button to switch it into the “On” position to enable Storage Sense. When your drive starts to get low on space, Windows will intervene and start deleting unneeded temporary files, without touching your content.
You can customise how Storage Sense operates by clicking the “Change how we free up space automatically” link. Here, you can control how often Storage Sense should run with the “Run Storage sense” dropdown. By default, it’s set to “When Windows decides,” which enables the automatic execution whenever space runs low. You may prefer to run it on a regular schedule though, helping you to keep unnecessary files from piling up.

You also have some control over what Storage Sense deletes. Under the “Temporary Files” heading, you can decide whether or not Storage Sense should remove app temporary files which are no longer in use. There are also options to automatically empty files in your recycle bin and Downloads folder that have been there for a prolonged period of time, keeping these destinations clean.
Once you’ve configured Storage Sense, you should be able to leave it to run without having to think too much about freeing up space. You can also manually invoke Storage Sense by clicking the “Free up space now” link in Settings. Finally, if your PC does get low on space again, you can always return back to the storage overview screen to identity where your drive’s capacity is going.
Further reading: Storage Sense, Windows 10