How to Enable/Disable Wake on LAN in Windows 11
You can enable wake on LAN on Windows 11 with one command
![]() 3 min. read
3 min. read
![]() Updated on
Updated on
Share this article

Improve this guide
Read our disclosure page to find out how can you help Windows Report sustain the editorial team Read more
Key notes
- To enable wake on LAN on Windows 11, you need to adjust your BIOS settings first.
- The feature isn't enabled by default, so you need to modify advanced network adapter options.
Wake-on-LAN is a networking feature on Windows 11, and with it, you can remotely wake up your PC from hibernation or sleep mode.
Although it’s not used often by casual users, this feature is incredibly useful to network administrators and advanced users who work with wired networks, and today we’re going to show you how to set it up.
How do I know if my computer supports Wake-on-LAN?
- PC needs to be connected to an ATX power supply so that you can wake it up from sleep mode remotely.
- An access control list needs to be created and added to all routers in the network.
- The network card needs to support the wake-on LAN feature.
- For this feature to work, both computers need to be on the same network.
While most Ethernet adapters support the wake-on LAN feature via the Ethernet cable, this feature isn’t usually available on wireless adapters. If you want to use it with a Wi-Fi adapter, make sure that it has the Wake-on-Wireless-LAN or Wake-on-WLAN feature.
How do I enable Wake on LAN on my PC?
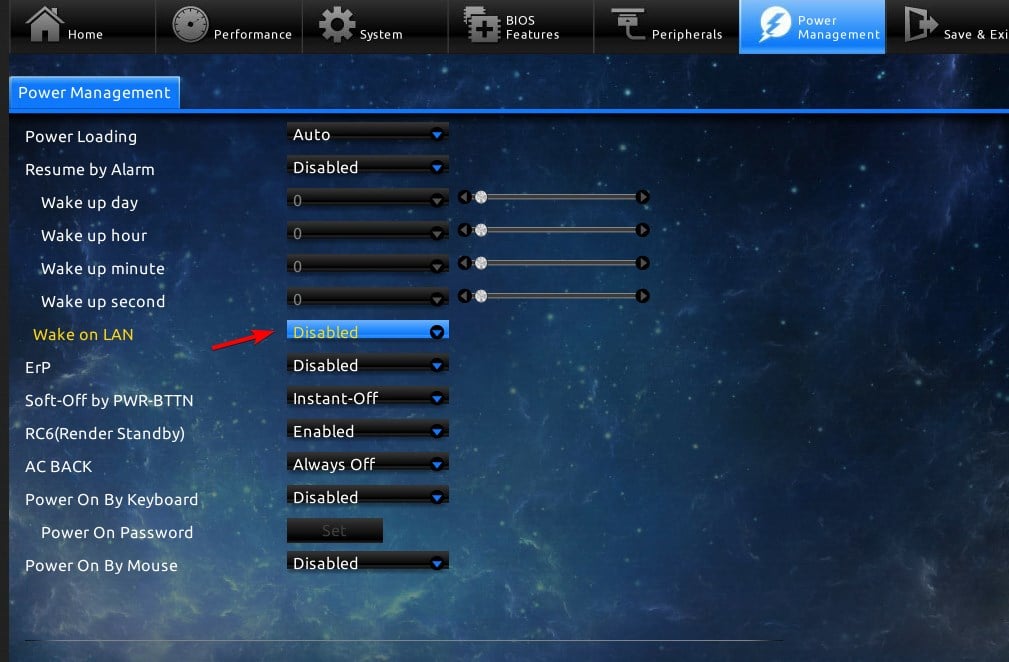
1. Configure BIOS
- Restart your PC.
- While it restarts, keep pressing F2 or Del or the dedicated BIOS key for your motherboard.
- From the BIOS menu navigate to the Power Management section.
- Locate Wake on LAN and set it to Enabled.

- Save changes and exit BIOS.
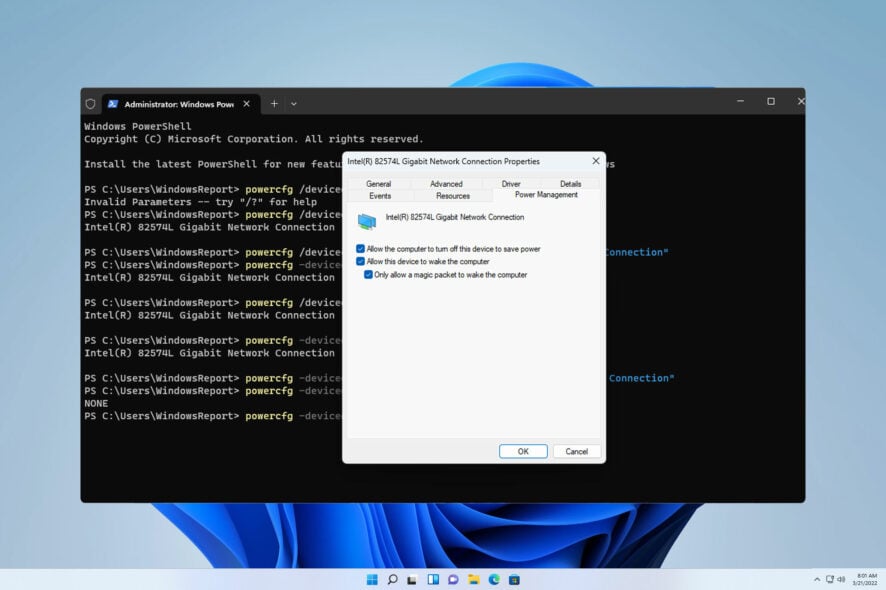
2. Change the network adapter settings
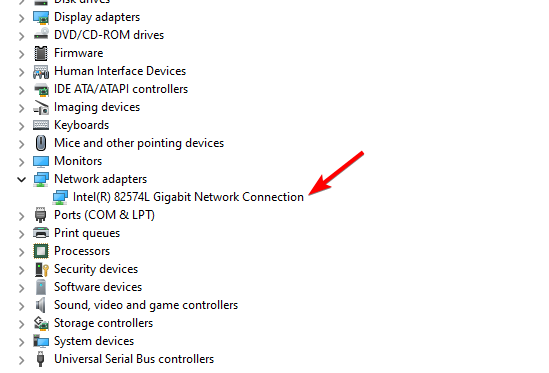
- Press the Windows key + X and select Device Manager.

- Locate your network adapter and double-click it.

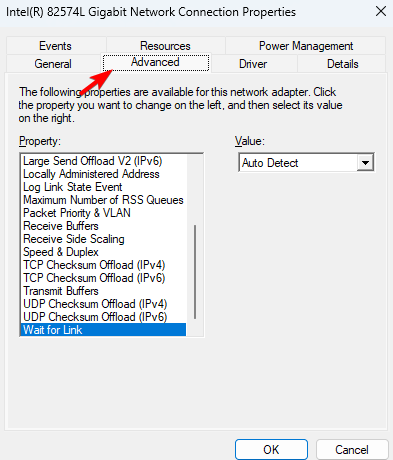
- Navigate to the Advanced options tab. After that select Wake on Magic Packet, and set it to Enabled.

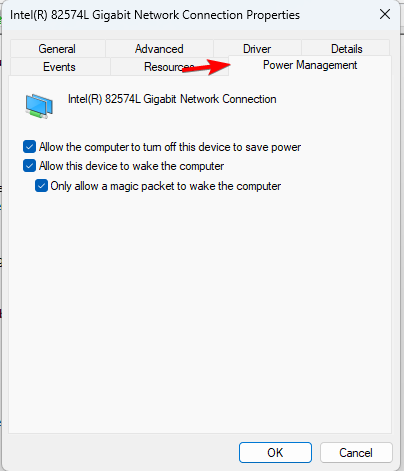
- Lastly, go to the Power Management tab, and enable all options. Click on OK to save new power options.


3. Use the command line
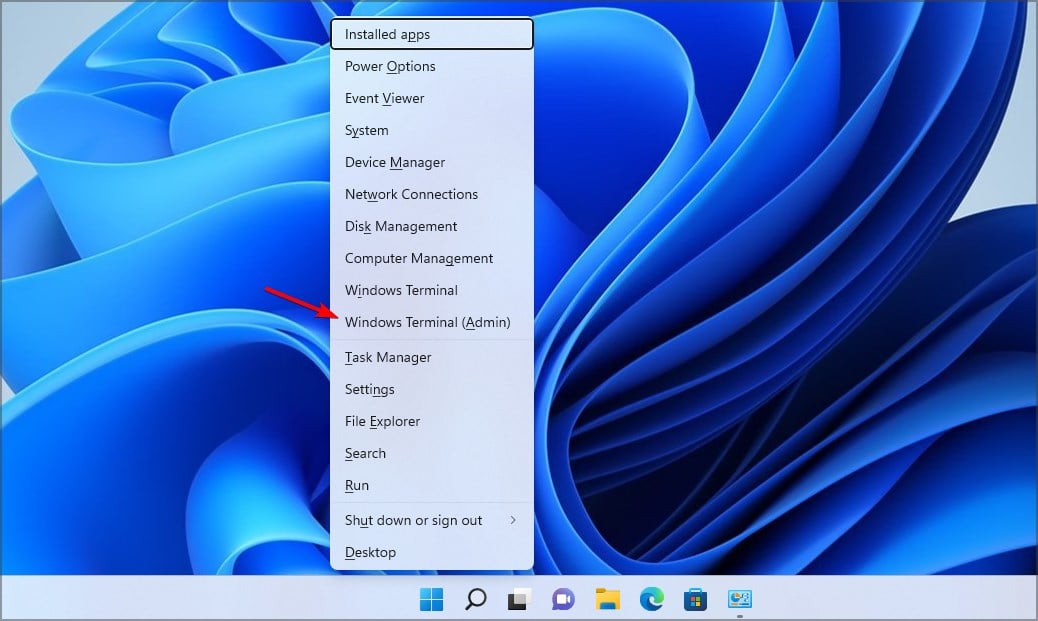
- Press the Windows key + X and select Windows Terminal (Admin).

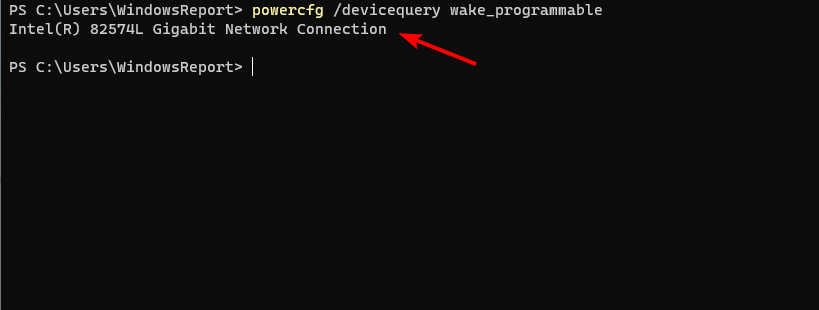
- Run the following command
powercfg /devicequery wake_programmable
- Locate your adapter from the network adapters list.
- Now run the following command:
powercfg /deviceenablewake "Adapter Name"
- After doing that WoL feature should be enabled.

How do I turn off Wake on LAN on Windows 11?
To disable Wake on LAN on Windows 11, you just need to follow the same steps from above, but this time disable all settings that mention this feature.
You can do it also do it quickly with the command line:
- Open the Terminal as administrator.
- Run the following command:
powercfg -devicequery wake_armed
- Locate your network adapter on the list.
- Now run this command:
powercfg -devicedisablewake "Adapter Name"

Why is Wake-on-LAN not working in Windows 11?
- Your remote wake up software isn’t properly configured.
- Wake on LAN isn’t configured properly on the remote computer.
- The remote computer can’t be located by the device that is waking it up.
- If the MAC address for the magic packet doesn’t match with MAC address of the remote PC, wake on LAN won’t work.
Wake on LAN on Windows 11 is easy to setup and you’ll use it if you’re a network administrator or a PC enthusiast, however, issues such as a laptop waking on its own or Wi-Fi disconnects after sleep mode can appear if you don’t configure it properly.
Have you ever used this feature before? Let us know in the comments section.