How to Get Android Notifications on a Windows 10 PC
Learn to access your phone from your PC using Phone Link
![]() 1 min. read
1 min. read
![]() Updated on
Updated on
Share this article

Improve this guide
Read our disclosure page to find out how can you help Windows Report sustain the editorial team Read more
Key notes
- If you want to get Android notifications on your PC, you need to connect the devices.
- The app called Phone Link, formerly known as Your Phone, is a built-in app on Windows 10 that allows users to connect their phones to their PCs.
- You can tweak the app's permissions and only allow it to access certain things from your phone, according to your preferences.
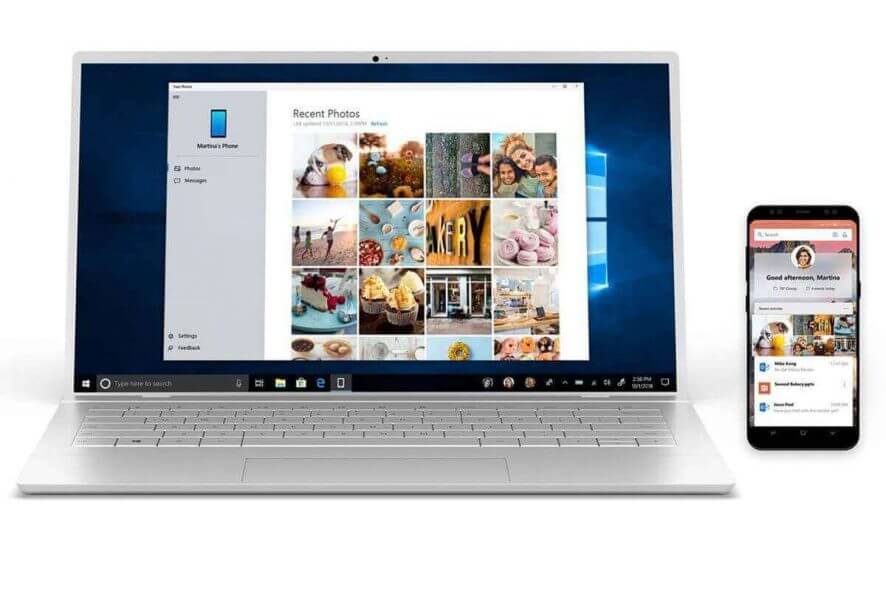
If you own an Android smartphone, you’ll be happy to know that you can finally manage Android notifications in Windows 10.
The app that links your phone with your PC is called Phone Link, formerly known as Your Phone, and it allows you to see notifications from your smartphone directly on your Windows 10 PC.
Also, you can see your entire SMS history or reply to messages directly from the PC.
Read on to find out how to connect your devices so that you can receive Android notifications directly on your PC.
How can I get Android notifications on my PC?
If you want to connect your Android phone to a Windows 10 PC in order to receive notifications on the PC, you need to use the Phone Link app.
First, make sure that you have the Phone Link app on your PC and that it’s updated. If you don’t have the app, you can get it from the Microsoft Store.
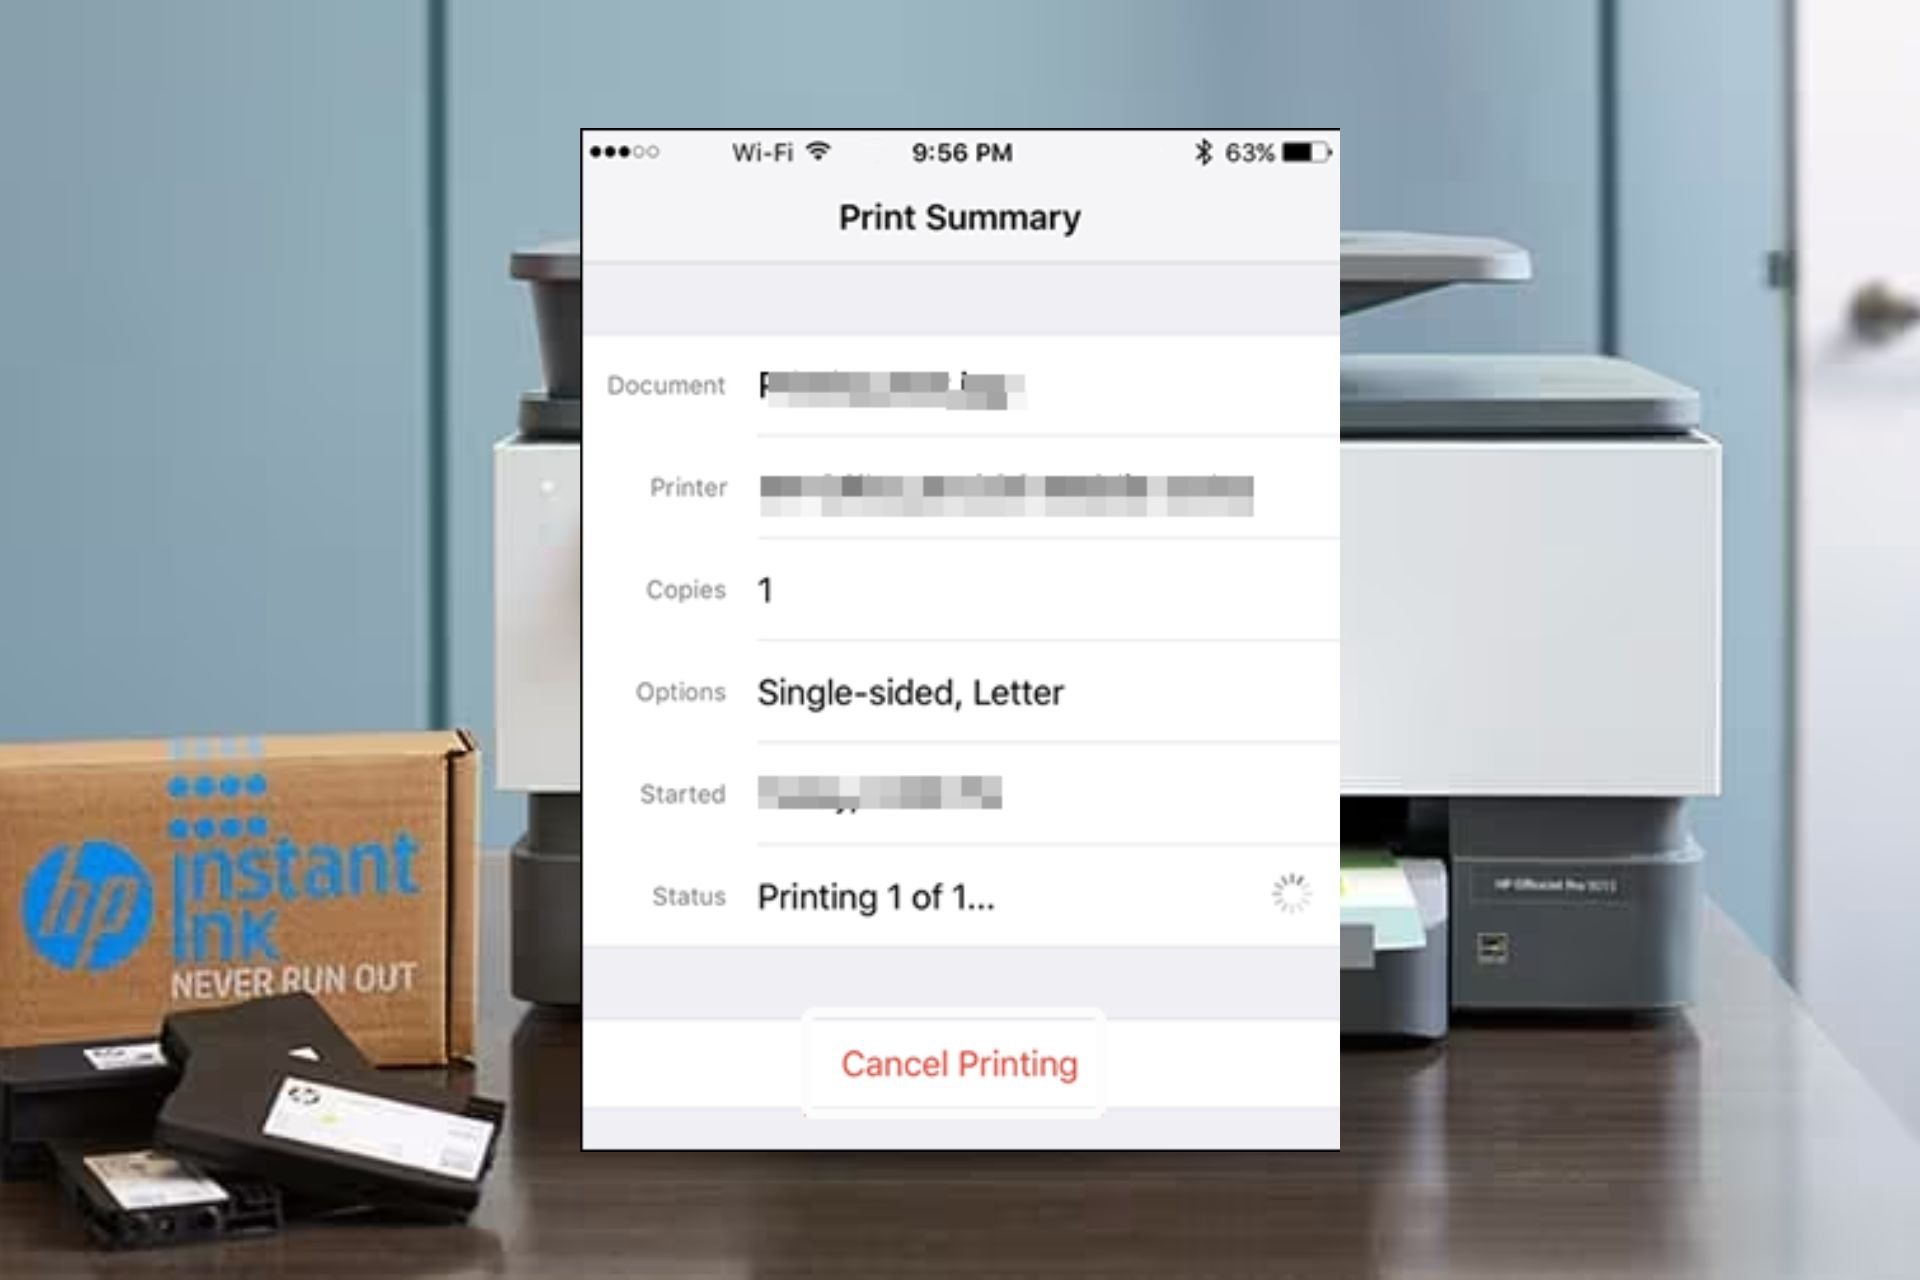
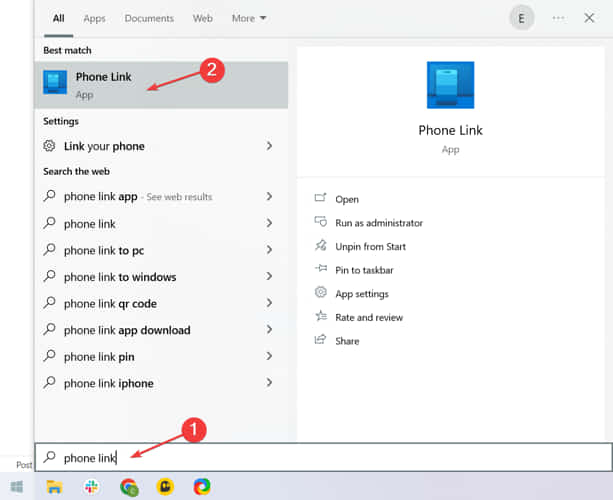
1. Press the Windows key on your keyboard and type Phone Link in the search box that opened, then click on the first result to open the app.
2. Click on Get Started.
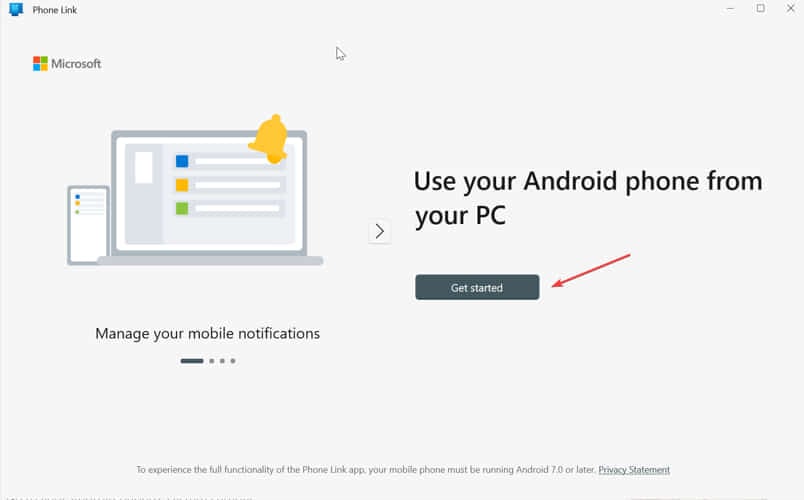
3. Sign in with your preferred Microsoft account.
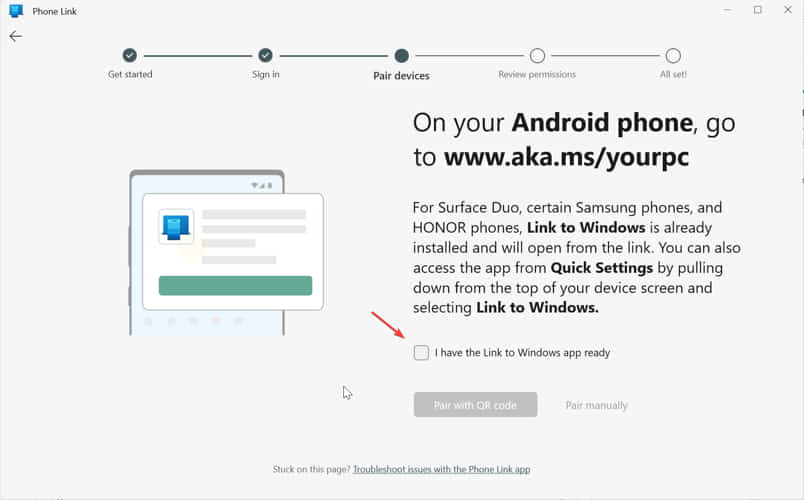
4. On your Android phone, navigate to the www.aka.ms/yourpc web address and install the Link to Windows app.
When you’re done, go back to your PC and click on I have the Link to Windows app ready.
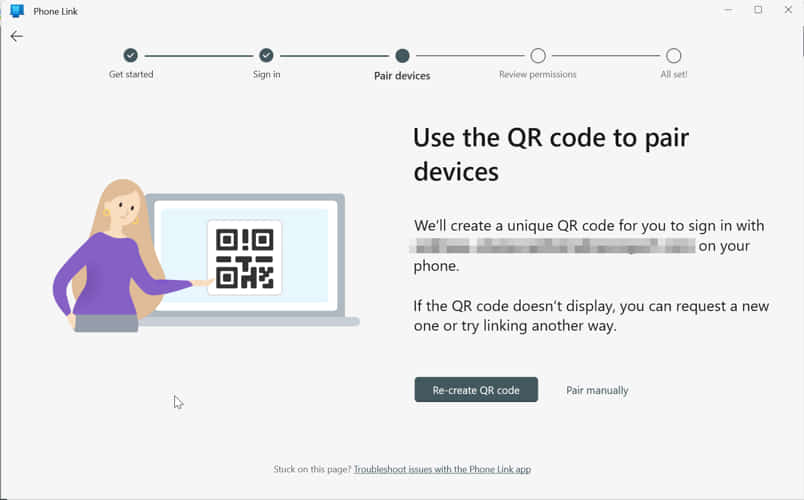
5. Choose between Pair with QR code and Pair manually. If you choose the first option, the app will create a QR code for you to scan using your Android phone, in order to automatically connect your devices.
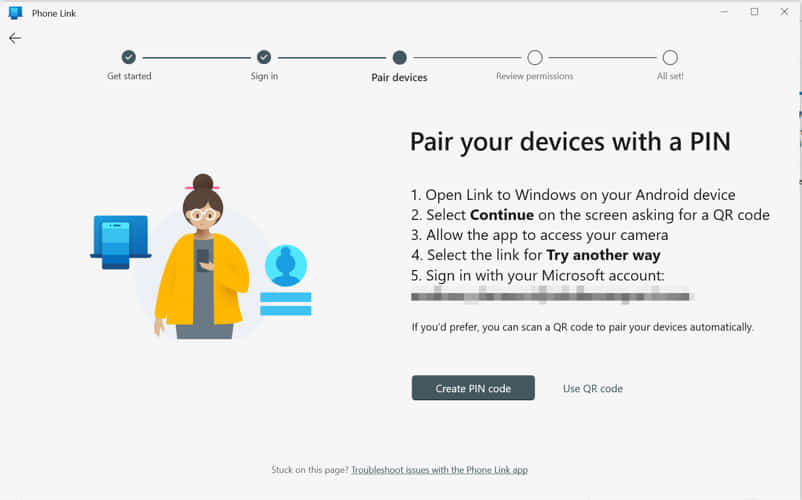
6. If you prefer to choose the Pair manually option, you need to open the Link to Windows app on your device, click on Continue, allow the app to access your camera, and then press on Try another way.
After, you need to sign in with your Microsoft account on your Android in order to connect the devices.
7. After you connect the devices, you just need to review the permissions. You can choose whether you want to allow Windows Link to:
- Access your contacts
- Make and manage phone calls
- Send and View SMS messages
- Access photos and media on your device
8. After, click on Continue.
9. Select whether you want to let the app run in the background.
10. Click on Done.
11. And that’s it. From now on, you’ll receive notifications and messages from your Android phone directly to your desktop.
If you’ve missed some of them, you can always find the in the Windows 10 Notification Center.
It’s worth mentioning you’re also able to reply to messages from all your messaging apps, not only from your default Android SMS app. One less to take your phone out of your pocket!
Your Phone app won’t connect to the smartphone? Check out our guide to solve the problem in no time.
In case your Android phone isn’t recognized by your Windows 10 PC, we have yet another dedicated guide that will help you fix the issue.
If you have any more questions or suggestions, feel free to leave them in the comments section below.