4 Steps to Change your User Folder Name on Windows 11
Detailed steps to follow to successfully change your folder name
![]() 6 min. read
6 min. read
![]() Updated on
Updated on
Share this article

Improve this guide
Read our disclosure page to find out how can you help Windows Report sustain the editorial team Read more
Key notes
- Changing your user folder name is not as straightforward as changing a standard folder name, but it is not impossible.
- The first thing to do is to achieve this is to create a new administrator account.
- Modifying your registry is the most definitive step in this process.
The user folder name and the account name are set during setting up your user account. However, there are times when you need to change your user folder name on Windows 11 for some reason.
Unlike renaming standard folders, this process is not as straightforward. But with the right information, the process can be effortless, and that is what we have to offer you in this guide.
Is it safe to rename my user folder name?
As mentioned earlier, changing the user folder name on Windows 11 is not as straightforward as renaming ordinary folders. Even when you change your user account name, the user folder name will still remain the same.
Microsoft advises against changing your user folder name because it might cause some apps not to work. This is because the registered path name for these will have changed from the default.
Though this can be fixed by changing the path of the faulty apps and processes so there is no lasting damage.
But, it is advised not to change your user folder name unless you have a good reason for it.
How can I change my user folder name on Windows 11?
1. Create a new admin account
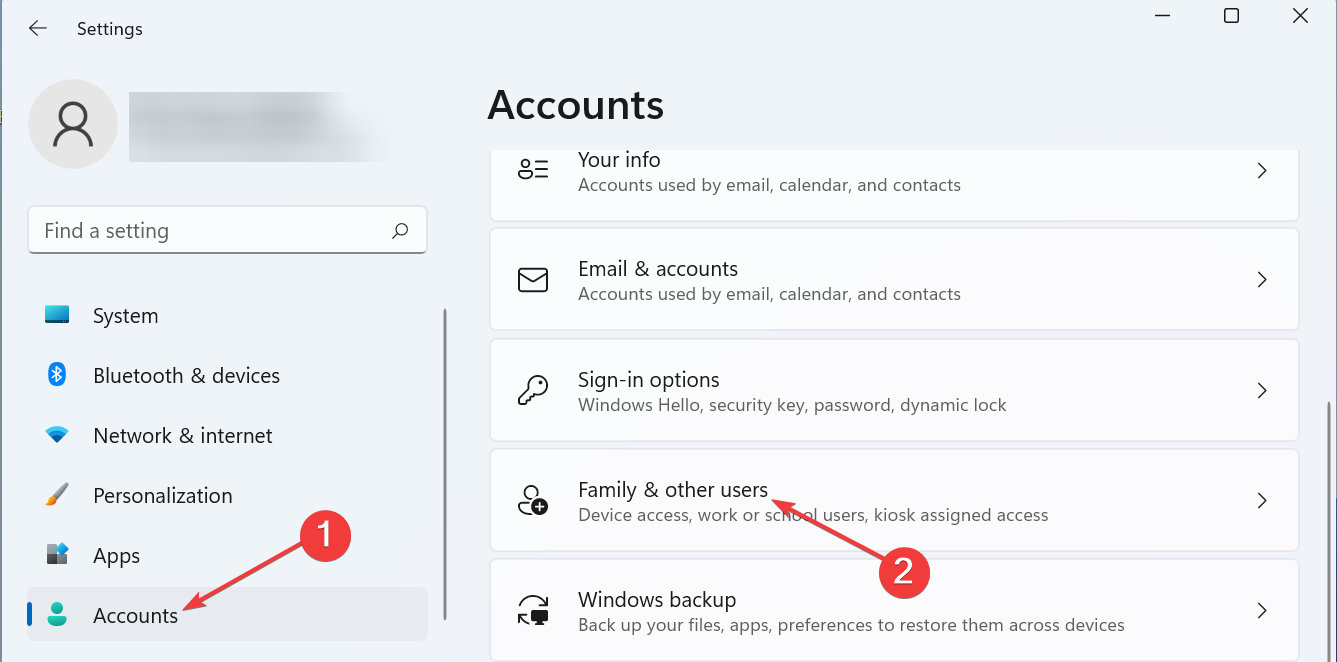
- Press the Windows key+ I to open the Settings app and select the Accounts option in the left pane.
- Select Family & other users in the right pane.
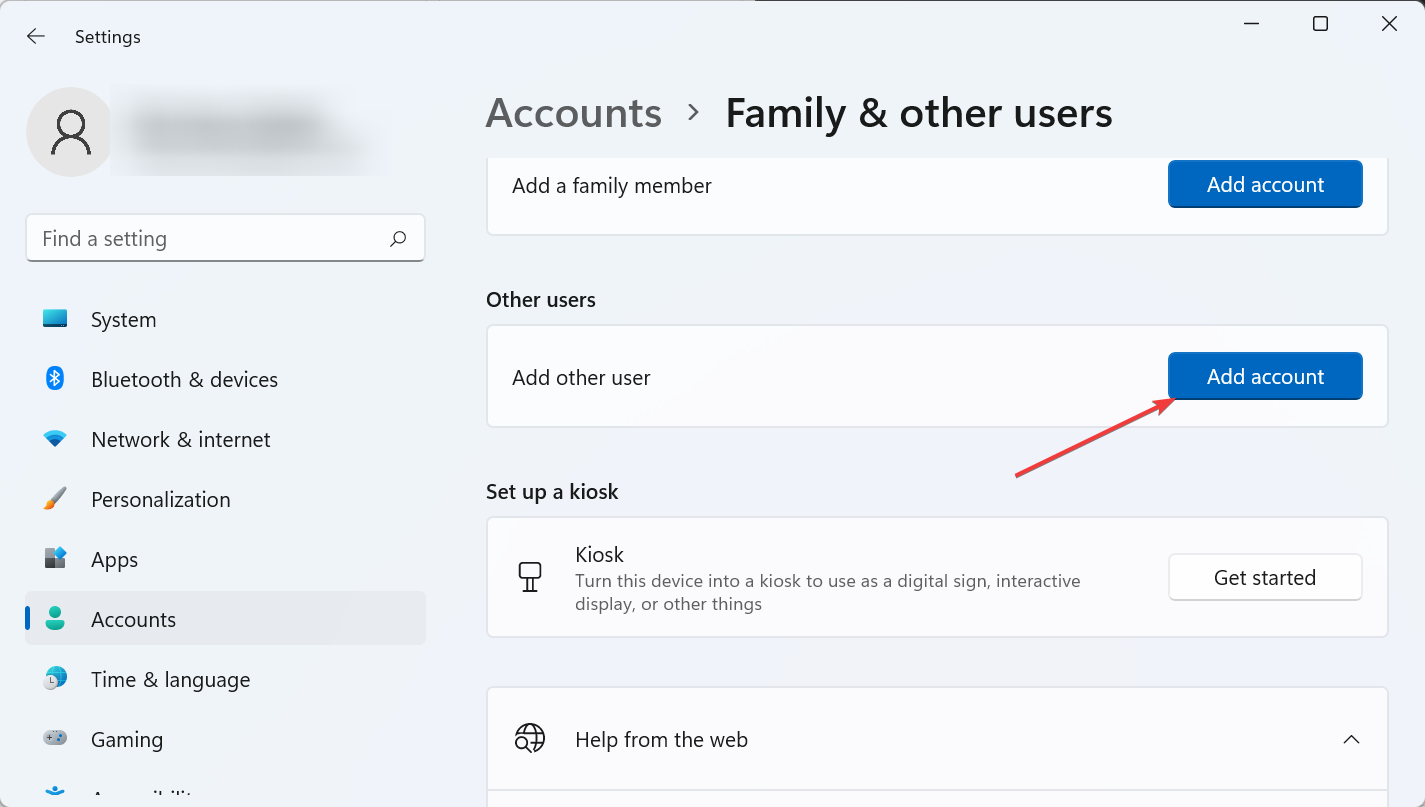
- Now, click the Add account button under Other users.
- Next, select I don’t have this person’s sign-in information.
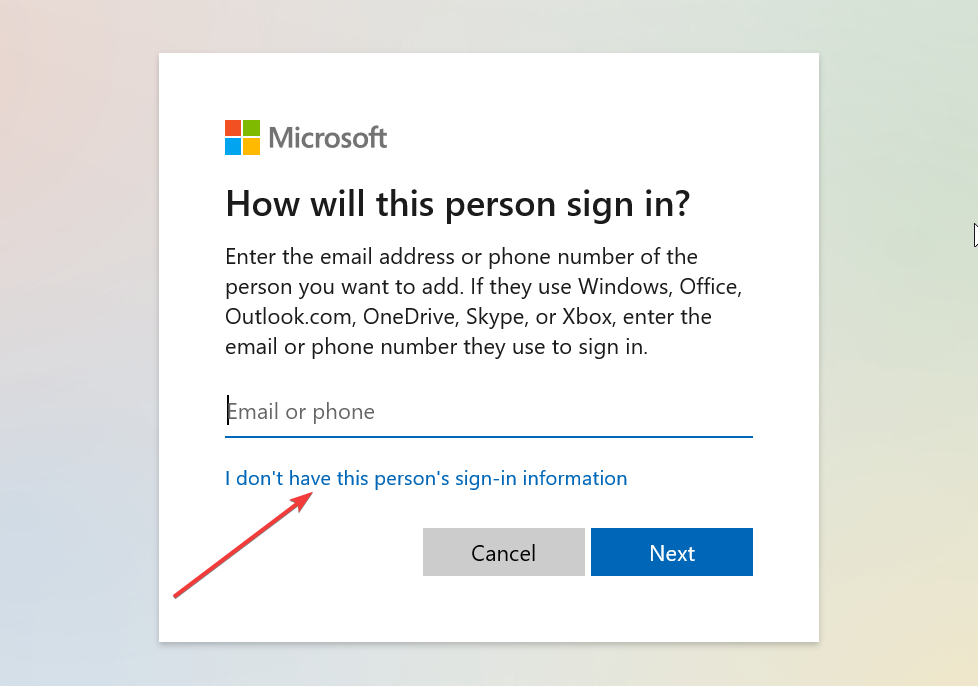
- Click Add a user without a Microsoft account.
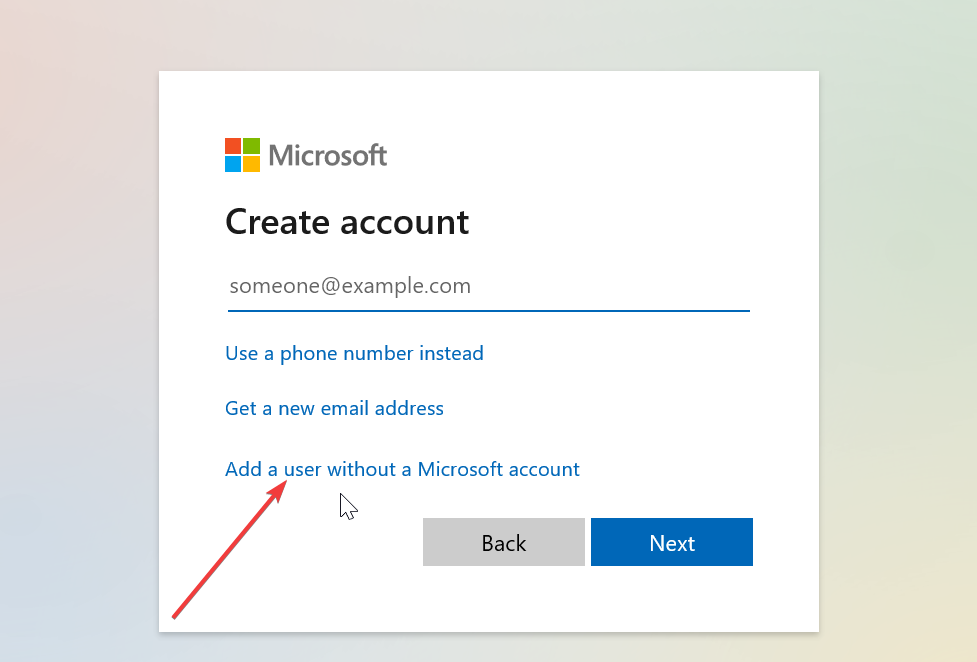
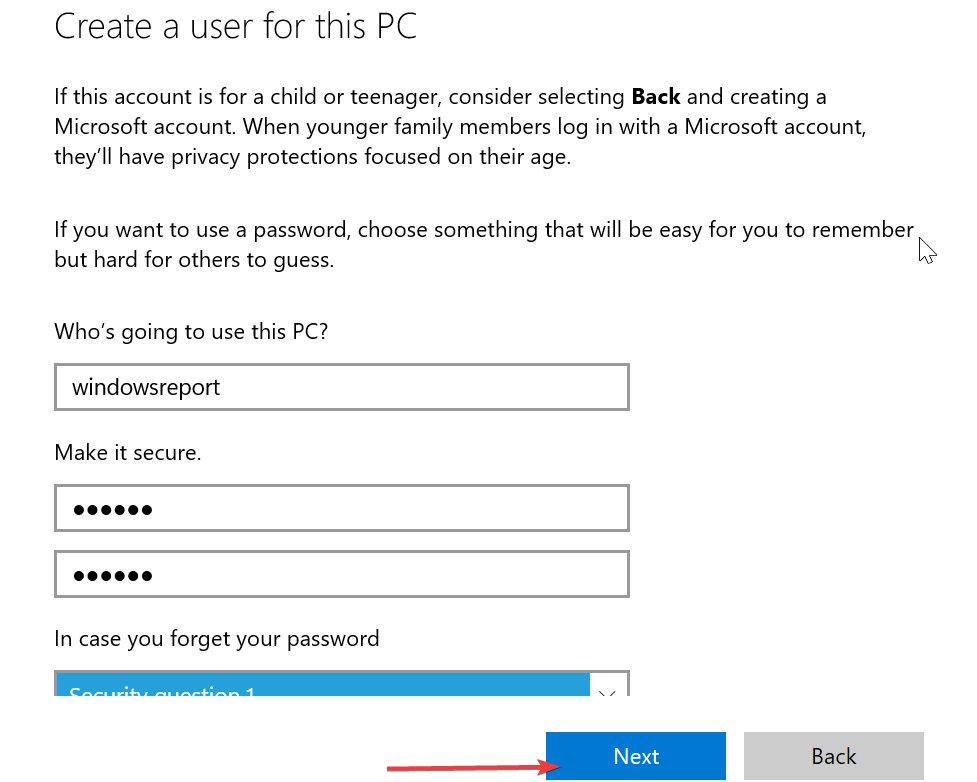
- From here, enter the username, password, and other details and click Next to complete the process.
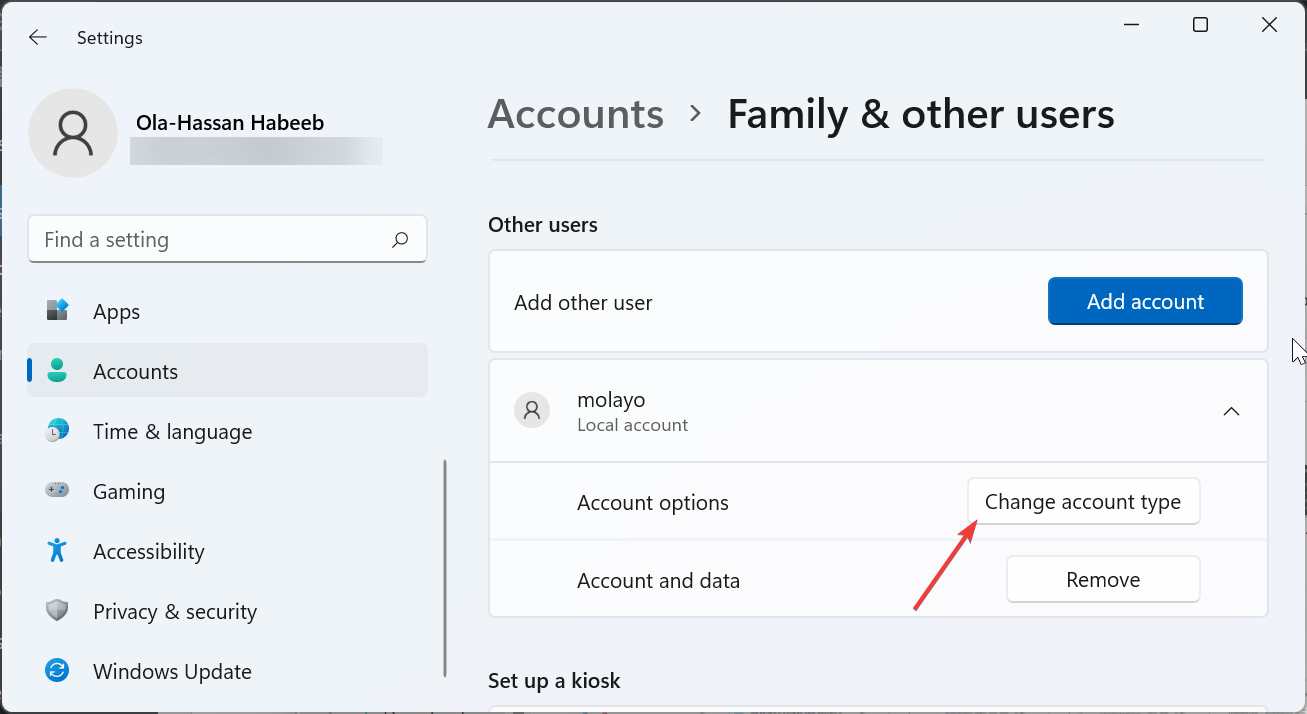
- Now, choose the new account you created and select Change account type.
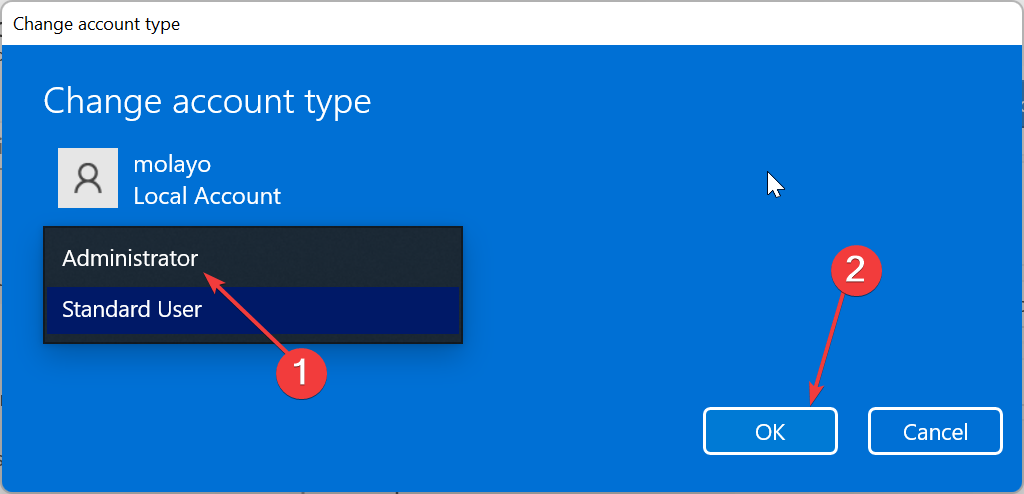
- Click the Account type dropdown and choose the Administrator option.
- Click the OK button to save the changes.
- Finally, sign out of your account and sign in to the new administrator account created.
The first thing to do in the quest to change your user folder name on Windows 11 is to create a new administrator account. This is because you cannot make changes to the account you are currently logged into.
If you don’t want to go through the stress of creating a new admin account, as shown above, you can enable the hidden admin account instead.
After creating the new admin account, you must proceed to the next section to determine your account SID.
2. Determine the SID
- After signing out of your current user account and logging into the new admin account, press the Windows key + R, type netplwiz, and press Enter.

- Now, select the account you are logged into and click the Properties button.
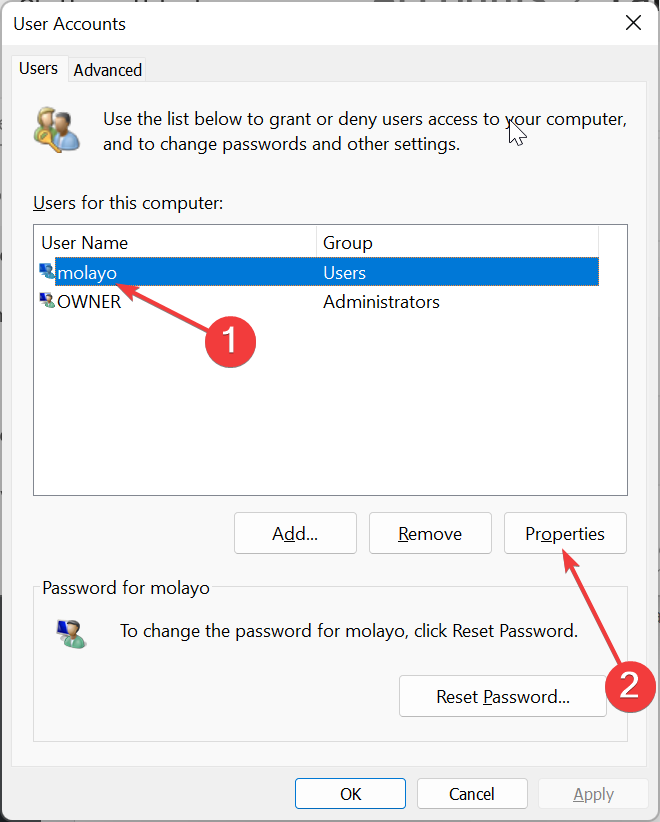
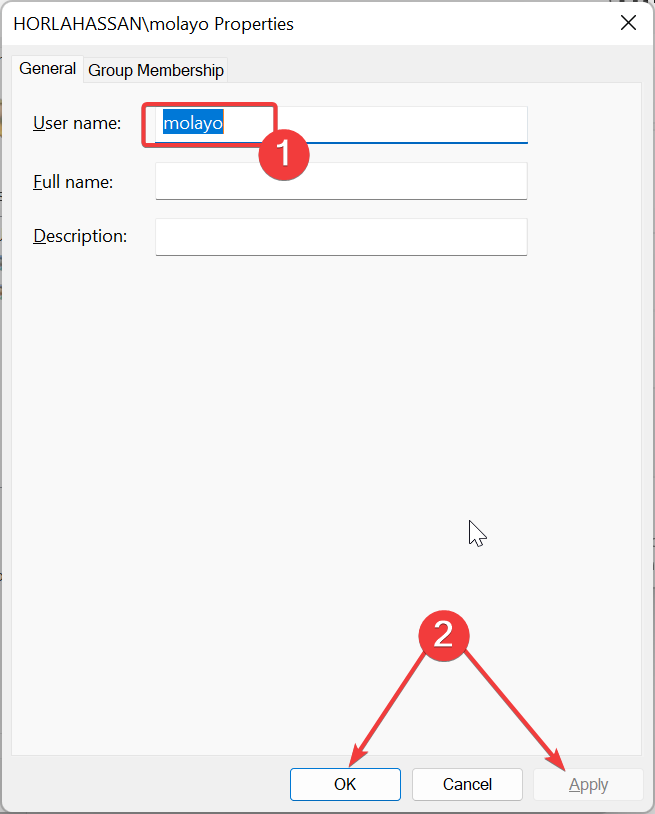
- Check the User name and Full name under the User Properties section.
- Next, set your preferred user name and full name.
- Click the Apply button, followed by OK.
- Exit the User Accounts page and restart your PC.
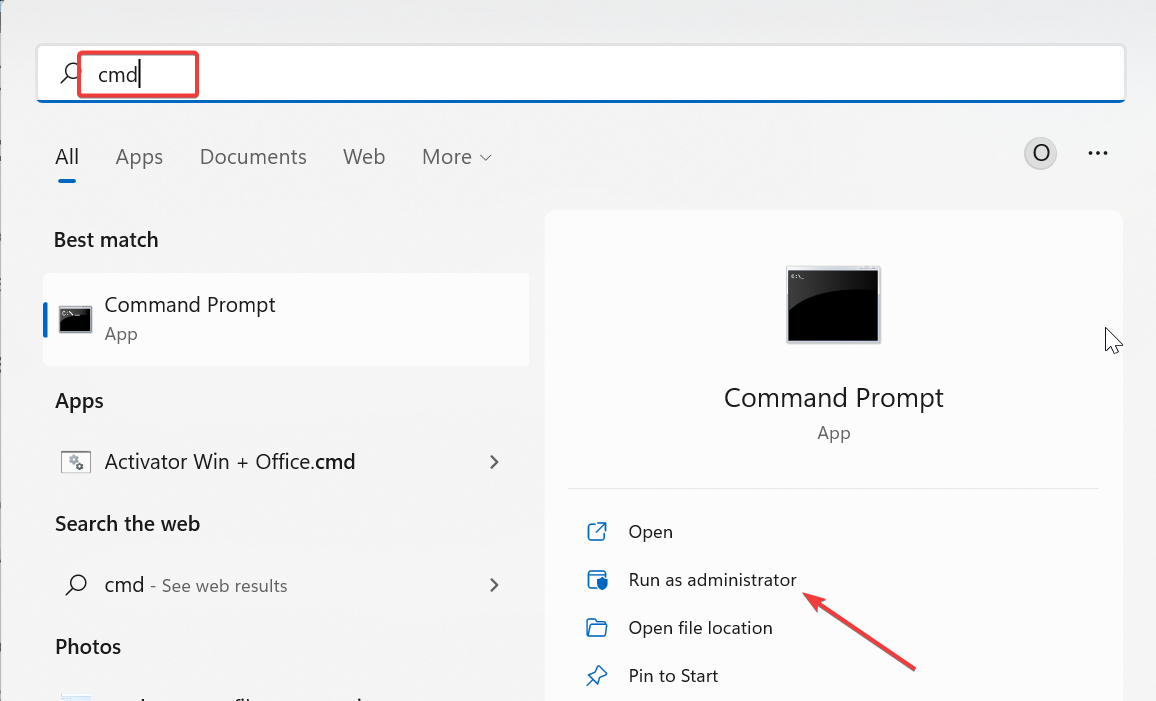
- Now, press the Windows key, type cmd, and select Run as administrator under Command Prompt.
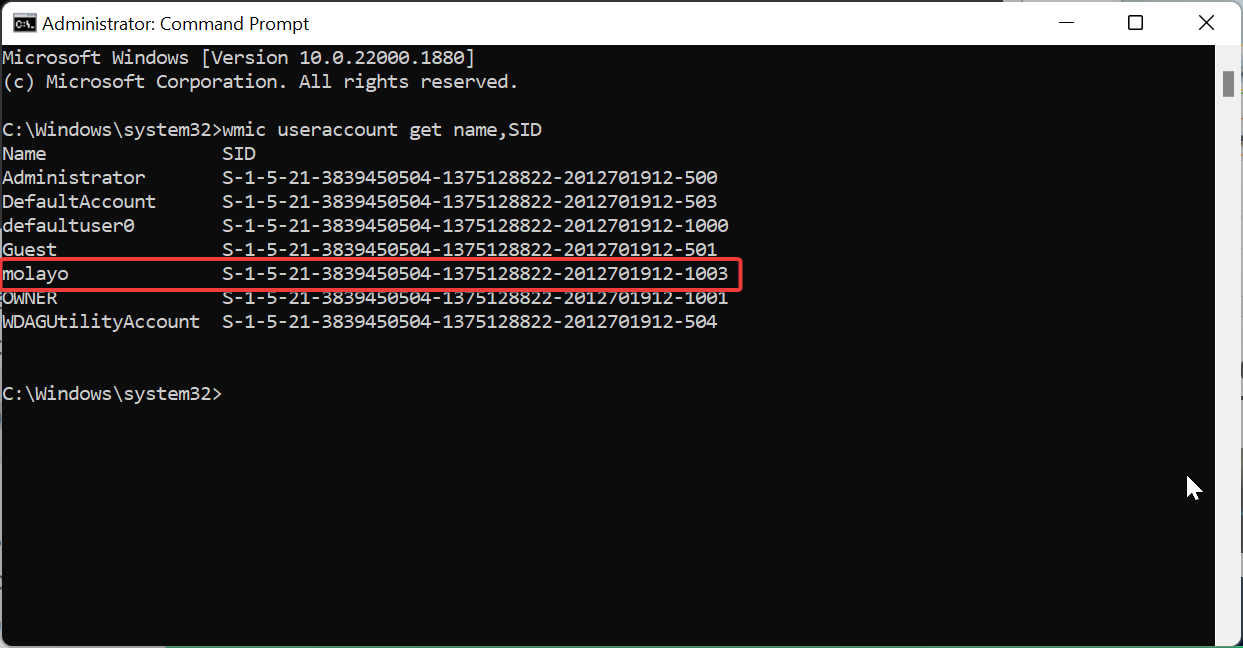
- Type the command below and hit Enter to view the SID (Security Identifier) for all users on your PC:
wmic useraccount get name,SID - Finally, take note of the SID of the account you want to change the user profile folder name for.
Before changing your user folder name on Windows 11, you need to determine the account SID. First, you need to set a user name for your new administrator account to differentiate it from the old one.
Then you need to run a command to determine the SID of the account you want to make changes to. After doing this, you must proceed to the next section to change your user folder name from your registry.
Note that you need to proceed with caution in this step, as mistakes can be costly. Preferably you should create a restore point before proceeding.
3. Modify your registry to change the user folder name
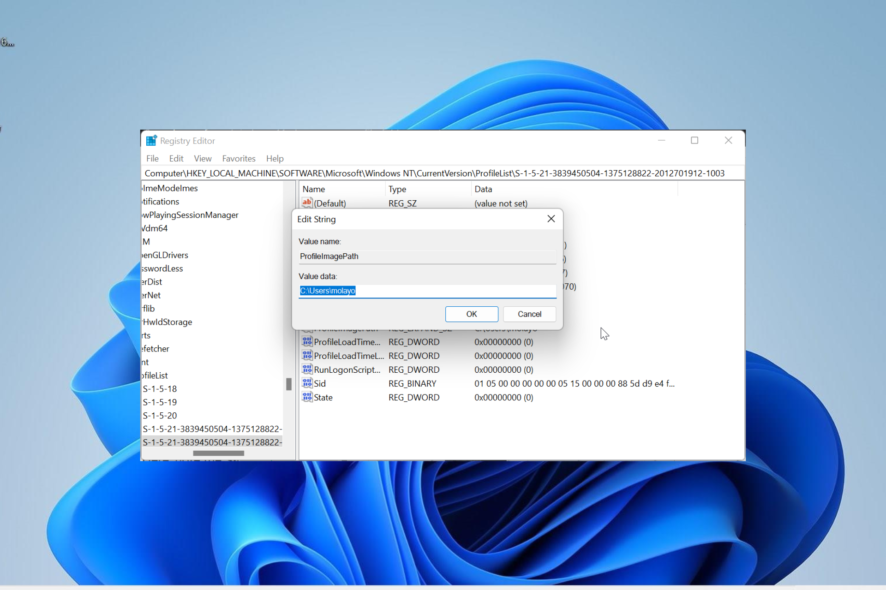
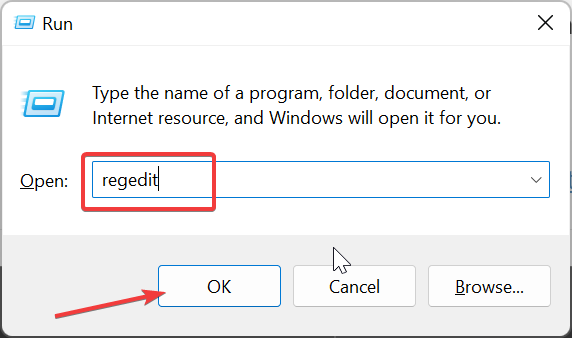
- Press the Windows key + R, type regedit, and click the OK button.
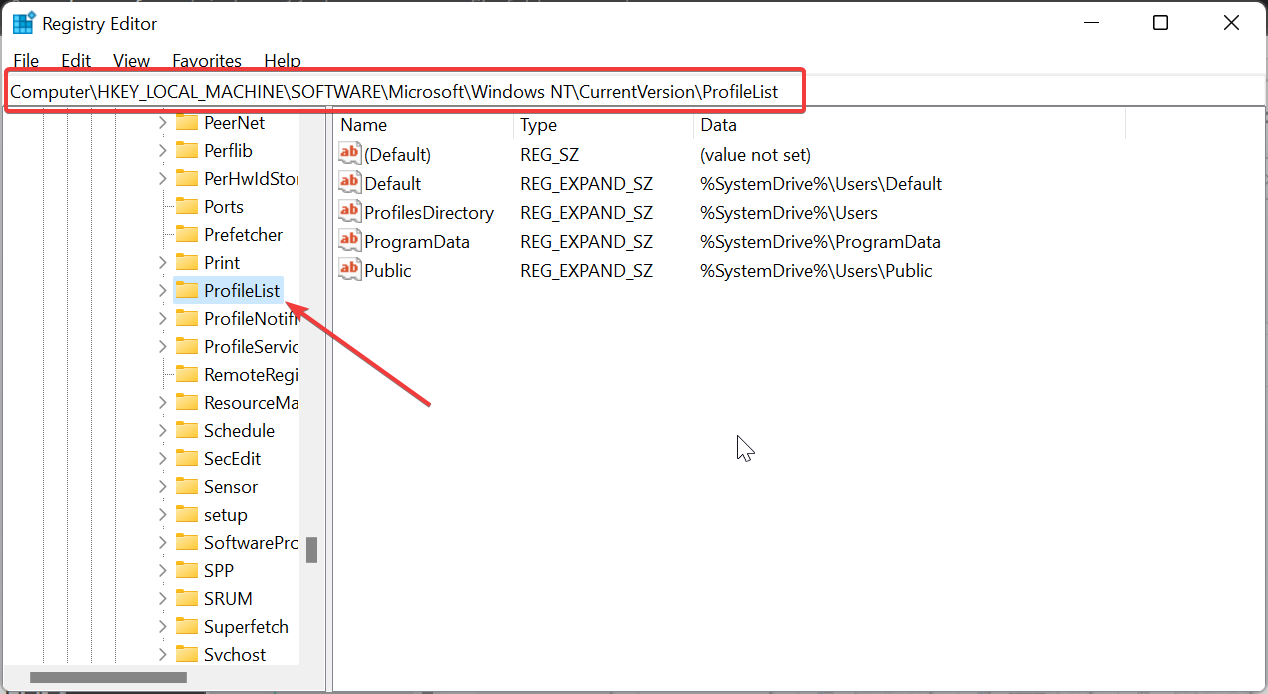
- Navigate to the path below in the left pane:
HKEY_LOCAL_MACHINE\SOFTWARE\Microsoft\Windows NT\CurrentVersion\ProfileList - Now, select the ProfileList key.
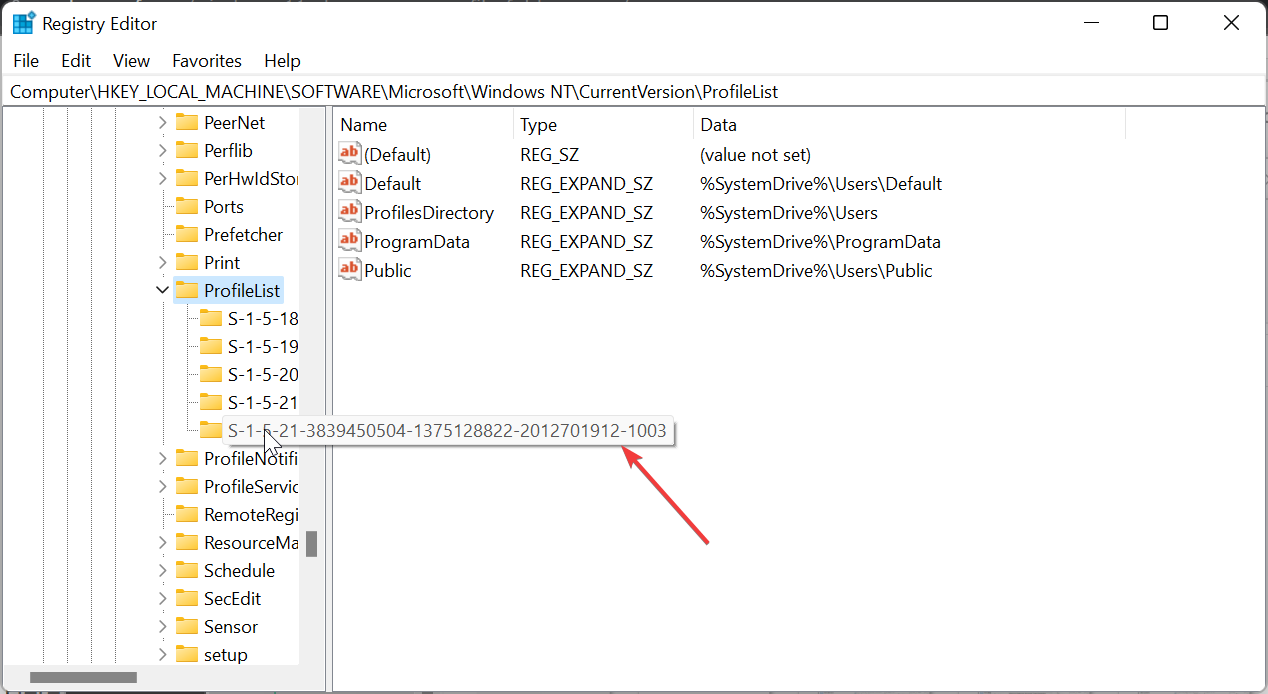
- Next, check for the SID you noted in solution 2 above and click on it.
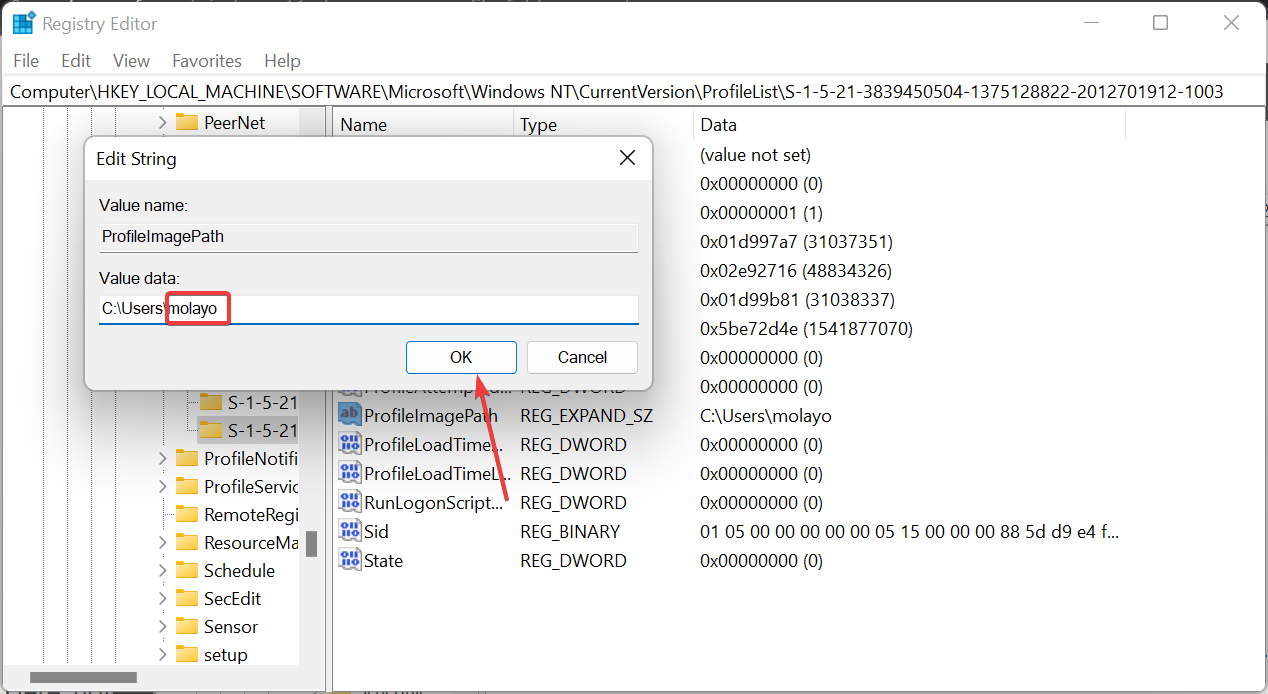
- Double-click the ProfileImagePath in the right pane.
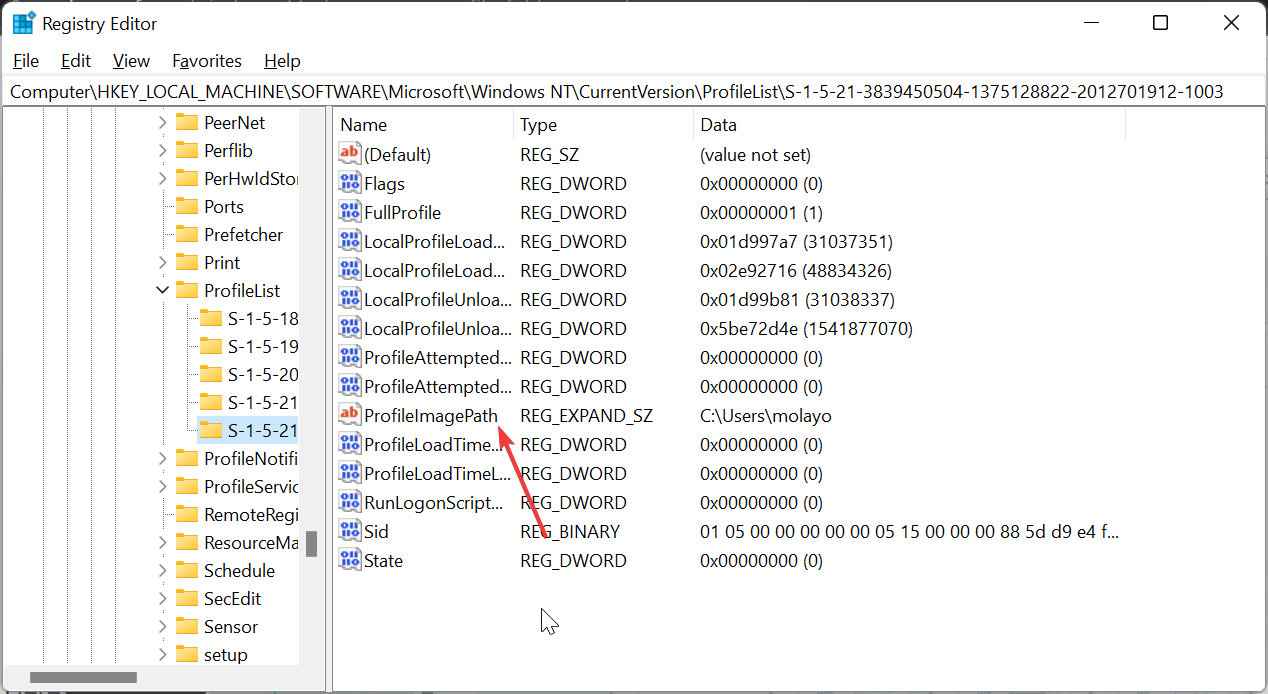
- Delete the old name at the end of the path in the Value data box and add the new one of your choice.
- Finally, click the OK button and exit the Registry Editor.
This is the most integral part of this process, and it requires you to be careful. After changing the user folder name in the Registry Editor on Windows 11, you can now proceed to the section below to complete the process.
4. Confirm the change in File Explorer
- Press the Windows key + E to launch File Explorer and navigate to the path below:
C:\Users\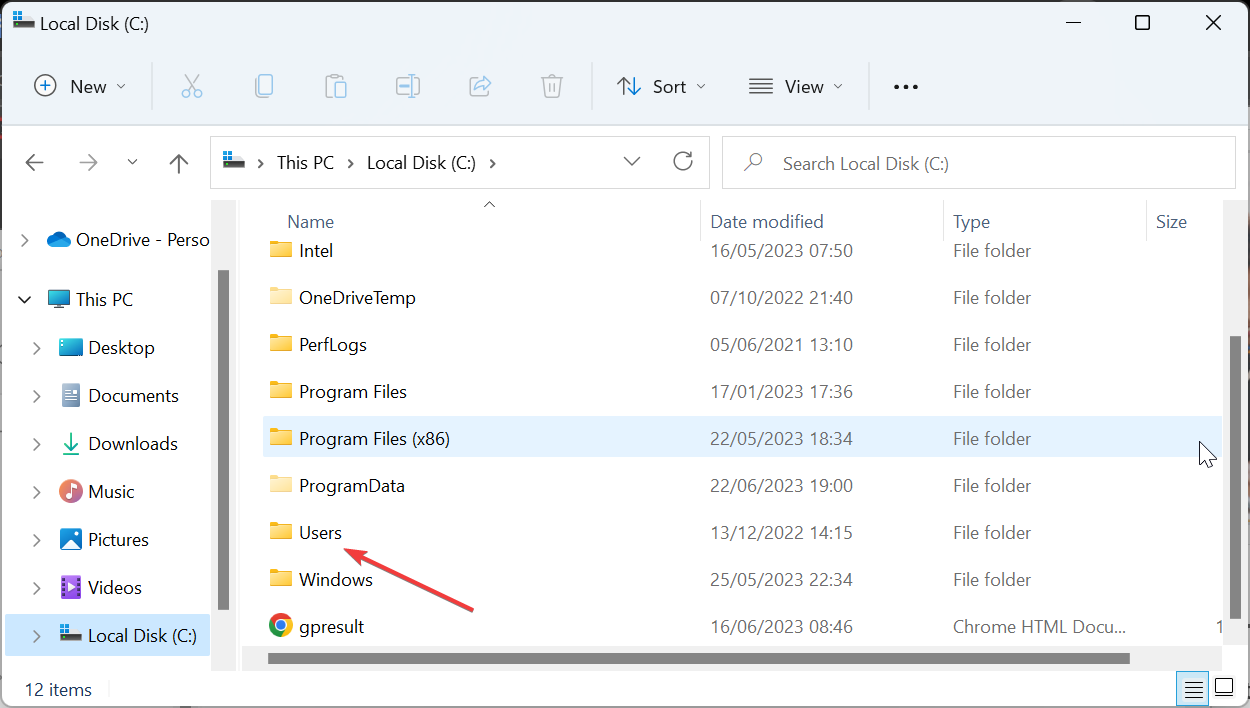
- Right-click the user folder you want to change and select Rename.
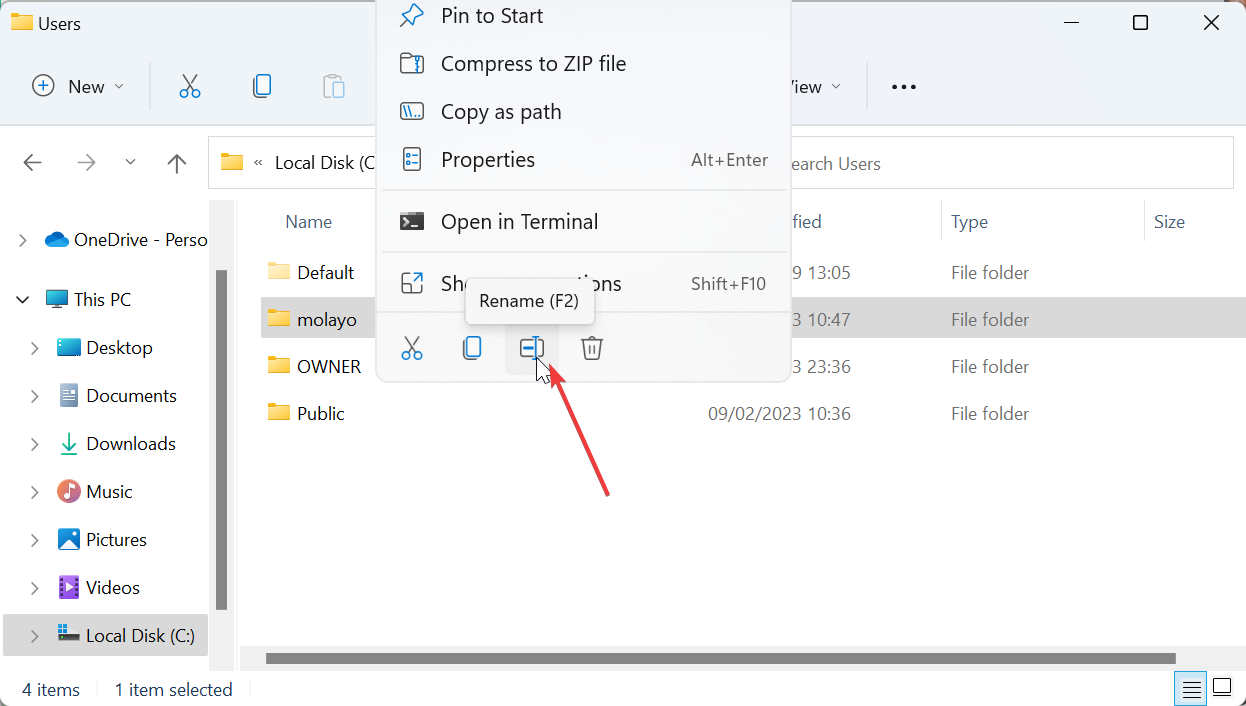
- Now, type the new name and press Enter. Note that it must correspond with the name you set in the Registry Editor.
- Finally, click Continue when prompted.
With this, you have successfully changed your user folder name on Windows 11. If you encounter an error like You can’t perform this action while renaming the folder, it means you did not sign out of the user account properly.
You need to sign out of the account properly or, better still, restart your PC. After completing the process, you can log into the profile with the new folder name and use it normally.
With this, we can conclude this guide on how to change your user folder name on Windows 11. While the process is pretty easy if you follow the steps above, we reiterate that some of your apps might encounter issues.
But you can fix this by changing the path to those apps. In the same vein, if you are unable to rename a standard folder on Windows 11, check our detailed guide to fix it. For more information about this folder, check our guide on how to access a user folder from an old hard drive.
Let us know if you encounter any issues applying the steps above in the comments below.