How to keep your Office 365 files when graduating from school
To save your files from a school-provided Office 365 account:
- Use OneDrive and File Explorer on a PC to copy your school files to your personal OneDrive account.
- Use OneNote.com to save copies of any OneNote Class Notebooks to your personal OneDrive account.
- Login to your personal Outlook.com and click Settings > Email > Sync to import your school email.
Applies to All Windows 10 Versions
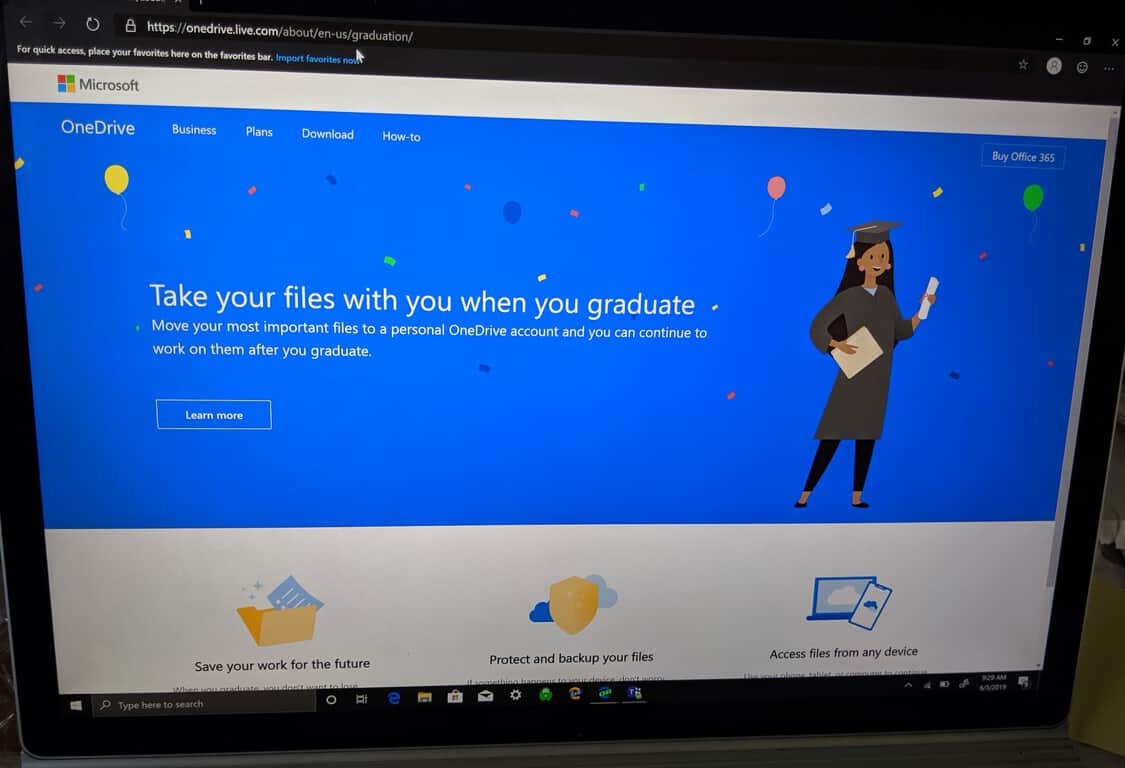
It’s coming up to graduation time, which means many students will soon lose access to their school-provided Office 365 accounts. If you’re currently using Office 365 at your school, you should consider how you’ll offload your files to a personal account. Microsoft has provided a plan of action for you, in its recently-published “Take your files with you when you graduate” guide.
Files
You’ll have been storing your school files in the OneDrive cloud storage which comes with your educational Office 365. The easiest way to keep these accessible in the cloud is to move them all to a personal OneDrive account.

Get started by making sure all your school files have synced to your PC. In the system tray, the white OneDrive icon represents your personal account, while the blue one is your school Office 365 account. If you see blue sync arrows, files may still be downloading from the cloud.
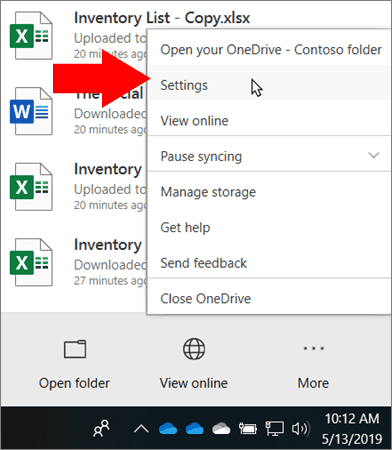
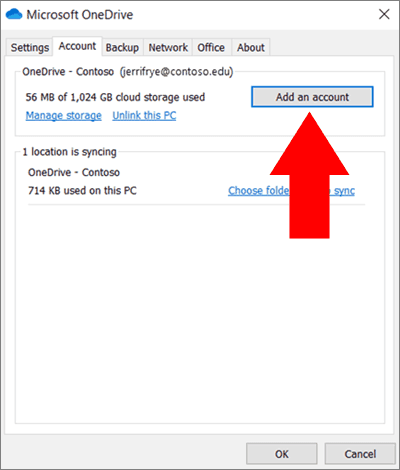
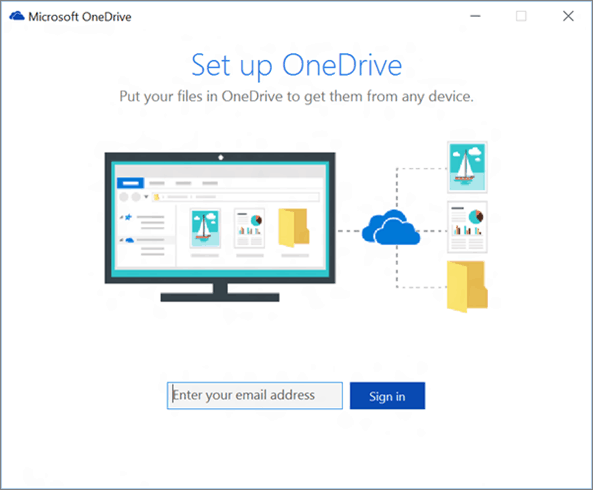
If you haven’t added your school OneDrive to your PC (you don’t see the blue icon), right-click the white one and choose “Settings.” Switch to the “Account” tab in the popup which appears. Press the “Add an account” button and enter the login details for your school Office 365. You’ll be asked which folders you’d like to synchronise; make sure to select them all if you want to retain everything in your account. Now wait until the sync process has finished, when the blue arrows disappear from the OneDrive tray icon.
With all your school files available on your PC, it’s time to move them to your personal OneDrive. Double click the personal (white) OneDrive icon to open your OneDrive folder. Create a new folder and name it “School Files,” or a name of your choice.
Next, double-click your school (blue) OneDrive icon to open the contents of your school OneDrive. From here, simply copy and paste (Ctrl+C then Ctrl+V) the files into your personal account. You’ll need to wait while the files are uploaded to your own OneDrive; again, when the sync arrows disappear from the OneDrive icon, everything is complete.
That’s all there is to it. Naturally, you could also copy your files to any other destination on your PC – you don’t have to use OneDrive. However, keeping them in the cloud ensures they’re still accessible from all of your devices. Login to OneDrive on each PC or phone you use to see your files.
You may also have school emails which you’d like to retain copies of. The simplest method to keep these is to import them all into your own email account.

Login to Outlook.com on the web. Click the Settings cog icon in the top-right and then press the “View all Outlook settings” link at the bottom of the pane.
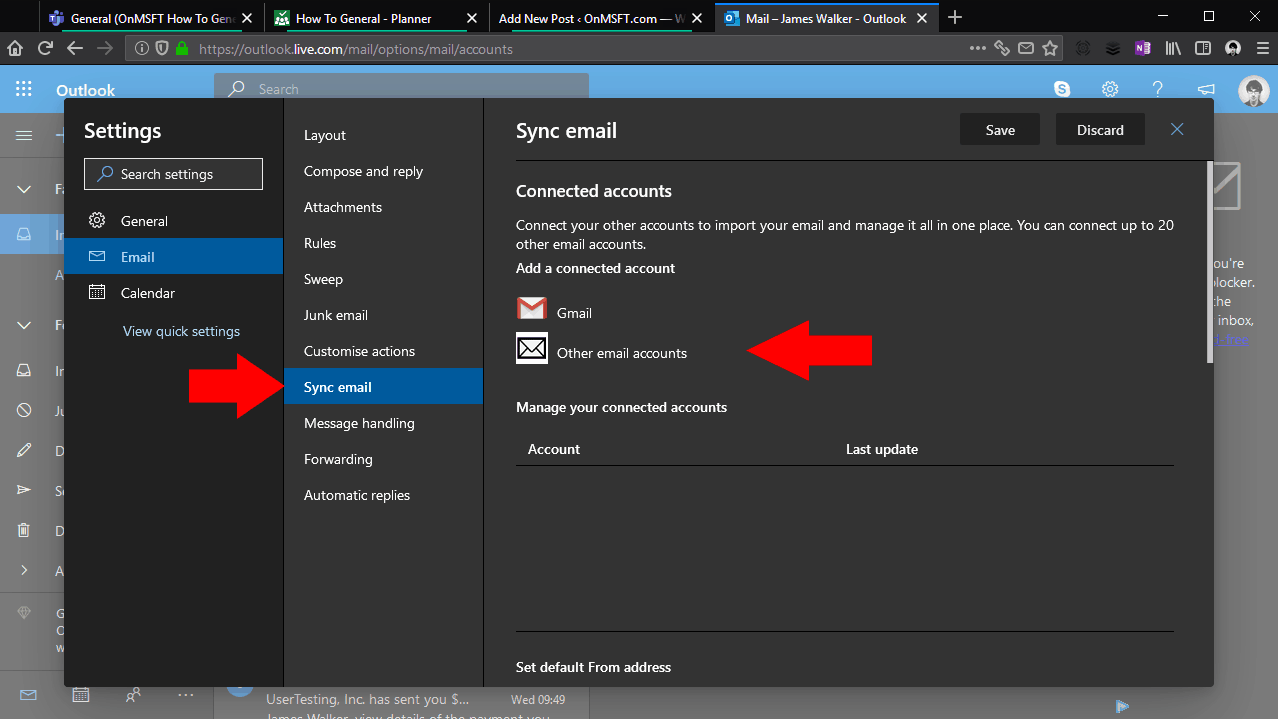
In this popup, click the “Sync email” button in the navigation bar. Under “Connected accounts,” click “Other email accounts” and provide the details for your school email account. Give the account a display name of “School” and enter your school Office 365 email address and password.
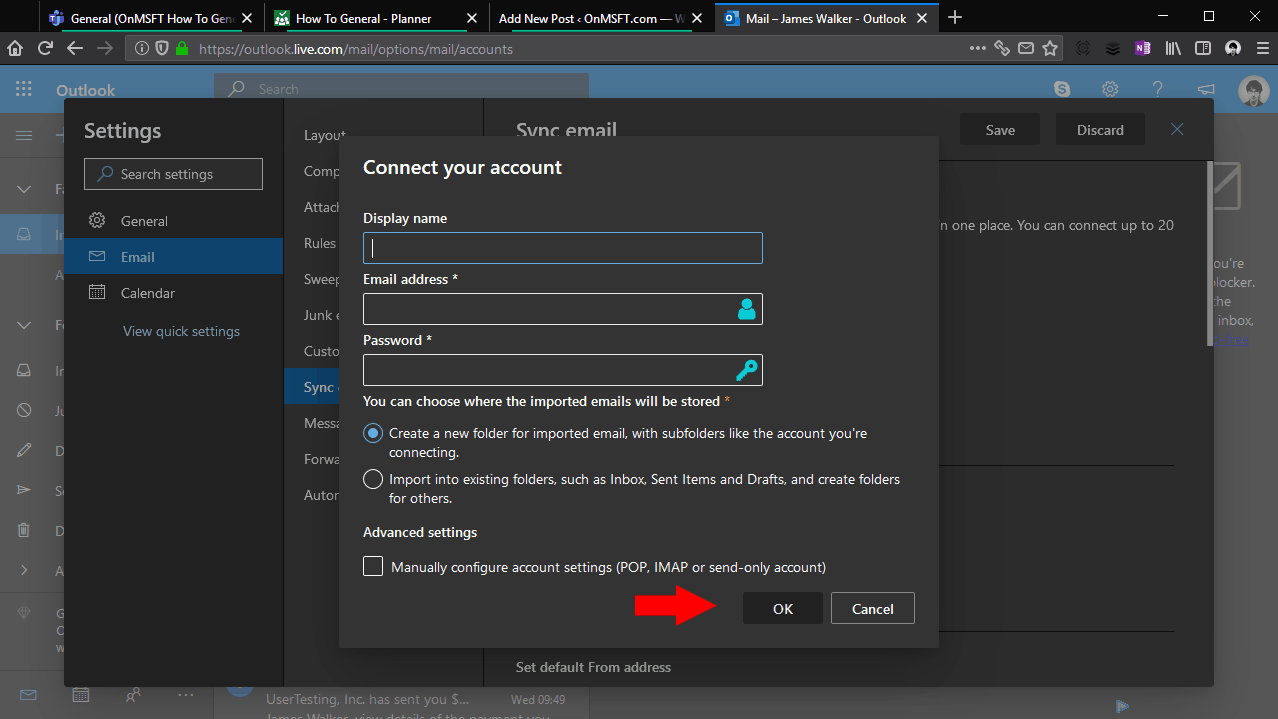
You can choose whether to import your school emails directly into your inbox, or to keep them within a new sub-folder. The choice is yours, although we recommend sticking with the default and creating a new folder – this will keep your school email separated from your personal messages.
Press the “OK” button to start the import process.
OneNote notebooks
Finally, you’ll need to copy any OneNote notebooks separately to your regular files. The OneDrive sync client won’t automatically download OneNote notebooks, so you’ll have to use the OneNote web app.
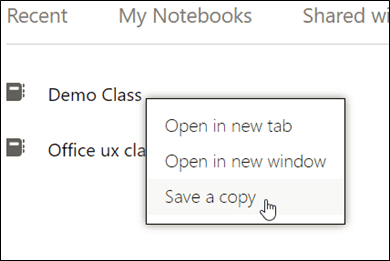
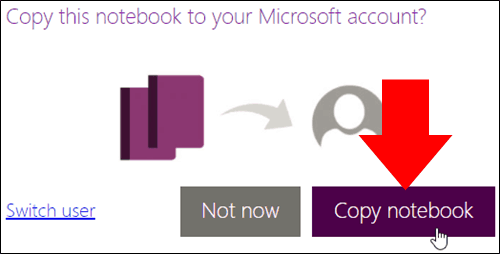
Login to onenote.com with your school email. When the OneNote interface loads, find the notebook you want to save using the tabs at the top of the menu. Right-click the notebook you want to use and press “Save a copy.”
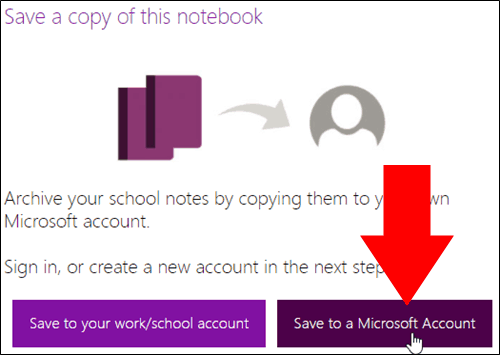
In the dialogue which appears, click “Save to a Microsoft account” and enter your personal account details. The notebook will then be copied to your personal OneDrive – it should show up in OneNote next time you login with your own account.
You can also download notebooks directly from OneDrive using OneDrive.com – navigate to the folder containing the notebook, click it and delete it.
Migrating away from your school email isn’t too complicated, provided you’ve got a plan for handling it. If you get stuck at any point, you may find it helpful to consult Microsoft’s own graduation guidance. Alternatively, contact your school’s Office 365 administration team, who should be able to help you archive your data – including any files created within school SharePoint sites that you might want to retain.
Further reading: Education, Office 365, Office 365 Education, OneDrive