Here’s how you can use the Touch Bar on a MacBook Pro with Office 365 for boosted productivity
![]() 11 min. read
11 min. read
![]() Published on
Published on
Share this article

Read our disclosure page to find out how can you help Windows Report sustain the editorial team Read more
When Apple released the fourth generation MacBook Pro in 2016 it came with a new feature known as the “Touch Bar.” An OLED strip running above the keyboard, the Touch Bar replaced the traditional function keys with multi-touch keys. Depending on which app you use, the Touch Bar is able to adapt and show you various functions, as well as a digital “ESC” key. Many apps in MacOS, including Microsoft’s own Office 365 suite, have special Touch Bar functionality, and in this guide, we’ll show you how to make the most of it in the core Office apps.
Word
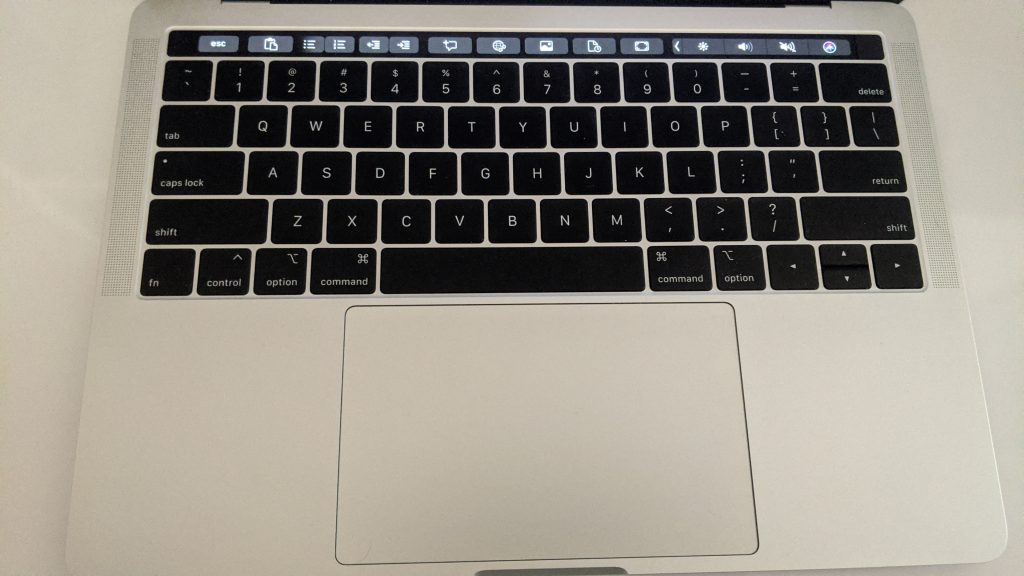
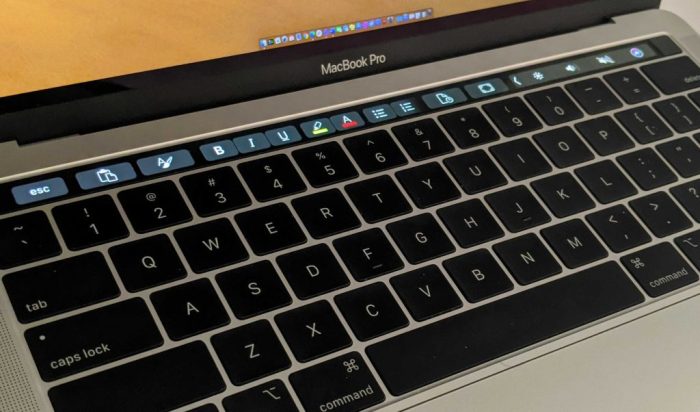
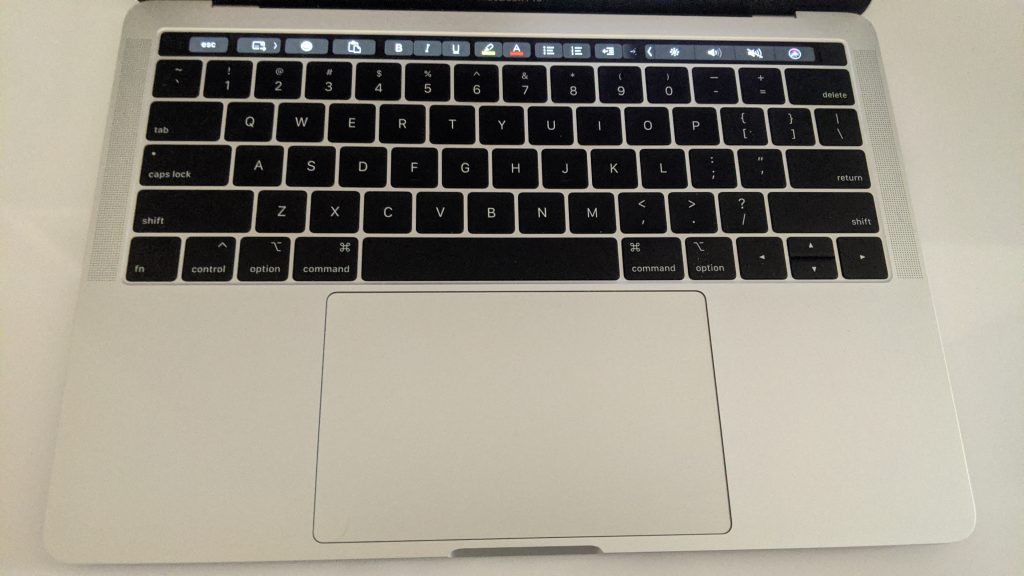
In Microsoft Word on Mac OS, there are quite a few useful Touch Bar functions to help you be more productive and skip out common keyboard shortcuts. Starting from left to right, you will find access to a clipboard paste button and a styles button for bold, italics and underline. You’ll also find options for highlighting, followed by text color, and bulleting, numbers, and justification.
Scrolling on the Touch Bar will show additional controls for inserting hyperlinks, photos, and comments. For faster access to opening documents, there’s even a button for opening recent documents. Finally, on the far left, you’ll find one to bring Word full-screen.
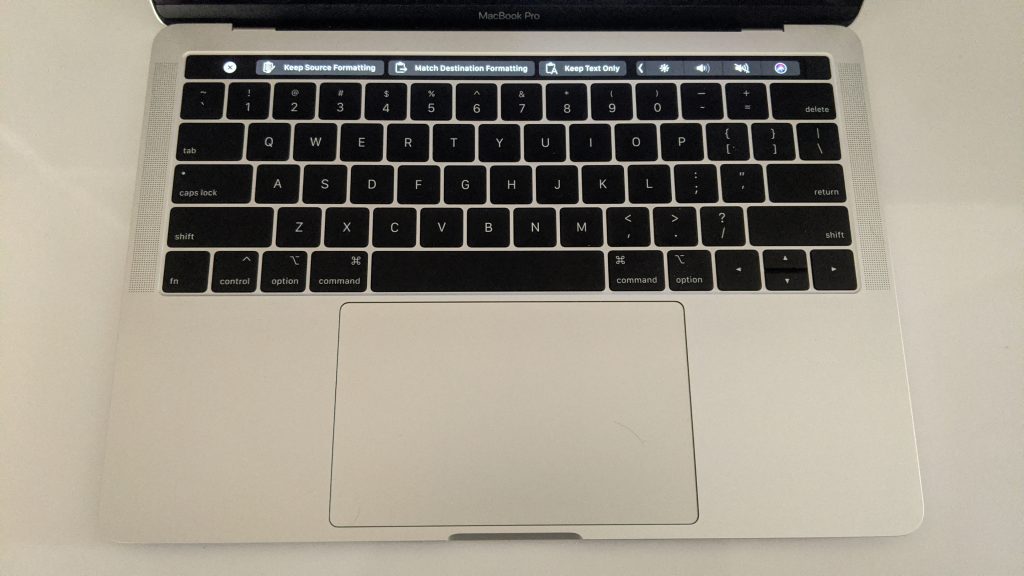
It’s worth noting that some of these buttons on the Touch Bar will have secondary functions. Clicking the clipboard gives you quick access to pasting, complete with formatting options. The highlight button will then show you a color wheel and allow you to pick the right color for highlighting. The same also applies to the font color. It’s a quick convenient way of getting to core editing functions and will save you a valuable click.
Excel

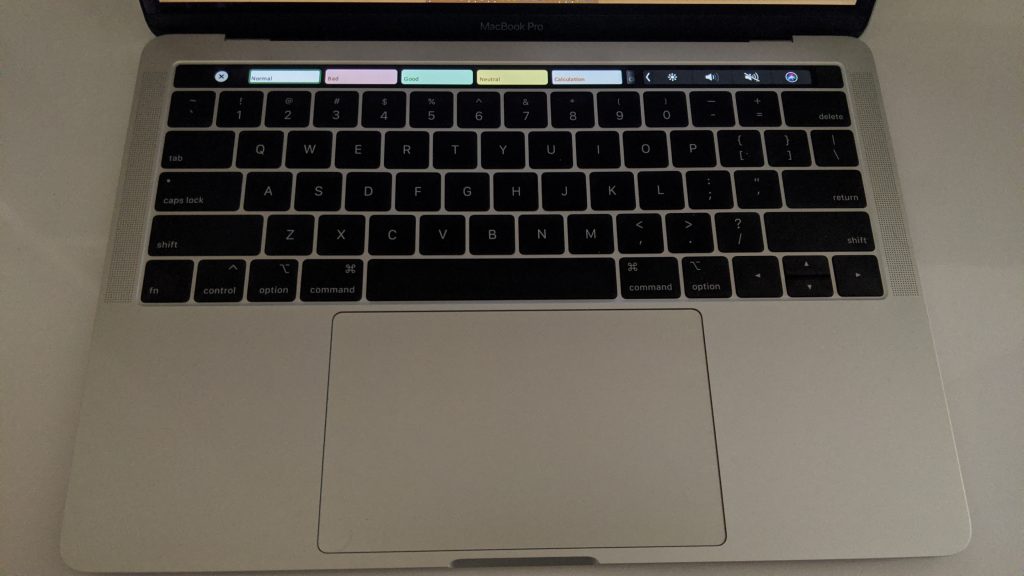
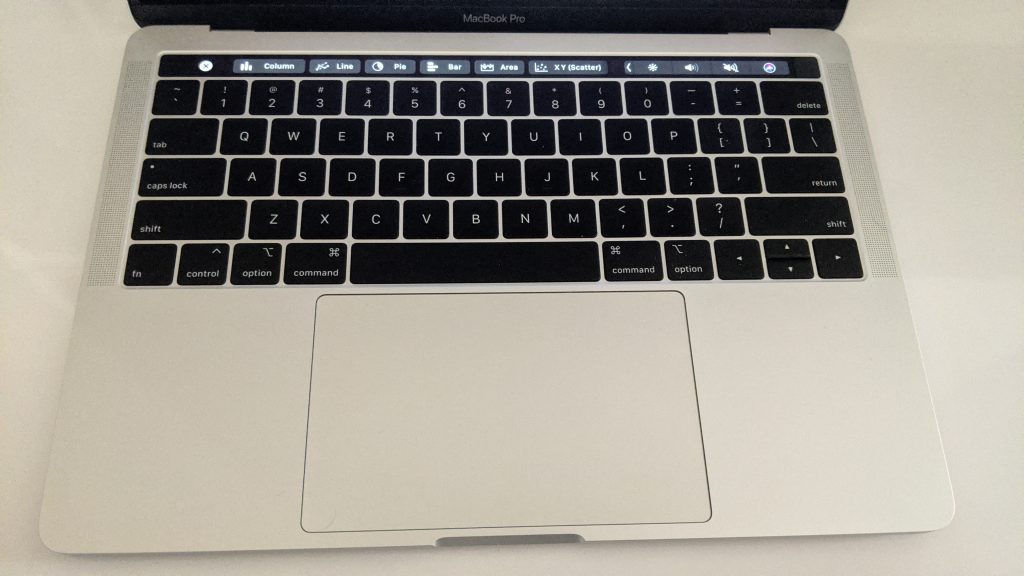
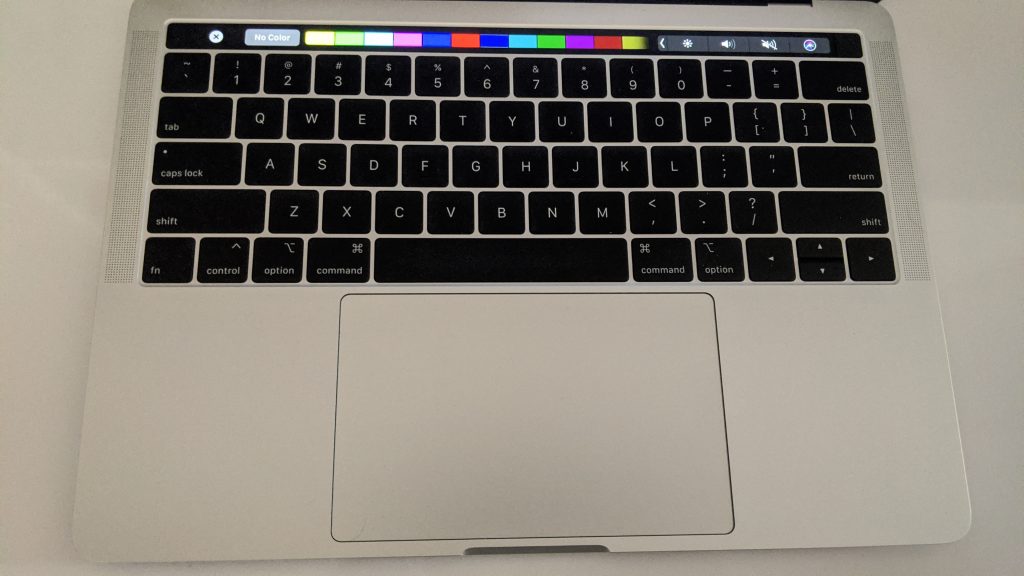
Moving on to Excel, the functions of the Touch Bar are quite similar to the ones for Word. Again, left to right, you’ll still have access to some basic editing functionality without using keyboard shortcuts. This includes a paste button, as well as options for formatting for bold, italics and underline. After that, though, the buttons change a bit. There’s a new option for boarders in cells, as well as an option for the cell fill color. That’s then capped off with options for the cell style, and then an option to create a chart.
In terms of secondary functions, the cell border button will give you access to various cell border styles. The Cell fill color, meanwhile, will give you a color picker, as does the font color option. As for the cell style button, you can choose from a variety of styles such as “Good,” “Bad,” or “Neutral.” Finally, the chart button will give you quick picks for charts such as Column, Line, or Pie. Again, this is a quick way of avoiding clicking on the ribbon in Excel for common tasks.
PowerPoint
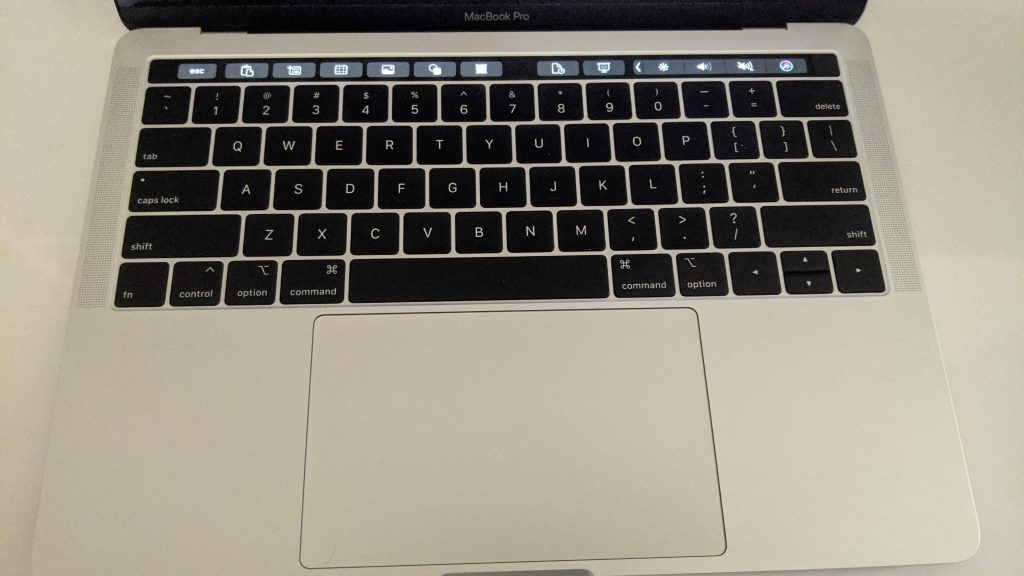
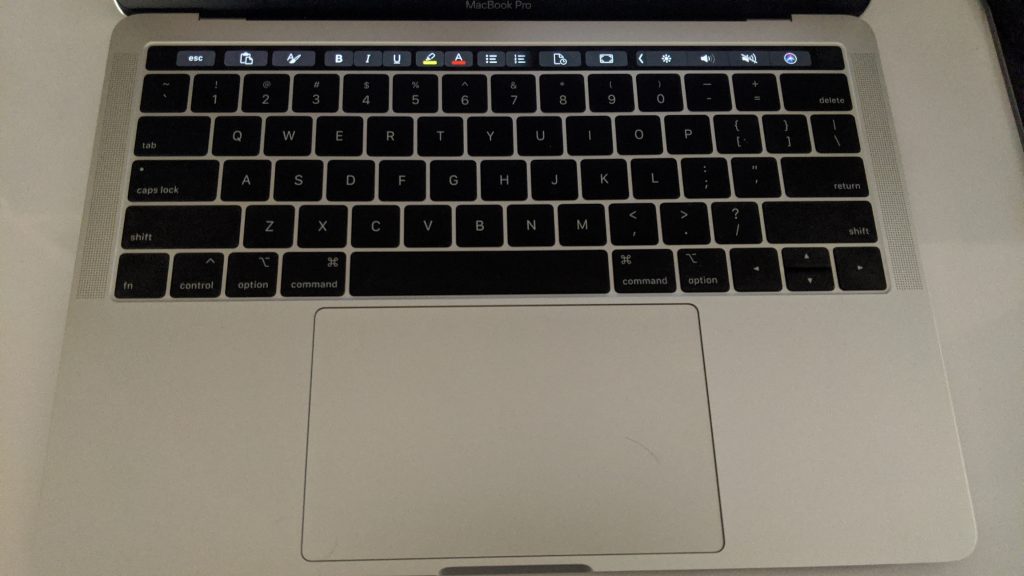
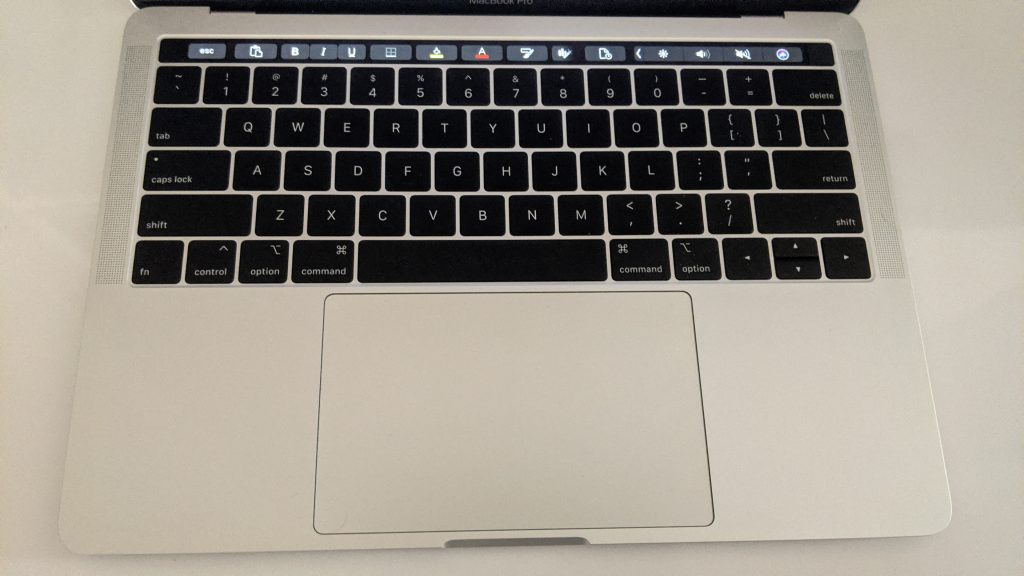
Next up, there’s PowerPoint. This Office program has perhaps what is the best function for the Touch Bar on the MacBook Pro as the functions change based on how you’re using PowerPoint. We’ll be starting first with the functions for editing mode. In this mode, from the left side, you’ll find the clipboard paste option, just as you do in the other Office apps. That’s then followed up by a button to add a new slide and a button to insert a table, photo, and shape. You’ll then find a button to summon the text edit option, followed by a button to open recent files, and another to begin the presentation. We’ll move on to the text edit options next.
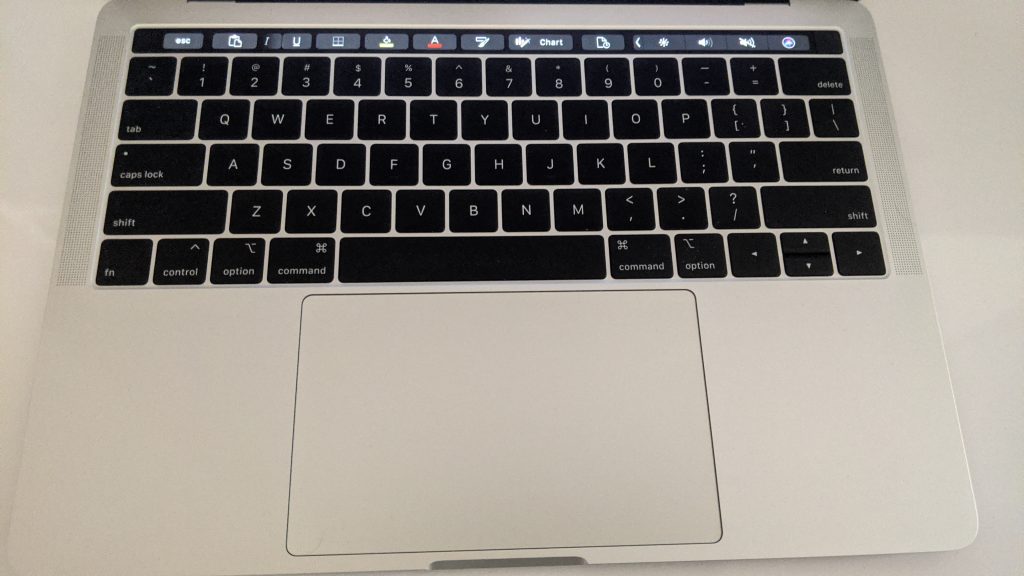
With the text edit options for the Touch Bar in PowerPoint on the MacBook. there’s quite a lot similar to Word. There are buttons to bold italics, underline, insert number or bullets, edit the color of text, and change the justification. When in this mode, you can go back to the main view by tapping the ESC key. That will then give you access to additional features such as fill color, outline color, and options to rotate images and change image formats. Again, quite useful, as these are typically buried beneath the right-click menu.
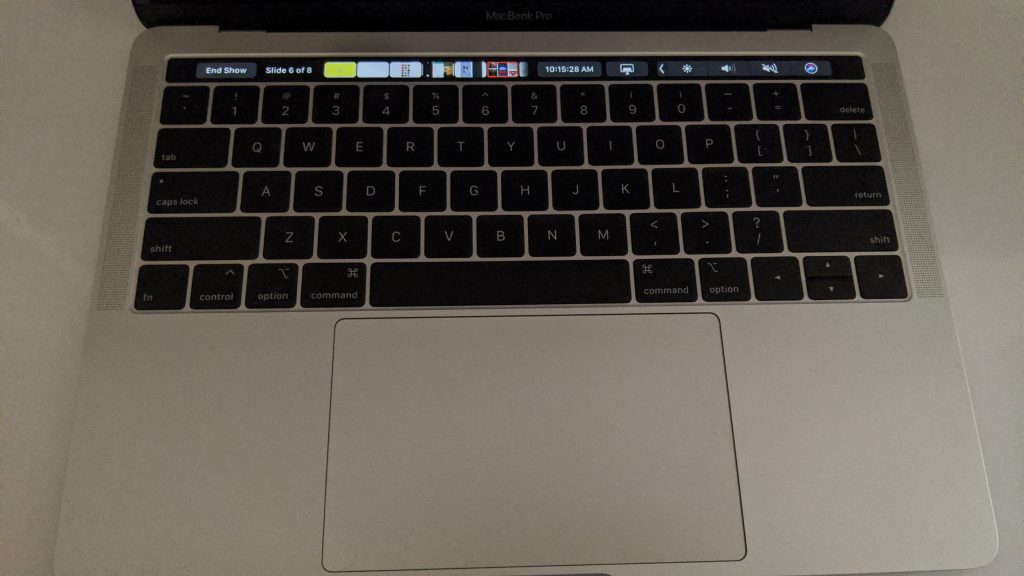
Finally, we’ll talk about how you can use the Touch Bar on the MacBook Pro in PowerPoint during a presentation. This is the coolest mode of them all, as here, you’ll be able to see a live preview of your slides. A button on the left of the Touch Bar will allow you to end the show, and the button next to it will show you the progress on the slideshow. You’ll then see a preview of each of the slides, and you’ll be able to drag your way through and touch each slide one by one while seeing it on the screen to move from one to the next. There’s even a mini clock in the Touch Bar to show you the time, and additional controls to switch your screen to the more traditional presentation mode.
Outlook

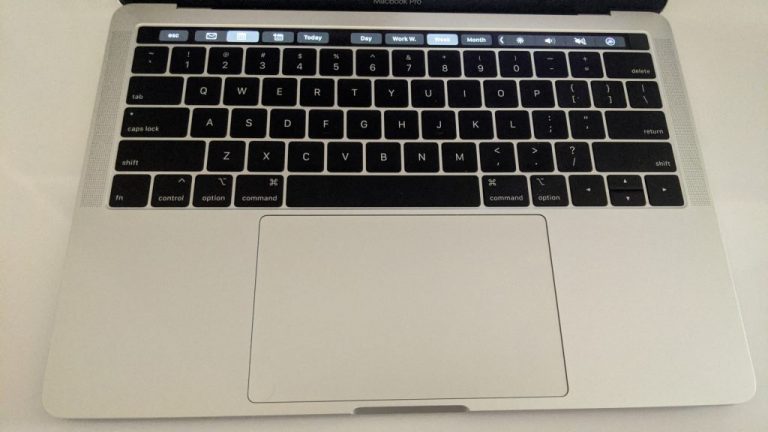
Much like PowerPoint, the Touch Bar in Outlook will show you different options based on how you use the app. We’ll be starting first with when you’re in your inbox. In this mode, you’ll find a button to switch between the mail and calendar portions of outlook. That’s then followed by options for creating a new message, deleting, arching, moving, and replying to the message. You’ll also find a flag button, too.
Next, there are functionalities for when you’re replying to an email. In this mode, The Touch Bar will have a button to send out your email, followed by an emoji key, and then the clipboard paste button. There are then the standard editing options seen from the rest of Office 365, such as style, font color, and more.
Lastly, there are some functions for the calendar. In this mode, there are options for sorting through the different views: Day, Month, Week, Work Week. There’s even a key to start a new meeting or event. It’s quite the nifty little trick, to help you avoid clicking buttons in the menu bar, or using keyboard shortcuts.
Just a little way to boost productivity
Looking at things all together, these Touch Bar tricks are just one small way to boost your productivity. Instead of having to worry about keyboard shortcuts or where to click in the Office Ribbon, you can slide your fingers up to the Touch Bar instead. It’s just one small thing, though, as we’ve previously explained tips and tricks for many of the Core Office 365 apps. Check out our coverage here for more, and let us know your thoughts in the comments below.