Slow SSD in Surface Book: Here's how to fix this issue
![]() 5 min. read
5 min. read
![]() Updated on
Updated on
Share this article

Improve this guide
Read our disclosure page to find out how can you help Windows Report sustain the editorial team Read more

Steps to fix slow SSD on Surface Book:
- Download the Samsung NVM Express Controller
- Disable Onboard VGA
- Disconnect your peripherals
- Free up some space
- Use a high power plan
The Surface Book is an amazing device, there’s no doubt about it. Along with the Surface Pro 4, they represent the best of personal computing hardware that has come out of Microsoft’s labs.
However, as it’s always the case, there have been various problems reported, but Microsoft responded to a few of them, fixing problems with the faulty display drivers, flickering screens but there did remain a few unsolved issues. And one of these problems has been for a long while the slow SSD for new Surface Book owners.
Surface Book owners complaining about slow SSD speeds
Problems have been reported since the end of October, and here’s what some users have been complaining about on the Microsoft support forums:
I am experiencing very poor SSD writing performance in my Surface Book. It’s i5 dGPU 8GB RAM and 256GB storage model. Installing applications and copying files have been really slow. Windows 10 is updated to the latest. Has anyone having the same? Disabling BitLocker slightly helped (10~20%) but not very much.
Many users suggested trying a full reset of the device, but this measure only worked for a couple of users. Besides the slow SSD, one furious user says he has even more problems:
Mine (i5 256GB) Pro 4 is even slower, with sequential writing 88MB/s and 4K at 0.87MB/s. Horrible speed!!!! And I also have battery drain, loss screen touch response, camera won’t take picture, Input personalization server using more than 30% of CPU all the time. and so on.
A couple of Reddit users are suggesting that the 128GB Surface Pro 4 models use perhaps the worst NVMe based SSD in production, which means this is actually a hardware problem. There’s another lengthy thread on OverClock.net, as well.
So, the harsh truth in all this is that Microsoft seems to be using a poor piece of hardware in such an expensive device, at least for some users. This user puts it really well:
I don’t understand why Microsoft would offer this drive in a $1500 notebook; this 128GB drive has the slowest sequential writes that I have seen of any SSD in the past four years. Literally, spinning hard disks write faster than this drive. That 6TB spinning disk writes @ 215MB/s.
You know what’s most aggravating? There are much faster 128GB SSDs (all non-NVMe) that have been available for years. Sure, in any one line of SSDs, the 128GB model is the slowest (or whatever the lowest capacity is). But, in general–128GB SSDs can hold their own. Just not this one.
But, I suspect Microsoft didn’t expect users of the lowest-end model to really be copying lots of files (even though they paid $1500 for their system). Honestly, though, this SSD is an embarrassment to 2015 SSDs and a bad mark on PCIe NVMe drives. To make it even worse, this uses TLC NAND from Samsung. I still haven’t forgiven Samsung for the issues they caused in the 840 EVO and the 840
This could actually turn out to be a big problem for Microsoft if more users hear about this. Some of them have resorted to some drastic decisions, such as returning the Surface Book:
After reading this post and observing the same lame speeds, and especially knowing that the Apple MacBook pro gives 1400 mbps speeds both in read and write I am returning my surface book today. What’s the point of paying more than an Apple computer if you don’t even get their quality /specs.
How to fix slow SSD on Surface Book
Solution 1 – Download the Samsung NVM Express Controller
What seems to have worked for some users is installing the Samsung NVM Express Controller which allegedly doubled the write speed. This seems to be the single solution at the moment, because you can’t user-upgrade the SSD as it is soldered in.
Solution 2 – Disable Onboard VGA
Some users also said that disabling Onboard VGA helped them fix their slow SSD issues. In order to disable this feature, go to Advanced BIOS Settings. However, if you haven’t tweaked your BIOS settings before, you should skip this step. Incorrect BIOS settings may brick your computer.
Solution 3 – Disconnect your peripherals
Other users confirmed that disconnecting their peripherals before booting up their devices helped them mitigate this issue. While this was not the case for all users, it may help you to alleviate this problem.
Solution 4 – Free up some space
If your SSD is almost full, this definitely explains why your Surface Book is slow. Maintain a minimum of 20% free space on your SSD in order to avoid performance issues. For more information on how to delete junk files, check out these guides:
- The 12 best tools to delete junk files from your Windows 10 PC
- How to delete temporary files using Disk Cleanup on Windows 10, 8, 7
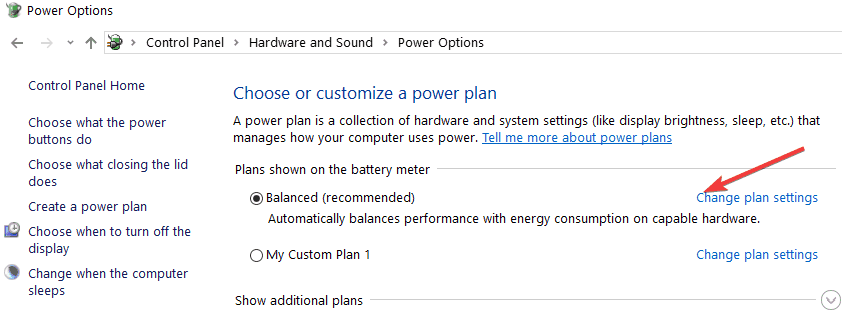
Solution 5 – Use a high power plan
If you enabled a balanced power plan on your device, chances are that another hardware may be using too much power. As a result, your SSD doesn’t receive enough power to run properly. Go to Control Panel > Hardware & Sound > Power Options and enable a High Power Plan.
At the moment Microsoft has still not reacted to this, and chances are it won’t, since it will have to admit to having made a poor decision. Did you manage to increase your SSD speeds on your Surface Book? Leave your comment below and let us know how you did it.
RELATED STORIES TO CHECK OUT: