These days, working from home often involves juggling a lot of different types of information. You have to keep track of To-Do lists, documents, your notes for meetings, links to websites, and a lot more. That often means sifting through many different Microsoft services, like To Do, Outlook, OneDrive, or Edge.
In such a treasure chest of information, it’s really easy to get lost or feel disorganized. So, why not have a single, central hub where you can organize and bring all this information under one place?
That’s where Project Moca preview comes into the picture. It’s a new experience from Microsoft, currently in a preview, which simplifies your workflow so you can focus on what matters. Here’s a hands-on look with the experience.
Launching Project Moca

Currently, project Moca is in preview for Microsoft 365 consumer subscribers, EDU customers, and select commercial customers. To open the experience, you need to click to it from the module switcher on Outlook for the web. That’s the area at the bottom where you have access to your Outlook Calendar.
If you don’t see it there, you need to look for it in the overflow menu at the bottom (the . . . ) If it’s still not available there, you can access Project Moca by going to Outlook.com/Spaces. That’s because Project Moca had another name, known as Outlook Spaces, as we detailed back in February. It’s not clear if Outlook Spaces will be the final name.
Different Templates
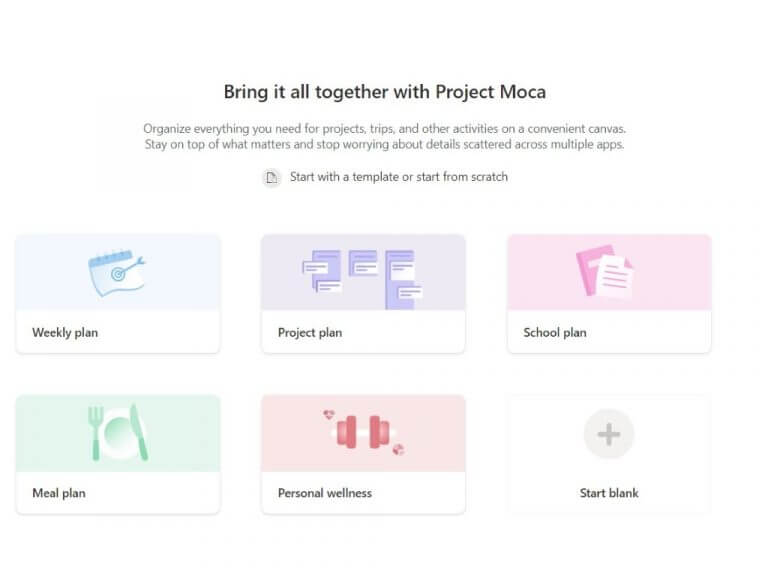
As soon as you go into Project Moca, you’ll be greeted with the option to choose different types of templates. Some of these include a weekly plan, a project plan, a school plan, a meal plan, or a personal wellness plan. No matter which template you choose, they’ll all be placed on a simple canvas known as a “space,” allowing you to stay on top of information for that specific plan. You also can start from blank, and create your own one, too, if needed. We suggest you start here, so you can play around with Moca and learn the ropes.
For the purposes of this hands-on, we’ll be creating a blank template. Regardless if you choose one of the templates, or start from scratch, the process of adding information types and other materials will be the same. In our hands-on, we’ll be starting from blank and creating a custom template (and space) for our upcoming Surface Duo review. Once a plan is created, you’ll be able to get to it by selecting the “Space” from the main Project Moca page.
Getting Started
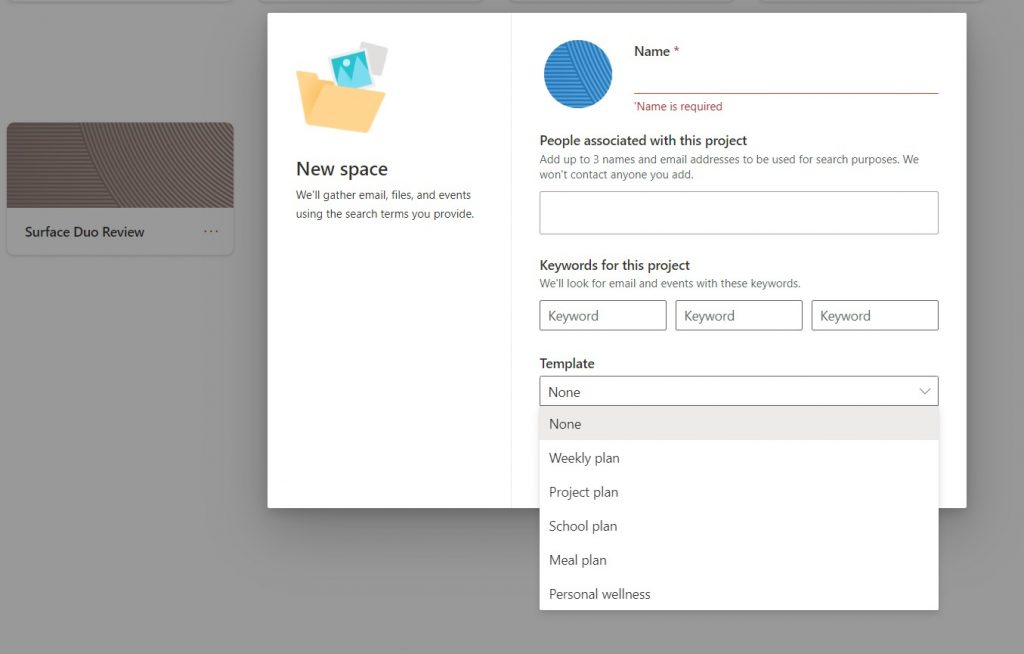
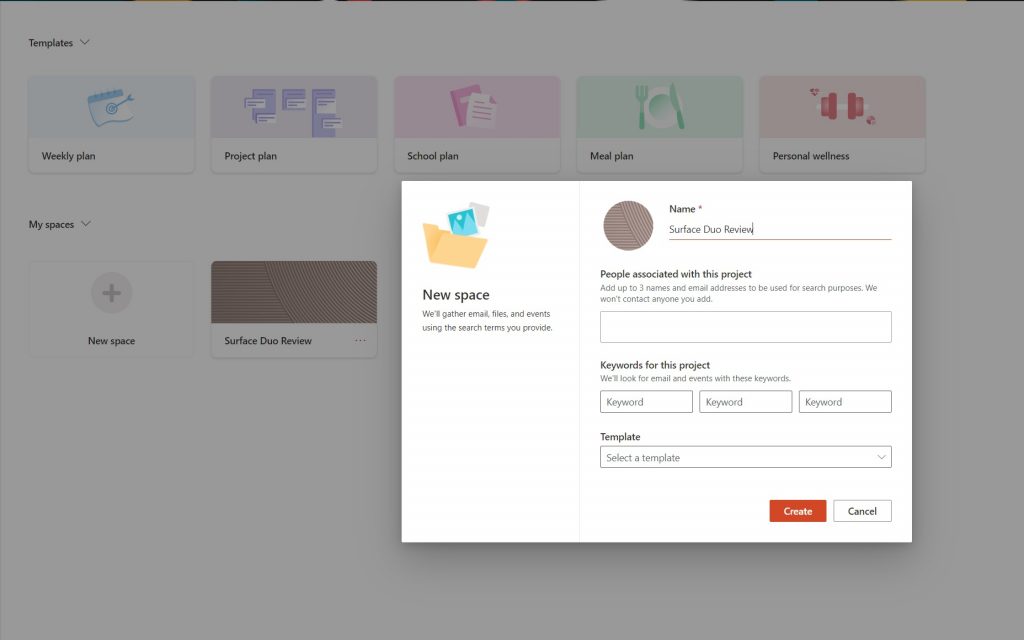
Once you create a space (or choose a Template) in Project Moca, you’ll have to give it a name. You also can add up to three names and email addresses to be used in the template for search purposes. Finally, you can add keywords, which helps Project Moca pull out information from Microsoft’s services to help you create that template. There’s also a drop-down menu to choose a template type, as well.
The Canvas
Now that you created a space in Project Moca, you’re free to start editing it and adding more information. A bit like Microsoft Whiteboard, the canvas in Project Moca has a few different tools, and all of them are used to add things to your canvas.
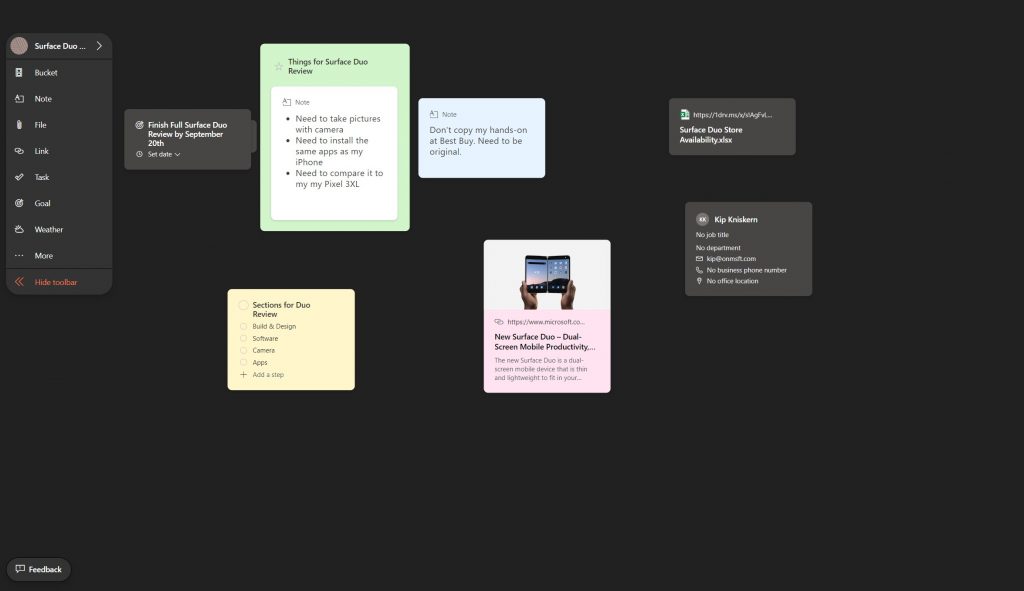
You’ll see these tools all in the toolbar at the side of the screen. It can be collapsed at any time by clicking Hide Toolbar. From here, you can add a bucket, a note, a file, link, task, goal, or weather. There’s also the ability to add a location or a person too. You can even zoom out to add more content, by clicking the magnifying glass in the bottom right corner of the screen. Finally, anything you add to the canvas can be dragged around, as you see fit.
We’ll start first by creating a bucket. In Project Moca, a bucket allows you to drag certain items into a central hub of sorts, to organize your space a bit more. We created a main bucket for “things for Surface Duo Review” and will be dragging some notes into it, created fusing the Note tool. If you want, you can change the color of the bucket, or set the due date as well. Anything you create in Moca can be dragged into a bucket. You also can change the color for anything you add in Moca, as well.
Next up, we’ll talk about some of the other things you can add to the canvas in a space on Project Moca. You can create Notes, just as you would a sticky note in Windows 10. These notes will sync up to your Windows 10 PC, too. You also can add files, as well. Any added file will come from your OneDrive account. Additionally, you can add a link to a relevant webpage, or create a task. Tasks will be saved to To Do. Finally, any goal added to Space will be saved to Outlook.
Adding additional content, and email messages
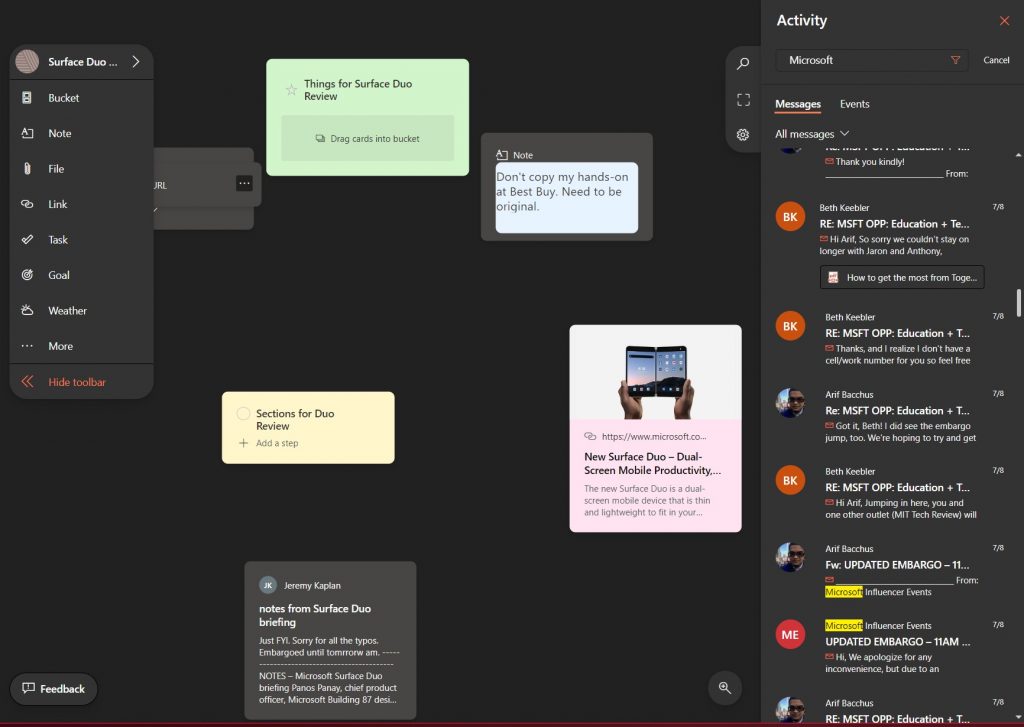
Another interesting point about Project Moca is the ability to drag in emails to your canvas and space. You can do this by clicking the search icon at the top right corner of the screen. When done, You’ll see a list of your messages from Outlook. To put it on the canvas, just click it and choose to add to canvas. You can also drag items, too, if need be.
This is a super useful feature for when you want to keep an email handy in relation to your ongoing space. If you want, you also can do the same thing with events, too. And, you can “capture” an email by clicking Add to Project Moca from the . . . menu from your email in your Outlook inbox.
Check it out now and let us know your thoughts!
Project Moca is a super cool experience, and it definitely is a nice take on Trello and other task management tools. It allows you to bring all things Microsoft related to work or play, right under one central place to help you stay organized. Check it out now, and let us know if you like the experience by dropping us a comment.