Hands on with Outlook Spaces: A clean and efficient hub for all things Outlook
![]() 4 min. read
4 min. read
![]() Published on
Published on
Share this article

Read our disclosure page to find out how can you help Windows Report sustain the editorial team Read more
When you’re getting close to an important meeting at work or just planning an important event, things can get messy. From looking for emails, meetings, schedules, important documents, and more, you’ll need to dive through various menus and places across Outlook to find it all. Well, with Outlook Spaces, Microsoft is looking to change that, and give you one central hub for all things Outlook. Here’s a hands-on look at the experience.
Getting Started
It’s important to note that Outlook Spaces hasn’t officially yet launched yet. This experience is still a work-in-progress, but thanks to a tip from Microsoft leaker WalkingCat, we were able to get it working, and you can too. We won’t get into the technicalities here, but it involves opening the developer menu in your web browser and adding a line of code. Check out WalkingCat’s tweet for more.
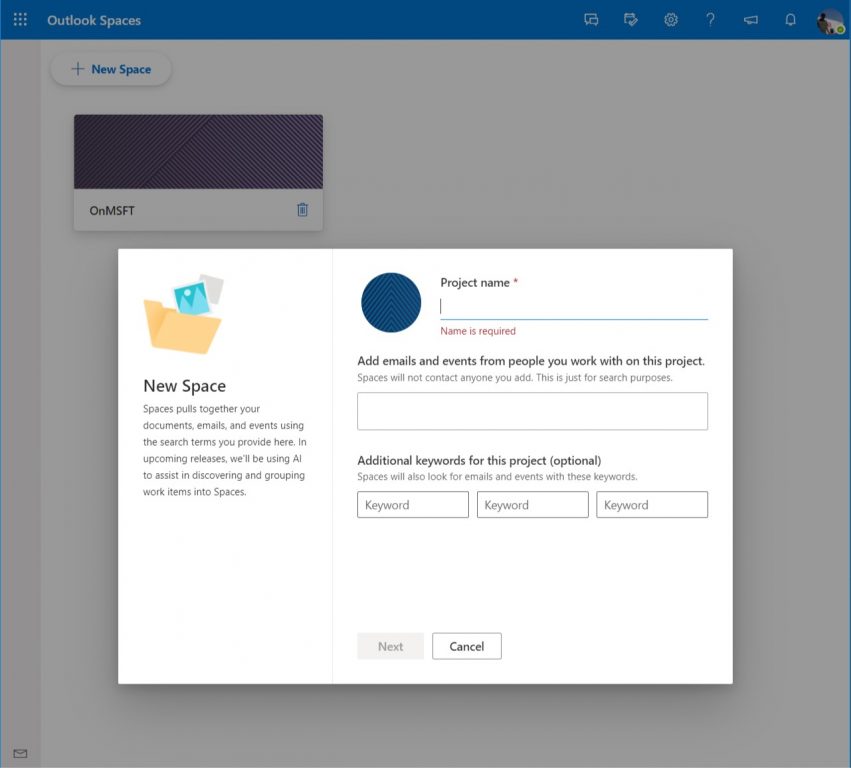
Anyway, once you enable the experience, you’ll get greeted with the main page, and a video explaining how things work. You can then create your new space with the “New Space” button on the top left corner of the screen. You’ll be able to name your project, and add emails and events from Outlook into the project. You also can add certain keyboards to help Outlook Spaces find the right emails and events for your new project.
If you’re someone that likes dark mode, you also can turn on the dark mode for Outlook Spaces by clicking the settings icon at the top right corner of the screen. You’ll then want to click the toggle switch for Dark mode. It will make everything a bit easier to read.
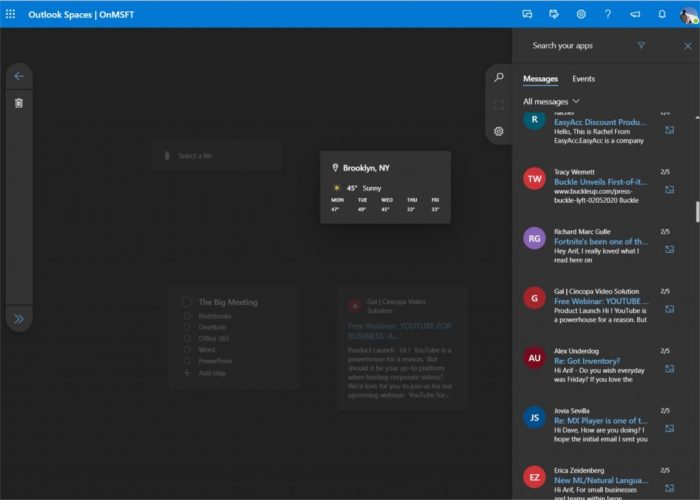
The Project Space
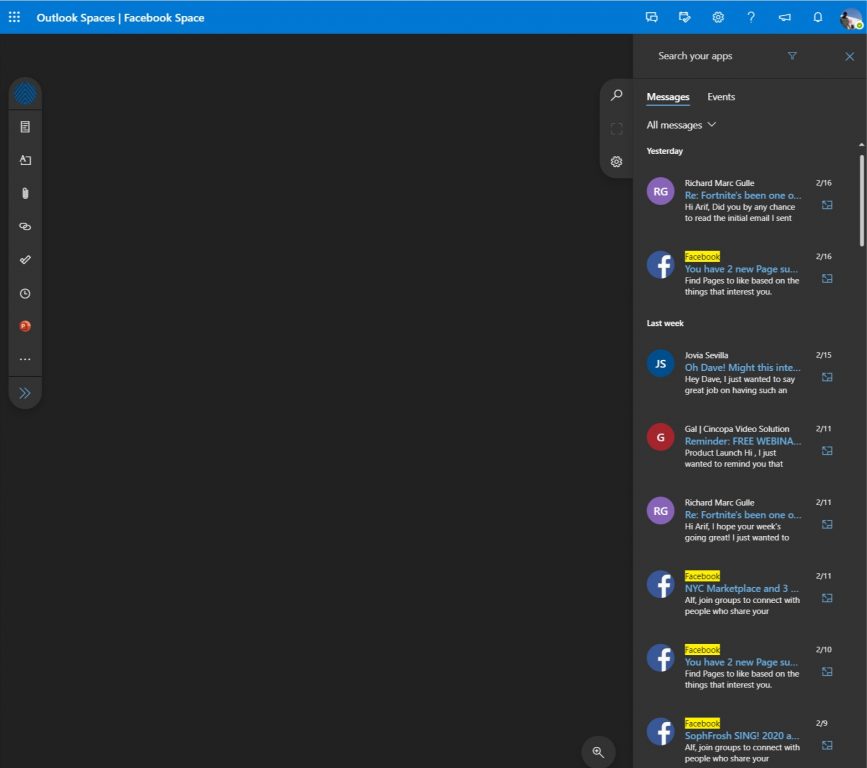
Once you create your project, you’ll be greeted with a new project space. This is the canvas area where you’ll be working in Outlook Spaces. By default, you’ll see a bar open up on the right side on the screen. This bar has tabs for you to see your messages and events from Outlook. You can click on any message or event and drag it out into the open project space on to the left of the bar. Once you do that, you can collapse the bar by pressing the magnifying glass. If you need to change the project space or search for more content, you can click the magnifying glass or the settings gear.
Adding content to your Project Space
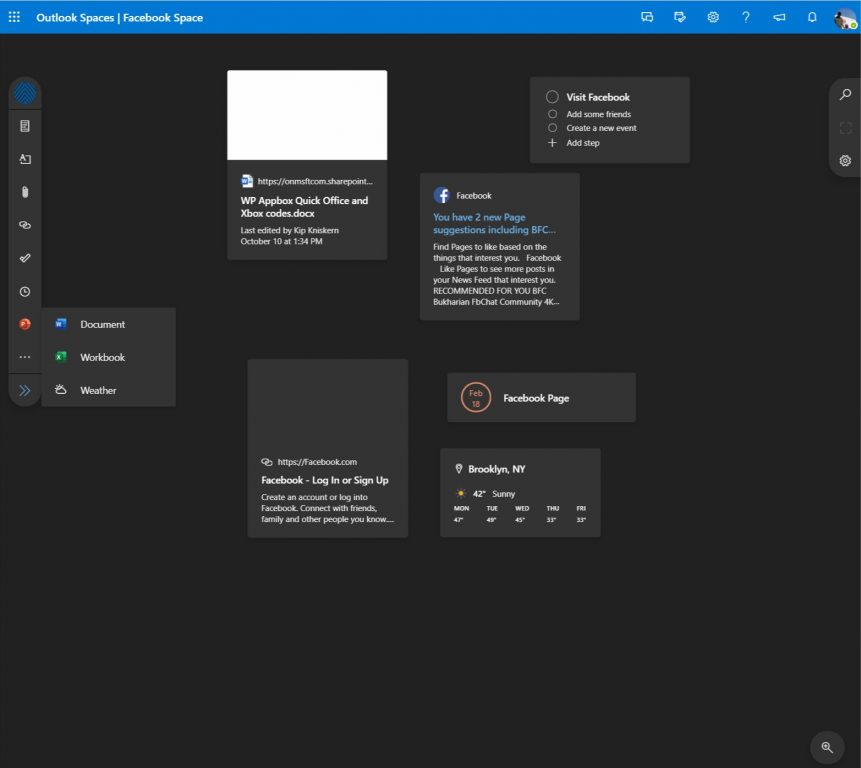
Emails and events are not the only things you can add to a project space in Outlook Spaces. As we hinted before, you also can add other items from across Outlook and Office 365 so you can have one hub for all things related to your important email or event. You can add these items with the menu running along the left side of the screen.
The top of the menu is home to the switcher for your project spaces. If you click it, you’ll be able to switch between spaces or create a new one. Under that, are the other items you can add to your space. Some of these aren’t yet available yet, such as Bucket, Presentation, Document or Workbook. However, the bulk of the experience is there. You’ll be able to add things such as Notes, Files, Links, Tasks, Deadlines, or even the Weather. Once you create any of these items, you can drag them around the space as needed. You also can zoom in or out with the magnifying glass at the bottom of the screen.
A nifty experience
Microsoft has yet to announce Outlook Spaces, but this experience is quite nifty. But it is not to be confused with Windows Live Spaces, Microsoft’s old blogging and social networking platform. It’s a lot like a version of Trello, mixed with the Dashboard in MacOS or sidebar gadgets in Windows 7 and Vista. You’re able to create mini representations of important things from your Outlook inbox, drag it around, and have everything you need in one, clean, and easy to understand space. We’ll be keeping an eye on this, and will update you once Outlook Spaces officially launches. But, for now, we’re fairly impressed.